Tag: stencil

  • Create a Stunning Stenciled Card & Send Love

    Create a Stunning Stenciled Card & Send Love

    Would you like to experiment with a design like this? You’ll find a supply list below, including a link to the stencil I used from A Colorful Life Designs.  Follow the link and use discount code ChrisFan10 to save 10% on your entire order! (Master Creator Bundles are excluded as they already have a 20% discount built in.)

    Let’s get Started:

    Card Base: 5.5 x 8.5, scored and folded at 4.25:

    Card Face:5.5 x 4.25

    Card Face:

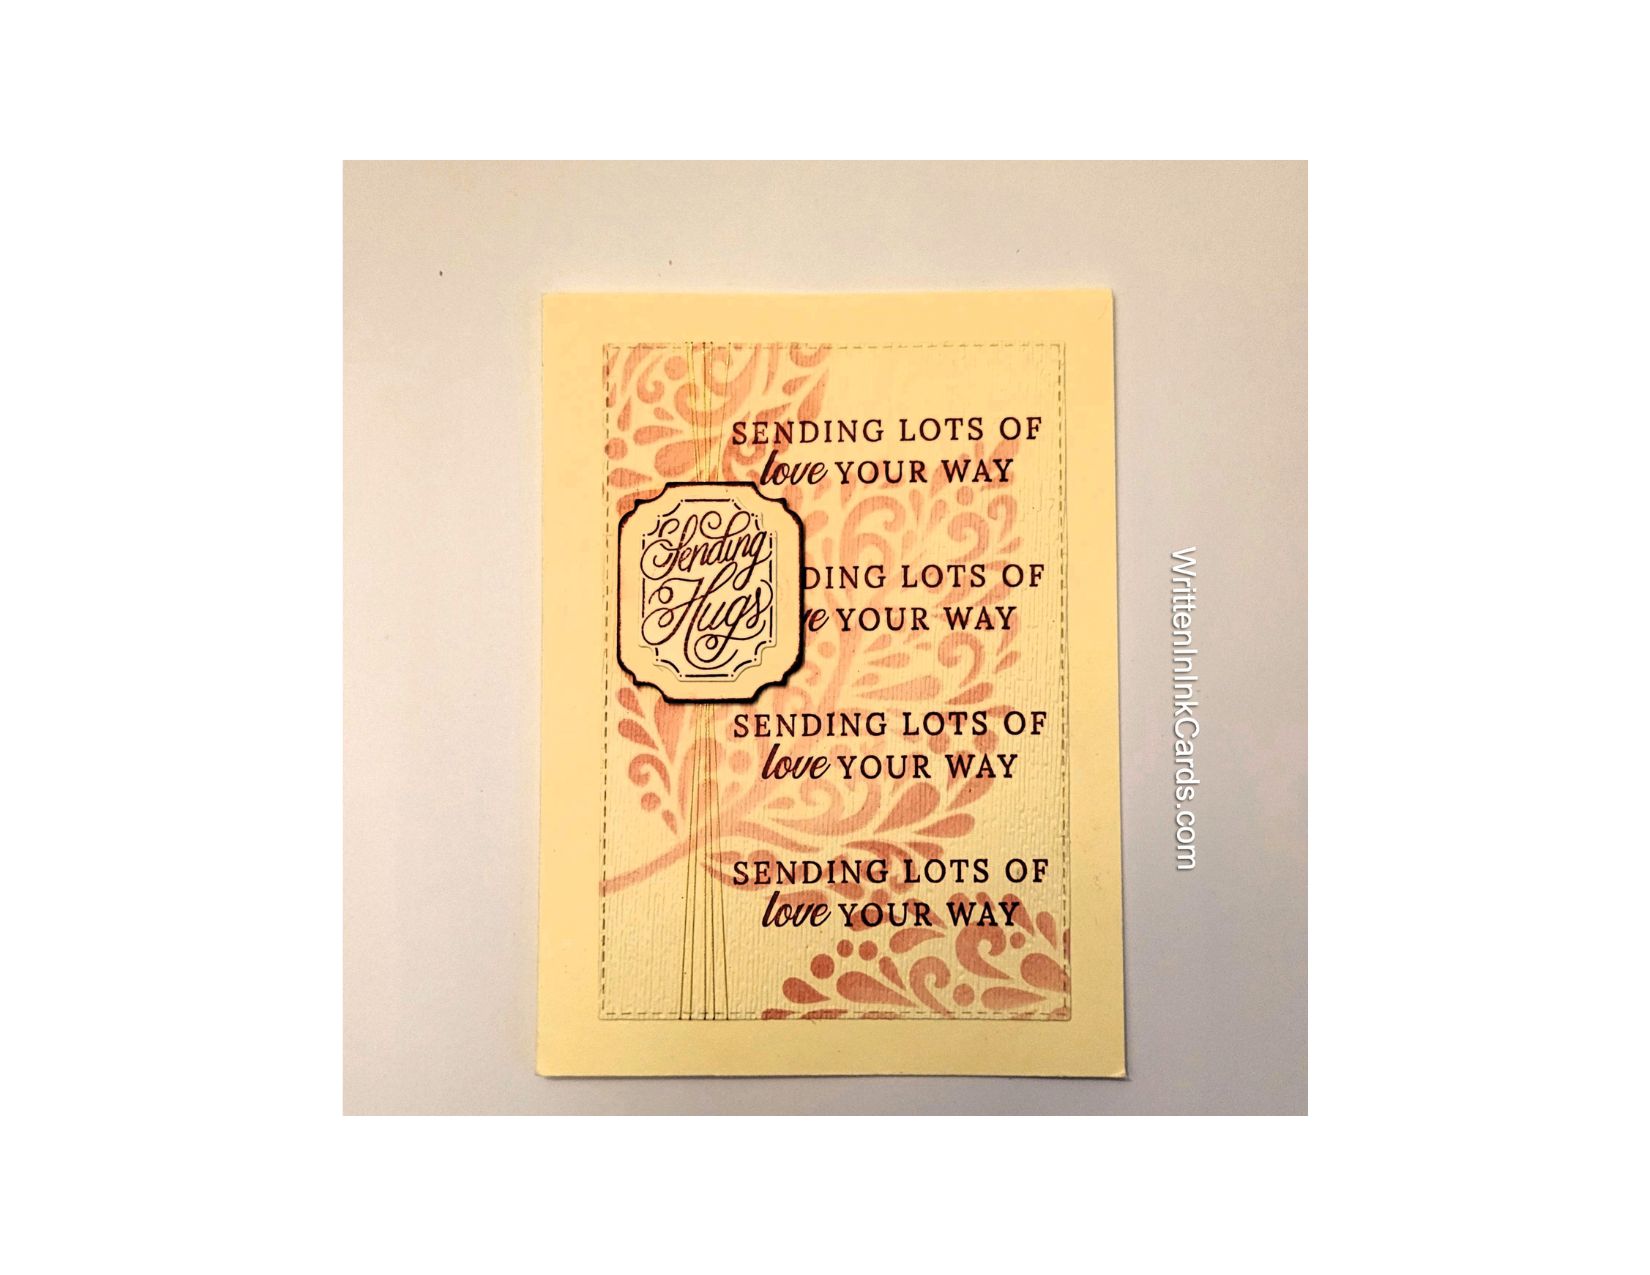
    • I laid the card face onto my Grip Mat,  and then positioned the stencil towards the vertical center.
    • I used a medium pink ink to cover all exposed areas, allowing variations in the depth of colour.
    • I moved the stencil down and to the right and repeated the inking,  allowing the stencilled areas to touch but not overlap.
    • I repeated this once more, positioning the stencil above the first stencilled leaf and slightly to the left.
    • I put the card face into my stamp positioner and stamped the “sending lots of love your way” with the same ink,  but stamping a couple of times to intensify the colour.
    • I left the stamp and the card face where they where,  but shifted the platform door down two spots,  and stamped again.   I repeated this twice more.
    • I cut the card face down with a stitched rectangle die  (approximately 5 x 3.75),  and then added texture by putting it into an embossing folder and running it through the Big Shot .

    Other:

    • I stamped the “sending hugs” sentiment on a scrap of cardstock,  and cut it out with a matching die.
    • I used another die from the same set to cut a slightly larger, complimentary shape from scrap cardstock.   
    • I glued these two pieces together, centering the stamped sentiment.
    • I put dimensional foam on the back of the sentiment.

    Assembly

    • I wrapped metallic gold thread around the left hand side of the card face 5X.   I used a small piece of the same thread to tie a knot around them approx ⅓ of the way down the card face.  Pulling this taut (and securing it with a dot of glue) created a sort of hourglass shape.
    • I glued the card face onto the card base, centering on all sides.
    • I put the sentiment in place over the knot in the metallic thread.

    Final Thoughts:

    I’m happy with the various textures and shapes in this design:  they came together to form a pretty card.

    Supplies: (and links where possible)

       I have listed which products I have used, and where they may be purchased. It’s a huge marketplace and in most instances, there are multiple sources and many alternatives to choose from.

    Stencil: Filigree Leaf,  A Colorful Life Designs

    Waffle Flower Grip Mat, 8.5 x 6.5, Scrapbook.com

    Ink: Stampin’ Up!

    Blending Brushes: Stampin’ Up! 

    Adhesive: Tombow Aqua, Michaels

    Cream Card Base & Card Face: 110 lb Recollections, Michaels

    Do you have comments or thoughts to share on this design?  Drop me a line in the Comments Section below –  I’d love to hear from you!

    You can also use the Comments Section  to be notified when I release new work.

    Filigree Leaf by A Colorful Life Designs

  • DIY Card Making: Using a Stencil for Unique Designs

    DIY Card Making: Using a Stencil for Unique Designs

    Would you like to experiment with a design like this? You’ll find a supply list below, including a link to the stencil I used from A Colorful Life Designs.  Follow the link and use discount code ChrisFan10 to save 10% on your entire order! (Master Creator Bundles are excluded as they already have a 20% discount built in.)

    Let’s get Started:

    Card Base: 5.5 x 8.5, scored and folded at 4.25

    Card Face:  5.5 x 4.25 (before tearing)

    Card Face:

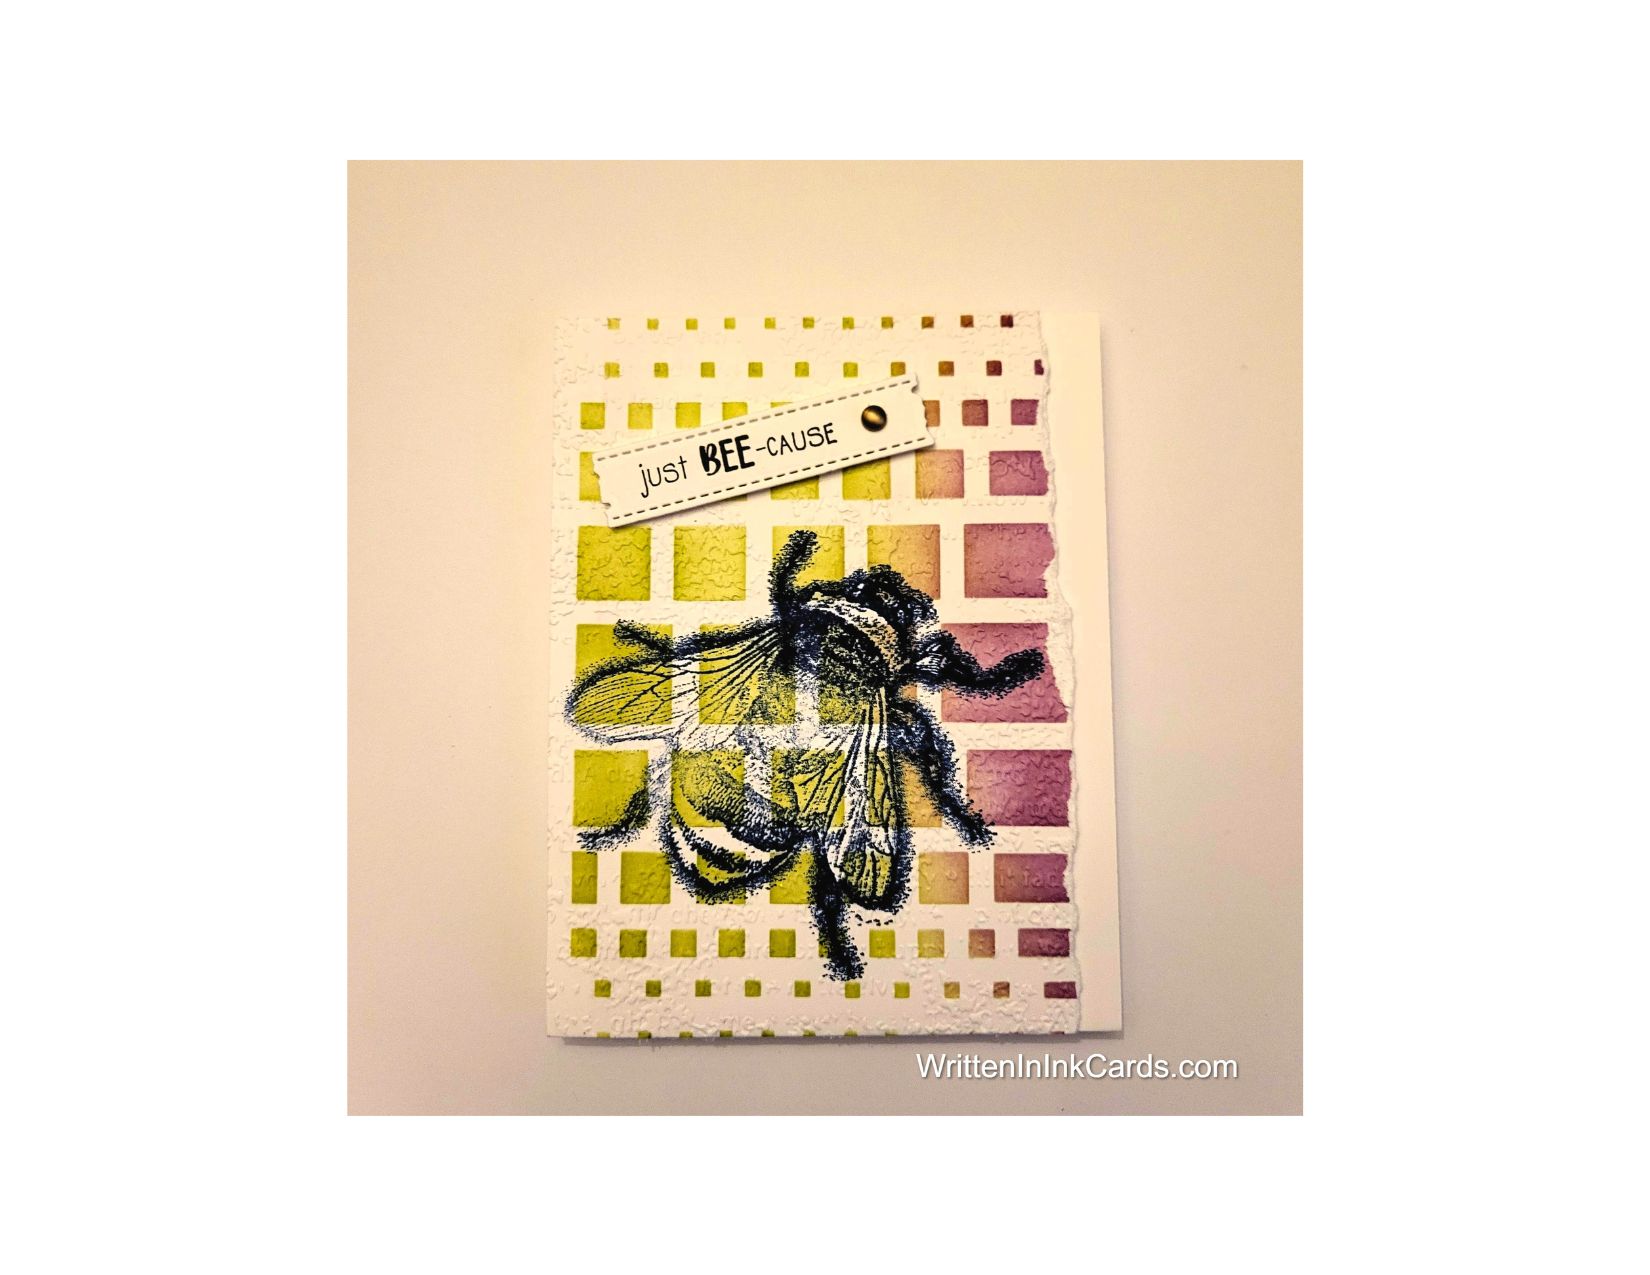
    • I laid my card face down onto the Grip Mat and positioned the stencil.
    • I used lime green ink on one end and purple on the other. I allowed the green ink to cover about ⅔  of the surface, and took care when it met the purple not to blend them too much –  there was a big possibility of creating  “mud”.
    • I put the card face into my stamp positioner and stamped the bee with Versafine Clair. 
    • I used an embossing folder to create texture on the card face.
    • I tore off the right-hand side to create texture and visual interest.

    Other:

    • I stamped the sentiment onto a scrap of cardstock,  and used a die to cut it out.

    Assembly

    • I glued the card face to the card base, aligning snugly to the left hand edge.
    • I added dimensional tape on the back of the sentiment, and put it in place as shown.
    • I added a metallic embellishment to the right-hand end of the sentiment.

    Final Thoughts:

    I’m so happy with this compilation:  I love the stencil, the image, the colours –  and they all played together wonderfully well.

    Supplies: (and links where possible)

       I have listed which products I have used, and where they may be purchased. It’s a huge marketplace and in most instances, there are multiple sources and many alternatives to choose from.

    Stencil: Ordered Lines, A Colorful Life Designs

    Waffle Flower Grip Mat, 8.5 x 6.5, Scrapbook.com

    Stamps:  Bee:  Technique Junkies  (no longer in business)

    Die: Impression Obsession  (no longer in business)

    Ink: Stampin’ Up!

    Blending Brushes: Stampin’ Up! 

    Versafine Onyx, Simon Says Stamp

    Adhesive: Tombow Aqua, Michaels

    Card Base & Card Face: Recollections 110 lb., Michaels

    Do you have comments or thoughts to share on this design?  Drop me a line in the Comments Section below –  I’d love to hear from you!

    You can also use the Comments Section  to be notified when I release new work

    Ordered Lines by A Colorful Life Designs

  • Create a stellar birthday card that is Out of this WORLD

    Create a stellar birthday card that is Out of this WORLD

    Would you like to experiment with a design like this? You’ll find a supply list below, including a link to the stencil I used from A Colorful Life Designs.  Follow the link and use discount code ChrisFan10 to save 10% on your entire order! (Master Creator Bundles are excluded as they already have a 20% discount built in.)

    Let’s get Started:

    Card Base: 5.25 x 10.5, scored and folded at 5.25

    Border:  5 ⅛ x 5 1/8

    Card Face:  5 x 5

    Card Face:

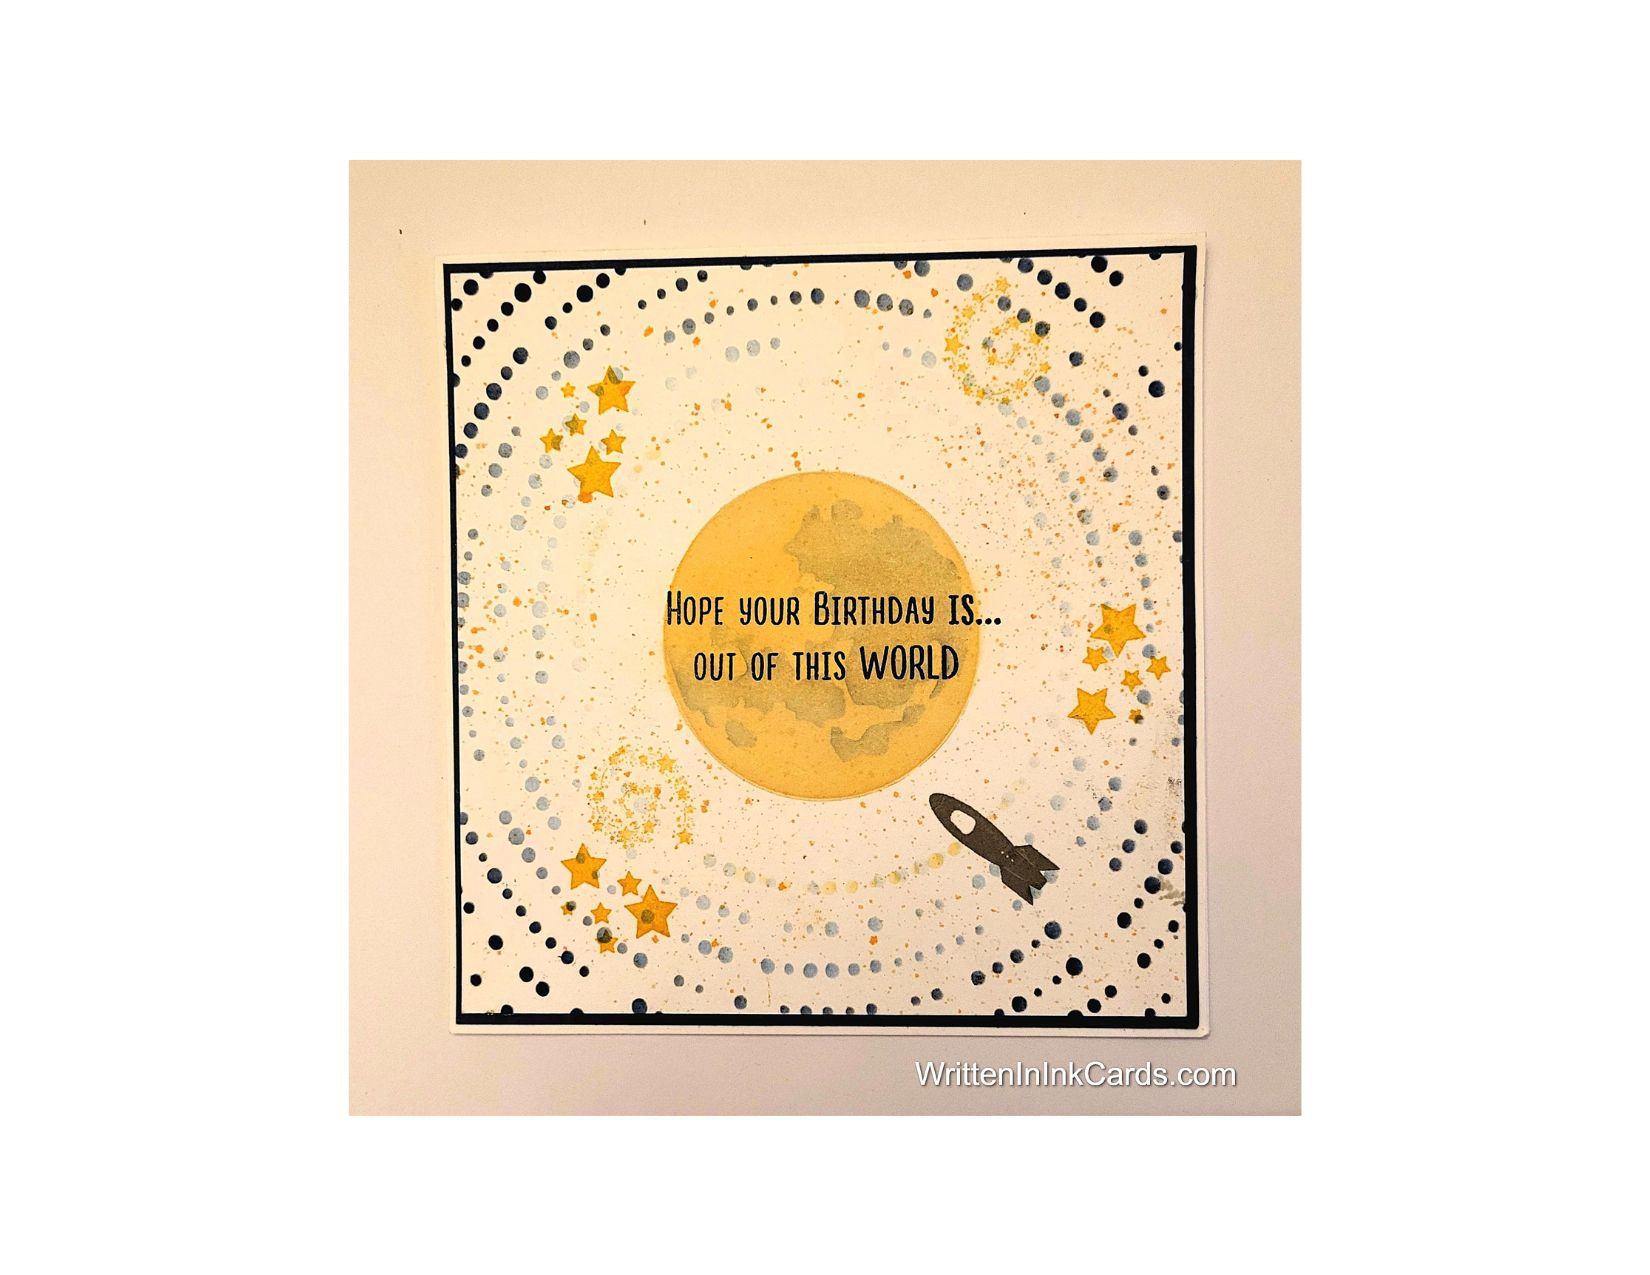
    • I laid the card face onto my Grip Mat and positioned the stencil.
    • Avoiding the center,  I used light blue-gray ink on the inner circles of dots,  and black on the outer circles.
    • I filled in the opening in the center with very pale yellow ink to create the moon.
    • I repositioned the stencil and added the landmasses on the moon with the blue ink used earlier in the process.
    • I added the stars with yellow ink,  and then used the same colour to create a fine spatter over the surface of the card.  (to represent stars in far away galaxies.)
    • I added the rocket with black ink.
    • I realized that I had failed to protect my moon, and this now had yellow spatter on it.  I didn’t care for that,  so I went over the moon with the yellow ink,  until I had equalized the colour and the spatter was no longer visible.
    • BUT –  I didn’t want my moon to be that bright, so I went over this area with white pigment ink (4 or 5 times)  to soften the colour again.
    • I put the card face into my Stamp Positioner and stamped the sentiment.

    Assembly

    I glued the border layer to the card base, and centered the card face on both.

    Final Thoughts:

    This is a super fun stencil –  making this card for a girl or boy interested in space was quick and easy.

    Supplies: (and links where possible)

       I have listed which products I have used, and where they may be purchased. It’s a huge marketplace and in most instances, there are multiple sources and many alternatives to choose from.

    Stencil: Circl Moon,  A Colorful Life Designs

    Waffle Flower Grip Mat, 8.5 x 6.5, Scrapbook.com

    Ink: Stampin’ Up!

    Blending Brushes: Stampin’ Up! 

    Versafine Onyx, Simon Says Stamp

    Adhesive: Tombow Aqua, Michaels

    Card Base & Card Face: Accent 100 lb., Amazon

    Do you have comments or thoughts to share on this design?  Drop me a line in the Comments Section below –  I’d love to hear from you!

    You can also use the Comments Section  to be notified when I release new work

    Circle Moon by A Colorful Life Designs

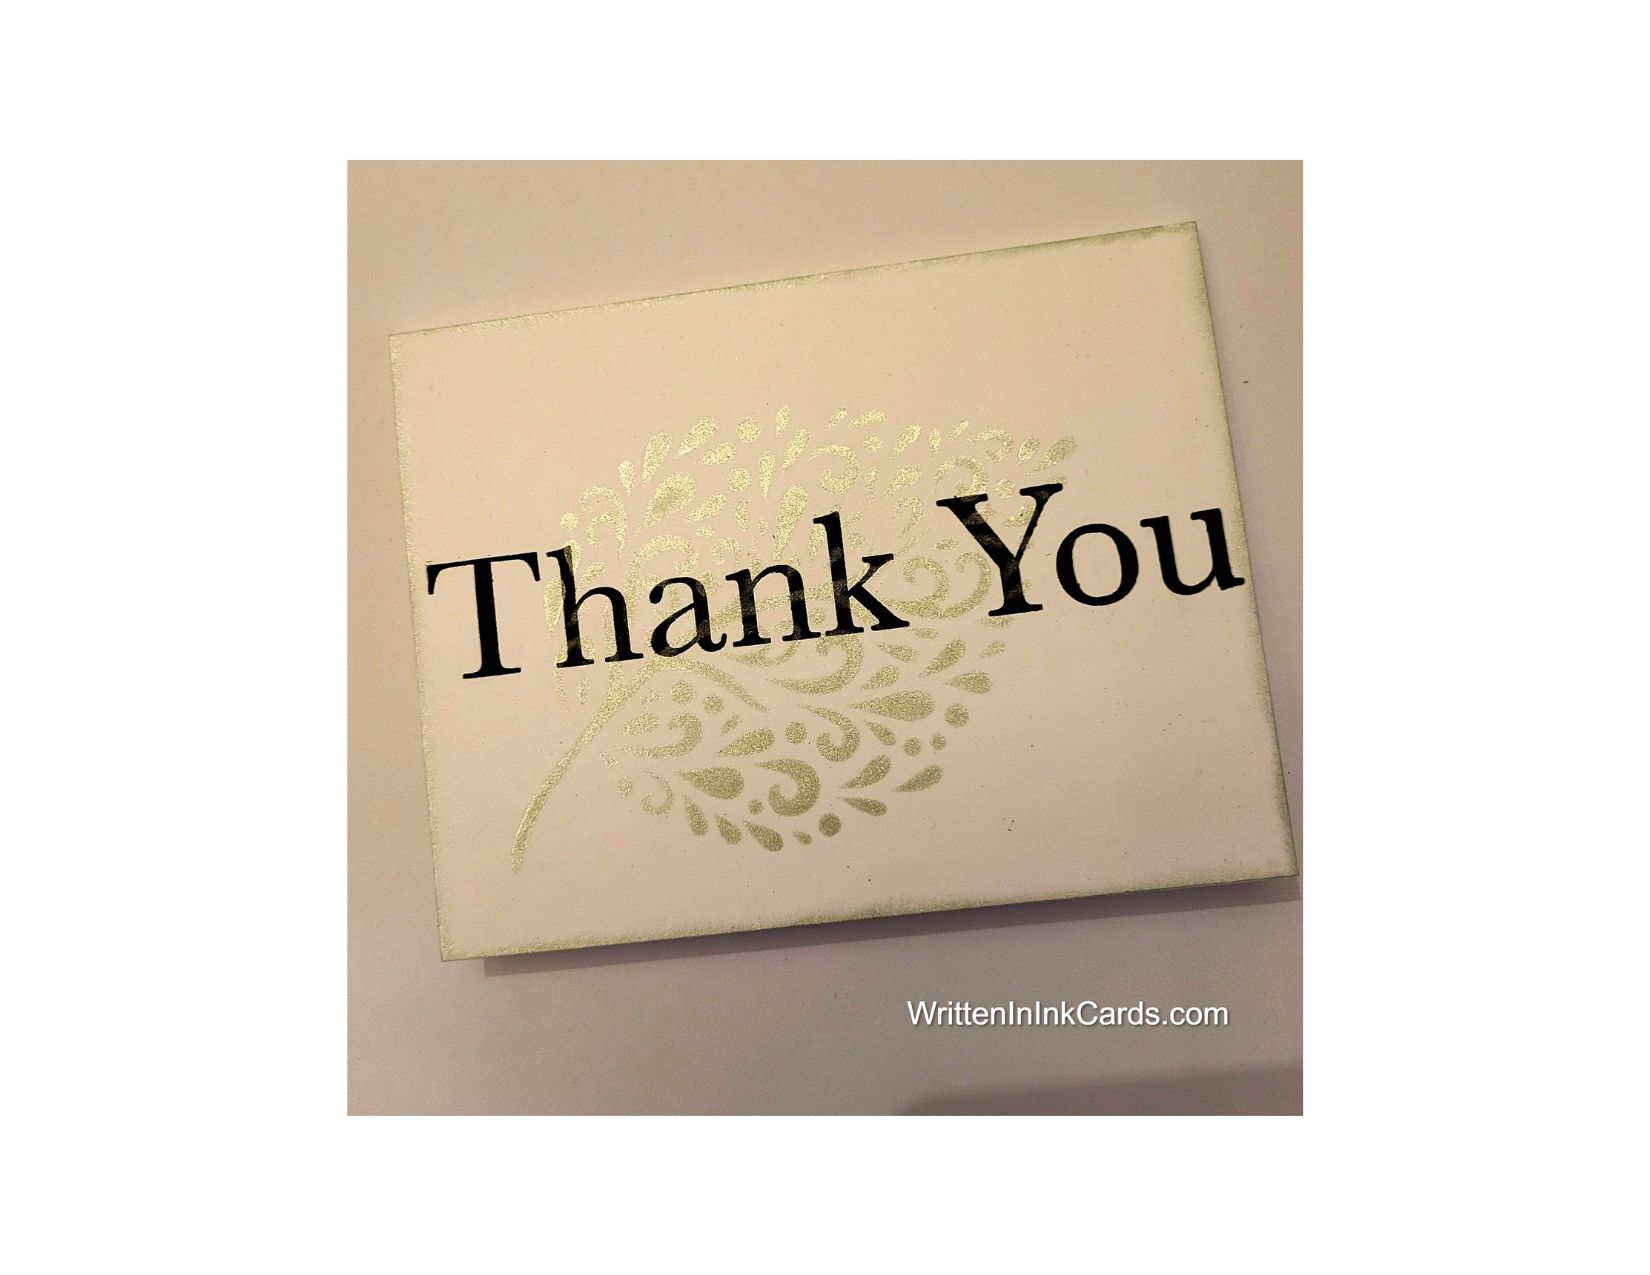
  • A simple & elegant – and sincere! – thank you card

    A simple & elegant – and sincere! – thank you card

    Would you like to experiment with a design like this? You’ll find a supply list below, including a link to the stencil I used from A Colorful Life Designs.  Follow the link and use discount code ChrisFan10 to save 10% on your entire order! (Master Creator Bundles are excluded as they already have a 20% discount built in.)

    Let’s get Started:

    Card Base: 5.5 x 8.5, scored and folded at 4.25

    Card Face:  5.5 x 4.25

    Card Face:

    • I placed the card face on the Grip Mat and positioned the stencil.
    • I applied metallic silver ink across all exposed areas.
    •      Although I routinely use blending brushes for dye inks,  I use blending foams for pigment/metallic inks.   This is mostly because I have a supply of foams (from my pre-brush era) and I want to have a dedicated foam to each colour of metallic/pigment ink.)
    • After removing the stencil I placed the card face into the stamp positioner and added the sentiment with Versafine Onyx.
    • I used the edge of the ink pad to apply a narrow border of silver ink to all edges of the card face.

    Assembly

    • I glued the card face to the card base.

    Final Thoughts:

    I needed a simple but elegant thank you card –  this duet more than met the challenge!

    Supplies: (and links where possible)

       I have listed which products I have used, and where they may be purchased. It’s a huge marketplace and in most instances, there are multiple sources and many alternatives to choose from.

    Stencil: Filigree Leaf Stencil, A Colorful Life Designs

    Stamps:  Simply Sentimental,  Trinity Stamps

    Waffle Flower Grip Mat, 8.5 x 6.5, Scrapbook.com

    Ink: Metallic Ink- Lisa Horton, Glitter & Ink

    Blending Tool:  Studio Light, Ecstasy Crafts

    Versafine Onyx, Simon Says Stamp

    Adhesive: Tombow Aqua, Michaels

    Card Base & Card Face: Accent 100 lb., Amazon

    Do you have comments or thoughts to share on this design?  Drop me a line in the Comments Section below –  I’d love to hear from you!

    You can also use the Comments Section  to be notified when I release new work

    Filigree Leaf by A Colorful Life Designs

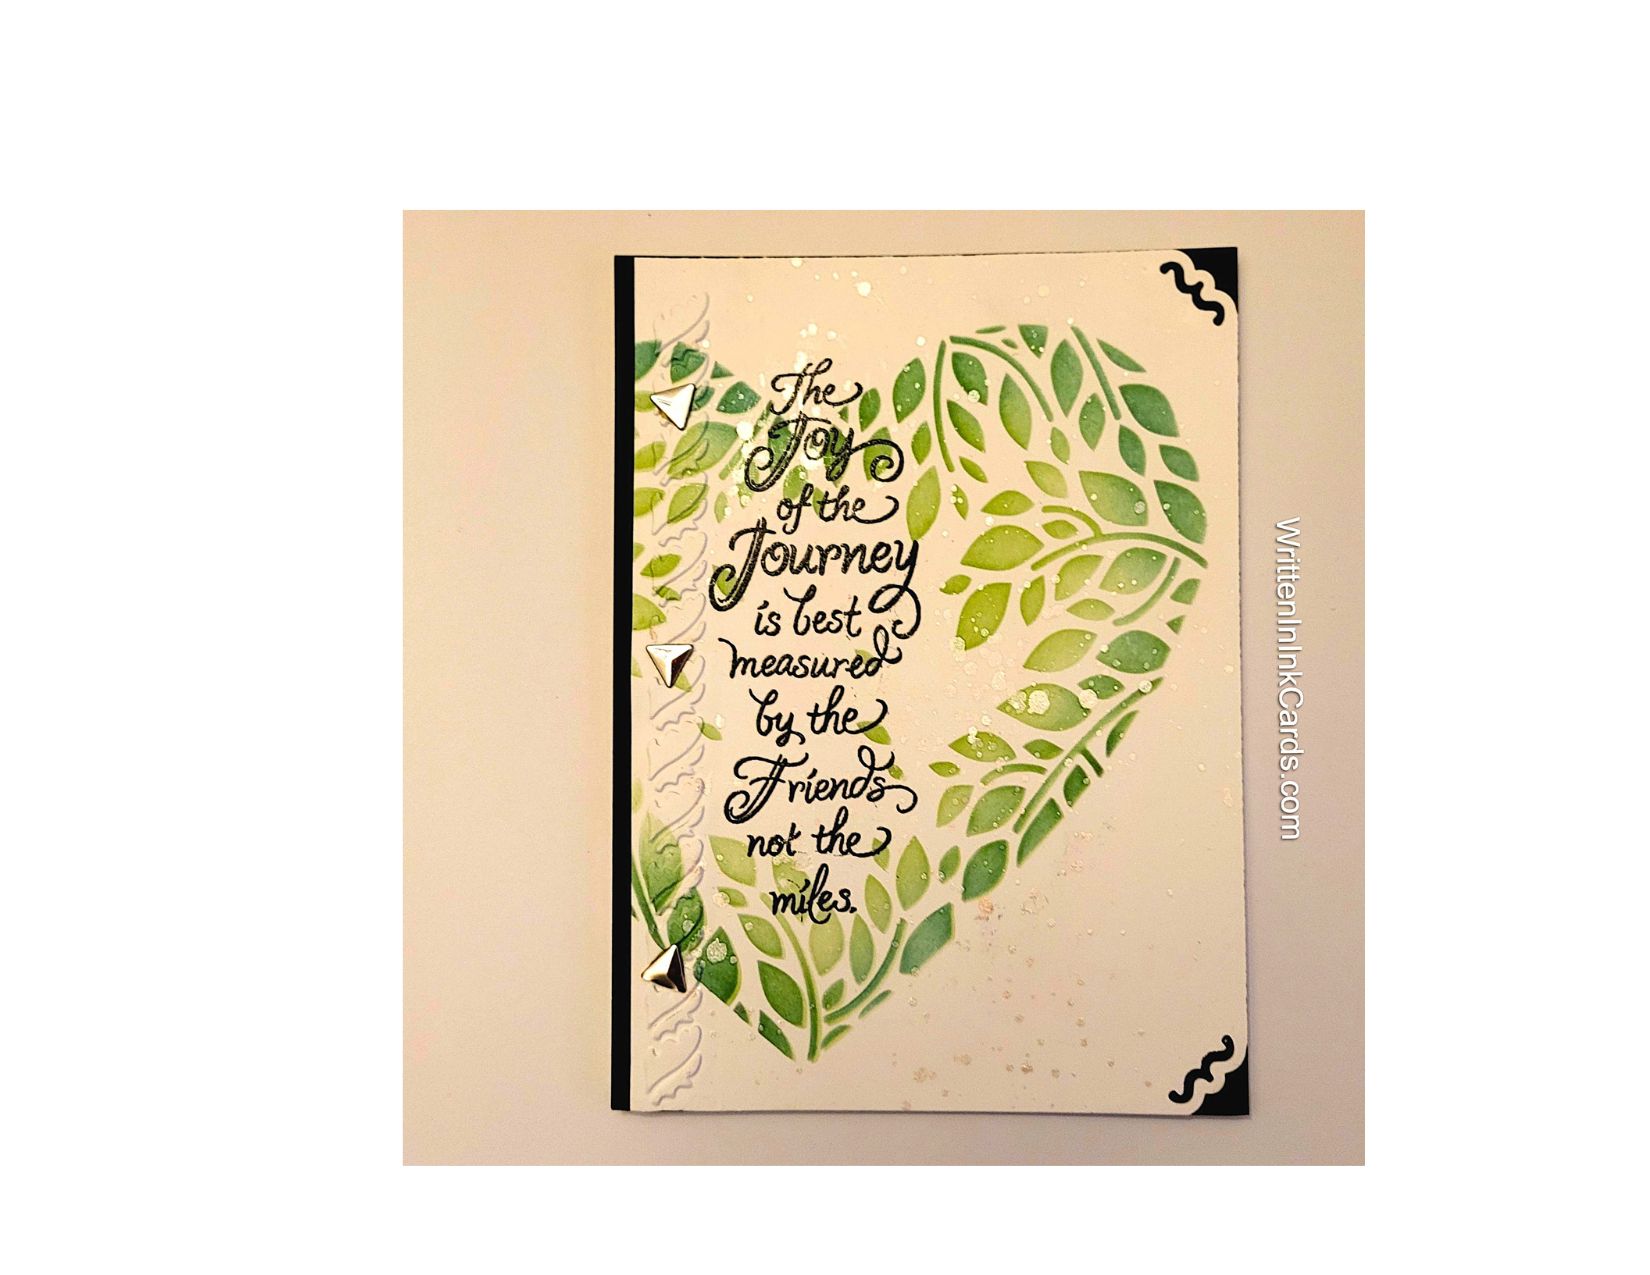
  • Easy Steps for Stunning Card Making

    Easy Steps for Stunning Card Making

    handWould you like to experiment with a design like this? You’ll find a supply list below, including a link to the stencil I used from A Colorful Life Designs.  Follow the link and use discount code ChrisFan10 to save 10% on your entire order! (Master Creator Bundles are excluded as they already have a 20% discount built in.)

    Let’s get Started:

    Card Base: 5.5 x 8.5, scored and folded at 4.25

    Black Border:  5.5 x 4.25

    Card Face:  5.5 x 4 1/8

    Card Face:

    • I laid the card face onto my Grip Mat and positioned the stencil so that it was hanging off the left-hand side.
    • I applied light green ink across all open areas,  and then applied dark green ink around the edges,  building up intensity gradually.
    • I put the card face into the stamp positioner and added the sentiment with Versafine Onyx.
    • I sprinkled the ink with clear embossing powder while it was still wet,  and set it with my heat gun.  This intensified the sentiment, making it stand out from the leafy background.
    • I positioned a very narrow embossing folder  (½” wide)  on the left-hand side of the card face and ran this through the Big Shot.
    • I spattered white metallic watercolour over the card face.
    • I used a punch on both top and bottom corners of the right-hand edge of the card face.

    Assembly

    • I glued the black border layer to the card base.
    • I glued the card face on top of these, aligning snugly on the right-hand edge and leaving a ⅛” border on the left.
    • I added three small metallic embellishments to the left-hand edge, on top of the embossing.

    Final Thoughts:

    The various colours and textures work well together in this design.

    Supplies: (and links where possible)

       I have listed which products I have used, and where they may be purchased. It’s a huge marketplace and in most instances, there are multiple sources and many alternatives to choose from.

    Stencil: Leafy Heart Frame,  A Colorful Life Designs

    Waffle Flower Grip Mat, 8.5 x 6.5, Scrapbook.com

    Clear Embossing Powder,  Wow,  Simon Says Stamp

    Stamps:   The Joy of the Journey, Stampendous , Amazon

    Metallic Water Colour: Amazon

    Ink: Stampin’ Up!

    Blending Brushes: Stampin’ Up! 

    Versafine Onyx, Simon Says Stamp

    Adhesive: Tombow Aqua, Michaels

    Card Base & Card Face: Accent 100 lb., Amazon

    Do you have comments or thoughts to share on this design?  Drop me a line in the Comments Section below –  I’d love to hear from you!

    You can also use the Comments Section  to be notified when I release new work

    Leafy Heart Frame by A Colorful Life Designs

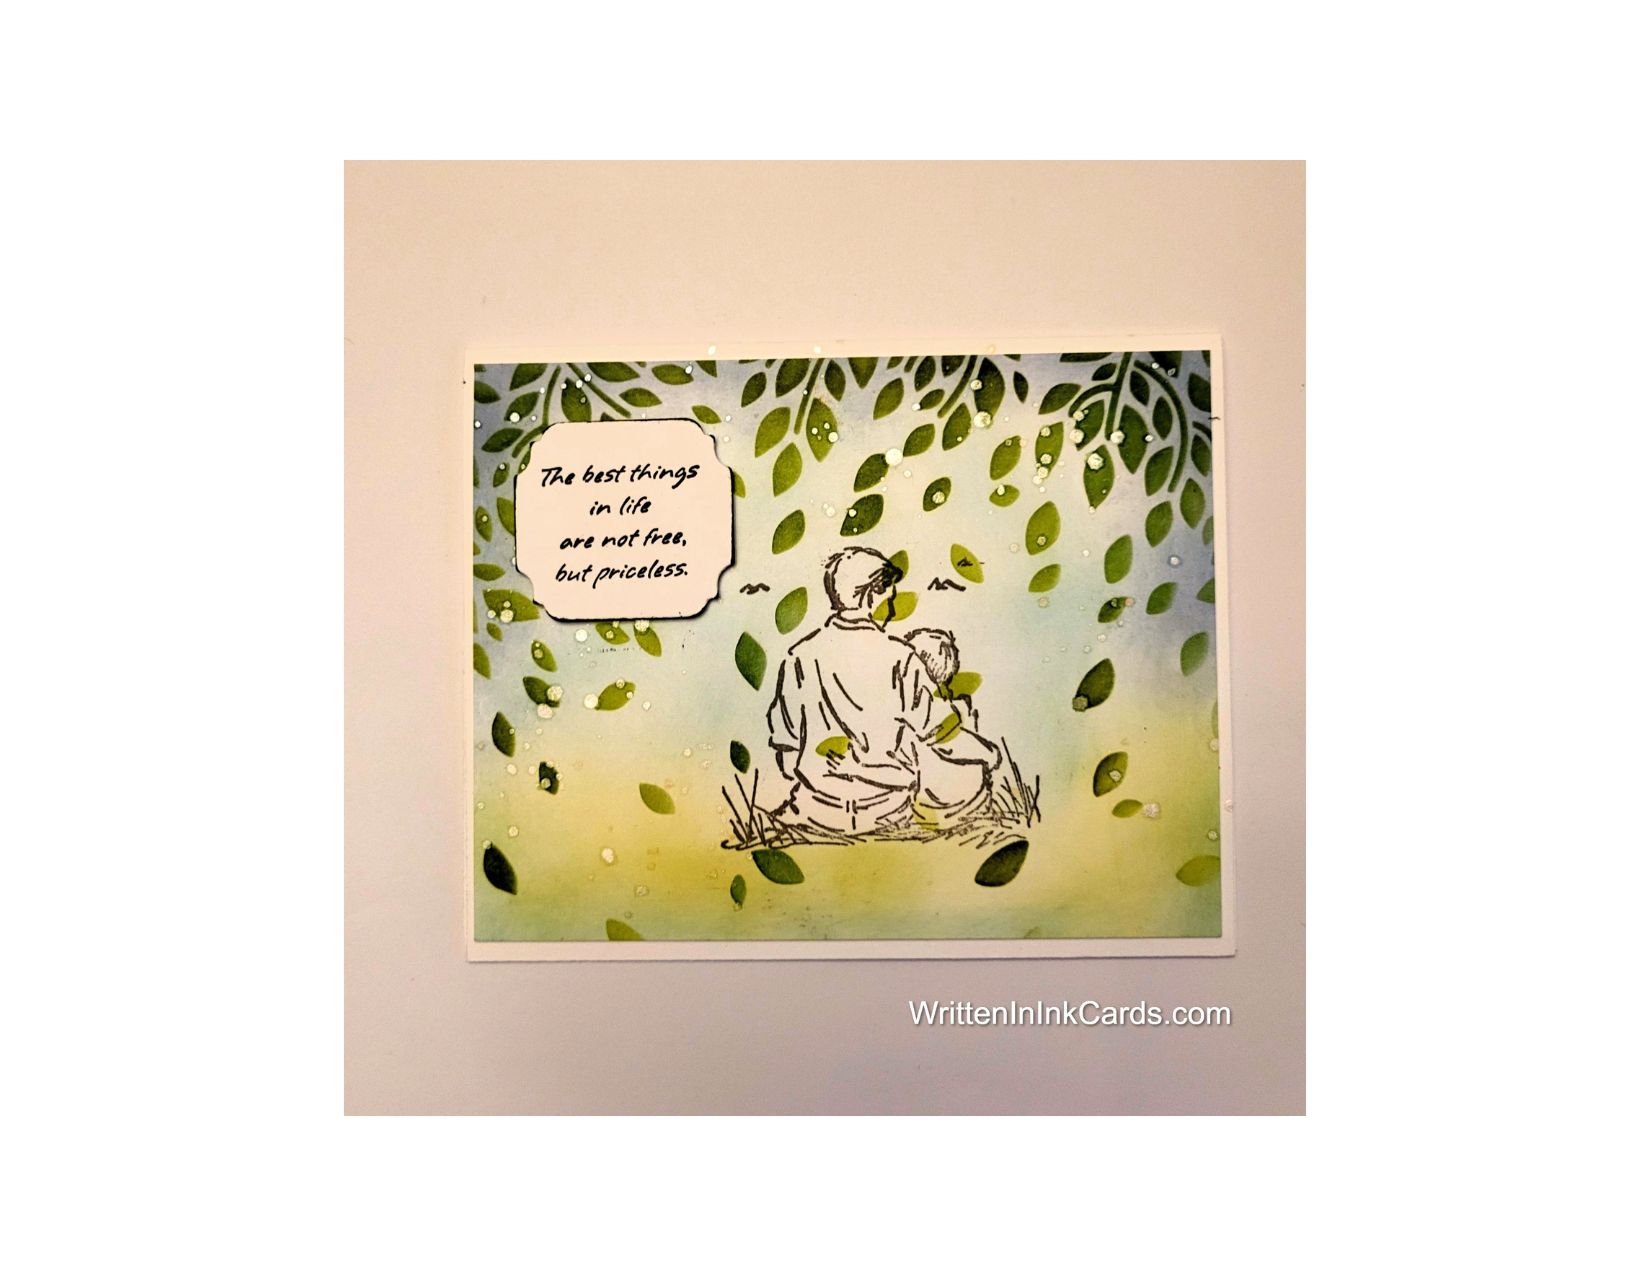
  • Simple Moments Become Treasured Memories

    Simple Moments Become Treasured Memories

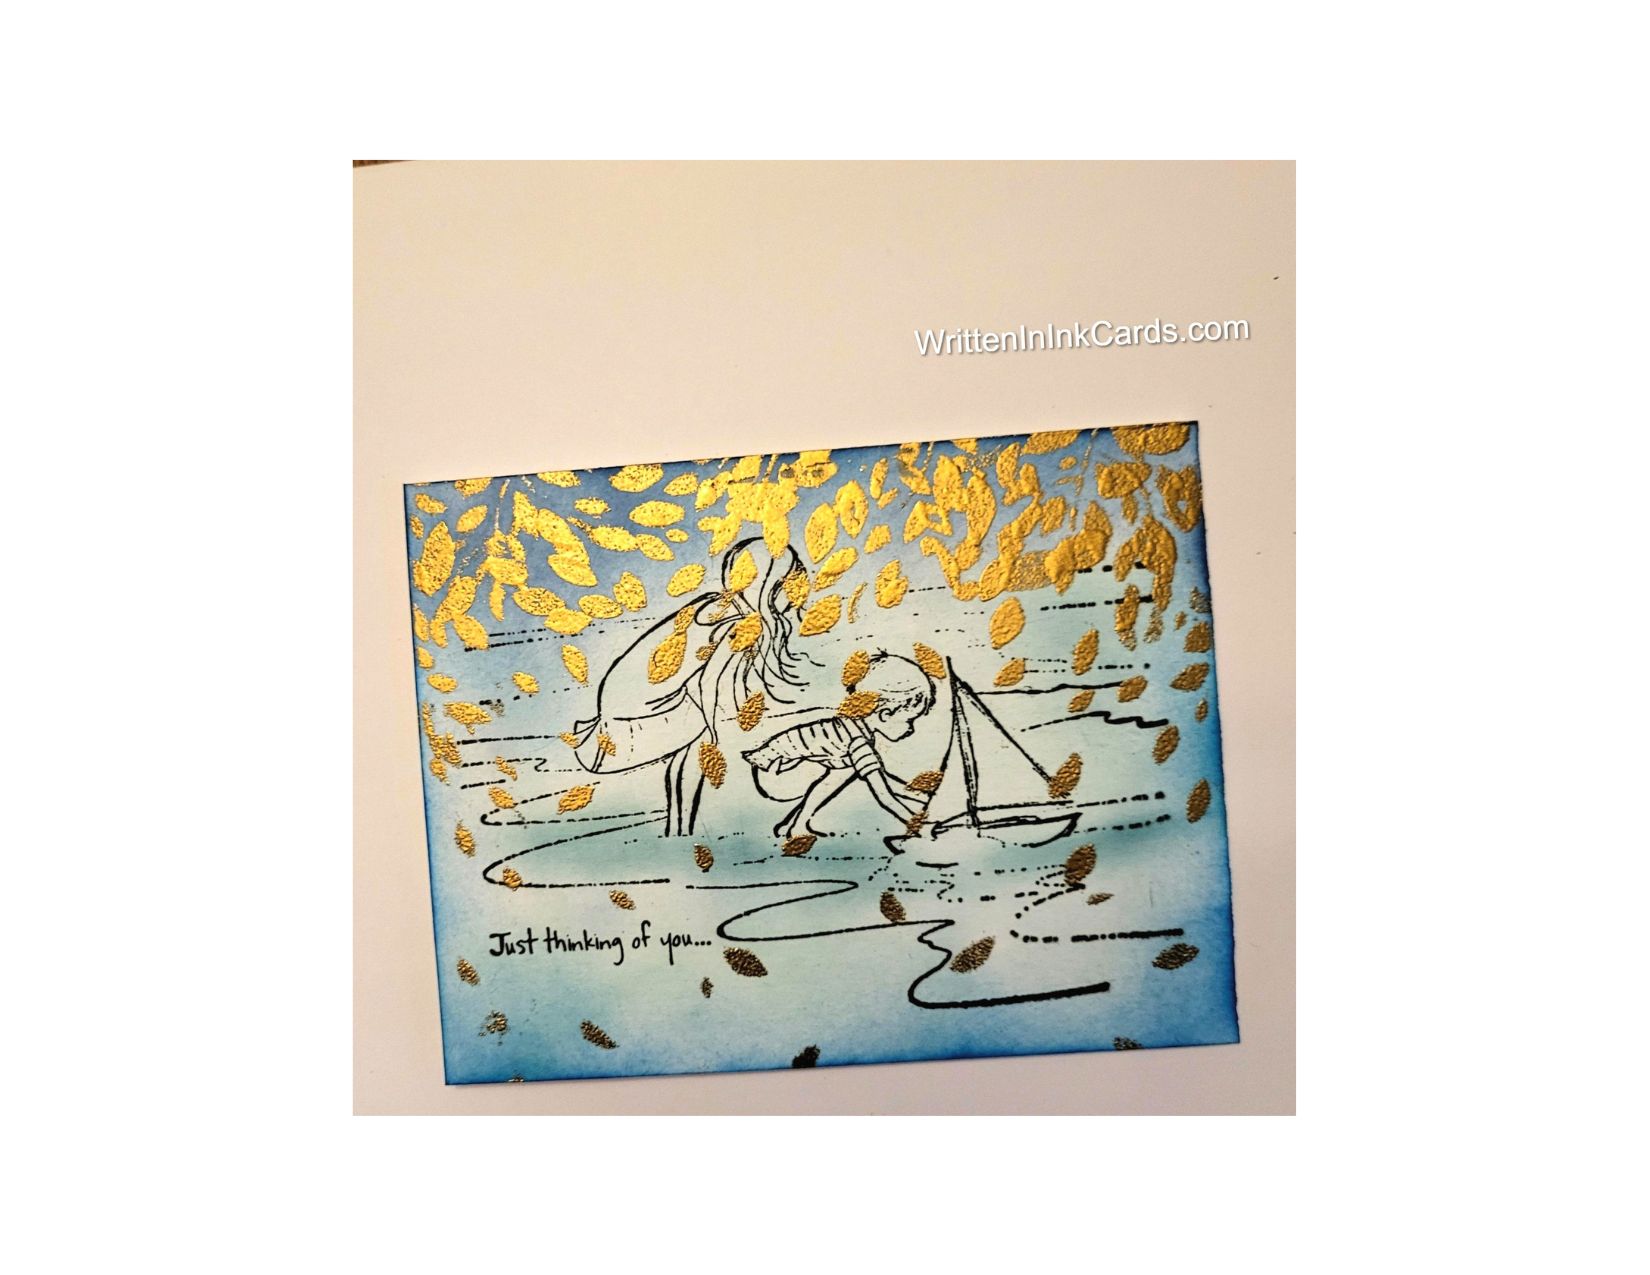
    Would you like to experiment with a design like this? You’ll find a supply list below, including a link to the stencil I used from A Colorful Life Designs.  Follow the link and use discount code ChrisFan10 to save 10% on your entire order! (Master Creator Bundles are excluded as they already have a 20% discount built in.)

    Let’s get Started:

    Card Base: 5.5 x 8.5, scored and folded at 4.25

    Card Face:  5 3/8 x 4 1/8

    Card Face:

    • I laid the card face onto the Grip Mat and applied green and blue ink with a soft hand. 
    • I placed the stencil over the card face and used a variety of dark and medium green inks over the exposed areas.
    • I moved the card face to the stamp positioner and added the image with Versafine Onyx.
    • I intensified the blue around the edges, which adds to the sense of looking into a scene.
    • I spattered the card face with white metallic watercolour .

    Other:

    • I stamped the sentiment on a piece of scrap cardstock and cut it out with a punch.
    • I cut two additional “blanks” with the punch.

    Assembly

    • I glued the three punched shapes together,  with the sentiment on top.
    • I glued the card face to the card base, and added the sentiment as shown.

    Final Thoughts:

    I love the soft colours with the gentle feel and sentiment used on this card.  

    Supplies: (and links where possible)

       I have listed which products I have used, and where they may be purchased. It’s a huge marketplace and in most instances, there are multiple sources and many alternatives to choose from.

    Stencil: Falling Leaves,  A Colorful Life Designs

    Stamp:  Stampin’ Up! (retired)

    Waffle Flower Grip Mat, 8.5 x 6.5, Scrapbook.com

    Metallic Watercolour: Amazon 

    Ink: Stampin’ Up!

    Blending Brushes: Stampin’ Up! 

    Versafine Onyx, Simon Says Stamp

    Adhesive: Tombow Aqua, Michaels

    Card Base & Card Face: Accent 100 lb., Amazon

    Do you have comments or thoughts to share on this design?  Drop me a line in the Comments Section below –  I’d love to hear from you!

    You can also use the Comments Section  to be notified when I release new work

    Falling Leaves by A Colorful Life Designs

    cc

  • Gotta tackle that To-Do list… but first COFFEE

    Gotta tackle that To-Do list… but first COFFEE

    “gotta have my coffee!” – the morning anthem of much of the world

    Would you like to experiment with a design like this? You’ll find a supply list below, including a link to the stencil I used from A Colorful Life Designs.  Follow the link and use discount code ChrisFan10 to save 10% on your entire order! (Master Creator Bundles are excluded as they already have a 20% discount built in.)

    Let’s get Started:

    Card Base: 5.5 x 8.5, scored and folded at 4.25

    Border Layer 5.5  x 4 1/8

    Card Face:  5.5 x 4 

    Card Face:

    • I laid the card face onto my Grip Mat and then positioned the stencil, offsetting the design to the left.
    • I used brown ink and a light hand to go over all exposed areas.
    • Working one row at a time, I masked half of each circle with a piece of paper, and once again went over exposed areas with brown ink and a light hand.  This made each circle two-toned, and provided additional visual interest.
    • I put the card face into my stamp positioner and added the focal sentiment with the coffee cups.  I used navy blue ink for this –  although it looks black in the picture, it’s navy, honest!
    • I placed the card face on my desktop and added coffee rings and spatter using the brown ink used earlier.
    •  I lightly spattered the card face with water, adding additional texture.

    Assembly

    • I glued the black border layer to the card base,  and then centered the card face on top of both.

    Final Thoughts:

    The stencil provides a great backdrop for this fun stamp:  just enough for visual interest without being a distraction.

    Supplies: (and links where possible)

       I have listed which products I have used, and where they may be purchased. It’s a huge marketplace and in most instances, there are multiple sources and many alternatives to choose from.

    Stencil: Quarter Moon,  A Colorful Life Designs

    Waffle Flower Grip Mat, 8.5 x 6.5, Scrapbook.com

    Versamark Embossing Ink: Simon Says Stamp

    Clear Embossing Powder,  Wow,  Simon Says Stamp

    Ink: Stampin’ Up!

    Blending Brushes: Stampin’ Up! 

    Adhesive: Tombow Aqua, Michaels

    Card Base & Card Face: Recollections 110 lb., Michaels

    Do you have comments or thoughts to share on this design?  Drop me a line in the Comments Section below –  I’d love to hear from you!

    You can also use the Comments Section  to be notified when I release new work

    Quarter Moons by A Colorful Life Designs
  • Be Your Beautiful Self – Celebrate the Wonderful Individuals in Your Life

    Be Your Beautiful Self – Celebrate the Wonderful Individuals in Your Life

    Oh, the elegance that can be added with gold!

    Would you like to experiment with a design like this? You’ll find a supply list below, including a link to the stencil I used from A Colorful Life Designs.  Follow the link and use discount code ChrisFan10 to save 10% on your entire order! (Master Creator Bundles are excluded as they already have a 20% discount built in.)

    Let’s get Started:

    Card Base: 5.25 x 10.5, scored and folded at 5.25

    Card Face:  5 x5

    Card Face:

    • I laid the card face down on the Grip Mat and positioned the stencil.  I used cranberry red ink over the exposed surface, avoiding the middle of the stencil.
    • I used an embossing marker to randomly go over some of the dots around the circle,  sprinkling the wet ink with gold embossing powder and setting it with my heat gun.

    Other:

    • I stamped the poppy outline with black ink,  and the fill-colour for the petals in the same red used in the background.
    • I used a circle punch to cut this out.
    • I taped two circular dies together on red card stock and ran them through the Big Shot to cut out the red circle.
    • I looked through my sentiment binder and selected the one shown in the picture.

    Assembly

    • I centered and glued the card face onto the card base.
    • I used the embossing pen to create a line around the edges of the card face, sprinkled gold embossing powder over this and set it with my heat gun.
    • I glued the poppy into the center of the card.
    • I glued the red ring around the poppy.
    • I put foam tape on the back of the sentiment and put it in place across the center of the blossom.
    • I put a gold pearl on both ends of the sentiment strip.

    Final Thoughts:

    This card is so pretty in real life:  the gold embossing catches the light beautifully,  and adds a touch of elegance to the finished design.

    Supplies: (and links where possible)

       I have listed which products I have used, and where they may be purchased. It’s a huge marketplace and in most instances, there are multiple sources and many alternatives to choose from.

    Stencil: Circle Moon, A Colorful Life Designs

    Waffle Flower Grip Mat, 8.5 x 6.5, Scrapbook.com

    Embossing Pen,  Ranger, R&R Scrapbooking

    Gold  Embossing Powder,  Wow, R & R Scrapbooking

    Stamps: Painted Poppies, Stampin’ Up! (retired)

    Dies: Nesting Circle Infinity Dies, Hero Arts

    Ink: Stampin’ Up!

    Blending Brushes: Stampin’ Up! 

    Versafine Onyx, Simon Says Stamp

    Adhesive: Tombow Aqua, Michaels

    Card Base & Card Face: Recollections 110 lb., Michaels

    Do you have comments or thoughts to share on this design?  Drop me a line in the Comments Section below –  I’d love to hear from you!

    You can also use the Comments Section  to be notified when I release new work

    Circle Moon by A Colorful Life Designs

  • Send your love: Create Stunning Cards with Bloom Mandala Stencil

    Send your love: Create Stunning Cards with Bloom Mandala Stencil

    The delicacy of the Bloom Mandala stencil creates a (quick!) gorgeous card.

    Would you like to experiment with a design like this? You’ll find a supply list below, including a link to the stencil I used from A Colorful Life Designs.  Follow the link and use discount code ChrisFan10 to save 10% on your entire order! (Master Creator Bundles are excluded as they already have a 20% discount built in.)

    Let’s get Started:

    Card Base: 5.5 x 8.5, scored and folded at 4.25

    Card Face:  5.5 x 3.75

    Gold Cardstock:  5.5 x .25”

    The strands in this stencil are very fine – to ensure crisp results I sprayed the back with Pixie Spray and allowed it to sit for about 30 seconds before putting it onto the card face.

    Card Face:

    • I laid the card face on my Grip Mat and positioned the stencil.  I rolled a brayer over it to ensure good adhesion.
    • I started applying ink in the center and worked towards to the outer edges of the stencil.  I built up layers of ink in the middle and allowed the intensity to fade as it moved to the edge.
    • I spattered the card face with gold metallic watercolour and waited a few minutes for this to dry completely.
    • I placed the card face into the stamp positioner and stamped the sentiment with Versafine Onyx.
    • I sprinkled this with clear embossing powder and set it with my heat gun. 

    Assembly

    • I glued the card face to the card base, aligning snugly on the left.  
    • I glued the gold strip against the right-hand edge of the card face.

    Final Thoughts:

    I had the gold strip in my “in case I need it” stash of metallics,  and it was already embossed.  It’s amazing how much visual interest that texture adds.

    This is such a beautiful stencil – it’s fun to use, and easy to create beautiful results.

    Supplies: (and links where possible)

       I have listed which products I have used, and where they may be purchased. It’s a huge marketplace and in most instances, there are multiple sources and many alternatives to choose from.

    Stencil: Bloom Mandala,  A Colorful Life Designs

    Waffle Flower Grip Mat, 8.5 x 6.5, Scrapbook.com

    Clear Embossing Powder,  Wow,  Simon Says Stamp

    Stamps: Life is Grand, Stampin’ Up!  (retired)

    Metallic Watercolour: Amazon

    Ink: Stampin’ Up!

    Blending Brushes: Stampin’ Up! 

    Versafine Onyx, Simon Says Stamp

    Adhesive: Tombow Aqua, Michaels

    Card Base & Card Face: Accent 100 lb., Amazon

    Do you have comments or thoughts to share on this design?  Drop me a line in the Comments Section below –  I’d love to hear from you!

    You can also use the Comments Section  to be notified when I release new work

  • Create a beautiful card – celebrate with balloons

    Create a beautiful card – celebrate with balloons

    a fast, easy & impressive card

    Would you like to experiment with a design like this? You’ll find a supply list below, including a link to the stencil I used from A Colorful Life Designs.  Follow the link and use discount code ChrisFan10 to save 10% on your entire order! (Master Creator Bundles are excluded as they already have a 20% discount built in.)

    Let’s get Started:

    Card Base: 5.5 x 8.5, scored and folded at 4.25

    Card Face: 5.5 x 4.25

    White Cardstock: 5 x 3.75  (before die cutting the frame)

    Scraps of White Cardstock for the word

    I used the Marvellous Masks – Balloons for this card, which include four different sizes of both stencils and masks and offers infinite variety.

    Card Face:

    I selected two of the balloon stencils, one quite a bit larger than the other.

    I laid the card face on my Grip Mat and positioned the larger balloon stencil. I applied yellow ink across the exposed area.

    I repeated this 3X, creating four large balloons randomly on the card face using purple, pink and red inks in addition to the yellow.

    I added smaller balloons in the colours mentioned above as well as adding blue and green to the mix,  allowing the balloons to overlap to create depth.

    I outlined each balloon with a black micro liner (I put the stencils back in place to do this, making the process fast and easy).  

    I drew strings on the balloons using the same micro liner.

    I added white spatter to the card face using diluted acrylic.

    Other:

    I die cut  “celebrate” 3X from the scrap cardstock.

    I positioned two stitched rectangle dies on the larger piece of white cardstock, taping them to ensure even spacing all the way around.  I ran this through the Big Shot to create the white frame.

    Assembly

    I stacked and glued the three words on top of each other.

    I glued the card face to the card base, and centered the white frame on these.

    I added the Celebrate on an angle, slightly above the center.

    I added white Nuvo drops as a finishing touch.

    Final Thoughts:

    I’m really happy with this fun, colourful card.  I hadn’t initially planned to outline the balloons,  but I am glad I did: the extra definition made a huge difference in this card.

    I only used two of the four sizes of balloons in the set –  you could easily alter the sizes and number of balloons in the design to create a new look each time.

    Supplies: (and links where possible)

       I have listed which products I have used, and where they may be purchased. It’s a huge marketplace and in most instances, there are multiple sources and many alternatives to choose from.

    Stencil: Marvellous Masks, Balloons, A Colorful Life Designs
    Waffle Flower Grip Mat, 8.5 x 6.5, Scrapbook.com

    Dies: Amazing You, Stampin’ Up! (retired)

    Ink: Stampin’ Up!

    Blending Brushes: Stampin’ Up! 

    Micro Liners: Amazon

    Acrylic: Dr Ph Martin, Taylored Expressions

    Adhesive: Tombow Aqua, Michaels

    Card Base & Card Face: Accent 100 lb., Amazon

    Do you have comments or thoughts to share on this design?  Drop me a line in the Comments Section below –  I’d love to hear from you!

    You can also use the Comments Section  to be notified when I release new work