

Would you like to experiment with a design like this? You’ll find a supply list below, including a link to the stencil I used from A Colorful Life Designs. Follow the link and use discount code ChrisFan10 to save 10% on your entire order! (Master Creator Bundles are excluded as they already have a 20% discount built in.)
Let’s get Started:
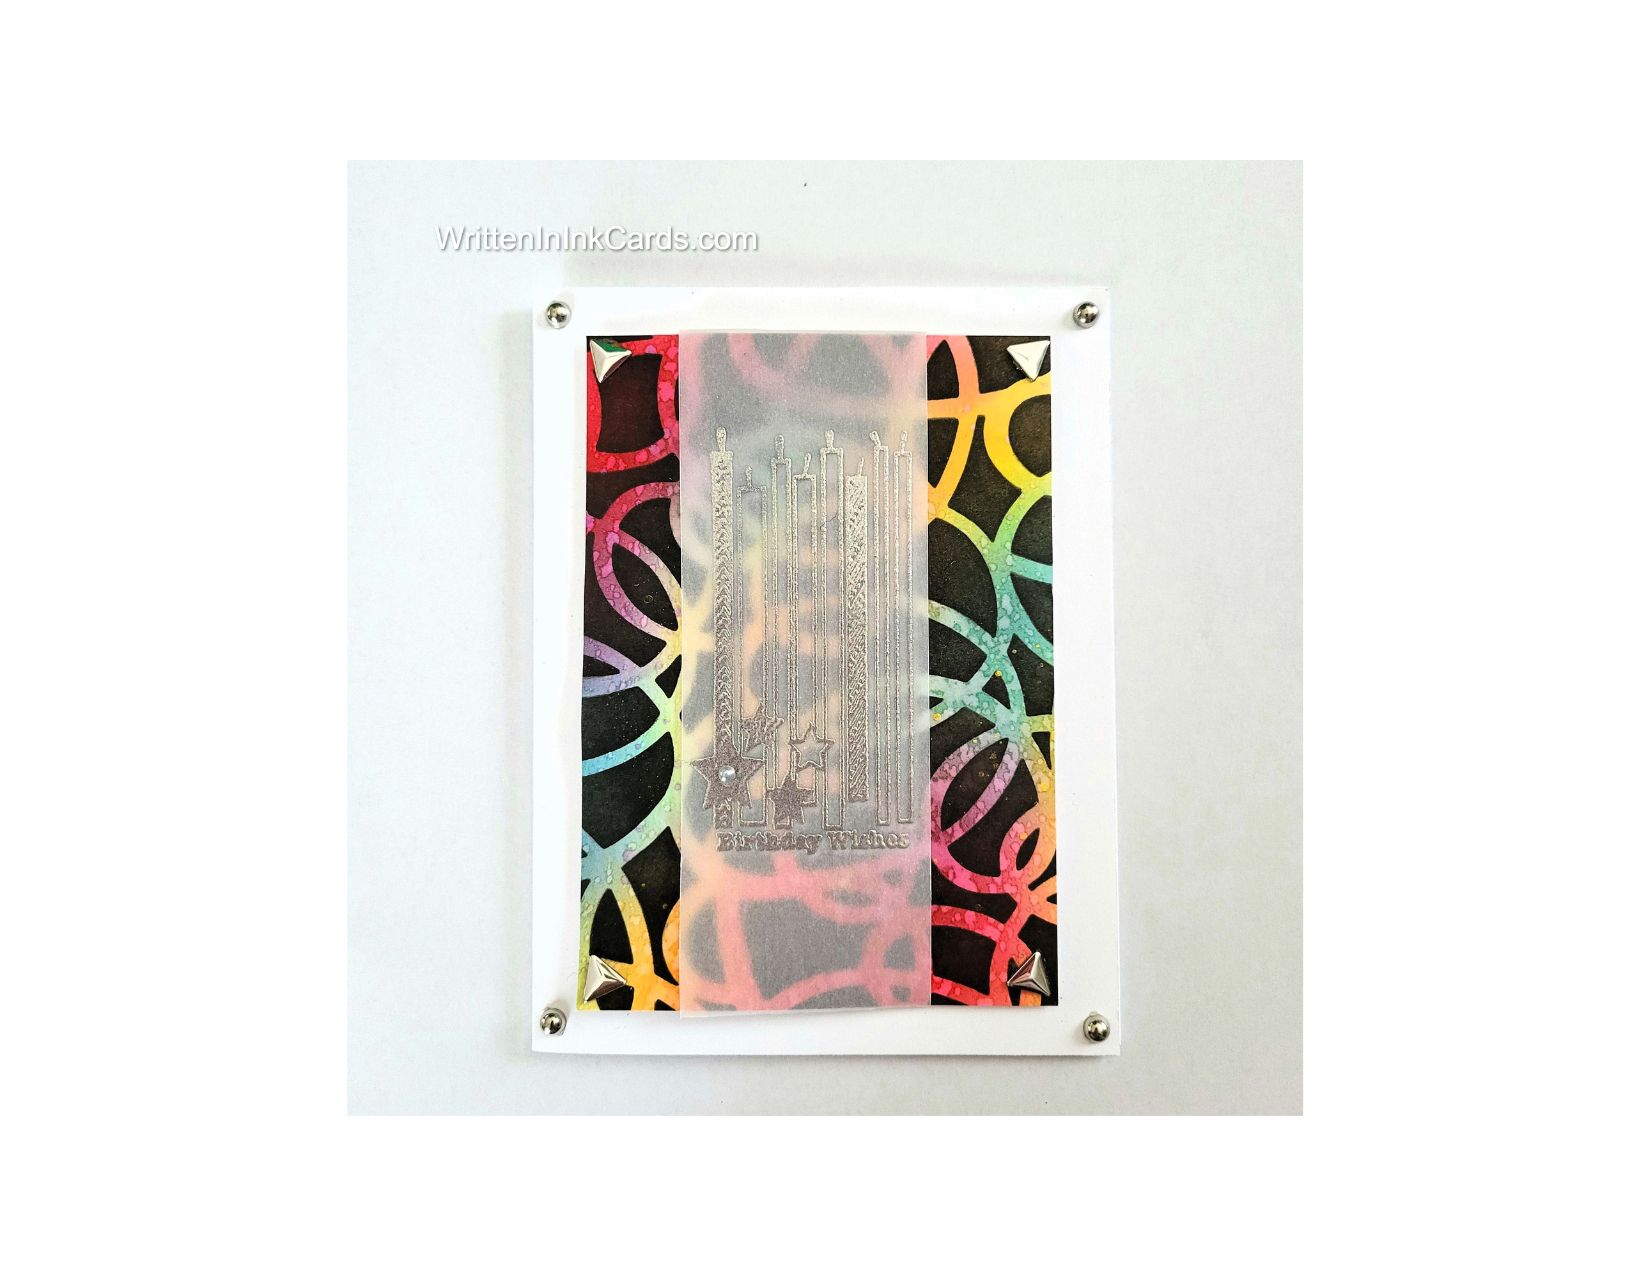
Card Base: 5.5 x 8.5, scored and folded at 4.25
Card Face: 5 x 3.75
Vellum: 7 x 2.5
Card Face:
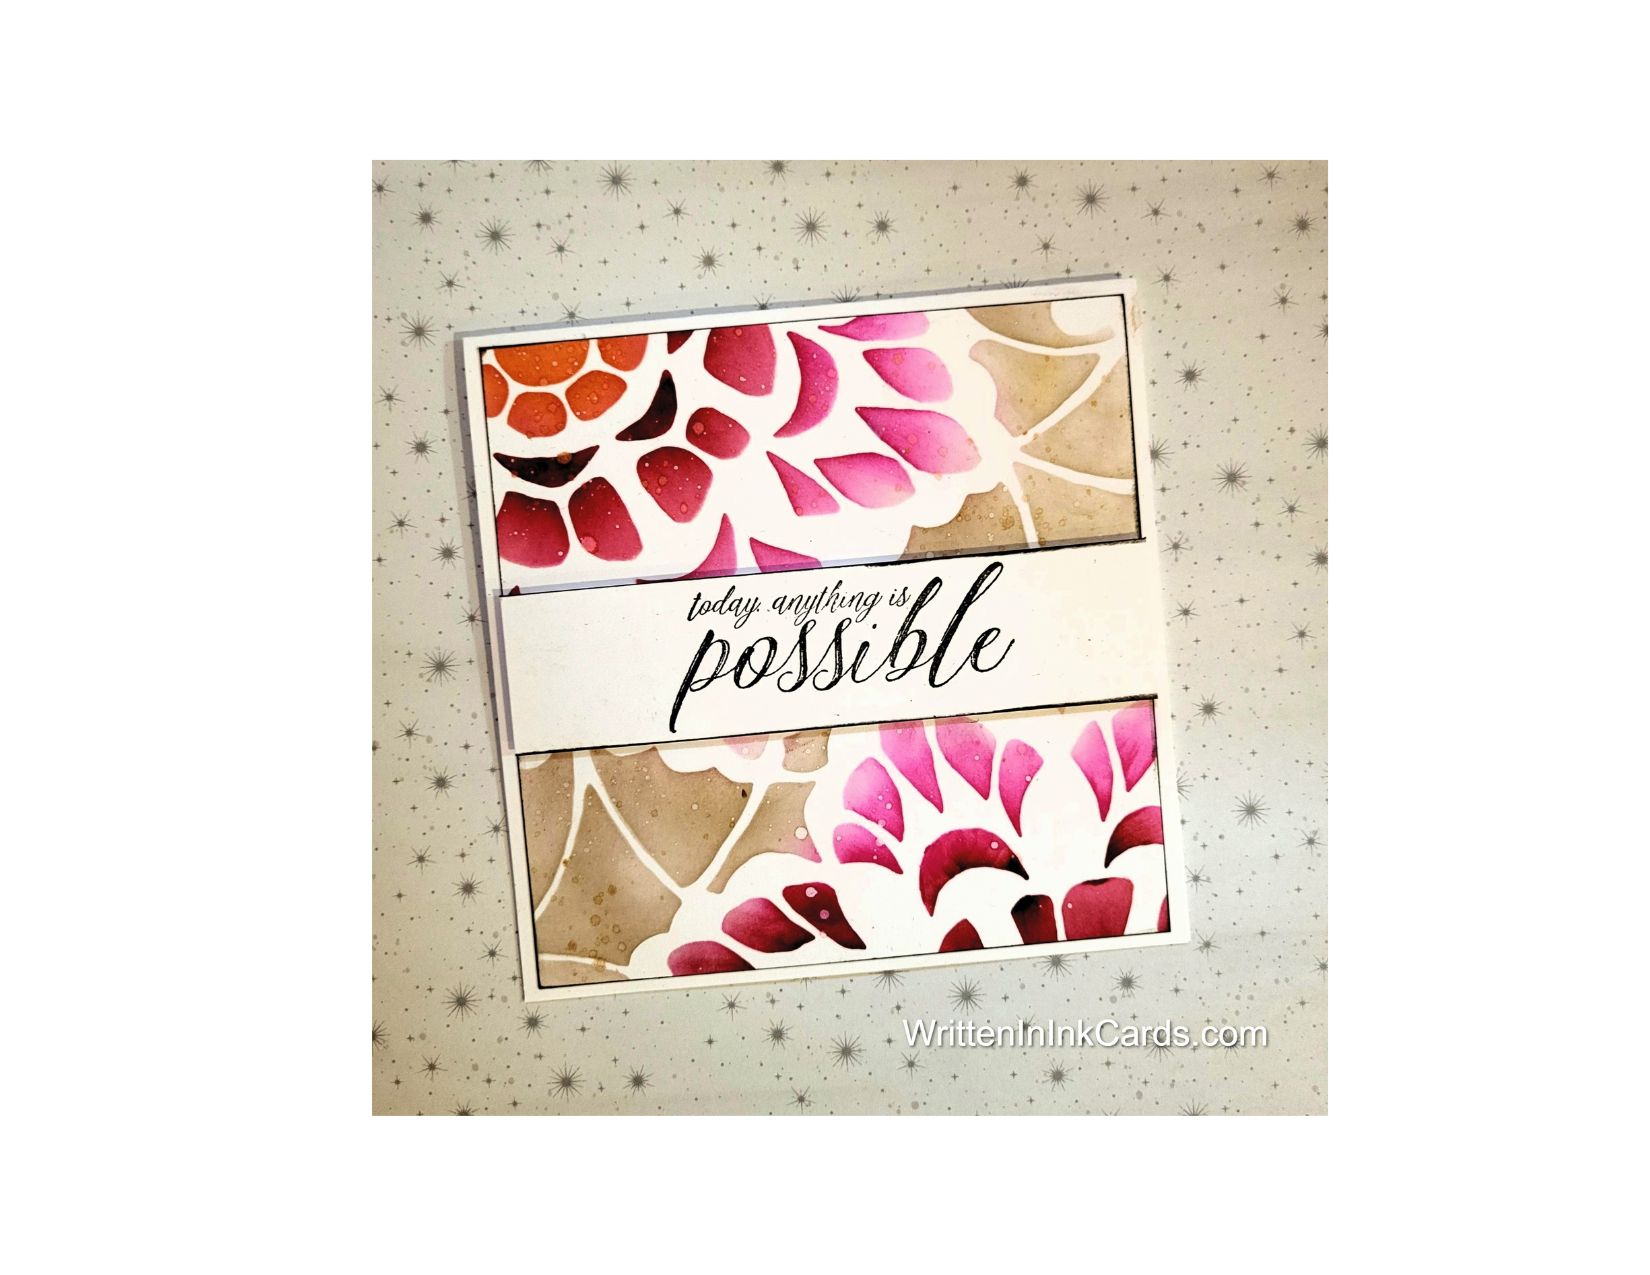
- I laid the card face on the grip mat and applied blue, yellow and red ink randomly , covering the entire surface.
- I spattered water generously over the surface, creating texture and depth.
- Once this had dried, I positioned the stencil and applied black ink with a heavy hand: the pattern was created by the areas which had been protected by the stencil, allowing the multicoloured base layer to show through.
Other:
- I dusted the vellum liberally with anti-static powder.
- I stamped the image with Versamark embossing ink, sprinkled silver embossing powder, and set it with my heat gun.
I turned the heat gun on for approximately 1 minute before use to be certain that it was good and hot. While embossing the vellum, I moved the heat gun constantly to prevent warping.
Assembly
- I wrapped the vellum around the card face and secured it with scotch tape, centering vertically.
- I put dimensional foam on the back of the card face, and put it in place in the center of the card base.
- I added a silver pearl to each corner of the card face, and a triangular metallic embellishment to each corner of the card base.
Final Thoughts:
I love the bits of texture created by the water spatter, and the interest provided by the use of different colours in the background.
The use of vellum softened the contrast and bold colours of the background.
Supplies: (and links where possible)
I have listed which products I have used, and where they may be purchased. It’s a huge marketplace and in most instances, there are multiple sources and many alternatives to choose from.
Stencil: Scribble Mask, A Colorful Life Designs
Waffle Flower Grip Mat, 8.5 x 6.5, Scrapbook.com
Versamark Embossing Ink: Simon Says Stamp
Silver Embossing Powder, Wow, R&R Scrapbooking
Stamps: Candles, Stars & Birthday Wishes , Unity Stamps (retired)
Ink: Stampin’ Up!
Blending Brushes: Stampin’ Up!
Versafine Onyx, Simon Says Stamp
Adhesive: Tombow Aqua, Michaels
Card Base & Card Face: Accent 100 lb., Amazon or Recollections 110 lb., Michaels
Do you have comments or thoughts to share on this design? Drop me a line in the Comments Section below – I’d love to hear from you!
You can also use the Comments Section to be notified when I release new work.
Scribble Mask by A Colorful Life Designs