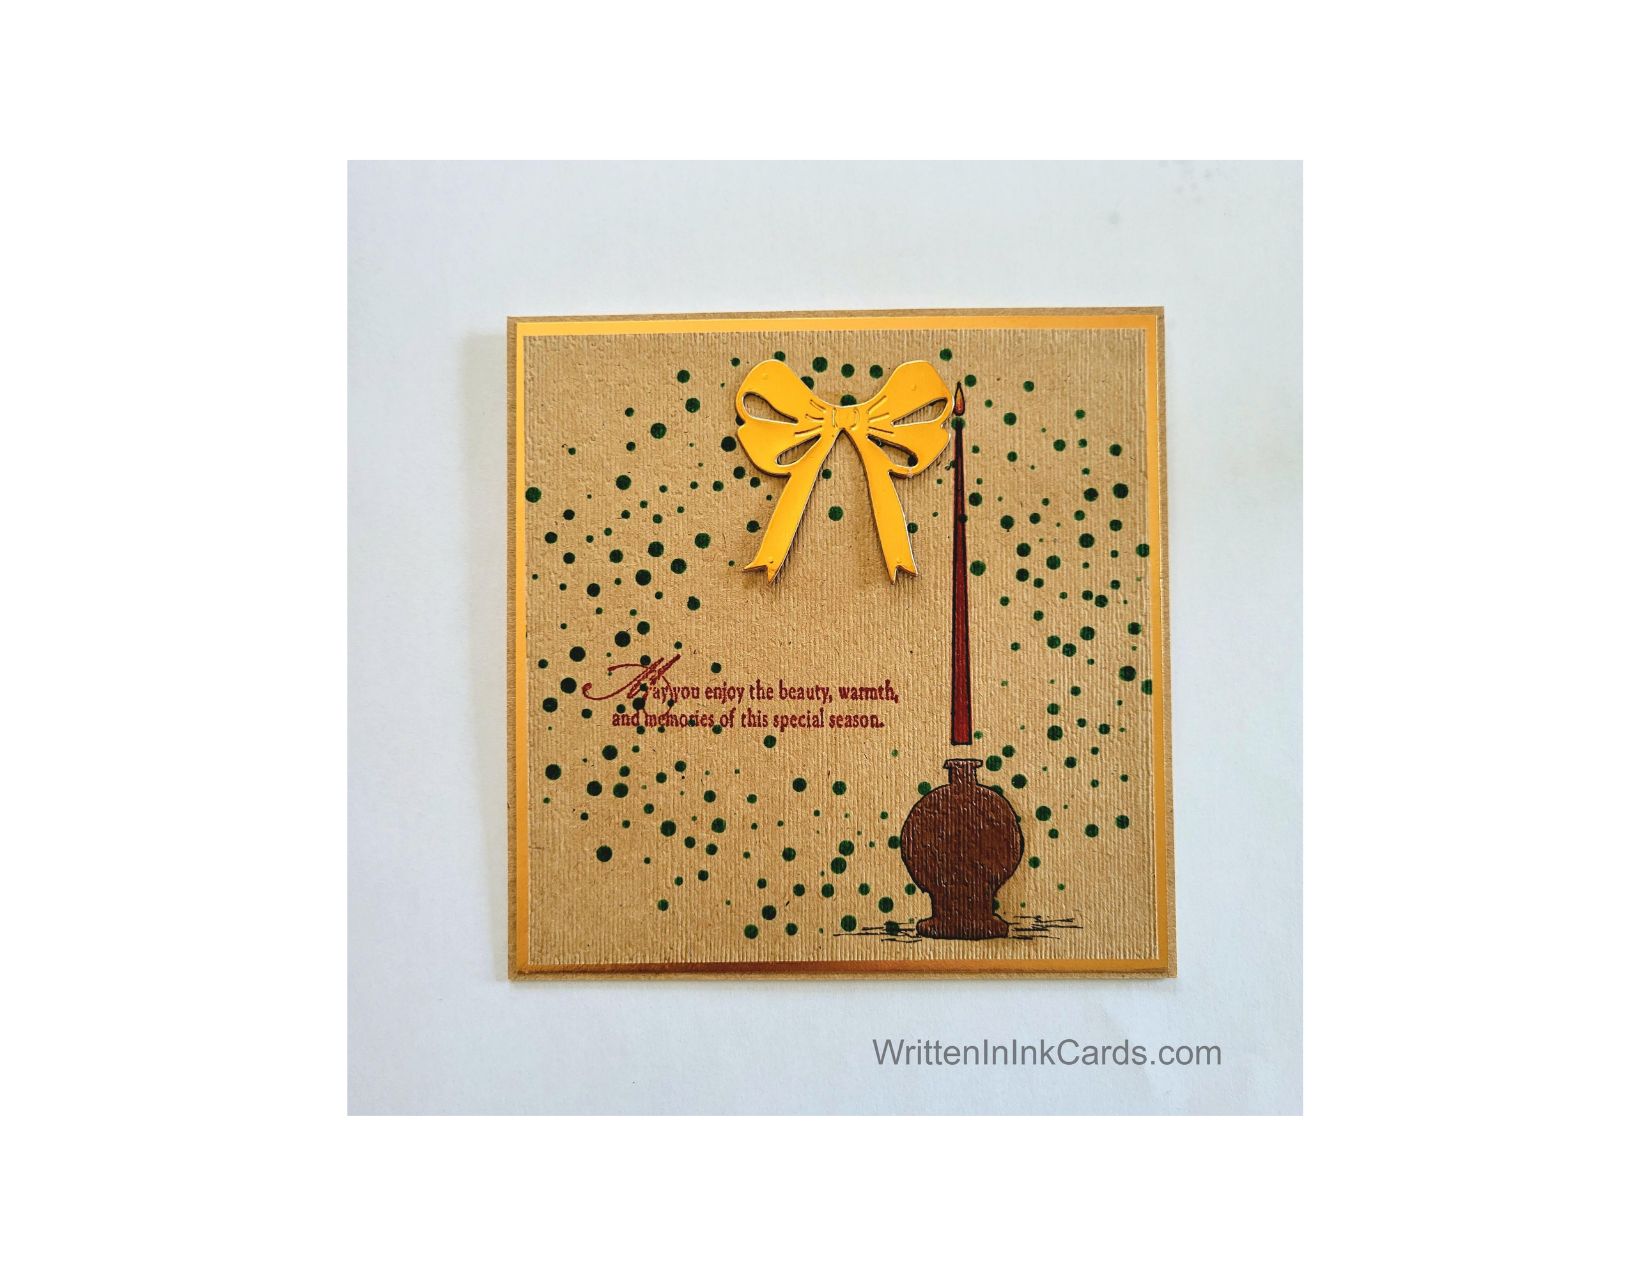
Would you like to experiment with a design like this? You’ll find a supply list below, including a link to the stencils I used from A Colorful Life Designs. Follow the link and use the discount code ChrisFan10 to save 10% on your entire order! (Master Creator Bundles are excluded as they already have a 20% discount built in.)
Let’s get Started:
Card Base: 5.25 x 10.5, scored and folded at 5.25
Kraft Border Layer: 5.25 x 5.25
Gold Border Layer: 5 ⅛ x 5 ⅛
Kraft Card Face: 4 ⅞ x 4 ⅞
Card Face:
- I laid the card face on my grip mat and positioned the wreath stencil. I applied green ink across all exposed areas.
- I removed the wreath stencil and positioned the Retro Candles stencil so the one I wanted to use was lined up in the lower right of the card face. (There are three candles on this stencil.)
- I masked off the candle and then pressed my Versamark ink pad through the opening for the candle holder. I sprinkled gold embossing powder over the wet ink and set it with my heat gun.
- After masking off the top of the candle holder and the flame on top of the candle, I applied red ink to the candle itself.
- Next, I masked off the top of the candle, used shading brushes to add yellow ink to create the flame, and then added a touch of red at the base.
- I traced all parts of the candle and candle stick with a fineliner to provide definition.
- I used a light grey alcohol marker to shade the right-hand side of the candle holder, and a black micro liner to add fine black lines to indicate a surface.
- I put the card face into my stamp positioner and added the sentiment in the same red as the candle.
- I put the card face in an embossing folder and ran it through my Big Shot to add surface texture.
Other:
- I used a die and a scrap of gold foil to create the bow.
Assembly
- I glued the kraft border layer to the card base.
- I centered the gold border layer on top of these, and then the card face on top of all.
- I glued the gold bow to the top of the wreath.
Final Thoughts:
This card has a timeless feel, and I love the kraft/gold foil combination.
Supplies: (and links where possible)
I have listed the products I have used and where they can be purchased. It’s a huge marketplace, and in most instances, there are multiple sources and many alternatives to choose from.
Stencils: (see images below)
Dotted Wreath, A Colorful Life Designs
Mid Century Candles, A Colorful Life Designs
Versamark Embossing Ink: R&R Scrapbooking
Gold Embossing Powder, Wow, Scrap n’ Stamp Canada
Dies: Bow Toppers, Scrapbook.com
Ink: Stampin’ Up!
Blending Brushes: Stampin’ Up!
Shading Brushes, Waffle Flower, Scrap n’ Stamp Canada
Fineliners, Amazon
Adhesive: Tombow Aqua, Michaels
Card Base & Card Face: Accent 100 lb., Amazon
Do you have any comments or thoughts on this design? Drop me a line in the Comments Section below – I’d love to hear from you!
You can also use the Comments Section to be notified when I release new work.

Would you like to experiment with a design like this? You’ll find a supply list below, including a link to the stencils I used from A Colorful Life Designs. Follow the link and use the discount code ChrisFan10 to save 10% on your entire order! (Master Creator Bundles are excluded as they already have a 20% discount built in.)
Let’s get Started:
Card Base: 5.25 x 10.5, scored and folded at 5.25
Kraft Border Layer: 5.25 x 5.25
Gold Border Layer: 5 ⅛ x 5 ⅛
Kraft Card Face: 4 ⅞ x 4 ⅞
Card Face:
- I laid the card face on my grip mat and positioned the wreath stencil. I applied green ink across all exposed areas.
- I removed the wreath stencil and positioned the Retro Candles stencil so the one I wanted to use was lined up in the lower right of the card face. (There are three candles on this stencil.)
- I masked off the candle and then pressed my Versamark ink pad through the opening for the candle holder. I sprinkled gold embossing powder over the wet ink and set it with my heat gun.
- After masking off the top of the candle holder and the flame on top of the candle, I applied red ink to the candle itself.
- Next, I masked off the top of the candle, used shading brushes to add yellow ink to create the flame, and then added a touch of red at the base.
- I traced all parts of the candle and candle stick with a fineliner to provide definition.
- I used a light grey alcohol marker to shade the right-hand side of the candle holder, and a black micro liner to add fine black lines to indicate a surface.
- I put the card face into my stamp positioner and added the sentiment in the same red as the candle.
- I put the card face in an embossing folder and ran it through my Big Shot to add surface texture.
Other:
- I used a die and a scrap of gold foil to create the bow.
Assembly
- I glued the kraft border layer to the card base.
- I centered the gold border layer on top of these, and then the card face on top of all.
- I glued the gold bow to the top of the wreath.
Final Thoughts:
This card has a timeless feel, and I love the kraft/gold foil combination.
Supplies: (and links where possible)
I have listed the products I have used and where they can be purchased. It’s a huge marketplace, and in most instances, there are multiple sources and many alternatives to choose from.
Stencils: (see images below)
Dotted Wreath, A Colorful Life Designs
Mid Century Candles, A Colorful Life Designs
Versamark Embossing Ink: R&R Scrapbooking
Gold Embossing Powder, Wow, Scrap n’ Stamp Canada
Dies: Bow Toppers, Scrapbook.com
Ink: Stampin’ Up!
Blending Brushes: Stampin’ Up!
Shading Brushes, Waffle Flower, Scrap n’ Stamp Canada
Fineliners, Amazon
Adhesive: Tombow Aqua, Michaels
Card Base & Card Face: Accent 100 lb., Amazon
Do you have any comments or thoughts on this design? Drop me a line in the Comments Section below – I’d love to hear from you!
You can also use the Comments Section to be notified when I release new work.
Mid Century Candles

Dotted Wreath

Leave a Reply