
Would you like to experiment with a design like this? You’ll find a supply list below, including a link to the stencil I used from A Colorful Life Designs. Follow the link and use discount code ChrisFan10 to save 10% on your entire order! (Master Creator Bundles are excluded as they already have a 20% discount built in.)
I do love a bit of grunge from time to time!
Let’s get Started:
Card Base: 5.5 x 8.5, scored and folded at 4.25
Border Layer: 5.5 x 4.25
Card Face: 5.25 x 4
Card Face:
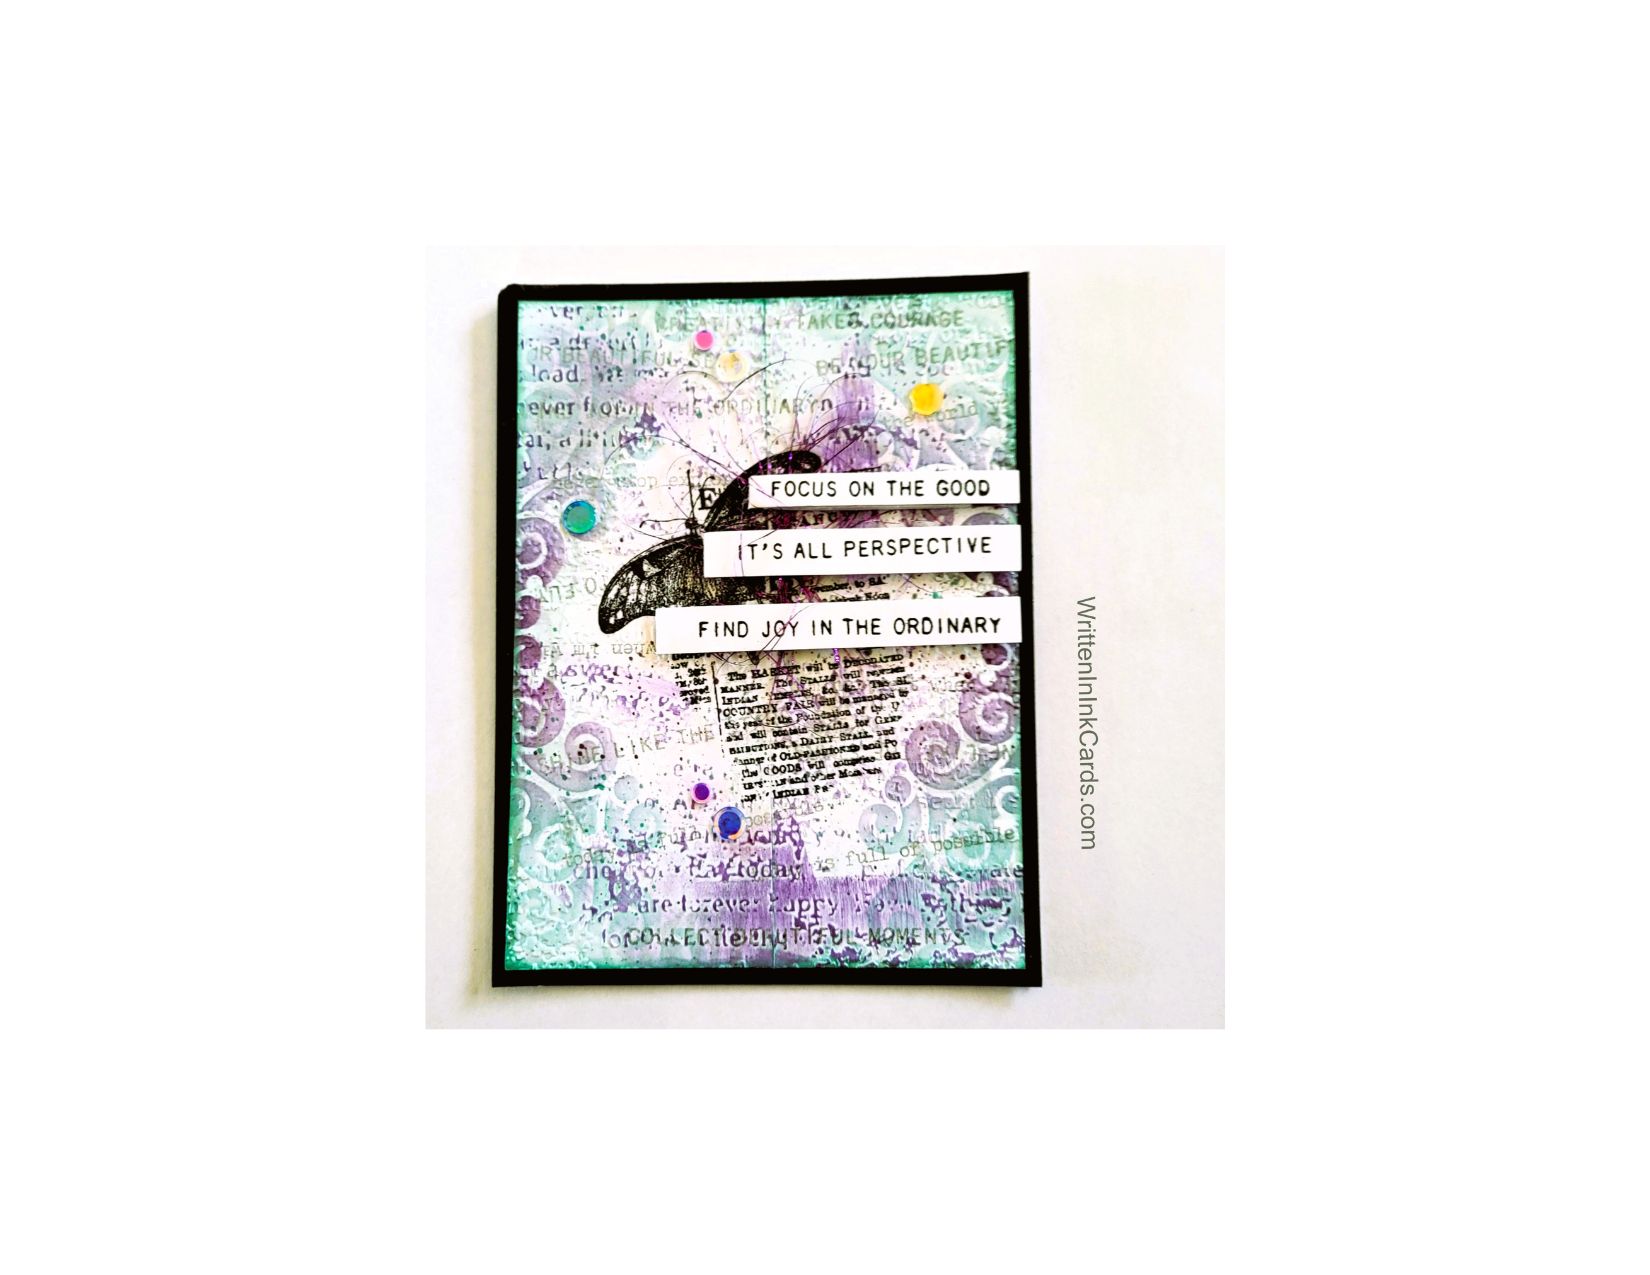
- I laid the card face on my Grip Mat and then positioned the stencil, going over it with a brayer to ensure good contact with the mat.
- Next I applied a mixture of light teal and purple inks over the exposed areas.
- I was really happy with the result, and then(because I was in an experimental mood) I cut the card face in half, and glued them to a piece of copy paper, reversing the order.
- I put this reconfigured card face into my stamp positioner and added the focal image in the center, using Versafine Onyx.
- The focal image is from a grunge set, and to further develop that theme, I stamped a few different sentiments onto the background, using grey ink and second-generation stamping.
- I ran each edge of the card face over the teal ink pad used on the stencil, tilting the paper slightly to allow the colour to bleed in just a bit.
Other:
- I grabbed my sentiment binder and pulled out three that worked with the mood of this piece. This binder contains sentiments that have been created in advance and saved for future need. It’s a great time saver!
- I put dimensional foam on the back of each strip.
Assembly
- I glued the black border layer onto the card base, and then centered the card face on top of these.
- I removed the backing from each of the three sentiments, and laid them lightly on the card face where I wanted them.
- I took a length of purple metallic thread, wrapped it loosely around my fingers and then secured it under each sentiment strip, lifting each slightly to slide the thread underneath and then pushing it down to hold the thread and secure it to the card face.
- I used an assortment of card bling to finish the card, gluing it randomly across the finished card face.
Final Thoughts:
- I like the reversed stencil image: if I had been planning on this when I started, it would have been easy to get this look by stencilling just half of the image on each outside edge. Cutting the card face down the middle left a visible line, which will be avoided if I redo this design.
- The metallic thread isn’t very visible in the image, but it adds a subtle bit of loveliness in real life.
- I do love a grungy card! My biggest issue with this style is that I don’t know when to stop, and the card gets muddy – how did I do this time?
Supplies: (and links where possible)
I have listed which products I have used, and where they may be purchased. It’s a huge marketplace and in most instances, there are multiple sources and many alternatives to choose from.
Stencil: Swirl Band, A Colorful Life Designs
Waffle Flower Grip Mat, 8.5 x 6.5, Scrapbook.com
Stamps:
Studio Light Inspire and Create Grunge Collection (retired)
Polka Dot Blossoms Sayings, Tim Holtz, Amazon
Card Bling: A Colorful Life Designs
Ink: Stampin’ Up!
Blending Brushes: Stampin’ Up!
Versafine Onyx, Simon Says Stamp
Adhesive: Tombow Aqua, Michaels
Card Base & Card Face: Accent 100 lb., Amazon
Do you have comments or thoughts to share on this design? Drop me a line in the Comments Section below – I’d love to hear from you!
You can also use the Comments Section to be added to the list, and notified when I release new work.
Swirl Band by A Colorful Life Designs – remember, use the code to save!
