Would you like to experiment with a design like this? You’ll find a supply list below, including a link to the stencil I used from A Colorful Life Designs. Follow the link and use the discount code ChrisFan10 to save 10% on your entire order! (Master Creator Bundles are excluded as they already have a 20% discount built in.)
Let’s get Started:
Card Base: 5.5 x 8.5, scored and folded at 4.25
Card Face: 5.25 x 4
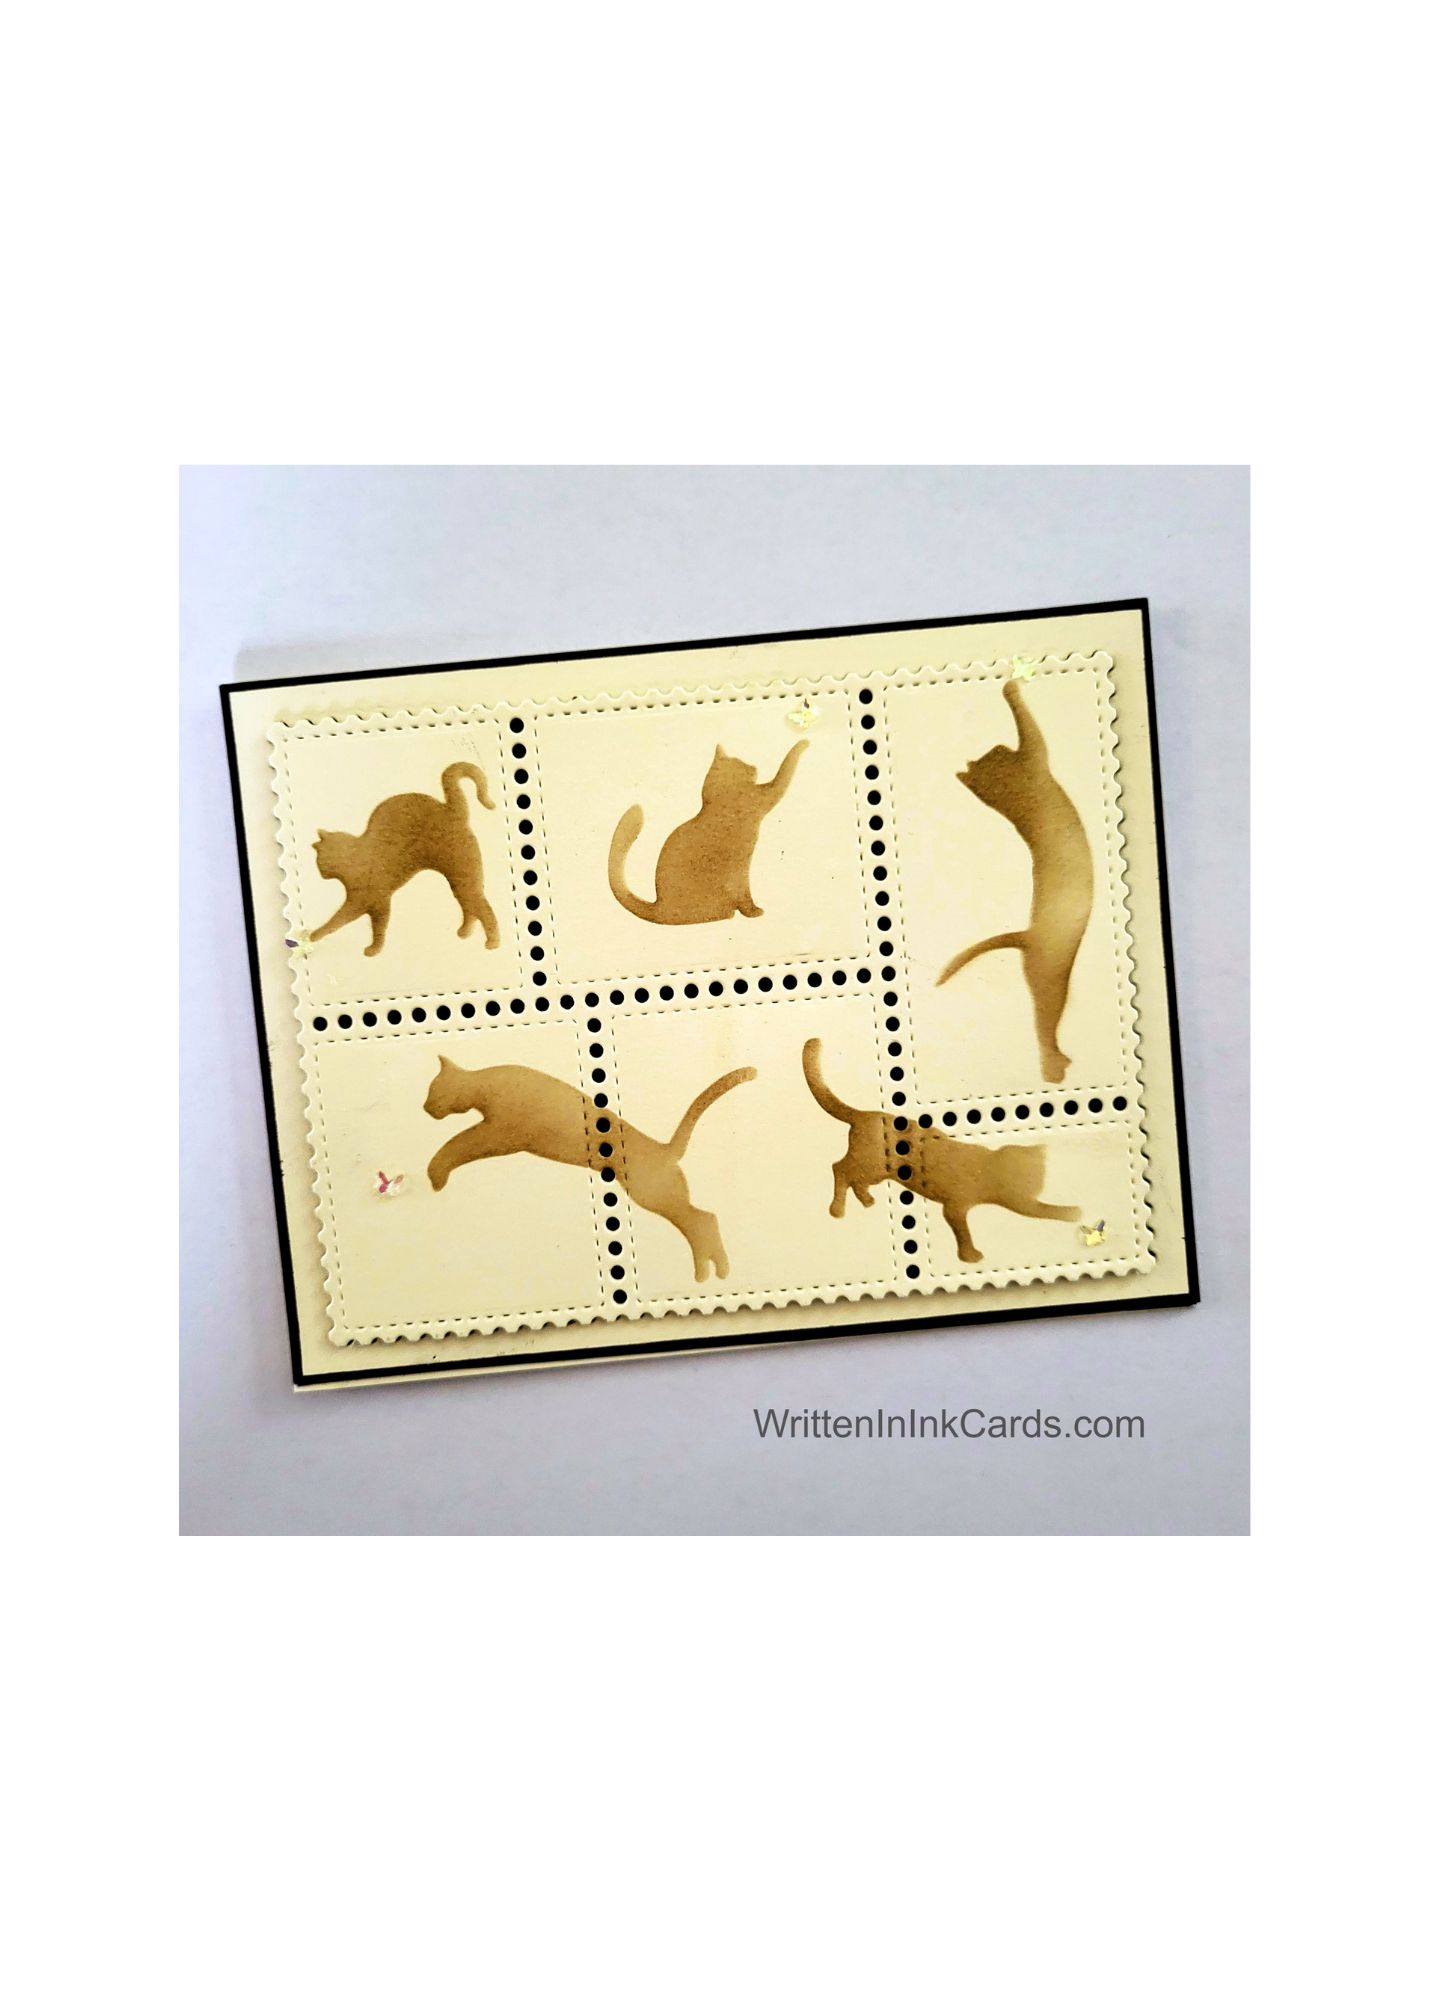
This set includes a stencil with six openings to create dogs, as well as the six cut-out shapes that act as masks. I used three of the masks to create this card.
Card Face:
- I laid the card face on the grip mat and positioned the three masks, securing each with a loop of low-tack tape.
- I applied light brown ink with a soft hand around each mask.
- I added touches of the same brown ink to some edges on the card face.
- I removed the masks, put the card face in an embossing folder and ran it through the Big Shot.
- I decided I wanted some spatter on the card face, so I put the masks back in place and added gold spatter here and there with metallic watercolour. I used the same puddle of gold metallic watercolour to run the edges of the card face through, allowing an irregular edge.
Other:
- I stamped the sentiment on a scrap of cardstock, and used a deckled-edge die to cut it out.
- I used a scrap of gold cardstock to die cut the bones.
Assembly
- I glued the card face to the card base, centering on all sides.
- I added dimensional foam to the back of the sentiment and put it in place on the upper left of the card face.
- I glued the bones in random spots, as shown.
- I added three clear embellishments to the sentiment as a finishing touch.
Final Thoughts:
I love the way this card came together: the negative images created by the masks, the texture and dimension created by the embossing folder, the die-cut bones …. All of these work so well together.
Supplies: (and links where possible)
I have listed the products I have used and where they can be purchased. It’s a huge marketplace, and in most instances, there are multiple sources and many alternatives to choose from.
Stencil: Dogs Playing, A Colorful Life Designs
Dies: KSCrafts, Amazon
Ink: Stampin’ Up!
Blending Brushes: Stampin’ Up!
Versafine Onyx, Simon Says Stamp
Adhesive: Tombow Aqua, Michaels
Card Base & Card Face: Recollections 110 lb., Michaels
Do you have any comments or thoughts on this design? Drop me a line in the Comments Section below – I’d love to hear from you!
You can also use the Comments Section to be notified when I release new work.
Dogs Playing