Tag: writtenininkcards

  • Beautiful Multi-Color Stenciling for Card Making

    Beautiful Multi-Color Stenciling for Card Making

    Would you like to experiment with a design like this? You’ll find a supply list below, including a link to the stencil I used from A Colorful Life Designs.  Follow the link and use discount code ChrisFan10 to save 10% on your entire order! (Master Creator Bundles are excluded as they already have a 20% discount built in.)

    Let’s get Started:

    Card Base: 5.25 x 10.5, scored and folded at 5.25

    Card Face:  5 x 5

    Sentiment Strip:  5 x 1.5”

    Card Face:

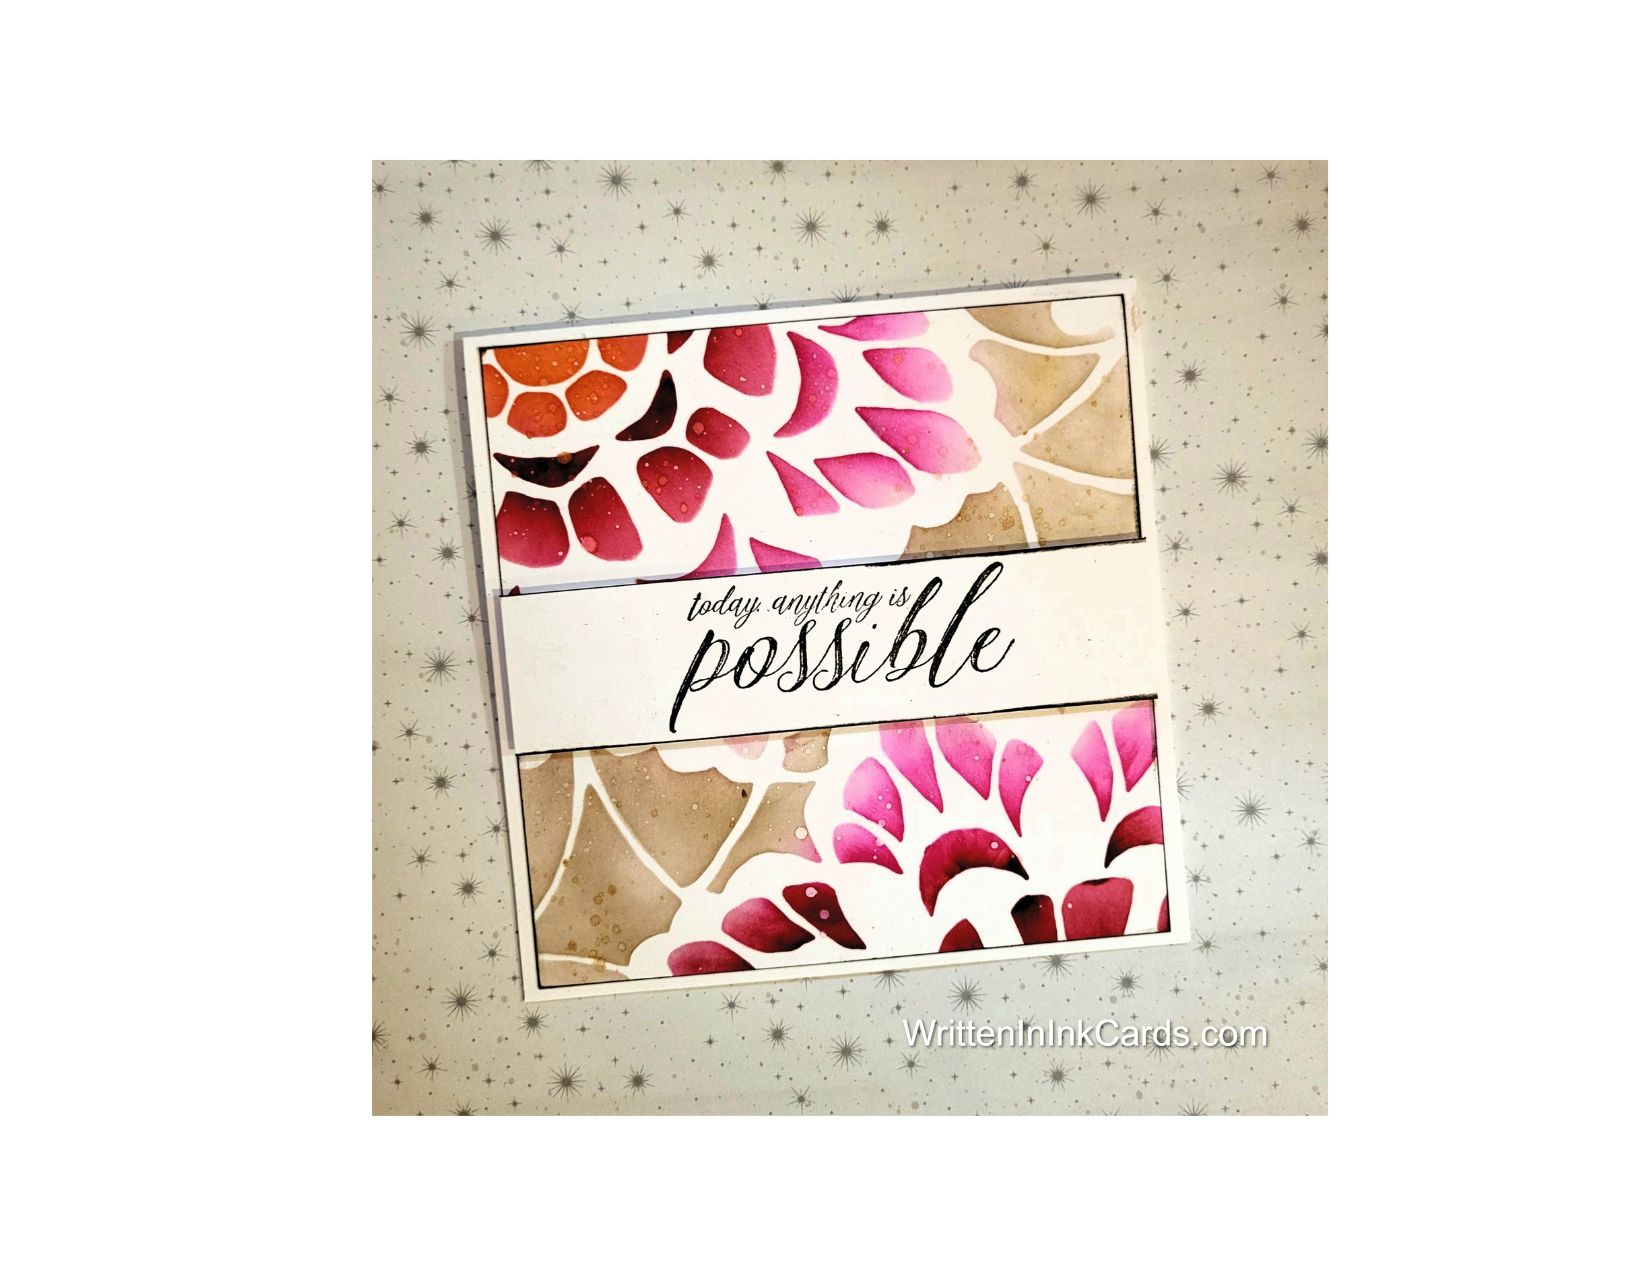
    • I laid the card face on a piece of scrap paper and positioned the stencil (this is a 6 x 9 stencil,  so there are options how how to place it – even on a 5 x 5 card face), and secured it with Mint Tape.
    • Using small blending and shading brushes,   I applied colours to the stencil.  I used orange on the  center of the flowers , then, moved to a dark red, then to pink.  I finished the background with soft beige.
    • I spattered the card face using metallic gold watercolour.
    • I ran all edges over a Versafine Onyx ink pad, adding definition to the card face.

    Other:

    • I placed the strip of card stock into the stamp positioner and added the sentiment with Versafine Onyx.  I ran the two horizontal edges of the strip over the black ink pad.

    Assembly

    • I glued the card face onto the card base, centering on all sides.
    • I added dimensional foam to the back of the card strip and centered it horizontally on the card face.

    Final Thoughts:

    This is a really pretty stencil to play with,  and the options for colour are endless –  everything from monochromatic to full colour, as I have chosen here.

    I’m really happy with the result of this multi-colour stencilling,  but it was absolutely necessary to use smaller brushes to control colour placement.

    Supplies: (and links where possible)

       I have listed which products I have used, and where they may be purchased. It’s a huge marketplace and in most instances, there are multiple sources and many alternatives to choose from.

    Stencil: Lace Close Up, A Colorful Life Designs

    Waffle Flower Grip Mat, 8.5 x 6.5, Scrapbook.com

    Stamps:  Technique Junkies  (no longer in business)

    Ink: Stampin’ Up!

    Blending Brushes: Sampler Pack, Waffle Flower, R&R Scrapbooking

    Versafine Onyx, Simon Says Stamp

    Adhesive: Tombow Aqua, Michaels

    Card Base & Card Face: Accent 100 lb., Amazon

    Do you have comments or thoughts to share on this design?  Drop me a line in the Comments Section below –  I’d love to hear from you!

    You can also use the Comments Section  to be notified when I release new work.

    Lace Close Up by A Colorful Life Designs

  • Fast, Distinctive and Contemporary makes a great holiday card

    Fast, Distinctive and Contemporary makes a great holiday card

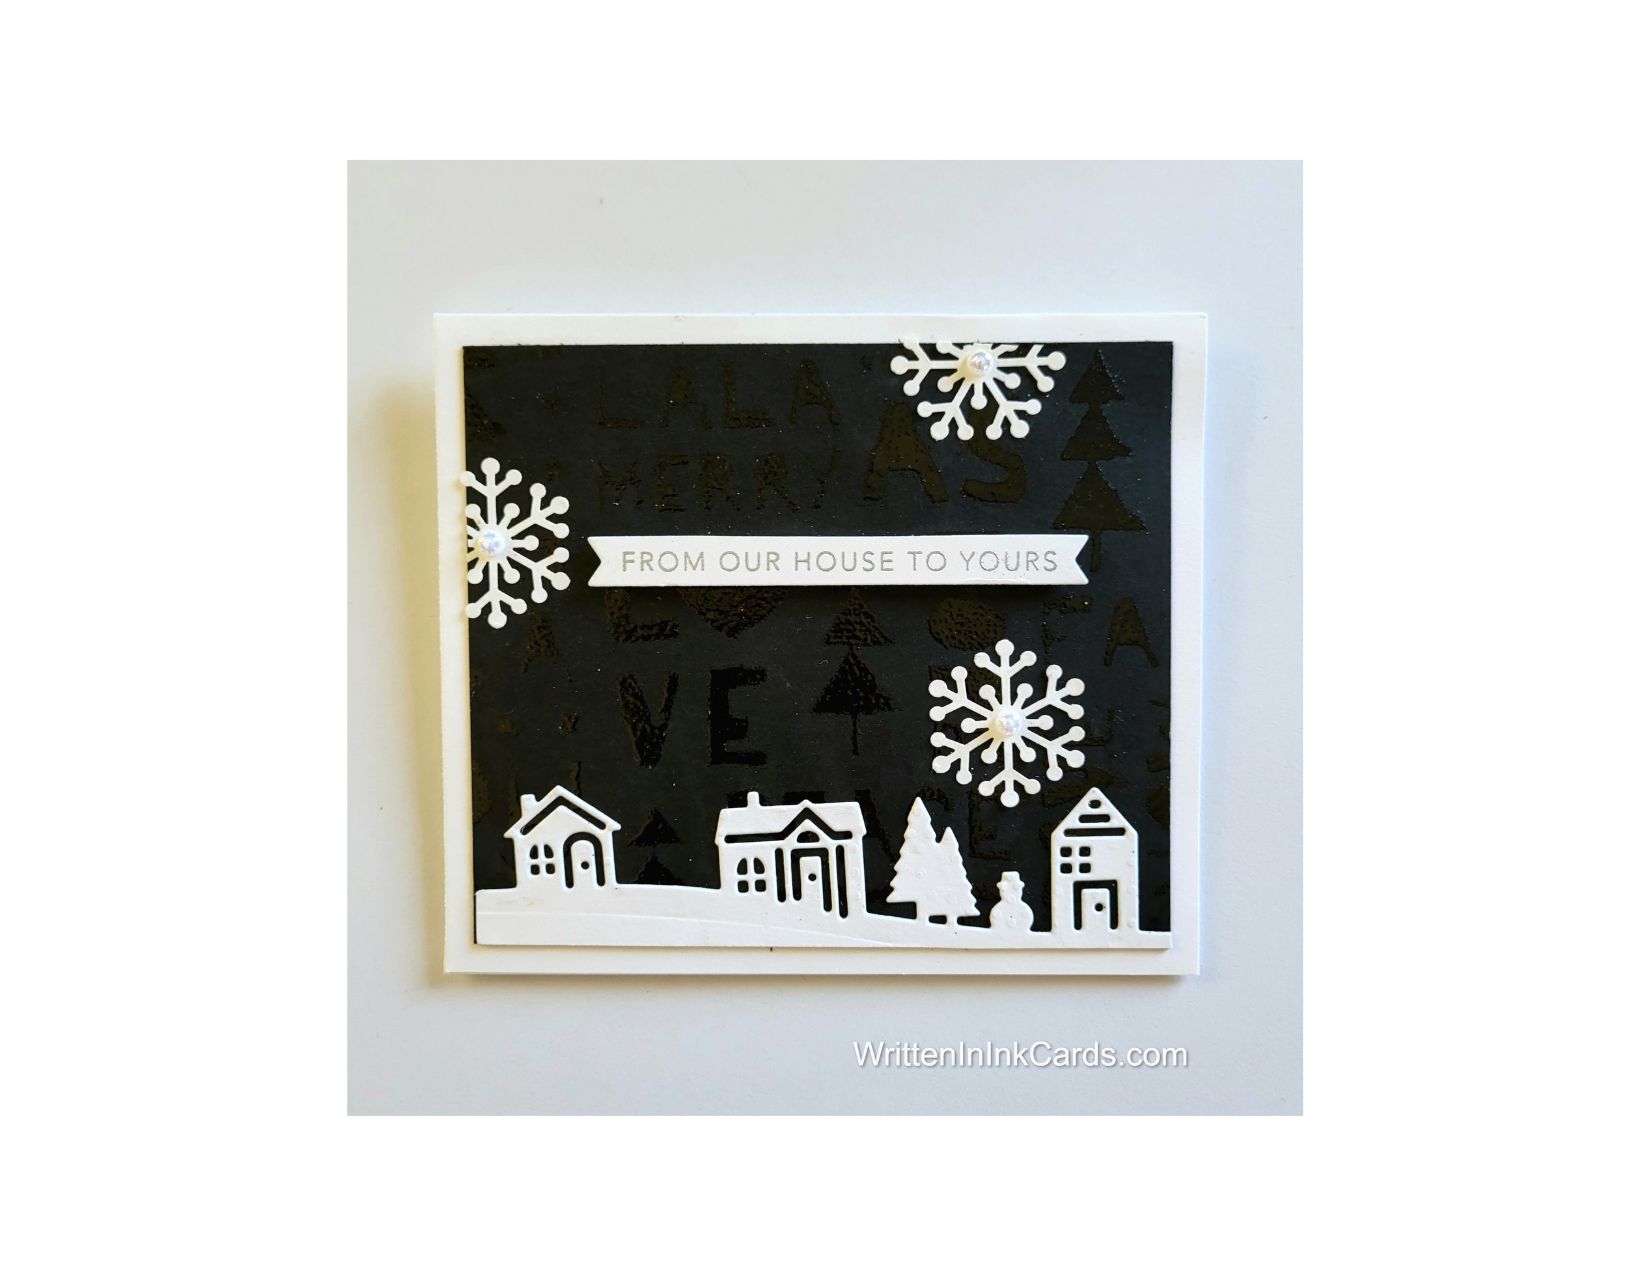
    Black is an unusual choice for a holiday card, but so distinctive!

    Would you like to experiment with a design like this? You’ll find a supply list below, including a link to the stencil I used from A Colorful Life Designs.  Follow the link and use discount code ChrisFan10 to save 10% on your entire order! (Master Creator Bundles are excluded as they already have a 20% discount built in.)

    Let’s get Started:

    Card Base: 5.5 x 8.5, scored and folded at 4.25

    Card Face:  5 ⅛ x 3 7/8

    Card Face:

    • I laid the black card face onto the Grip Mat and positioned the stencil.  
    • I pressed my Versamark embossing ink pad firmly into the openings, moving as needed and covering the entire surface twice to ensure good coverage.
    • After removing the stencil I sprinkled clear embossing powder over the card face, setting it with my heat gun.

    Other:

    • I looked through my “someday” binder, and struck gold with both the houses and the snowflakes.  
    • Then I looked through my sentiment binder and selected the one you see in the photo –  it worked well with the design.

    Assembly

    • I glued the strip with the houses to the bottom of the card face.
    • I glued the sentiment into (approximately) the center of the card face.
    • I added the snowflakes to the sky as shown, then placed a pearl in the center of each snowflake.
    • I glued the card face to the card base, centering on all sides.

    Final Thoughts:

    I love a card that has a hidden surprise, as this one does.  Seen from the front, it’s a simple scene of houses in snowfall; however, when you tilt it just slightly, the light catches the clear heat embossing, revealing the stencilled pattern.

    Supplies: (and links where possible)

       I have listed which products I have used, and where they may be purchased. It’s a huge marketplace and in most instances, there are multiple sources and many alternatives to choose from.

    Stencil: Christmas Montage,  A Colorful Life Designs

    Waffle Flower Grip Mat, 8.5 x 6.5, Scrapbook.com

    Versamark Embossing Ink: Simon Says Stamp

    Clear Embossing Powder,  Wow,  Simon Says Stamp

        Adhesive: Tombow Aqua, Michaels

    Card Base & Card Face: Accent 100 lb., Amazon

    Do you have comments or thoughts to share on this design?  Drop me a line in the Comments Section below –  I’d love to hear from you!

    You can also use the Comments Section  to be notified when I release new work.

    Christmas Montage by A Colorful Life Designs

  • Create Beautiful Christmas Cards with Cardinals

    Create Beautiful Christmas Cards with Cardinals

    Would you like to experiment with a design like this? You’ll find a supply list below, including a link to the stencil I used from A Colorful Life Designs.  Follow the link and use discount code ChrisFan10 to save 10% on your entire order! (Master Creator Bundles are excluded as they already have a 20% discount built in.)

    Let’s get Started:

    Card Base: 5.25 x 10.5,  scored and folded at 5.25

    Cream Border Layer: 5. X 5

    Red Border Layer  4 x 4

    Card Face: 3.75 x 3.75

    Scraps of cream and red cardstock for the banner and birds

    Card Face:

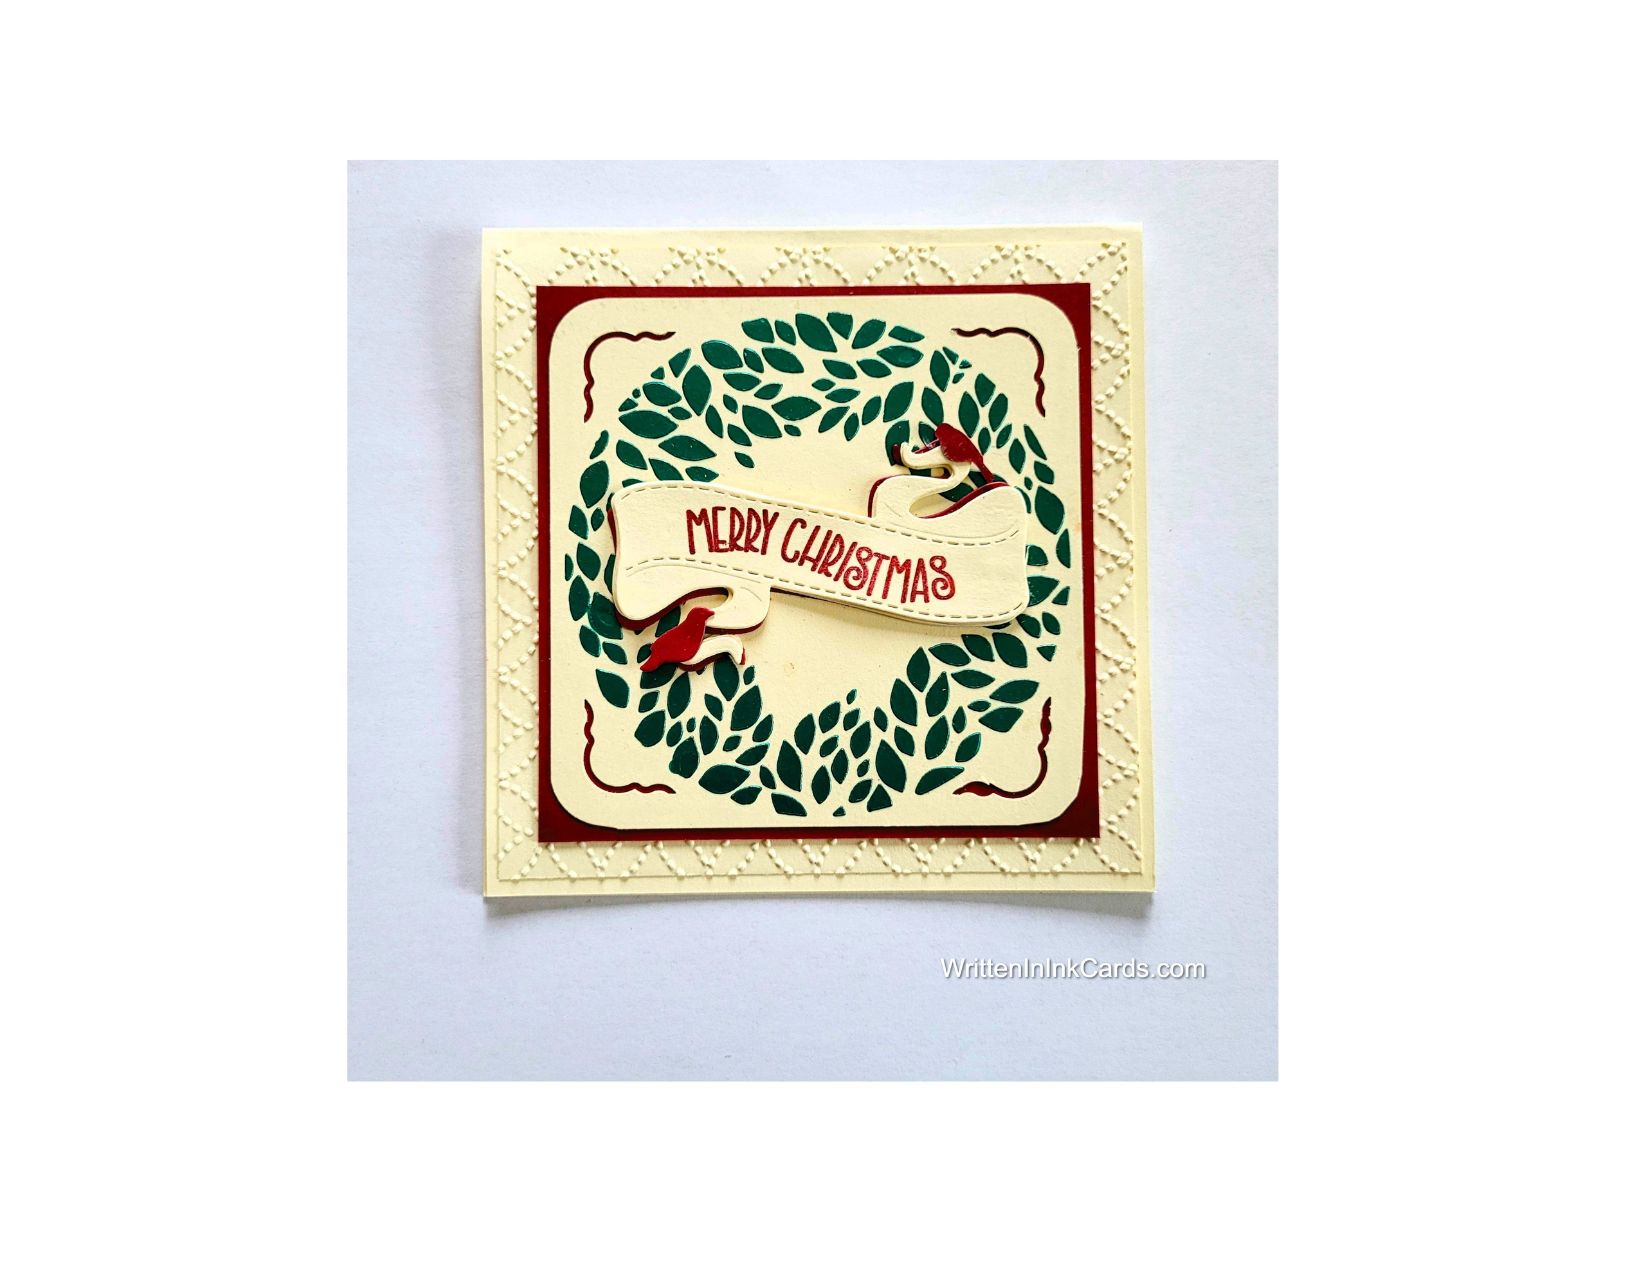
    • I laid the card face down onto scrap paper and positioned the stencil.  I applied green embossing paste to all exposed areas.
    • I removed the stencil carefully and put it into water immediately (to prevent the paste from drying on the surface).  
    • I put the card face aside to dry.  Once dry,  I used a corner punch on each corner, which created both the rounded edge and the peek-a-boo slot in the card face.

    Other:

    • I die-cut the banner 2x from cream cardstock and once from red.
    • I glued the two cream banners together, then added the red one behind, offsetting it just slightly.
    • I die-cut the tiny cardinals from the same red cardstock.
    • I put the banner in my stamp positioner and stamped Merry Christmas in red ink.
    • I put the cream border into an embossing folder and ran it through my Big Shot.

    Assembly

    • I glued the embossed, cream border to the card base, centering it on all sides.
    • I glued the card face to the red border layer, again centering it on all sides.
    • I glued these two layers together, again (of course!) centering on all sides.
    • I glued the banner into the center of the wreath.
    • I added the tiny cardinals as shown.

    Final Thoughts:

    I had such a time with that banner!   The first time I tried to glue it down I hadn’t allowed enough time for the ink to dry and smudged the red in the process.  The second attempt, I had glue on my finger, touched the red ink … and of course smudged it again.   At that point I put it aside for a couple of days –  I was tired of looking at it!

    When I returned to it I once again die cut a banner and stamped it, and very carefully glued it on top of what was there …  and I finally managed to get the task done without smudging it!

    Luckily,  I like the result, LOL.  The embossing paste has a lovely gleam and creates a wonderful backdrop for the banner and birds.

    Supplies: (and links where possible)

       I have listed which products I have used, and where they may be purchased. It’s a huge marketplace and in most instances, there are multiple sources and many alternatives to choose from.

    Stencil: Leaf Frame,  A Colorful Life Designs

    Waffle Flower Grip Mat, 8.5 x 6.5, Scrapbook.com

    Embossing Paste:  Later Gator Lunar Paste, Glitter & Ink

    Stamp & Die: Banner Sentiments, Penny Black, Teaspoon of Fun

    Ink: Stampin’ Up!

    Adhesive: Tombow Aqua, Michaels

    Cream Card Base & Card Face: Recollections 110 lb., Michaels

    Do you have comments or thoughts to share on this design?  Drop me a line in the Comments Section below –  I’d love to hear from you!

    You can also use the Comments Section  to be notified when I release new work.

    Leafy Frame by A Colorful Life Designs