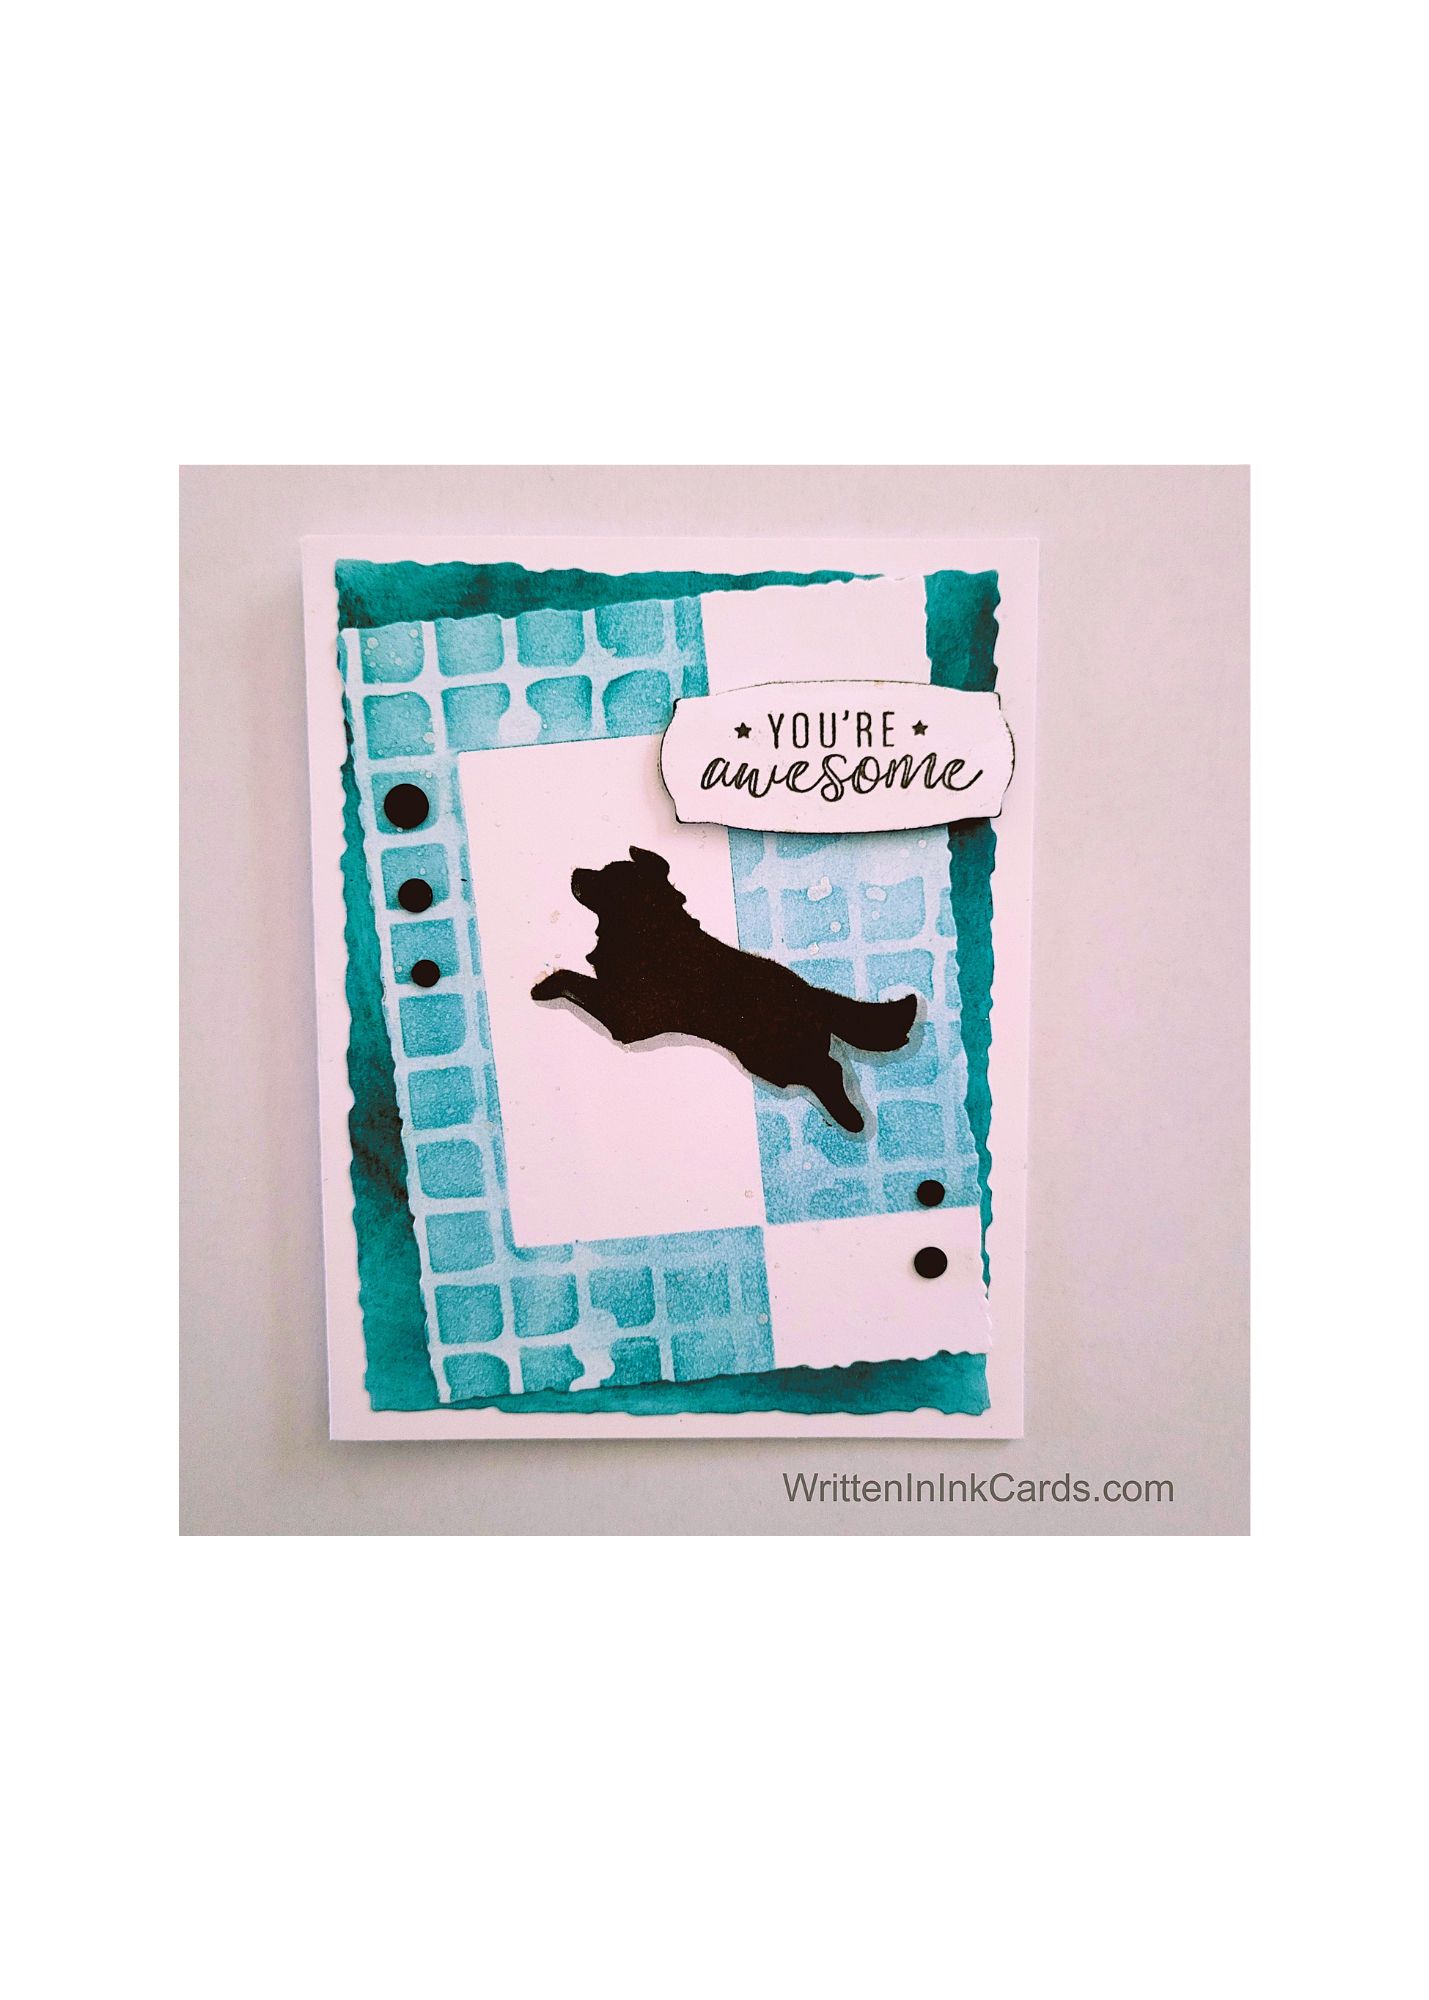
Tag: writtenininkcards

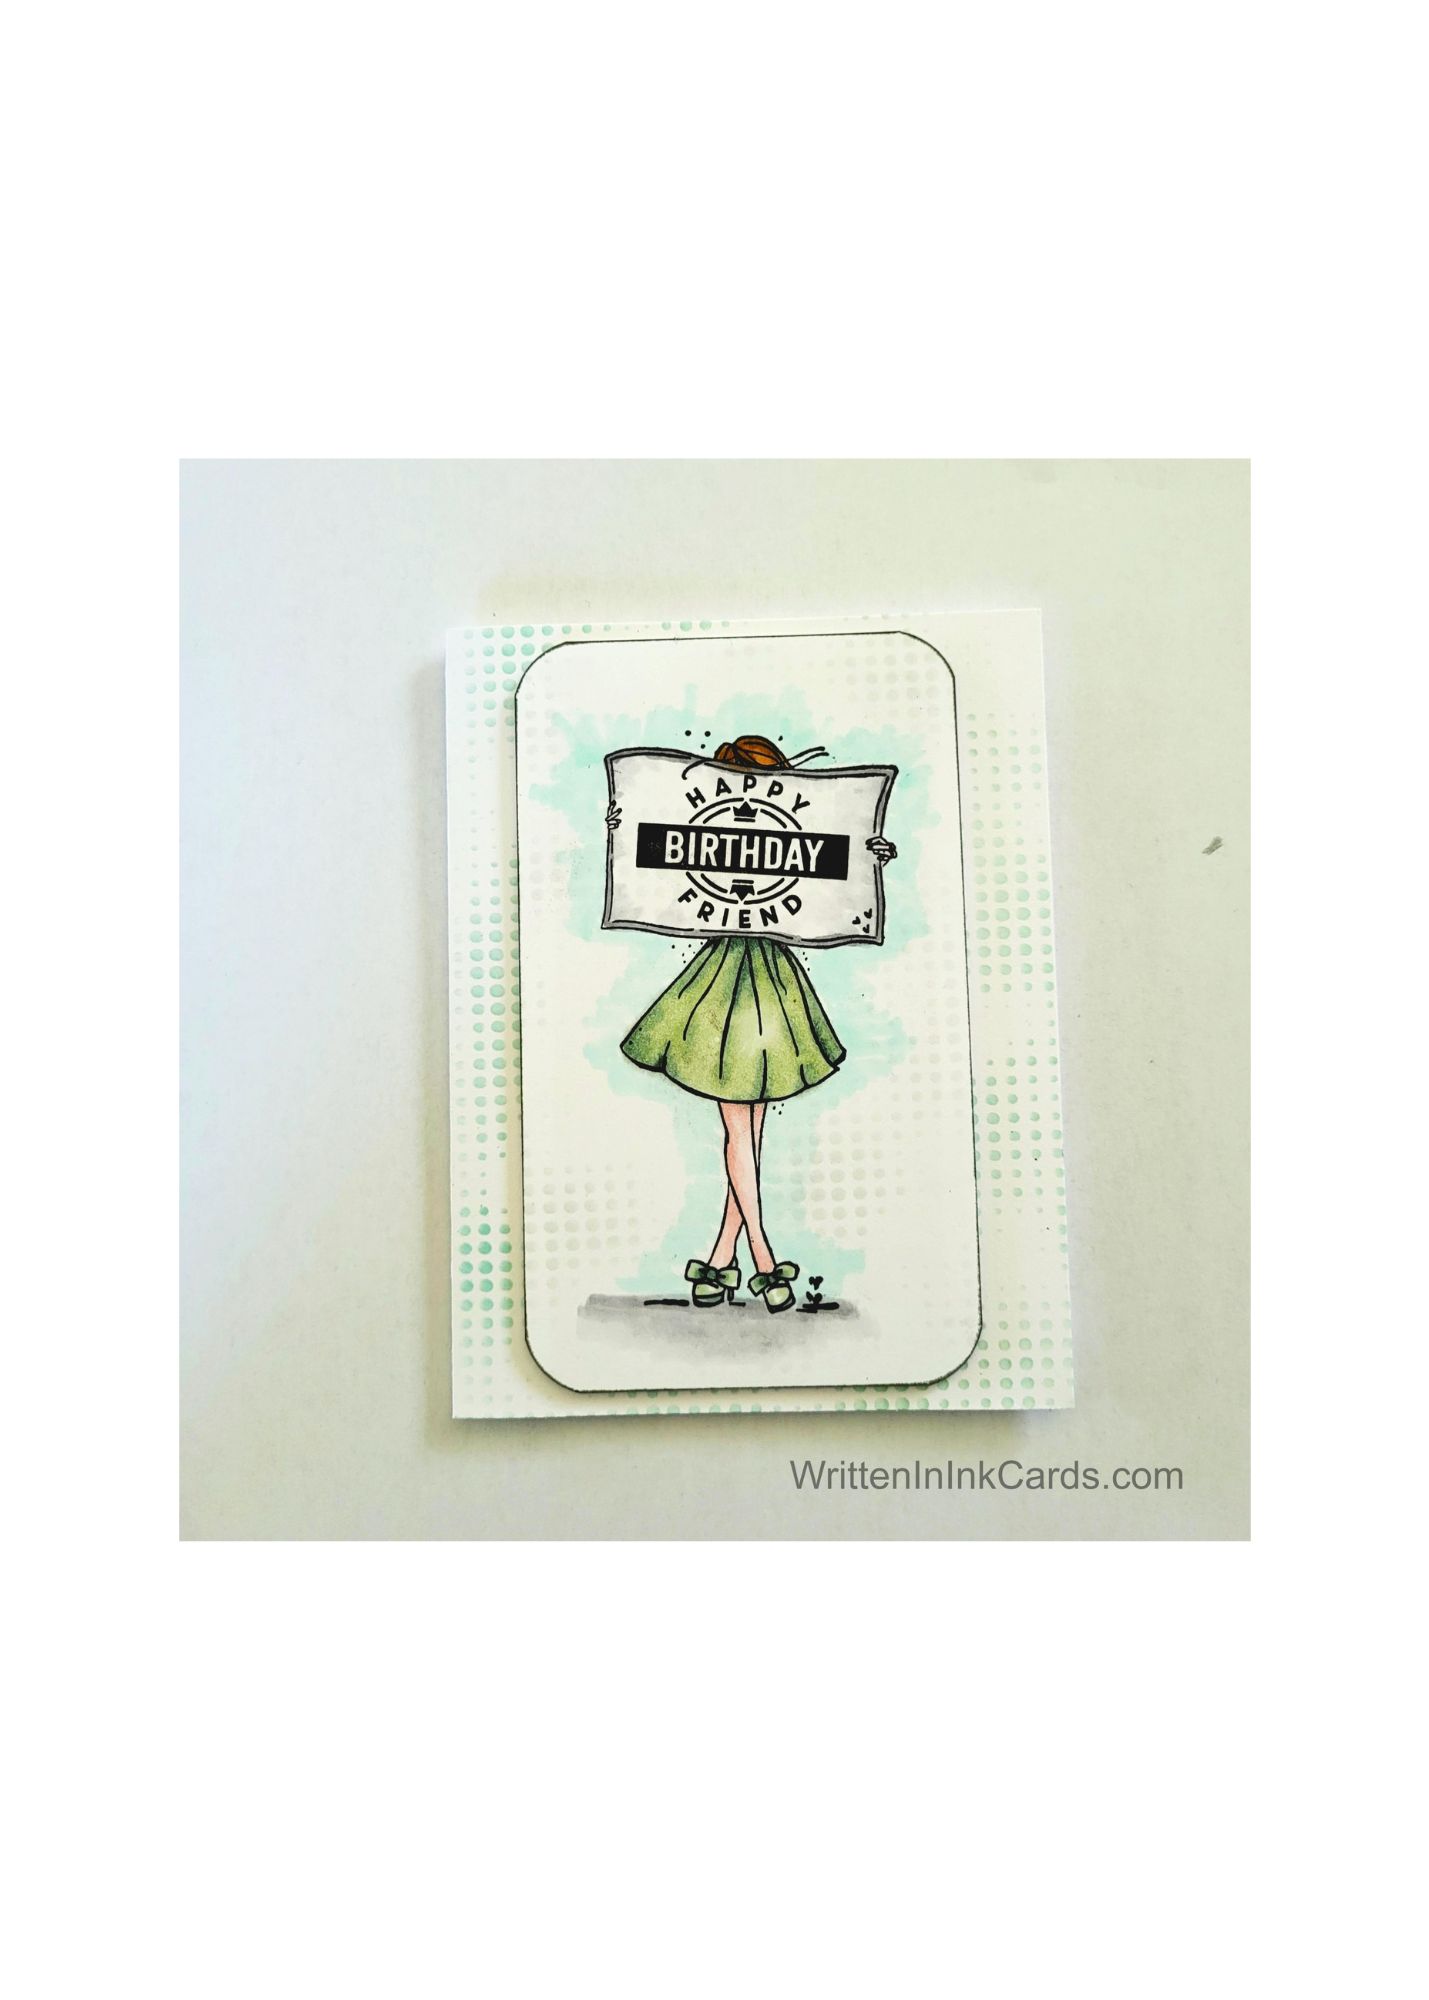
  • Make a Mistake? Turn Card Design Errors into Design Features

    Make a Mistake? Turn Card Design Errors into Design Features

    Would you like to experiment with a design like this? You’ll find a supply list below, including a link to the stencil I used from A Colorful Life Designs.  Follow the link and use the discount code ChrisFan10 to save 10% on your entire order! (Master Creator Bundles are excluded as they already have a 20% discount built in.)

    Let’s get Started:

    Card Base: 5.5 x 8.5, scored and folded at 4.25

    Border Layer: 5.25 x 4

    Card Face:  5 x 3.75

    Card Face:

    • I placed the card face in my stamp positioner and stamped the image with Memento ink.
    • I coloured the image with alcohol markers. 

     I made an error colouring her eyes/glasses:- while adding the fllesh tones behind her glasses I touched the green, and it was transferred to her skin. I couldn’t fix it entirely, so I made the best of the situation by turning them into sunglasses.

    When I was almost done colouring, I noticed a couple of spots of yellow ink on the card face, above the girl.  Rather than toss it – wasting materials and time –  I added more yellow dots,  turning the boo boo into a design detail.

    • I moved the card face to my grip mat and positioned the stencil.  I avoided inking over the stamped and coloured image, but used light aqua ink on all other exposed areas on the stencil.
    • I traced around the girl with a light grey marker –  this made her stand out more from the background.
    • I used a corner chomper on each corner.

    Other:

    • I used the same chomper on the border layer.

    Assembly

    • I glued the border layer to the card base and added the card face on top centering both layers carefully.
    • I added a small round embellishment to each corner,  as well as one over the clasp on the purse.

    Final Thoughts:

    This is such a happy pairing –  the stencil and stamp work really well together. 

    I will add a sentiment when it’s time to send the card –  right now I don’t know how I want to use it.

    I’m glad I was able to fix the errors on the fly and salvage the card.

    Supplies: (and links where possible)

       I have listed the products I have used and where they can be purchased. It’s a huge marketplace, and in most instances, there are multiple sources and many alternatives to choose from.

    Stencil: Lines and Dots,  A Colorful Life Designs

    Stamps: Hello Sunshine Girl,  Unity Stamps

    Ink: Stampin’ Up!

    Blending Brushes: Stampin’ Up! 

    Memento Ink: Stampin’ Up!

    Alcohol Markers:

         Stampin’ Blends: Stampin’ Up!

         Copics:  Wallacks

    Adhesive: Tombow Aqua, Michaels

    Card Base & Card Face: Accent 100 lb., Amazon 

    Do you have any comments or thoughts on this design?  Drop me a line in the Comments Section below –  I’d love to hear from you!

    You can also use the Comments Section to be notified when I release new work.

    Lines and Dots

  • Creative Card Making: combine Structure with Whimsey

    Creative Card Making: combine Structure with Whimsey

    Would you like to experiment with a design like this? You’ll find a supply list below, including a link to the stencil I used from A Colorful Life Designs.  Follow the link and use the discount code ChrisFan10 to save 10% on your entire order! (Master Creator Bundles are excluded as they already have a 20% discount built in.)

    Let’s get Started:

    Card Base: 5.5 x 8.5, scored and folded at 4.25

    Card Face:  5.5 x 4.25

    Card Face:

    • I laid the card face on the grip mat and positioned the stencil (taking care to keep the lines straight on this one!).
    • I applied yellow ink across all exposed areas, allowing a variation in tone to create depth.
    • After removing the stencil, I placed the card face in my stamp positioner and added the two flowers with bright pink ink.  I stamped several times to get the intensity I wanted.
    • I removed the floral stamps and replaced them with the sentiment, stamping this in Verafine Onyx.
    • I smooshed the pink ink pad on an acrylic block and then used a water pen to add large pink splotches to the card face.
    • I used a fine liner to freehand a whimsical black frame around the card face. (I was able to use the pattern to keep the border evenly distanced from the edges on all sides.)
    • I added fine black and pink spatter to the card face.

    Assembly

    • I glued the card face to the card base.
    • I added pink card bling to complete the card.

    Final Thoughts:

    The contrast between the very structured stencilled pattern and the whimsical frame makes me happy.

    I almost had an absolutely flat, one-layer card,  but in the end, I just couldn’t resist adding the card bling.

    Supplies: (and links where possible)

       I have listed the products I have used and where they can be purchased. It’s a huge marketplace, and in most instances, there are multiple sources and many alternatives to choose from.

    Stencil: Three Xs,   A Colorful Life Designs

    Stamps: Stampin’ Up!  (retired):

    Ink: Stampin’ Up!

    Blending Brushes: Stampin’ Up! 

    Versafine Onyx, Simon Says Stamp

    Fineliners: Amazon

    Card Bling:  A Colorful Life Designs

    Adhesive: Tombow Aqua, Michaels

    Card Base & Card Face: Accent 100 lb., Amazon 

    Do you have any comments or thoughts on this design?  Drop me a line in the Comments Section below –  I’d love to hear from you!

    You can also use the Comments Section to be notified when I release new work.

    Three Xs

  • Create a Stunning Card and Congratulate Someone Special

    Create a Stunning Card and Congratulate Someone Special

    Would you like to experiment with a design like this? You’ll find a supply list below, including a link to the stencil I used from A Colorful Life Designs.  Follow the link and use the discount code ChrisFan10 to save 10% on your entire order! (Master Creator Bundles are excluded as they already have a 20% discount built in.)

    Let’s get Started:

    Card Base: 5.5 x 8.5, scored and folded at 4.25

    Teal Border Layer: 5.5 x 4.25

    Card Face: 5.25 x 4

    Card Face:

    • I placed the card face into my stamp positioner:  the congratulations is a 3-step stamp,  and I grabbed red to stamp the outline first,  placing the stamp at an angle on the card face.
    • The next two layers are partial stamps for the word,  so I grabbed lime green and bright teal to complete them, lining everything up carefully.
    • I switched to the small “on your big news” stamp and added that, using the same red ink and echoing the angle of the large word.
    • I moved the card face to the grip mat and positioned the stencil.  I used yellow and orange inks randomly across the openings, allowing variations in tone and colour as I added ink.
    • I used a variety of small stamps to add additional interest to the background, stamping with Versamark embossing ink:  first, I tried a sparkly white powder, but the stamping was so fine that the sparkle blew off when I used the heat gun.  So I switched to silver embossing powder, which worked well.
    • I used a punch on each corner to add visual interest.

    Assembly

    I glued the border layer to the card base and centered the card face on top of these.

    I added small silver pearls as a final touch.

    Final Thoughts:

    I certainly wouldn’t try the sparkly embossing powder on such small images again: in this instance the silver pearls help distract from those areas, and overall I’m happy with this design.

    Supplies: (and links where possible)

       I have listed the products I have used and where they can be purchased. It’s a huge marketplace, and in most instances, there are multiple sources and many alternatives to choose from.

    Stencil: Star Streamers,  A Colorful Life Designs

    Versamark Embossing Ink: Simon Says Stamp

    Silver Embossing Powder,  Wow,   R&R Scrapbooking

    Stamps: Big Congratulations, Stampin’ Up! (retired)

    Ink: Stampin’ Up!

    Blending Brushes: Stampin’ Up! 

    Versafine Onyx, Simon Says Stamp

    Adhesive: Tombow Aqua, Michaels

    Card Base & Card Face: Accent 100 lb., Amazon 

    Do you have any comments or thoughts on this design?  Drop me a line in the Comments Section below –  I’d love to hear from you!

    You can also use the Comments Section to be notified when I release new work.

    Star Streamers stencil

  • Yummy Designs for Unique Birthday Cards

    Yummy Designs for Unique Birthday Cards

    Would you like to experiment with a design like this? You’ll find a supply list below, including a link to the stencil I used from A Colorful Life Designs.  Follow the link and use the discount code ChrisFan10 to save 10% on your entire order! (Master Creator Bundles are excluded as they already have a 20% discount built in.)

    Let’s get Started:

    Card Base: 5.5 x 8.5, scored and folded at 4.25

    Yellow Border Layer: 5 3/8 x 4 1/8

    Card Face:  5 ⅛ x 3 ⅞

    I had already created part of this card face weeks before even getting the cake stencil.  I had stamped and heat embossed with this with pearlized purple embossing powder for a different project –  and then decided that it wasn’t quite the right “look” at that time .  It turned out to be perfect for this one!

    Card Face:

    • I laid the card face down on the grip mat.
    • Alternating when required and masking as necessary, I created the cake using brown (chocolate!) and pink inks to form the cake’s layers.
    • I created the flames on the candles with a small brush, using red at the base of each flame and blending yellow towards the top.
    • The cake base was created with soft grey ink, blending silver ink (again with a small brush) towards the outside of each layer of the grey.
    • I drew the actual candles in with a gold gel pen.
    • I used Wink of Stella on the flames to add a subtle, unexpected detail.
    • I put the card face into my stamp positioner and added the sentiment with black Versafine Onyx.

    Assembly

    • I glued the yellow border layer to the card base, and then centered the card face on top of these.

    Final Thoughts:

    The embossed image feels like streamers to me (at least when combined with this image) –  I love the way these two products played together.

    Supplies: (and links where possible)

       I have listed the products I have used and where they can be purchased. It’s a huge marketplace, and in most instances, there are multiple sources and many alternatives to choose from.

    Stencil:  Layered Celebration Cake,  A Colorful Life Designs

    Versamark Embossing Ink: Simon Says Stamp

    Purple Embossing Powder:  unfortunately I have no idea what company produced this powder,  as it isn’t labelled, and was part of a “lot purchase” of goods from someone purging her stash. 

    Stamps: Technique Junkies  (no longer in business)

    Ink: Stampin’ Up!

    Blending Brushes: Stampin’ Up! 

    Versafine Onyx, Simon Says Stamp

    Adhesive: Tombow Aqua, Michaels

    Card Base & Card Face: Accent 100 lb., Amazon 

    Do you have any comments or thoughts on this design?  Drop me a line in the Comments Section below –  I’d love to hear from you!

    You can also use the Comments Section to be notified when I release new work.

    Layered Celebration Cake

  • Create A Luxe Card for that Special Somone

    Create A Luxe Card for that Special Somone

    Would you like to experiment with a design like this? You’ll find a supply list below, including a link to the stencil I used from A Colorful Life Designs.  Follow the link and use the discount code ChrisFan10 to save 10% on your entire order! (Master Creator Bundles are excluded as they already have a 20% discount built in.)

    Let’s get Started:

    Card Base: 5.5 x 8.5, scored and folded at 4.25

    Focal Layer:   scrap of cardstock approx 4.5 x 3

    Card Face: 5.25 x 4

    This stencil has three options for ribbon –  my first task was to decide which one to use on this card.

    Card Face:

    • I laid the card face on the grip mat and positioned the stencil.
    •  I pressed my Versamark embossing powder firmly through the openings, removed the stencil and sprinkled gold embossing powder over the wet ink.  I  set this with my heat gun.
    • I placed the card face in a texturizing embossing folder and ran it through the Big Shot.

    Other:

    • I put the scrap of cardstock into my stamp positioner and stamped the image with Versamark embossing ink.  
    • I sprinkled this with the same gold embossing powder and set it with my heat gun.
    • I used a stitched rectangle die to cut this down to size.

    Assembly

    • I centered the card face on the card base and then added the focal layer as shown in the picture.
    • I added a pearl to the center of the stencilled bow,  and a smaller pearl to the bottom of the loops on each side.
    • I added a pearl to the center of the flower on the focal layer.

    Final Thoughts:

    Cream and gold is such a luxe combination:  I love it.

    I also love the contrast between the textured card face and the oh-so-smooth focal layer.

    Supplies: (and links where possible)

       I have listed the products I have used and where they can be purchased. It’s a huge marketplace, and in most instances, there are multiple sources and many alternatives to choose from.

    Stencil: Bow,  A Colorful Life Designs

    Versamark Embossing Ink: Simon Says Stamp

    Gold Embossing Powder,  Wow,  R&R Scrapbooking

    Stamps:  Stampin’ Up!  (retired)

    Dies:  Stitched Rectangles,  Stampin’ Up!  (retired)

    Adhesive: Tombow Aqua, Michaels

     Recollections 110 lb., Michaels

    Do you have any comments or thoughts on this design?  Drop me a line in the Comments Section below –  I’d love to hear from you!

    You can also use the Comments Section to be notified when I release new work.

    Bows stencil

  • Spotlight on Fun Card Design with Norm, the Old Guy

    Spotlight on Fun Card Design with Norm, the Old Guy

    Would you like to experiment with a design like this? You’ll find a supply list below, including a link to the stencil I used from A Colorful Life Designs.  Follow the link and use the discount code ChrisFan10 to save 10% on your entire order! (Master Creator Bundles are excluded as they already have a 20% discount built in.)

    Let’s get Started:

    Card Base: 5.25 10.5, folded and score dat 5.25

    Black Border Layer: 5.25 x 5.25

    Card Face:  5 x 5

    Card Face:

    • I laid the card face down on the grip mat and positioned the stencil.
    • I applied vibrant pink ink in the center of the stencil, and soft orange ink to the outer edges,  blending the two where they met.

    Other:

    • I looked through my Ready to Go Binder to find the fine fellow you see in the image: I had previously coloured and fussy-cut him and wanted to use him on this card.
    • I cut three circles using my infinity dies, but in each instance, instead of ensuring even spacing, I pushed the dies together on one side, creating uneven circles.

    Assembly

    • I glued the black border layer to the card base.
    • I glued the three circles onto the card face, making the spacing uneven to echo the wonky shapes.
    • I put the card face into my stamp positioner and created a curve with a photopolymer stamp that worked between the two outer circles.  I stamped the sentiment with Versafine Onyx.

    Photopolymer stamps can be manipulated into a  curve:  as soon as I was done stamping I removed it from the stamp positioner and allowed it to return to it’s original shape.

    • I glued the old guy to the card face as shown.
    • I glued the card face to the card base.

    Final Thoughts:

    I like this card, but looking at it now, I wish I had put a piece of vellum under the old guy to make him stand out against that background.

    Supplies: (and links where possible)

       I have listed the products I have used and where they can be purchased. It’s a huge marketplace, and in most instances, there are multiple sources and many alternatives to choose from.

    Stencil: Spotlight,  A Colorful Life Designs

    Stamps:  

    Norm,  Art Impressions, Amazon

    Sentiment:  Kraftigali  (no longer in business)

    Dies: Circular Infinity Dies,  Hero Arts

    Ink: Stampin’ Up!

    Blending Brushes: Stampin’ Up! 

    Versafine Onyx, Simon Says Stamp

    Adhesive: Tombow Aqua, Michaels

    Card Base & Card Face: Accent 100 lb., Amazon 

    Do you have any comments or thoughts on this design?  Drop me a line in the Comments Section below –  I’d love to hear from you!

    You can also use the Comments Section to be notified when I release new work.

    Spotlight stencil

  • Share a Stunning Card Made with Two Leafy Stencils

    Share a Stunning Card Made with Two Leafy Stencils

    Would you like to experiment with a design like this? You’ll find a supply list below, including a link to the stencils I used from A Colorful Life Designs.  Follow the link and use the discount code ChrisFan10 to save 10% on your entire order! (Master Creator Bundles are excluded as they already have a 20% discount built in.)

    Let’s get Started:

    Card Base: 5.5 x 8.5, scored and folded at 4.25

    Card Face: 5.25 x 4

    This card began as a ghost print created during a gel printing session. The fine lines visible in the background were created there.

    Card Face:

    • I laid the card face on my grip mat and positioned the Leaf Lattice stencil.
    • I applied brown ink across the exposed areas, using more pressure in some areas to create more saturation and visual depth. With this particular stencil,  this process created the look of shadows under the leaves,  which was pretty fun.
    •  I removed that stencil and allowed the ink to dry completely.
    • I positioned the Leaf Sprigs stencil at the bottom-left of the card face and then pressed my Versamark embossing pad firmly through the openings.
    • I sprinkled gold embossing powder over the embossing ink and set it with my heat gun.
    • I positioned an edger die along the right-hand side of the card face and ran this through my Big Shot.  This split the card face in two,  while creating two different leafy patterns – one positive and one negative.
    • I trimmed off the rough edge left on the left-hand piece.

    Other:

    • I stamped the sentiment in Versafine Onyx and used a die to create the shape.

    Assembly

    • I glued both pieces of the card face to the card base, allowing a ⅛” border around the outside:  this left a white strip visible between the two pieces.
    • I put dimensional foam on the back of the sentiment and put it in place over that strip, as shown in the picture.
    • I added three metallic gems – two above the sentiment, and one below.

    Final Thoughts:

    These stencils are really pretty together,  and I really like this brown & gold combination.

    If I were to recreate this card,  I would add a border layer underneath the card face to create more contrast and show off the die-cut leaves a little more.

    Supplies: (and links where possible)

       I have listed the products I have used and where to purchase them. It’s a huge marketplace, and in most instances, there are multiple sources and many alternatives to choose from.

    Stencils:

    Leaf Lattice,  A Colorful Life Designs

    Leaf Sprigs,  A Colorful Life Designs

    Versamark Embossing Ink: The Scrapbook Cottage

    Gold Embossing Powder,  Wow,  R&R Scrapbooking

    Dies:  Stampin’ Up!  (retired)

    Ink: Stampin’ Up!

    Blending Brushes: Stampin’ Up! 

    Versafine Onyx, Simon Says Stamp

    Adhesive: Tombow Aqua, Michaels

    Card Base & Card Face: Accent 100 lb., Amazon 

    Do you have any comments or thoughts on this design?  Drop me a line in the Comments Section below –  I’d love to hear from you!

    You can also use the Comments Section to be notified when I release new work.

    Leaf Lattice stencil

    Leaf Sprigs stencil

  • Create a Beautiful Chick Card with Stencils

    Create a Beautiful Chick Card with Stencils

    Would you like to experiment with a design like this? You’ll find a supply list below, including a link to the stencil I used from A Colorful Life Designs.  Follow the link and use the discount code ChrisFan10 to save 10% on your entire order! (Master Creator Bundles are excluded as they already have a 20% discount built in.)

    Let’s get Started:

    Card Base: 5.25 x 10.5, scored and folded at 5.25

    Black Border Layer: 5 x 5

    Card Face: 4 ⅞ x 4 7/8

    Card Face:

    • I placed the card face on my work surface, positioned the stencil and secured it with low-tack tape.  (I find that my grip mat doesn’t work well with these larger cards, as there isn’t enough margin to stick well.)   
    • I used light green ink over all exposed areas.
    • I stamped the circular image in the middle of the background and cut it out with a die that was just slightly larger.
    • I used my scissors to roughen up the edges of both the card face and the circular die cut.

    Other:

    • I die cut the pieces of the chick from white cardstock and pressed them into yellow or orange ink pads to create the colours.  (I used a fineliner to colour the oh-so-tiny eyes.)
    • I cut two of the signs and glued them together.  I added the stamped sentiment as shown.

    Assembly

    • I assembled the chick and put her aside to dry.
    • I glued the black border layer to the card base and placed the card face on top.
    • I glued the die-cut circle back into the center and then added the chick on top.
    • I trimmed the bottom of the sign into a curve,  and then glued it into place against the chick’s wing.
    • I added orange spatter to the card face.
    • I added orange card bling to the finished card, starting at the top-left corner and ending at the bottom-right corner.

    Final Thoughts:

    I wasn’t certain how I wanted to use this stencil ,  so I pondered a bit, and then played a bit.

    I’m super happy with how it turned out.

    Supplies: (and links where possible)

       I have listed the products I have used and where to purchase them. It’s a huge marketplace, and in most instances, there are multiple sources and many alternatives to choose from.

    Stencil:  Lines and Dots,  A Colorful Life Designs

    Dies:

    Chicken:  Chicken Fiona,  Joy Crafts,  Frantic Stamper

    Sign:  Stampin’ Up!  (retired)

    Ink: Stampin’ Up!

    Blending Brushes: Stampin’ Up! 

    Versafine Onyx, Simon Says Stamp

    Adhesive: Tombow Aqua, Michaels

     Recollections 110 lb., Michaels

    Do you have any comments or thoughts on this design?  Drop me a line in the Comments Section below –  I’d love to hear from you!

    You can also use the Comments Section to be notified when I release new work.

    Lines and Dots

  • “Make a Wish” and send it to a friend

    “Make a Wish” and send it to a friend

    Would you like to experiment with a design like this? You’ll find a supply list below, including a link to the stencil I used from A Colorful Life Designs.  Follow the link and use the discount code ChrisFan10 to save 10% on your entire order! (Master Creator Bundles are excluded as they already have a 20% discount built in.)

    Let’s get Started:

    Card Base: 5.5 x 8.5, scored and folded at 4.25

    Black Border Layer: 5.25 x 5.25

    White Border Layer: 5 ⅛ x 5 ⅛

    Card Face:  5 x 5

    I love creating gel prints:  it’s an activity I share with my daughter (part of the reason I love it).  I have quite an accumulation,  and from time to time, I make a determined effort to use some of them up. This card was born during one of those times.

    Card Face:

    • I cut the gel print down to size and then placed it on the grip mat.  I positioned the stencil (it is a 6 x 9 stencil, so there are lots of options for how it’s placed on the page) and then pressed my Versamark ink pad firmly through the stencil onto the card face.
    • After removing the stencil, I sprinkled black embossing powder over the card face and set it with my heat gun.

    Other:

    • I used scraps of white cardstock to cut out the three cupcakes.  
    • I also cut three of the sentiments and glued them together, which created extra dimension and presence for the sentiment.

    Assembly

    • I glued the black border layer to the card base.
    • I centered the white border layer on top of these and then added the card face on top of both.
    • I glued the sentiment towards the bottom right as shown,  and then added the three cupcakes.
    • I added a pink embellishment to each cupcake.

    Final Thoughts:

    I love the addition of the stencilled embossing to the gel print: the die cuts finished it off perfectly.

    Supplies: (and links where possible)

       I have listed the products I have used and where to purchase them. It’s a huge marketplace, and in most instances, there are multiple sources and many alternatives to choose from.

    Stencil:  Big Squiggles,  A Colorful Life Designs

    Dies:  Make a Wish, Creative Expressions

    Adhesive: Tombow Aqua, Michaels

    Card Base & Card Face: Accent 100 lb., Amazon 

    Do you have any comments or thoughts on this design?  Drop me a line in the Comments Section below –  I’d love to hear from you!

    You can also use the Comments Section to be notified when I release new work.

    Big Squiggles

  • Create Unique Baby Cards with a Subtle Nautical Feel

    Create Unique Baby Cards with a Subtle Nautical Feel

    Would you like to experiment with a design like this? You’ll find a supply list below, including a link to the stencil I used from A Colorful Life Designs.  Follow the link and use the discount code ChrisFan10 to save 10% on your entire order! (Master Creator Bundles are excluded as they already have a 20% discount built in.)

    Let’s get Started:

    Card Base: 5.5 x 8.5, scored and folded at 4.25

    Blue Border Layer: 5.25 x 4

    Card Face:  5 ⅛ x 3 7/8

    Card Face:

    I laid the card face down on the Grip Mat and positioned the stencil; I applied light teal ink to all exposed areas.

    Setting the stencil aside,  I placed the card face in my stamp positioner.  I stamped the heart with dark blue ink, allowing the heart to extend over the right-hand edge of the paper.

    I put the card face into an embossing folder and ran it through the Big Shot to add depth and texture.

    Other:

    I used a scrap of white cardstock to die-cut the bunny.

    Using the dark blue I had used earlier, I stamped the sentiment on another scrap of white and cut it out with a small oblong die.

    I used a small scrap of blue cardstock (the same colour used for the border layer)  to create a collar for the bunny. 

    Assembly

    I glued the card face to the card base and added the bunny as shown in the picture.

    I glued the collar onto the bunny.

    I added the sentiment in the lower-left corner, as shown.

    I added three “buttons” to the bunny with tiny pale blue gems, and two above the sentiment on the left, as well as two more below on the right.

    Final Thoughts:

    I’ve wanted to create a baby card with this stencil since I first got it (isn’t it funny how some things just demand a specific use?).   

    These elements came together really well,  and I love the result.  It definitely reads “baby boy”,  but in a slightly less traditional way.

    Supplies: (and links where possible)

       I have listed the products I have used and where to purchase them. It’s a huge marketplace, and in most instances, there are multiple sources and many alternatives to choose from.

    Stencil: Nautical Stripes, A Colorful Life Designs

    Waffle Flower Grip Mat, 8.5 x 6.5, Scrapbook.com

    Dies: 

    Bunny:  unbranded,  Amazon

    Oblong:  Ornate Labels,   Sizzix,  Amazon

    Ink: Stampin’ Up!

    Blending Brushes: Stampin’ Up! 

    Adhesive: Tombow Aqua, Michaels

    Card Base & Card Face: Accent 100 lb., Amazon  

    Do you have any comments or thoughts on this design?  Drop me a line in the Comments Section below –  I’d love to hear from you!

    You can also use the Comments Section to be notified when I release new work.

    Nautical Stripes