Tag: writtenininkcard

  • Stencil + Cats + Butterflies = A One of a Kind Card

    Stencil + Cats + Butterflies = A One of a Kind Card

    Would you like to experiment with a design like this? You’ll find a supply list below, including a link to the stencil I used from A Colorful Life Designs.  Follow the link and use the discount code ChrisFan10 to save 10% on your entire order! (Master Creator Bundles are excluded as they already have a 20% discount built in.)

    Let’s get Started:

    Card Base: 5.5 x 8.5, scored and folded at 4.25

    Black Border Layer: 5.5 x 4.25

    Card Face:  5 ⅜ x 4 1/8

    Card Face:

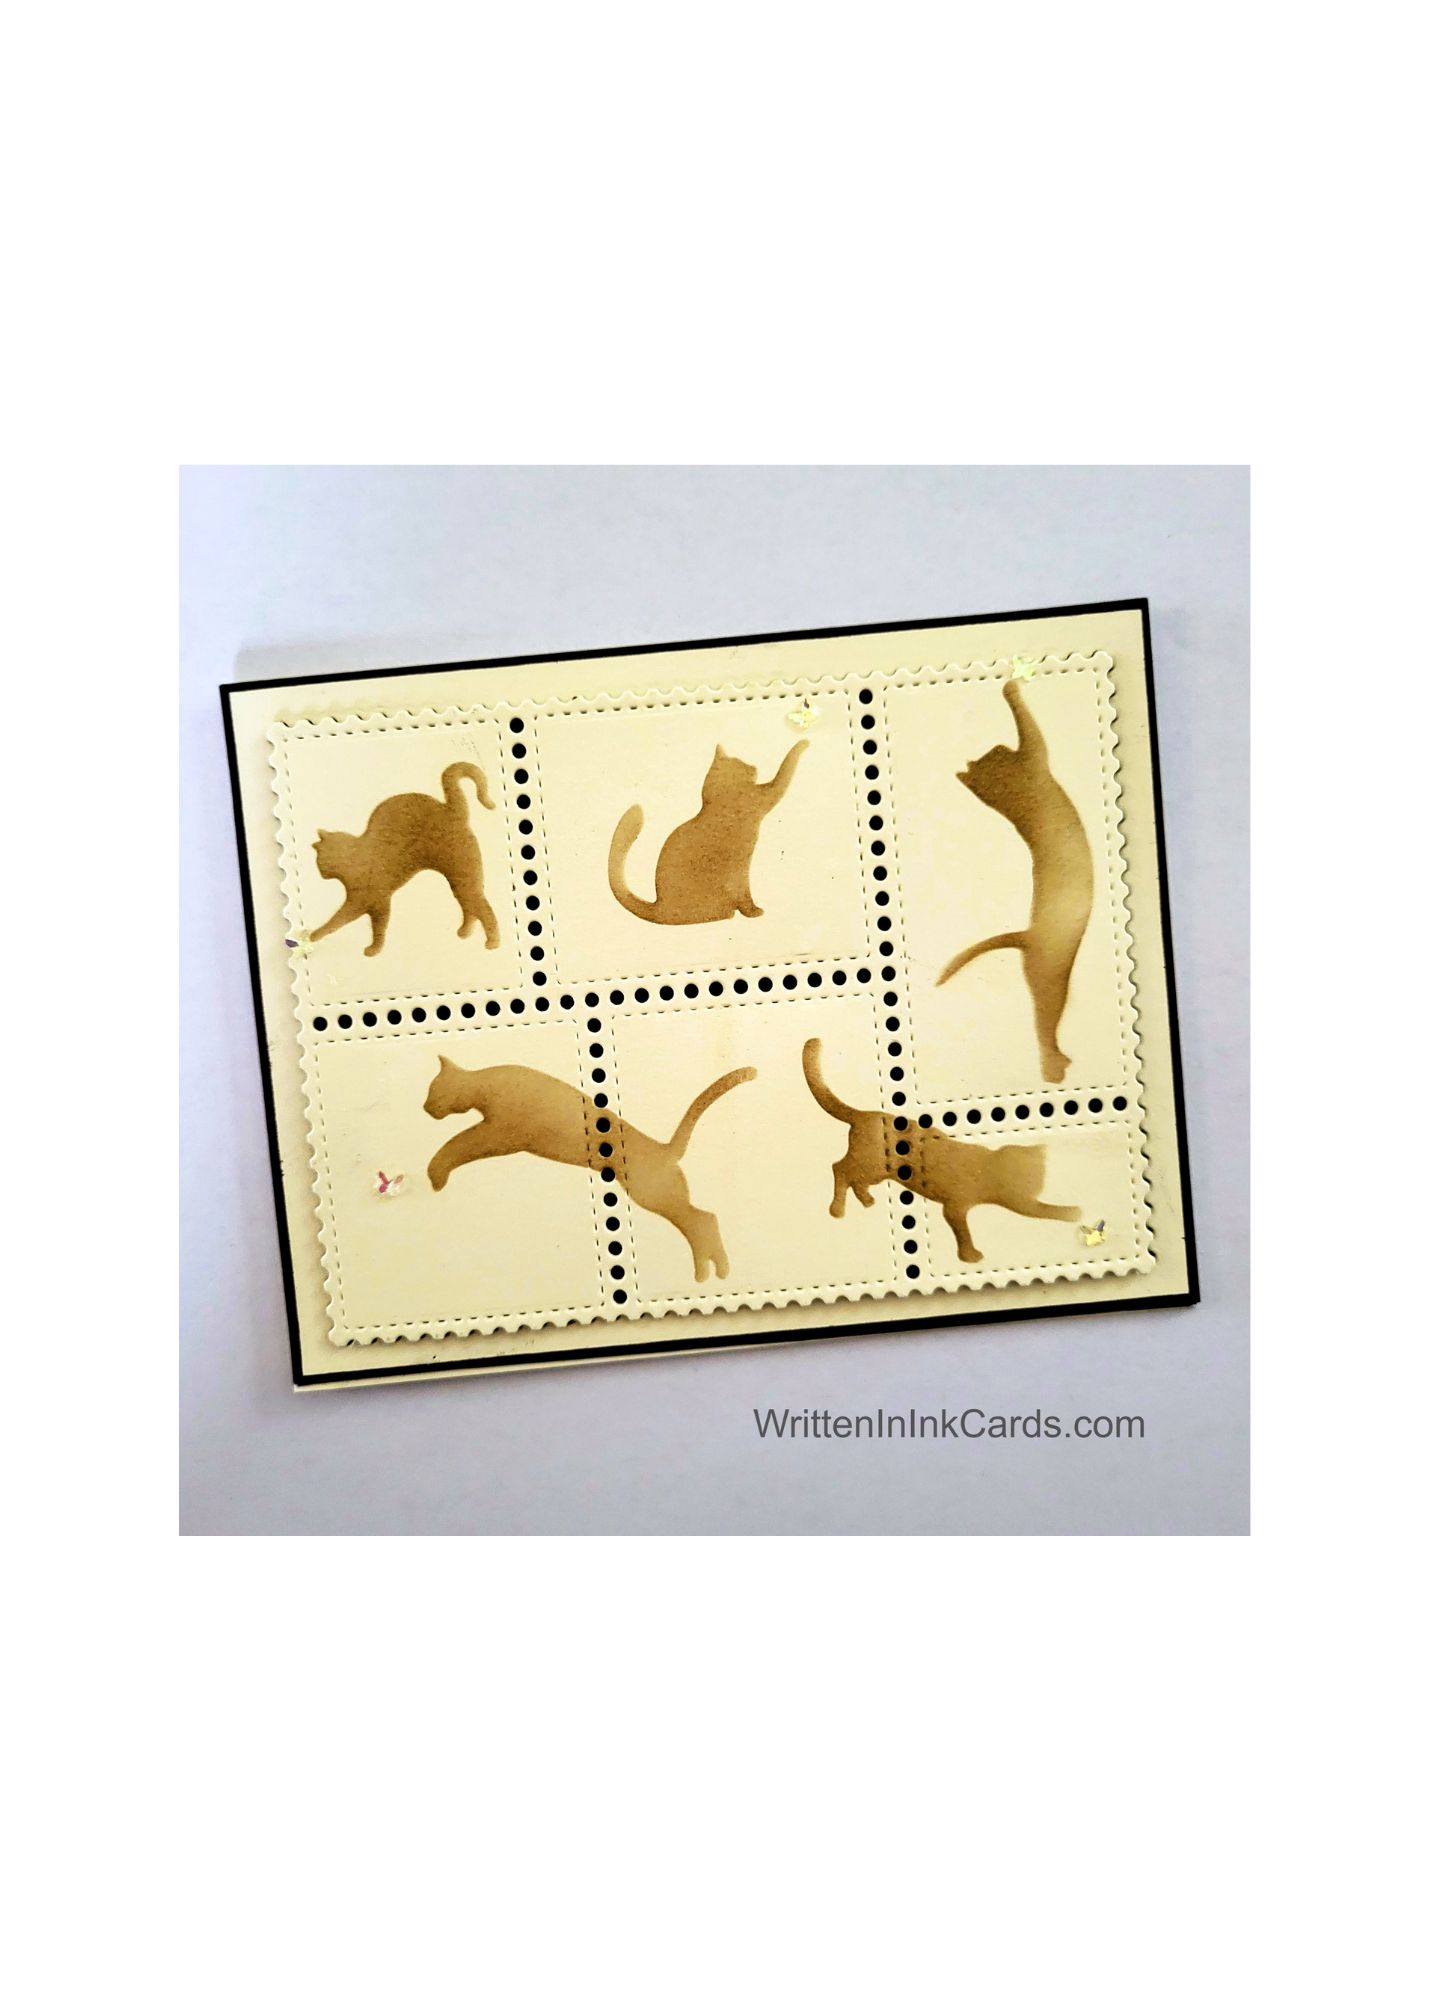
    • I positioned the die on the card face – centering carefully –  and ran it through the Big Shot.
    • I placed the center cut-out section on the grip mat and added the cats into the squares individually, using brown ink and varying pressure to create depth. This involved both moving the stencil and masking as necessary to prevent stray ink from ruining the design.  
    • Two of the cats were too large to fit into the squares – they were allowed to “spill over”   as shown in the picture.

    Assembly

    • I glued the black border layer to the card base,  and centered the outer section of the card face on top.
    • I put dimensional foam on the back of the card face and placed it back in the center opening.
    • I gave each cat a small butterfly embellishment to play with.

    Final Thoughts:

    This is such a fun design –  I think the cats and the postage stamp die are a great combination.  The tiny butterflies are hard to see in the picture,  but they are a great finishing touch.

    I will add a sentiment to this when I send it –  it could be used for almost any occasion and I’m leaving the options open till then.

    Supplies: (and links where possible)

       I have listed the products I have used and where they can be purchased. It’s a huge marketplace, and in most instances, there are multiple sources and many alternatives to choose from.

    Stencil: Cats Playing, A Colorful Life Designs

    Versamark Embossing Ink: R&R Scrapbooking

    Dies: Postage Collage,  Waffle Flower,  Glitter & Ink

    Ink: Stampin’ Up!

    Blending Brushes: Stampin’ Up! 

    Versafine Onyx, Simon Says Stamp

    Memento Ink: Stampin’ Up!

    Alcohol Markers:

         Stampin’ Blends: Stampin’ Up!

         Copics:  Wallacks

    Adhesive: Tombow Aqua, Michaels

    Card Base & Card Face: Accent 100 lb., Amazon 

    Do you have any comments or thoughts on this design?  Drop me a line in the Comments Section below –  I’d love to hear from you!

    You can also use the Comments Section to be notified when I release new work.

    Cats Playing

  • Fun Ways to Use Music in Card Making

    Fun Ways to Use Music in Card Making

    Would you like to experiment with a design like this? You’ll find a supply list below, including a link to the stencisl I used fromA Colorful Life Designs.  Follow the link and use the discount code ChrisFan10 to save 10% on your entire order! (Master Creator Bundles are excluded as they already have a 20% discount built in.)

    Would you like to experiment with a design like this? You’ll find a supply list below, including a link to the stencil I used from A Colorful Life Designs.  Follow the link and use the discount code ChrisFan10 to save 10% on your entire order! (Master Creator Bundles are excluded as they already have a 20% discount built in.)

    Let’s get Started:

    Card Base: 5.5 x 8.5, scored and folded at 4.25

    Card Face:  5.25 x 4 (after die-cutting)

    Card Face:

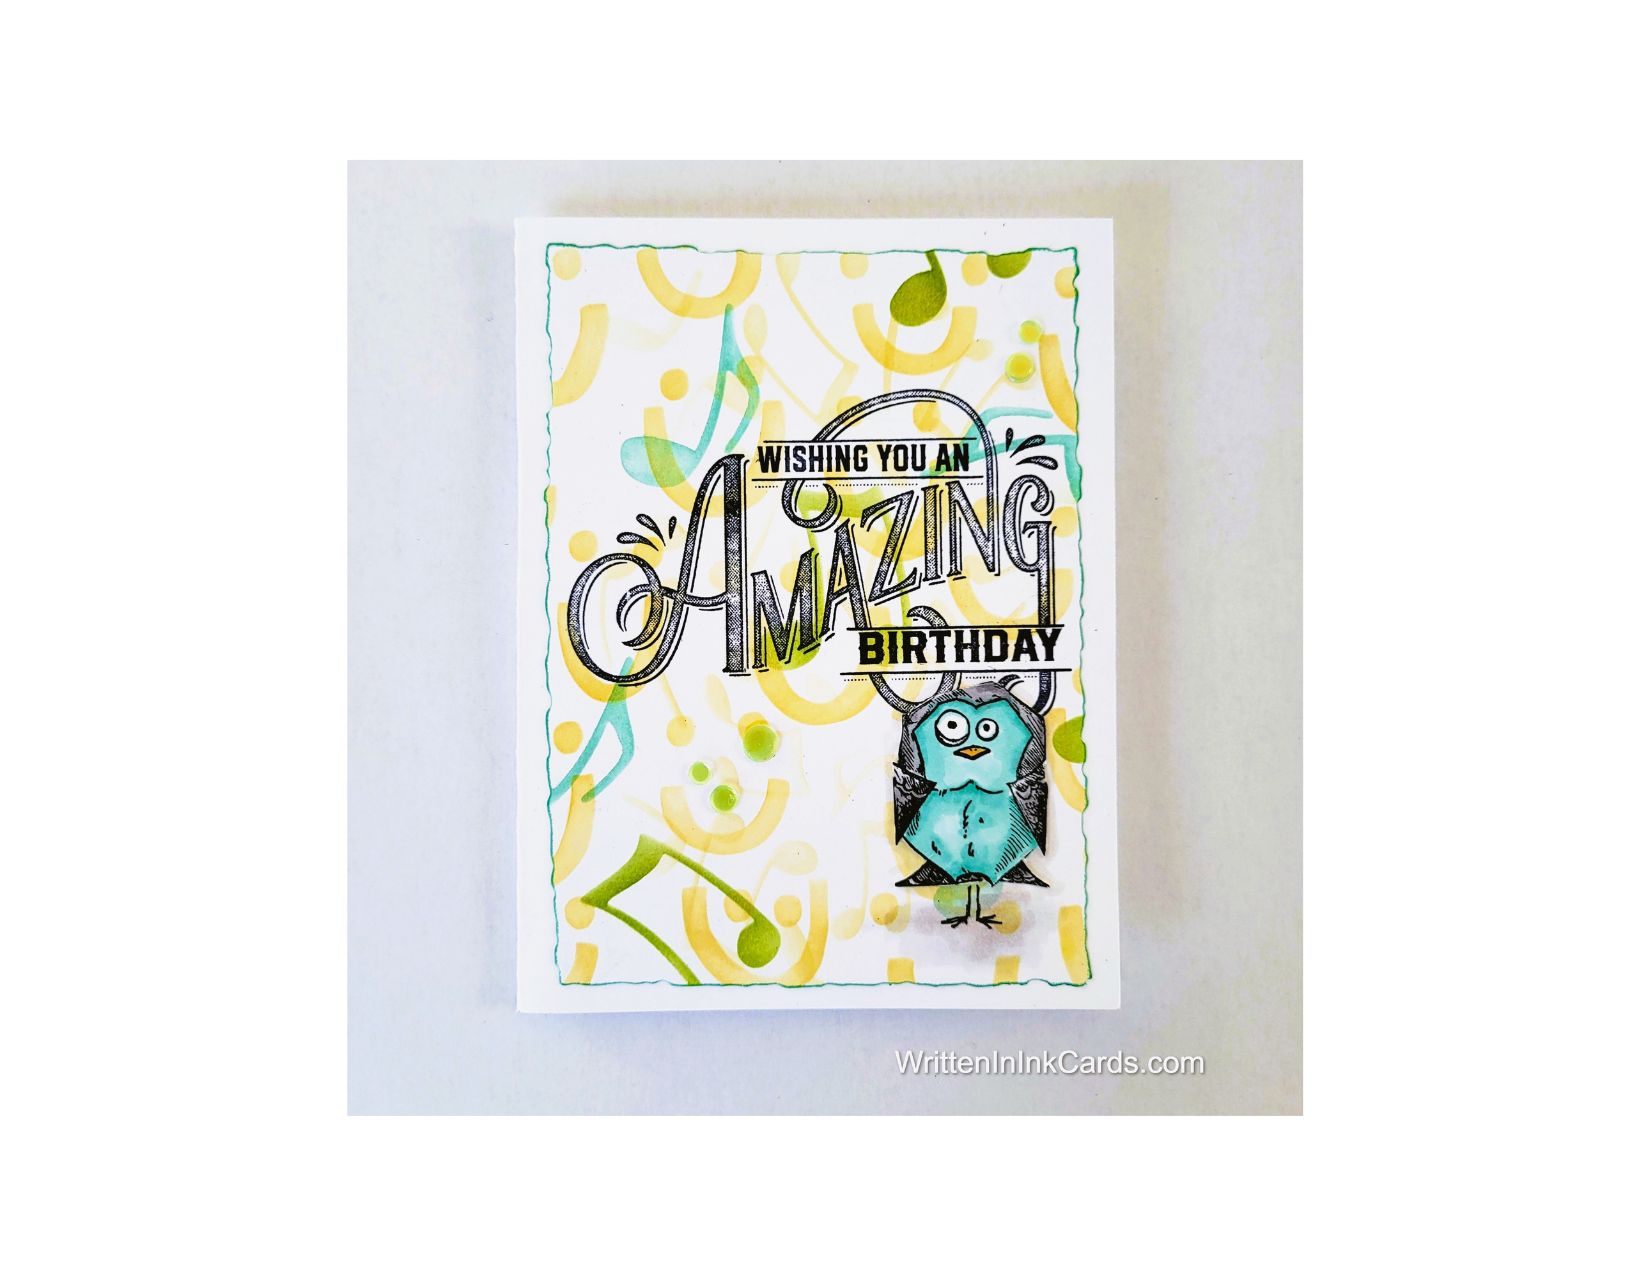
    • I placed the card face on the grip mat and positioned the Music Elements stencil so that the left-hand side of the stencil was centered on the card face.  I used a soft yellow ink across the exposed areas. 
    • I used blue and green inks to add additional detail with the large notes on the right of the stencil, randomly changing colours and which note was used.
    • I replaced it with the Smiley Faces stencil.  I used dark yellow across all exposed areas.
    • I put the card face into the stamp positioner and used Versafine Onyx to add the large sentiment.
    • I sprinkled the sentiment with clear embossing powder, and set it with my heat gun.

    Other:

    • I had previously stamped/coloured/fussy cut the bird –  I pulled him out of my Ready To Go binder.
    • I used a Deckled Edge die to cut the card face down to size, and then ran the edges of this piece over the blue ink pad,  creating definition.

    Assembly

    • I glued the card face onto the card base,  and added the bird below the sentiment as shown.
    • I used a fineliner to add legs and feet to the bird,  and added shadow under the bird with a gray alcohol marker.

    Final Thoughts:

    I love the fun vibe brought by this card.  

    Supplies: (and links where possible)

       I have listed the products I have used and where to purchase them. It’s a huge marketplace, and in most instances, there are multiple sources and many alternatives to choose from.

    Stencil:

    Music Elements:  A Colorful Life Designs

    Smiley Faces:  A Colorful life Designs

    Clear Embossing Powder,  Wow,  R&R Scrapbooking

    Stamps:  

    Sentiment: Stampin’ Up!  (retired)

    Bird:  Stampers Anonymous Crazy Birds and Things,  Amazon

    Dies:  Deckled Edge die:  Stampin’ Up!  (retired)

    Fineliners, Amazon

    Ink: Stampin’ Up!

    Blending Brushes: Stampin’ Up! 

    Versafine Onyx, Simon Says Stamp

    Memento Ink: Stampin’ Up!

    Alcohol Markers:

         Stampin’ Blends: Stampin’ Up!

         Copics:  Wallacks

    Adhesive: Tombow Aqua, Michaels

    Card Base & Card Face: Accent 100 lb., Amazon 

    Do you have any comments or thoughts on this design?  Drop me a line in the Comments Section below –  I’d love to hear from you!

    You can also use the Comments Section to be notified when I release new work.