

Would you like to experiment with a design like this? You’ll find a supply list below, including a link to the stencils I used from A Colorful Life Designs. Follow the link and use the discount code ChrisFan10 to save 10% on your entire order! (Master Creator Bundles are excluded as they already have a 20% discount built in.)
Let’s get Started:
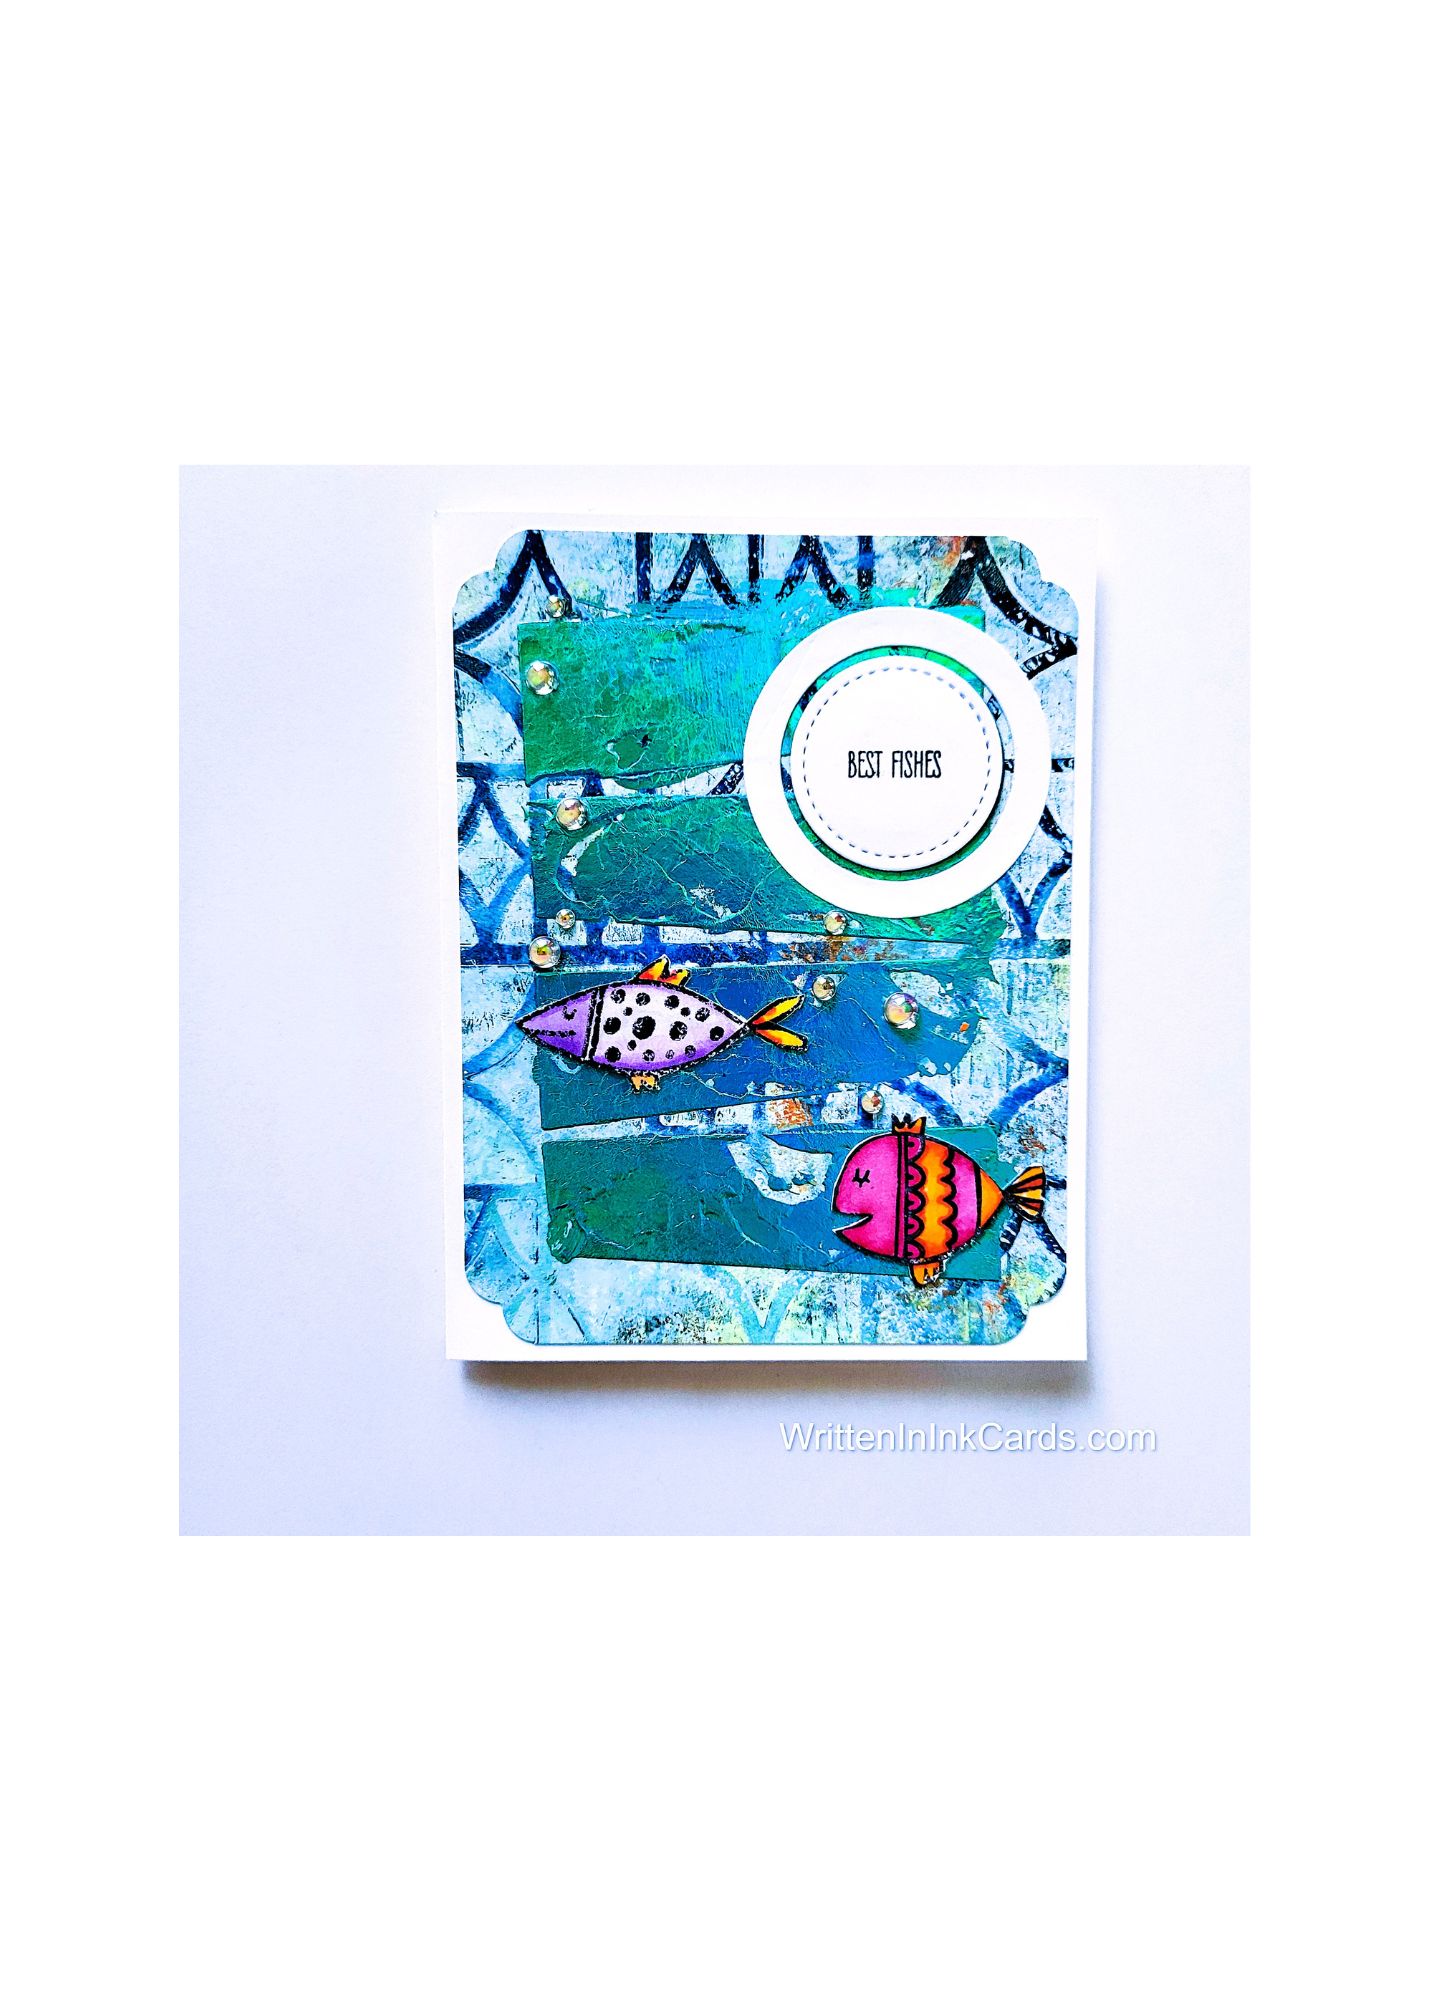
Card Base: 5.5 x 8.5, scored and folded at 4.25
Card Face: 5.25 x 4
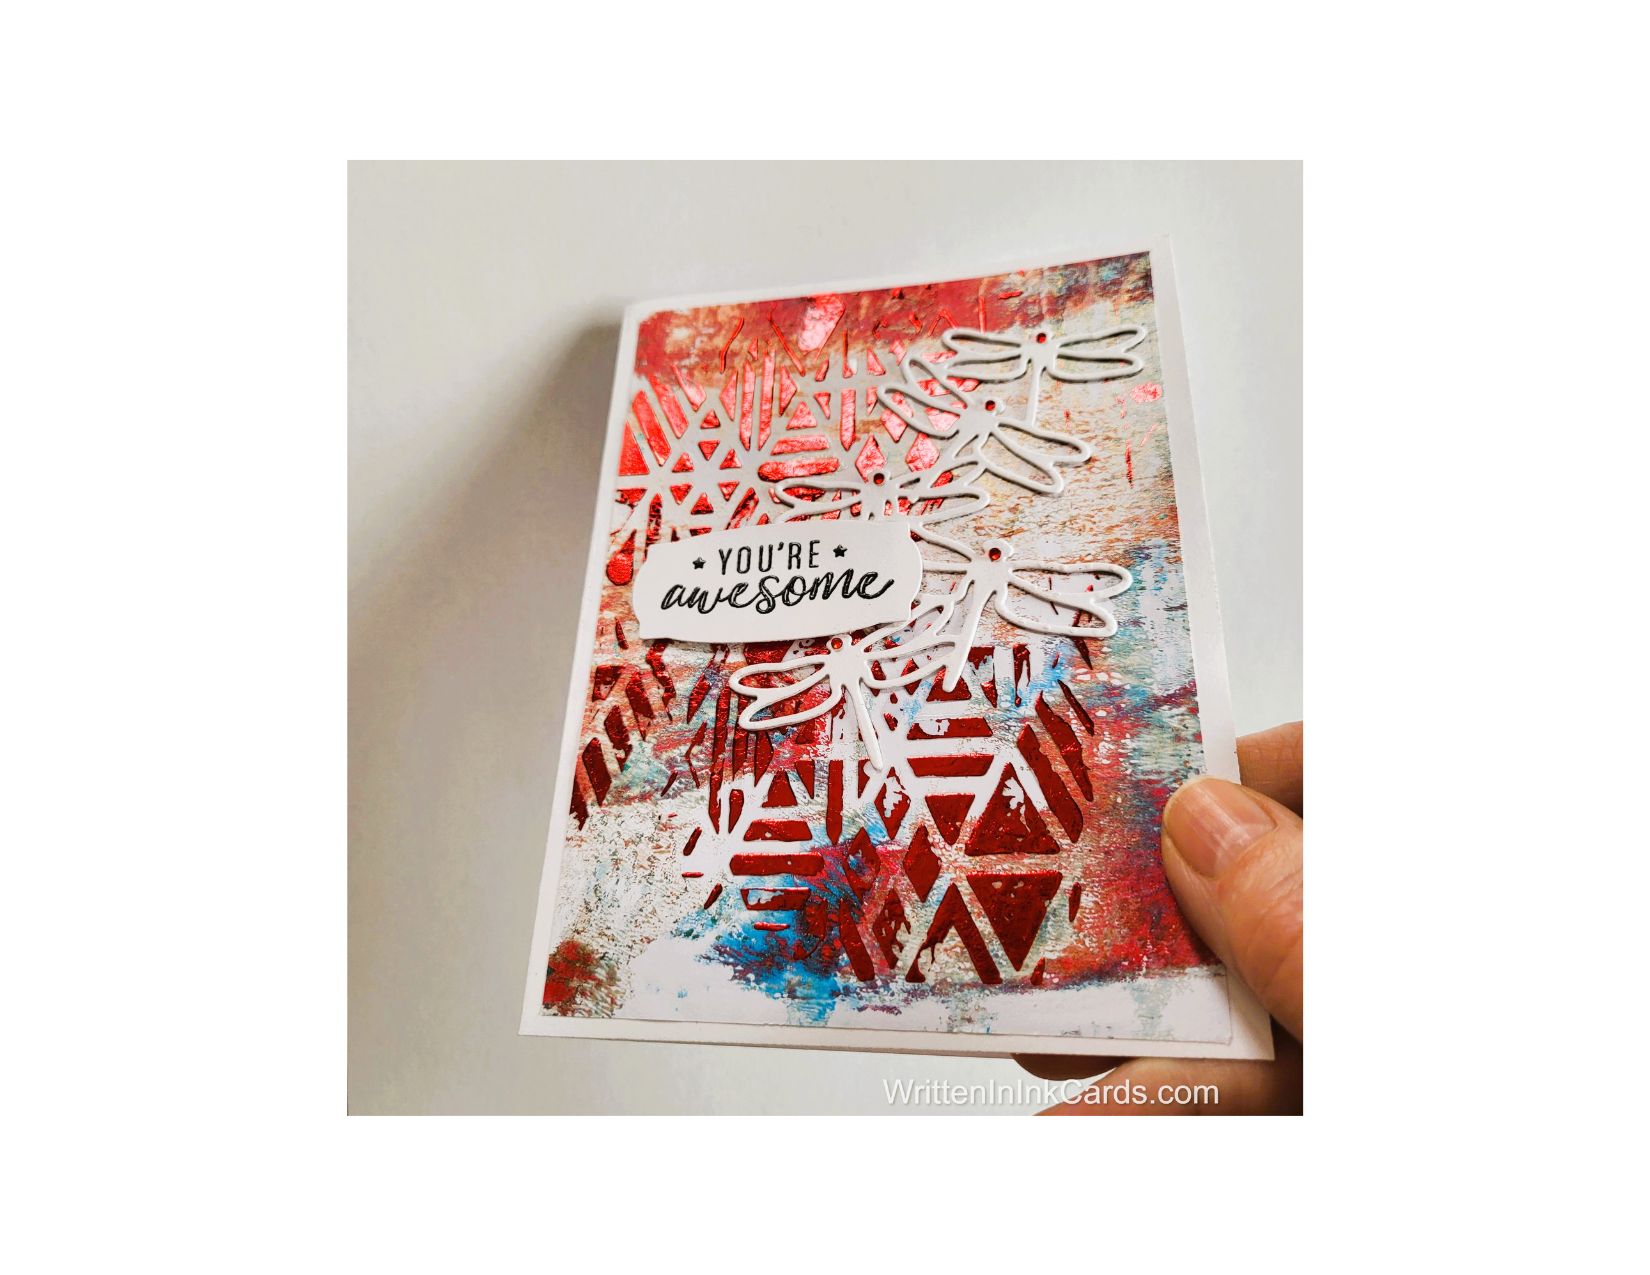
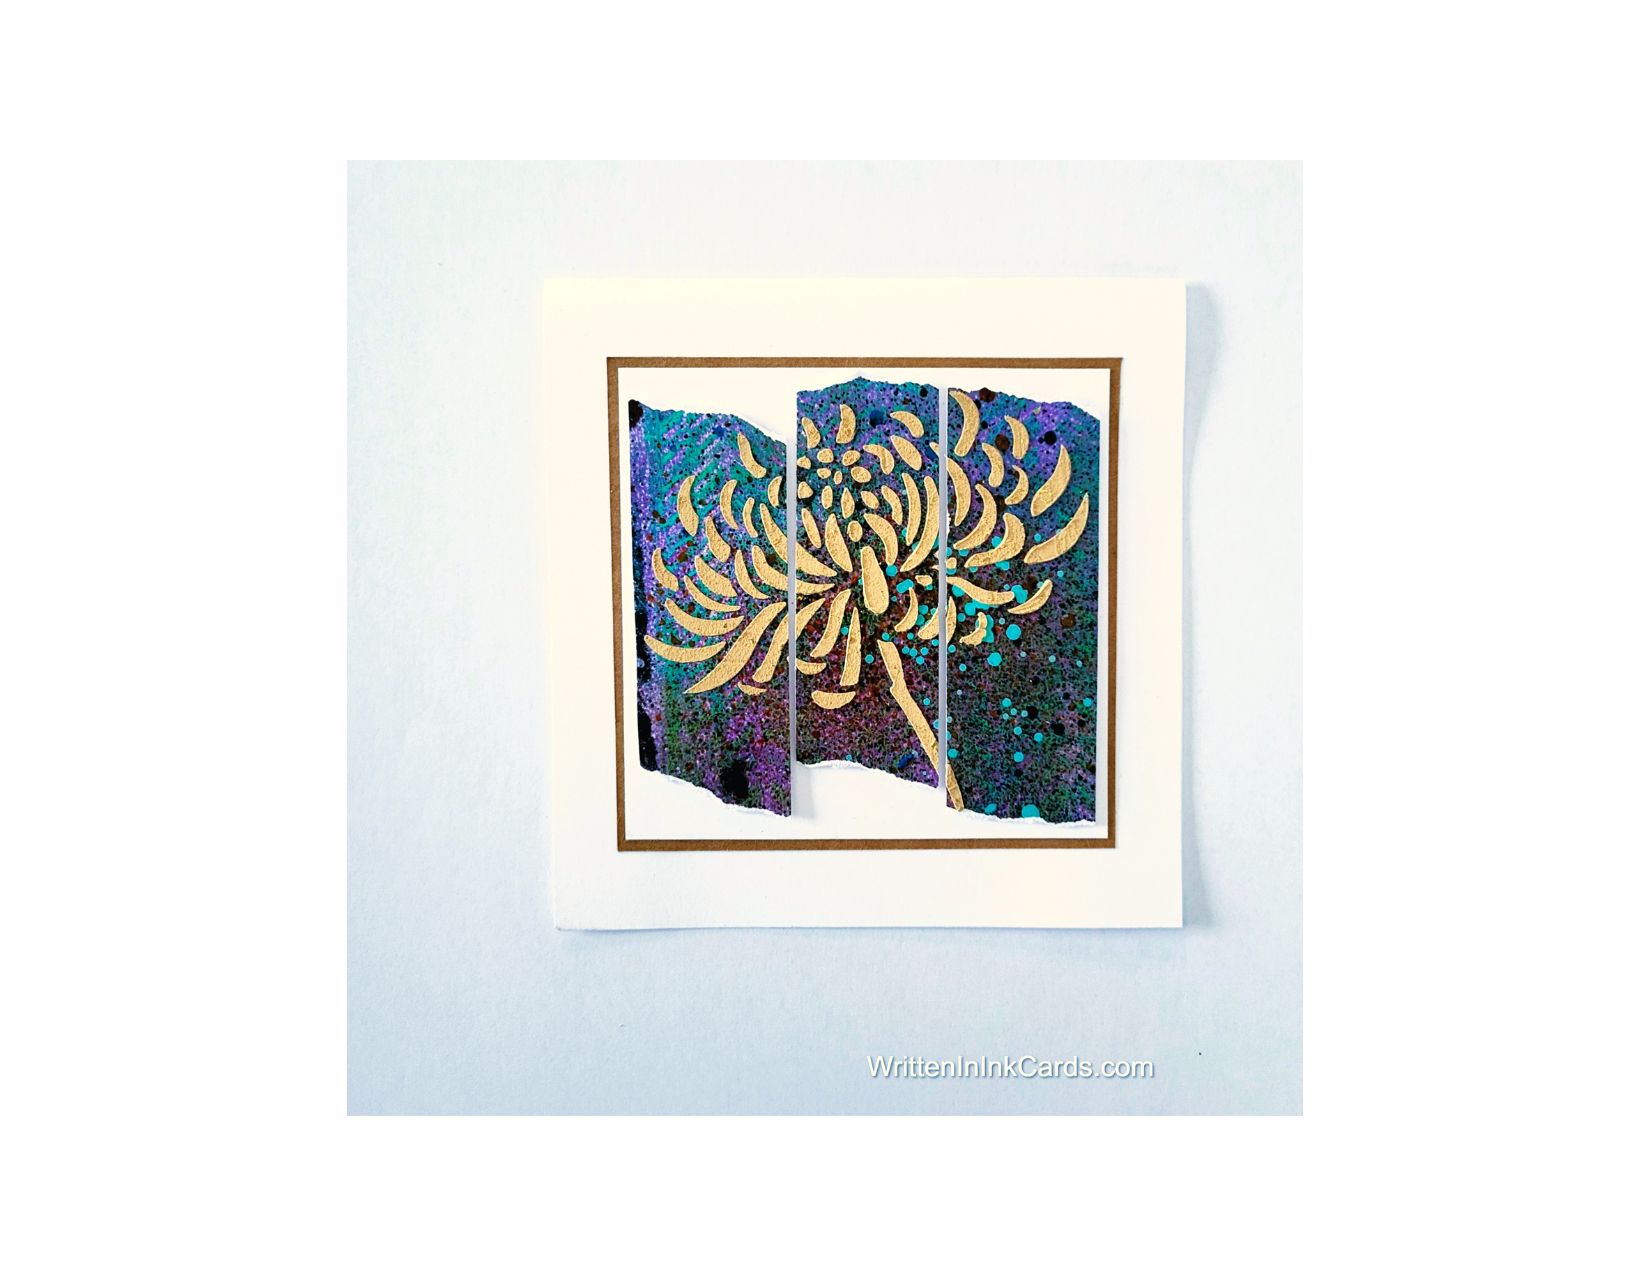
This card started with a gel print created with the Retro Star Grid stencil. I have piles of gel prints, and from time to time, I get a few out and use them up.
Card Face:
- I laid the Mid Century Shadow stencil on the card face and applied Duo Gel in a thin layer over the exposed areas. I allowed a few gaps in the gel as I applied it to create a patchy look once the foiling was complete. (I do this from time to time, to get a more interesting result.)
- I removed the stencil and put the card face aside to dry. (Duo Gel goes on white, and dries clear – the time taken for this depends on the thickness of the gel.)
The stencil went immediately into water until I could clean it: the Gel dries to be a super-sticky adhesive, and it’s almost impossible to get off at that point.
- Once the gel was dry, I laid a piece of transfer foil over it and ran it through the Big Shot. The pressure from the rollers brought the foil into contact with the adhesive.
- When I pulled the foil off the card face, the stencilled pattern remained.
- I used a corner chomper on the corners of the card face.
Other:
- I stamped and coloured the fish, then fussy-cut them out.
- I stamped the sentiment on a scrap of white cardstock and die-cut the circle as well as the circular border
Assembly
- I glued the card face to the card base, centering on all sides.
- I glued the two fish on.
- I added the sentiment and the circular border piece.
- I added iridescent glass beads to represent bubbles from the fish.
Final Thoughts:
Once I had completed the foiling on this piece, I had no idea how I wanted to finish it – this happens to me more often than I like to admit, LOL.
I finally made the decision on which direction the design would go, and after that it was easy – and I love the result.
Supplies: (and links where possible)
I have listed the products I have used and where they can be purchased. It’s a huge marketplace, and in most instances, there are multiple sources and many alternatives to choose from.
Stencils:
Retro Star Grid, A Colorful Life Designs
4 Mid Century Shadow, A Colorful Life Designs
Fish Stamps: A Colorful Life Designs (retired)
Dies:
Circle: Stampin’ Up! (retired)
Circular Border: Sizzix, Amazon
Duo Gel, Therm o web, Scrapbook.com
Foil: iCraft, R&R Scrapbooking
Versafine Onyx, Simon Says Stamp
Memento Ink: Stampin’ Up!
Alcohol Markers:
Stampin’ Blends: Stampin’ Up!
Copics: Wallacks
Adhesive: Tombow Aqua, Michaels
Card Base & Card Face: Accent 100 lb., Amazon
Do you have any comments or thoughts on this design? Drop me a line in the Comments Section below – I’d love to hear from you!
You can also use the Comments Section to be notified when I release new work.
4 Mid Century Shadow

Retro Star Grid