xxx

Would you like to experiment with a design like this? You’ll find a supply list below, including a link to the stencil I used from A Colorful Life Designs. Follow the link and use discount code ChrisFan10 to save 10% on your entire order! (Master Creator Bundles are excluded as they already have a 20% discount built in.)
Let’s get Started:
Card Base: 5.5 x 8.5, scored and folded at 4.25
Card Face: 5.5 x 4.25
Scraps of white cardstock for the floral image, the sentiment and the square
To Begin:
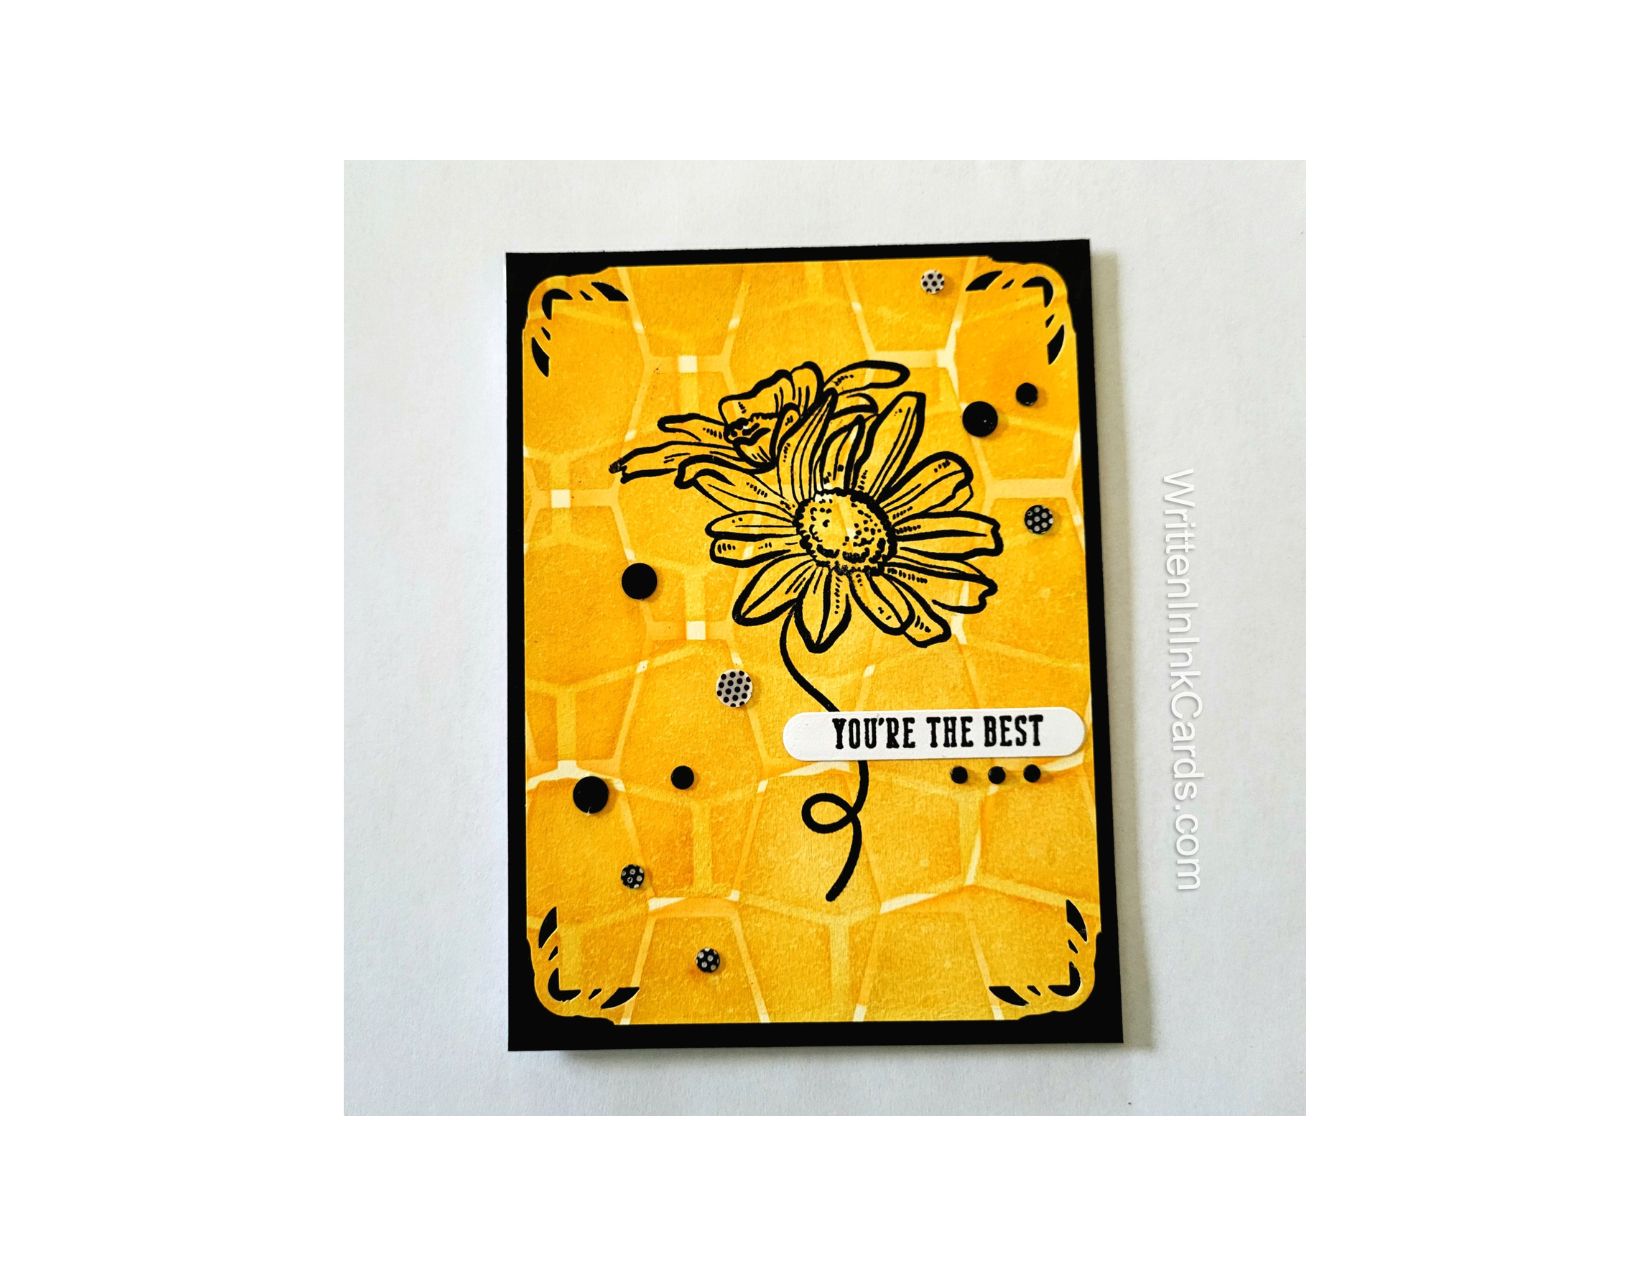
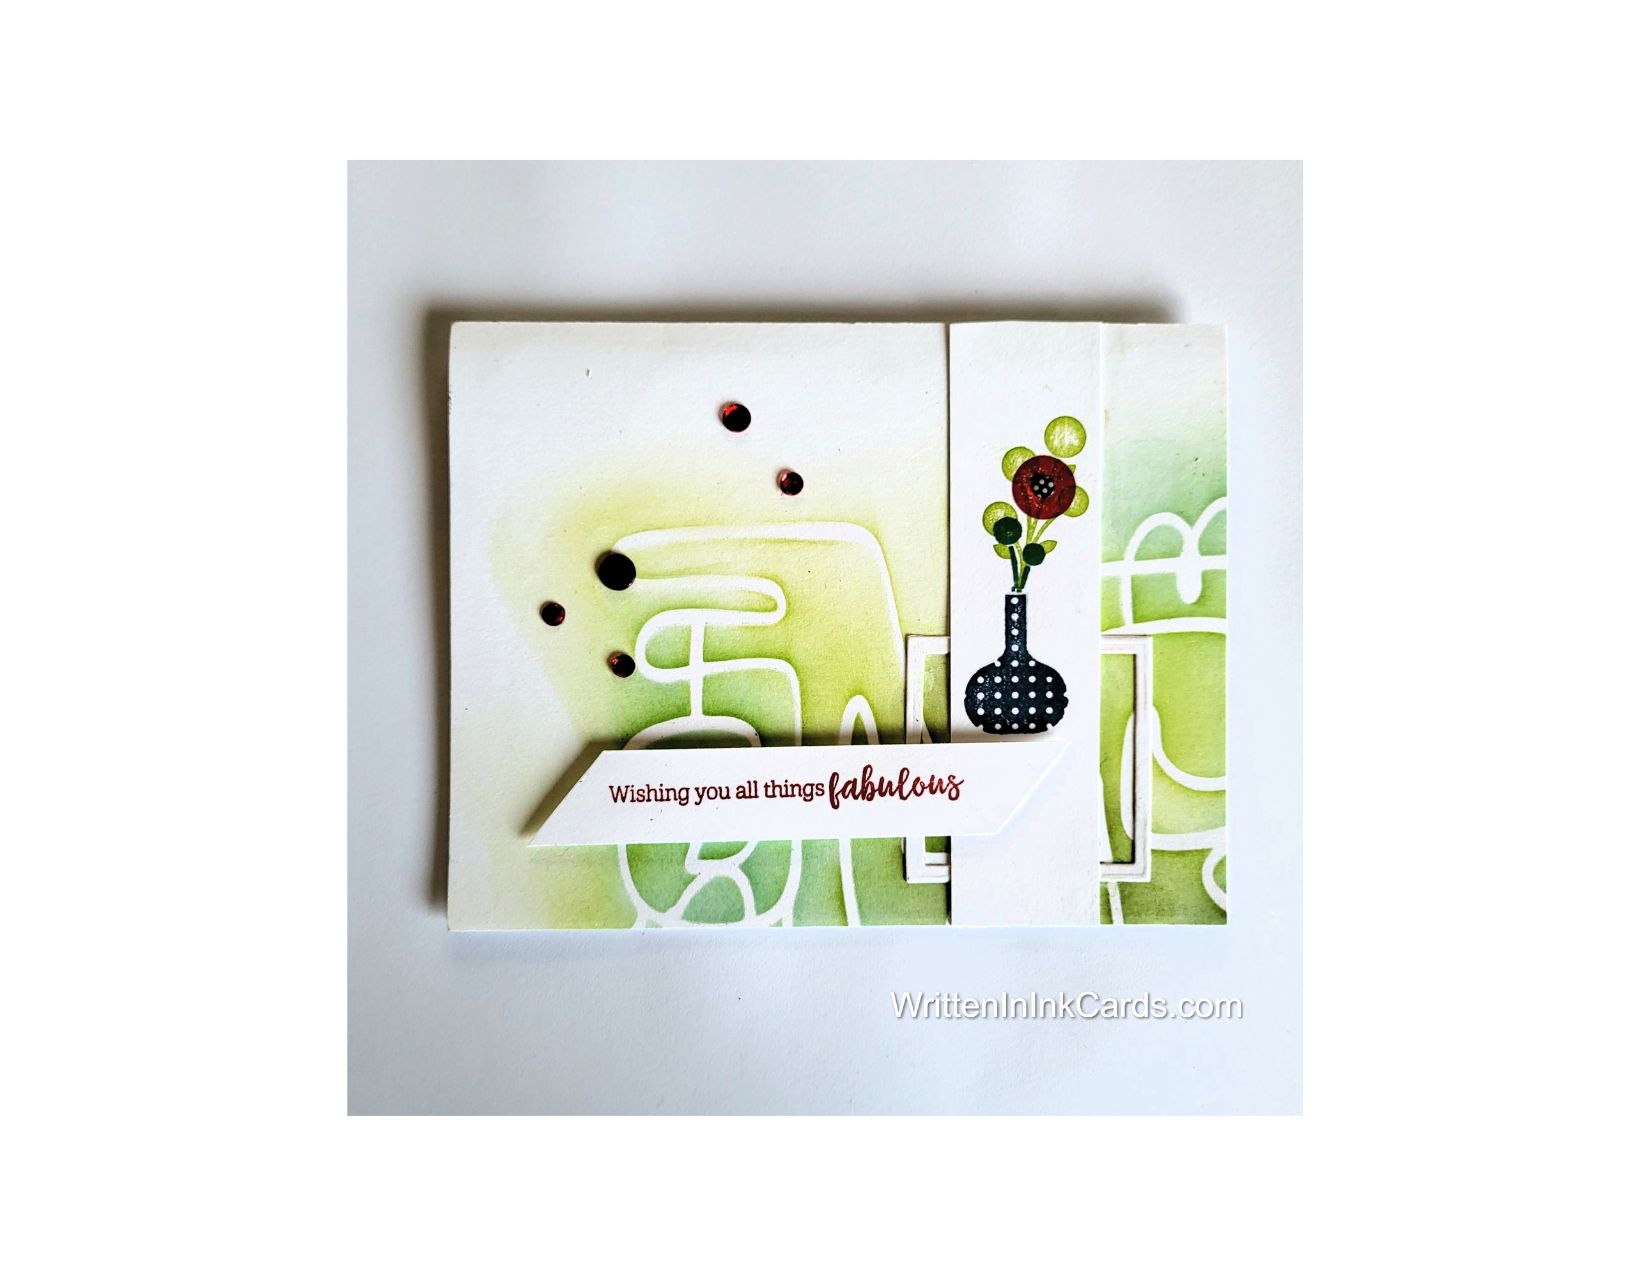
Four-for-One Technique:
- I centered this 6 x 9 stencil on a piece of 8.5 x 11 cardstock. After securing it with Mint Tape, I used a mixture of yellow and green ink randomly across the exposed areas, extending slightly past the edge of the stencil, but not going to the edge of the paper.
- I cut the cardstock into four equal pieces and selected one to use for this project.
Finishing Details:
- I placed a piece of scrap cardstock into my stamp positioner and stamped the vase in black. I changed stamps and stamped the green leaves. Finally I positioned the flower and stamped it in bright red. I trimmed this strip down to approximately 1 x 4.5
- I put another piece of scrap into the stamp positioner and stamped the sentiment in red. I trimmed this down to approximately .5 x 3, and put dimensional foam on the back.
- I used a final piece of scrap to create the small square: I positioned two square dies on the paper; one inside the other, ensuring equal spacing on all sides. I ran this through the Big Shot to create the hollow square shown in the image.
Assembly
- I glued the card face to the card base.
- I glued the square to the card face as shown, and then positioned the strip with the vase over top.
- I removed the backing from the foam on the sentiment and put it in place.
- I scattered red card bling randomly in the upper left of the card face.
Final Thoughts:
I’m really happy with the graphic feel of this card.
Supplies: (and links where possible)
I have listed which products I have used, and where they may be purchased. It’s a huge marketplace and in most instances, there are multiple sources and many alternatives to choose from.
Stencil: Mid Century Mask, A Colorful Life Designs
Stamps: Stampin’ Up! (retired)
Dies: Everlasting Square, Spellbinders, R&R Scrapbooking
Ink: Stampin’ Up!
Card Bling: A Colorful Life Designs
Adhesive: Tombow Aqua, Michaels
Card Base & Card Face: Accent 100 lb., Amazon
Do you have comments or thoughts to share on this design? Drop me a line in the Comments Section below – I’d love to hear from you!
You can also use the Comments Section to be notified when I release new work
Mid Century Mask by A Colorful Life Designs