
Would you like to experiment with a design like this? You’ll find a supply list below, including a link to the stencils I used from A Colorful Life Designs. Follow the link and use discount code ChrisFan10 to save 10% on your entire order! (Master Creator Bundles are excluded as they already have a 20% discount built in.)
Let’s get Started:
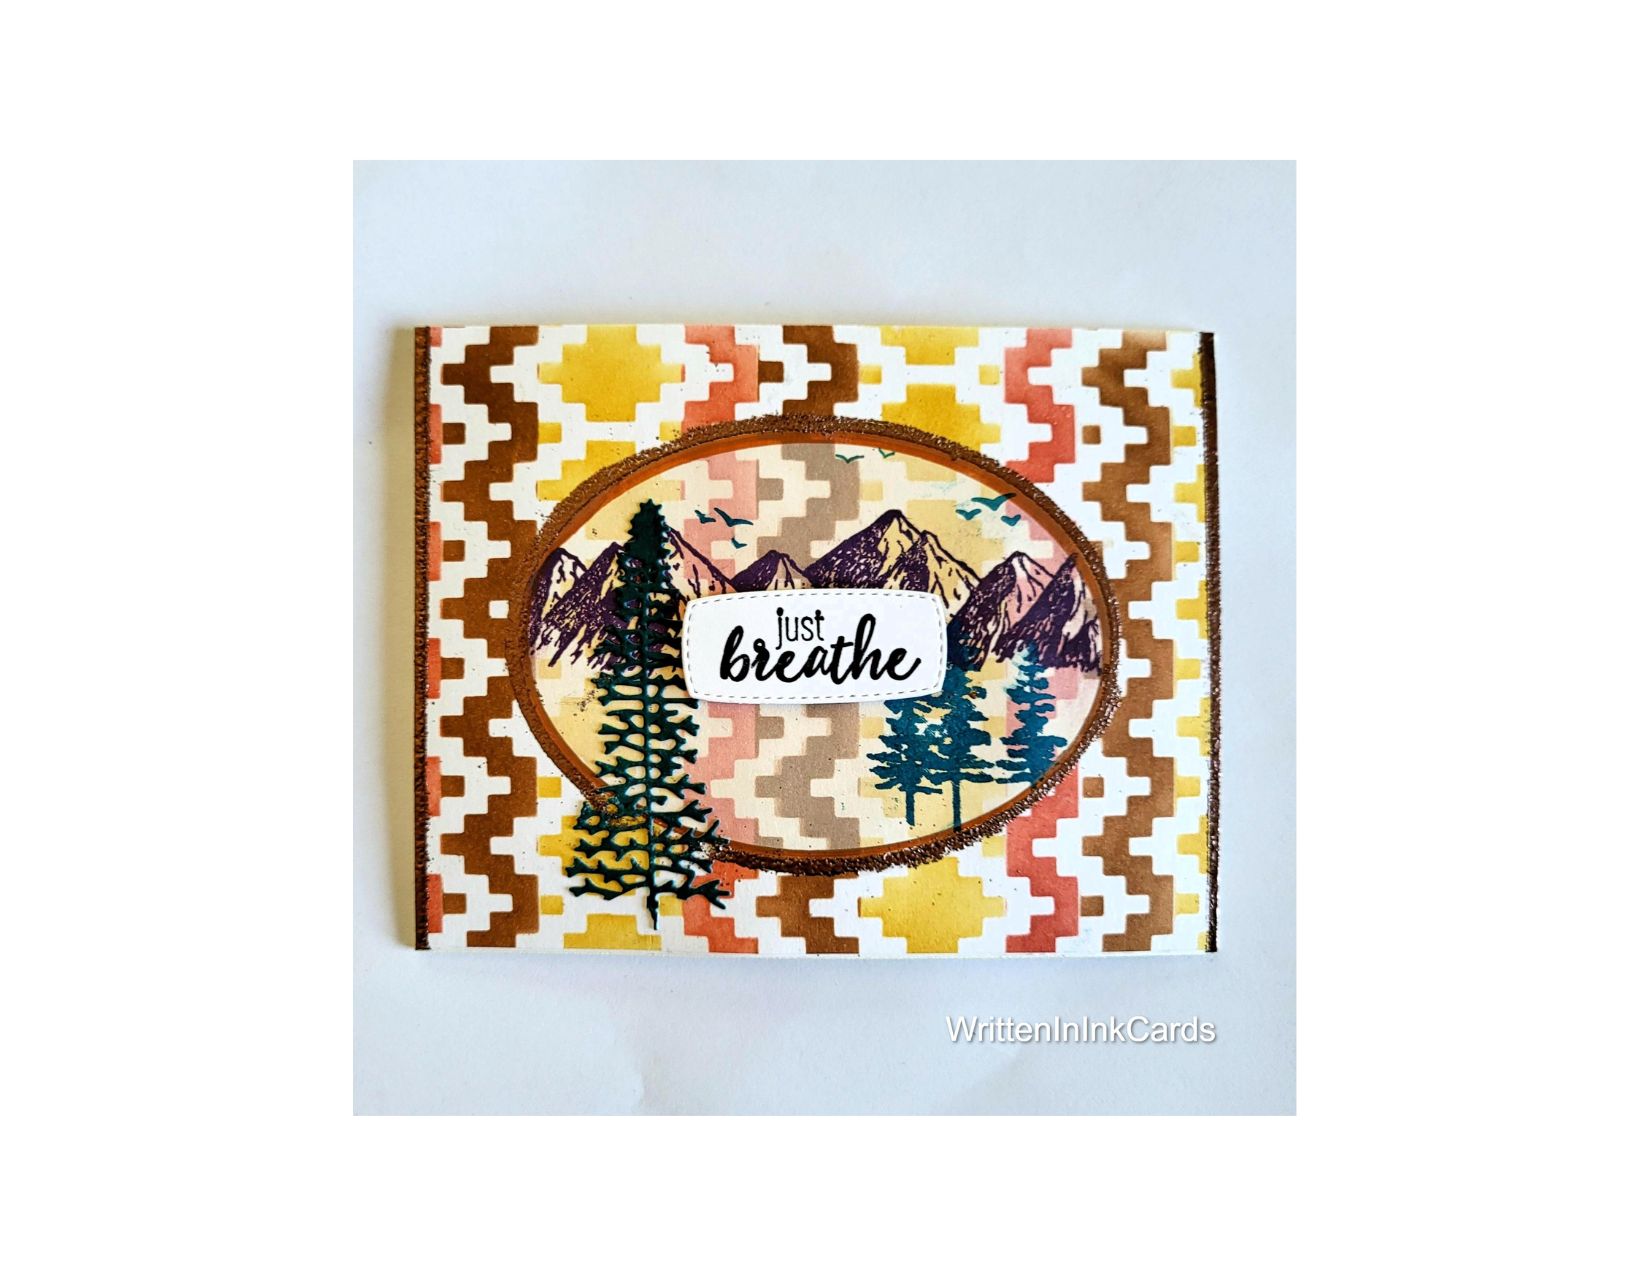
Card Base: 5.5 x 8.5, scored and folded at 4.25
Card Face: 5.5 x 4.25
Card Face:
- I laid the card face onto my grip mat and positioned the Aztec Pattern stencil.
- Masking between rows, I used yellow, rust and brown inks in a repeating pattern.
- After removing the first stencil, I centered the second largest oval stencil on the card face and applied white pigment ink liberally. I repeated this step 4 or 5 times, allowing time for the ink to dry between layers . This muted the Aztec pattern in the center of the card face.
- I put the card face info my stamp positioner and once again put the oval stencil in place and stamped the mountains, birds and trees. (Having the stencil in place allowed me to only stamp onto the muted section of ink as the rest was covered.)
- Returning the card face to my work surface, I put the corresponding oval mask into the opening, and then removed the stencil.. I traced around the oval with a brown marker.
- I used an embossing pen to create an oval just outside of the brown one, sprinkled it with copper embossing powder and set it with my heat gun.
- Using a ruler and the same embossing pen, I drew a line on both sides of the card face, sprinkled on copper embossing powder and set it with my heat gun.
Other:
- I die cut a tree from green cardstock.
- I looked through my sentiment binder, and found the perfect sentiment for this card.
Assembly
- I glued the card face to the card base.
- I added the die cut tree, allowing it to extend outside of the oval.
- I put foam tape on the back of the sentiment, and put it in place.
Final Thoughts:
This card was far more time consuming than I anticipated, due to the number of layers of white ink required, and the necessary dry time between layers. In fact at one point I put it aside for months before finally picking it up again. Luckily, I’m happy with the result!
Supplies: (and links where possible)
I have listed which products I have used, and where they may be purchased. It’s a huge marketplace and in most instances, there are multiple sources and many alternatives to choose from.
Stencils:
Marvellous Masks, Ovals, A Colorful Life Designs
Aztec Pattern, A Colorful Life Designs
Waffle Flower Grip Mat, 8.5 x 6.5, Scrapbook.com
Versamark Embossing Ink: Simon Says Stamp
Embossing Pen: Ranger, Amazon
Copper Embossing Powder, Wow, R&R Scrapbooking
Stamps: Mountain Air, Stampin’ Up! (retired)
Dies: Mountain Air, Stampin’ Up! (retired)
Ink: Stampin’ Up!
Blending Brushes: Stampin’ Up!
Adhesive: Tombow Aqua, Michaels
Card Base & Card Face: Accent 100 lb., Amazon
Do you have comments or thoughts to share on this design? Drop me a line in the Comments Section below – I’d love to hear from you!
You can also use the Comments Section to be notified when I release new work