
Would you like to experiment with a design like this? You’ll find a supply list below, including a link to the stencil I used from A Colorful Life Designs. Follow the link and use the discount code ChrisFan10 to save 10% on your entire order! (Master Creator Bundles are excluded as they already have a 20% discount built in.)
Let’s get Started:
Card Base: 5.5 x 8.5, scored and folded at 4.25
Black Border Layer: 5.5 x 4.25
Card Face: 5.5 x 4
Card Face:
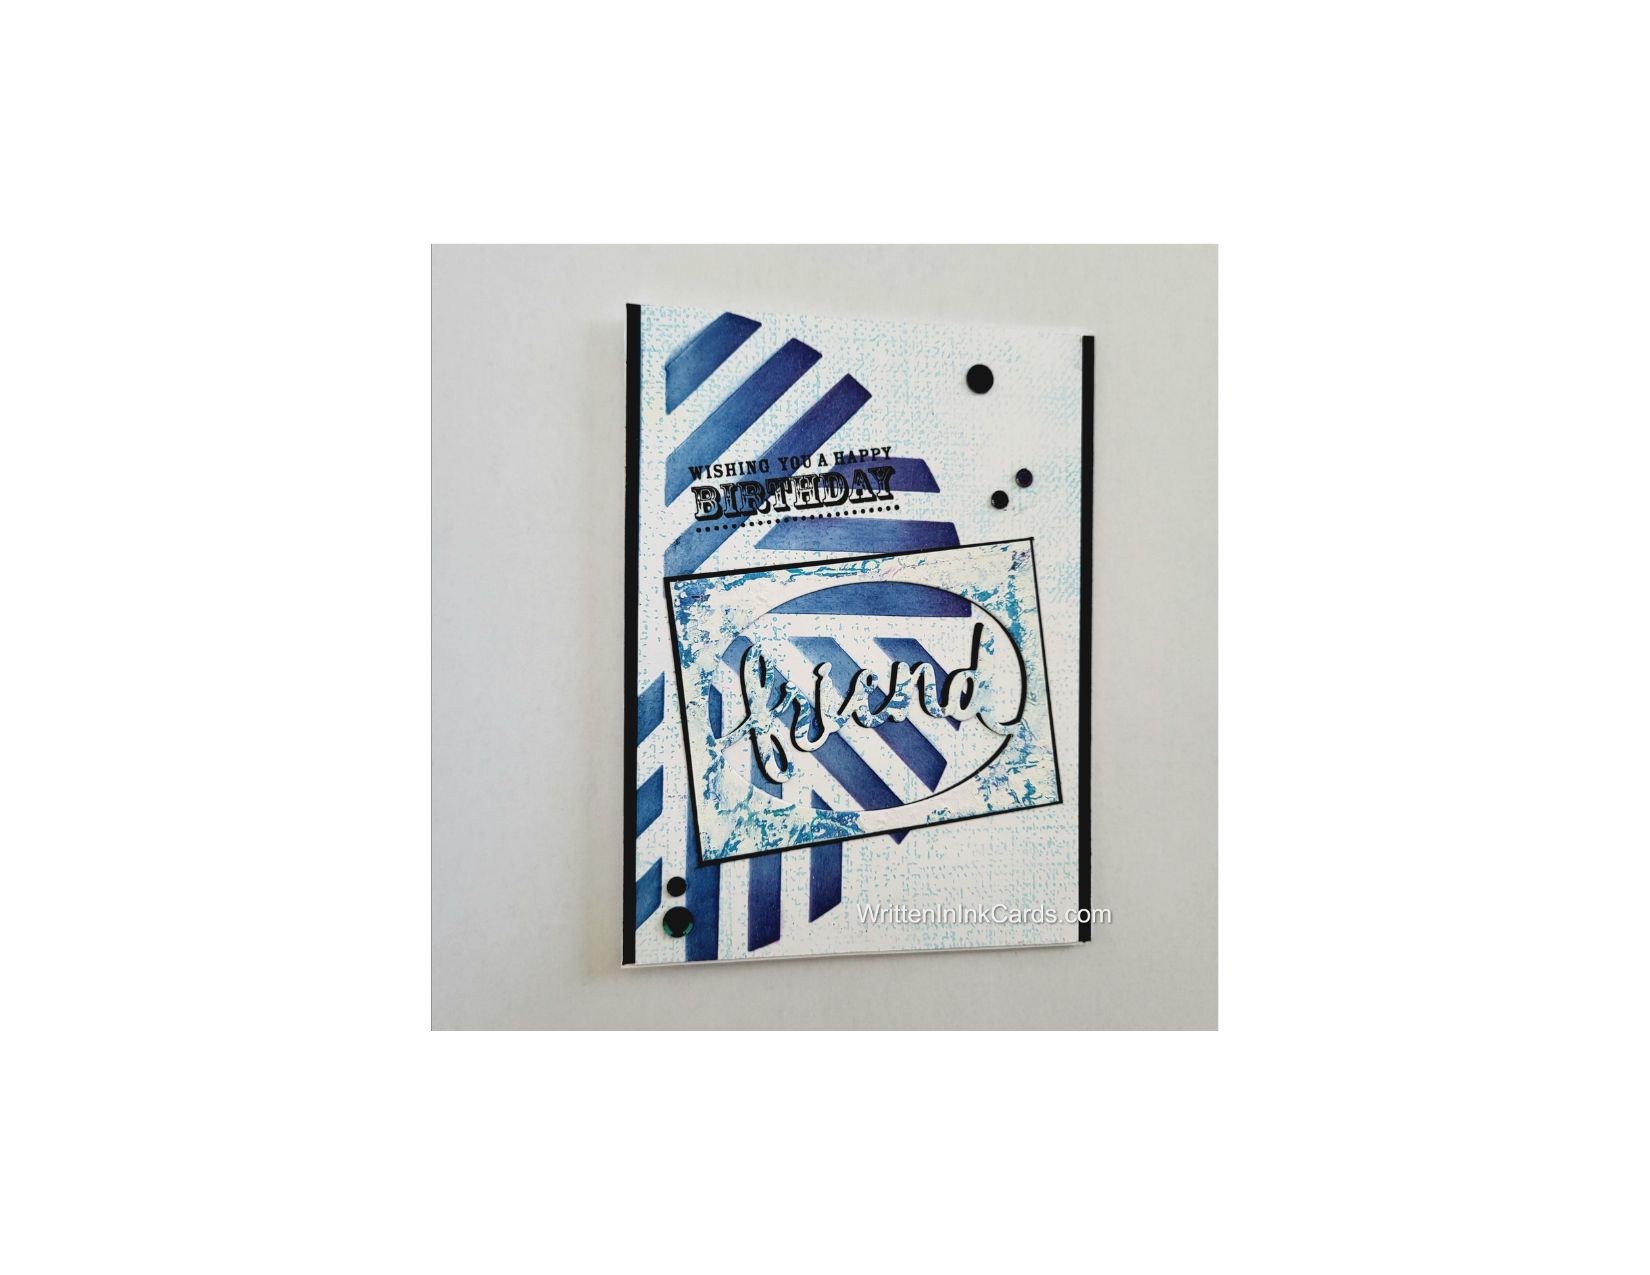
I laid the card face down on my grip mat and positioned the stencil. I added dark blue ink across the exposed areas.
I placed it into the stamp positioner and added the sentiment using Versafine Onyx.
I used a large background stamp to add texture and subtle colour, using blue ink that matched the die cut.
This is my favourite method for using a large background stamp: I lay it on my desk, face up. I apply ink to the stamp and then lay the card face down on it, being very careful not to let it shift during this step. I carefully cover the stamp/card face with a piece of scrap copy paper and then run one hand over the surface to ensure ink transfer, while holding the paper still with the other hand. (I saw this on YouTube several years ago, but sadly can’t remember who created the video to give credit.)
Other:
I grabbed a scrap piece of gel print and used a die to cut out the sentiment.
I cut a second die cut from black cardstock.
Assembly
I glued the black die cut behind the gel print die cut, offsetting slightly.
I glued the black border layer to the card base and centered the card face vertically on top.
I glued the die-cut layer on top of these as shown.
I added black card bling randomly.
Final Thoughts:
Full disclosure: This card sort of started with the die cut: I had a scrap of gel print to use, and I went looking for a pre-created background (I have a binder full of these!). I had stencilled this card face quite a while ago, but couldn’t decide on how to finish it off. The blues weren’t quite right to work together, so I added the blue ink to the background to marry the two – and I’m really happy with the result.
Supplies: (and links where possible)
I have listed the products I have used and where to purchase them. It’s a huge marketplace, and in most instances, there are multiple sources and many alternatives to choose from.
Stencil: Circle of Lines, A Colorful Life Designs
Waffle Flower Grip Mat, 8.5 x 6.5, Scrapbook.com
Card Bling: A Colorful Life Designs
Background Stamp: Rustic Linen, Altenew
Dies: Stampin’ Up! (retired)
Ink: Stampin’ Up!
Blending Brushes: Stampin’ Up!
Versafine Onyx, Simon Says Stamp
Adhesive: Tombow Aqua, Michaels
Card Base & Card Face: Accent 100 lb., Amazon
Do you have any comments or thoughts on this design? Drop me a line in the Comments Section below – I’d love to hear from you!
You can also use the Comments Section to be notified when I release new work.