
Would you like to experiment with a design like this? You’ll find a supply list below, including a link to the stencils I used from A Colorful Life Designs. Follow the link and use discount code ChrisFan10 to save 10% on your entire order! (Master Creator Bundles are excluded as they already have a 20% discount built in.)
Let’s get Started:
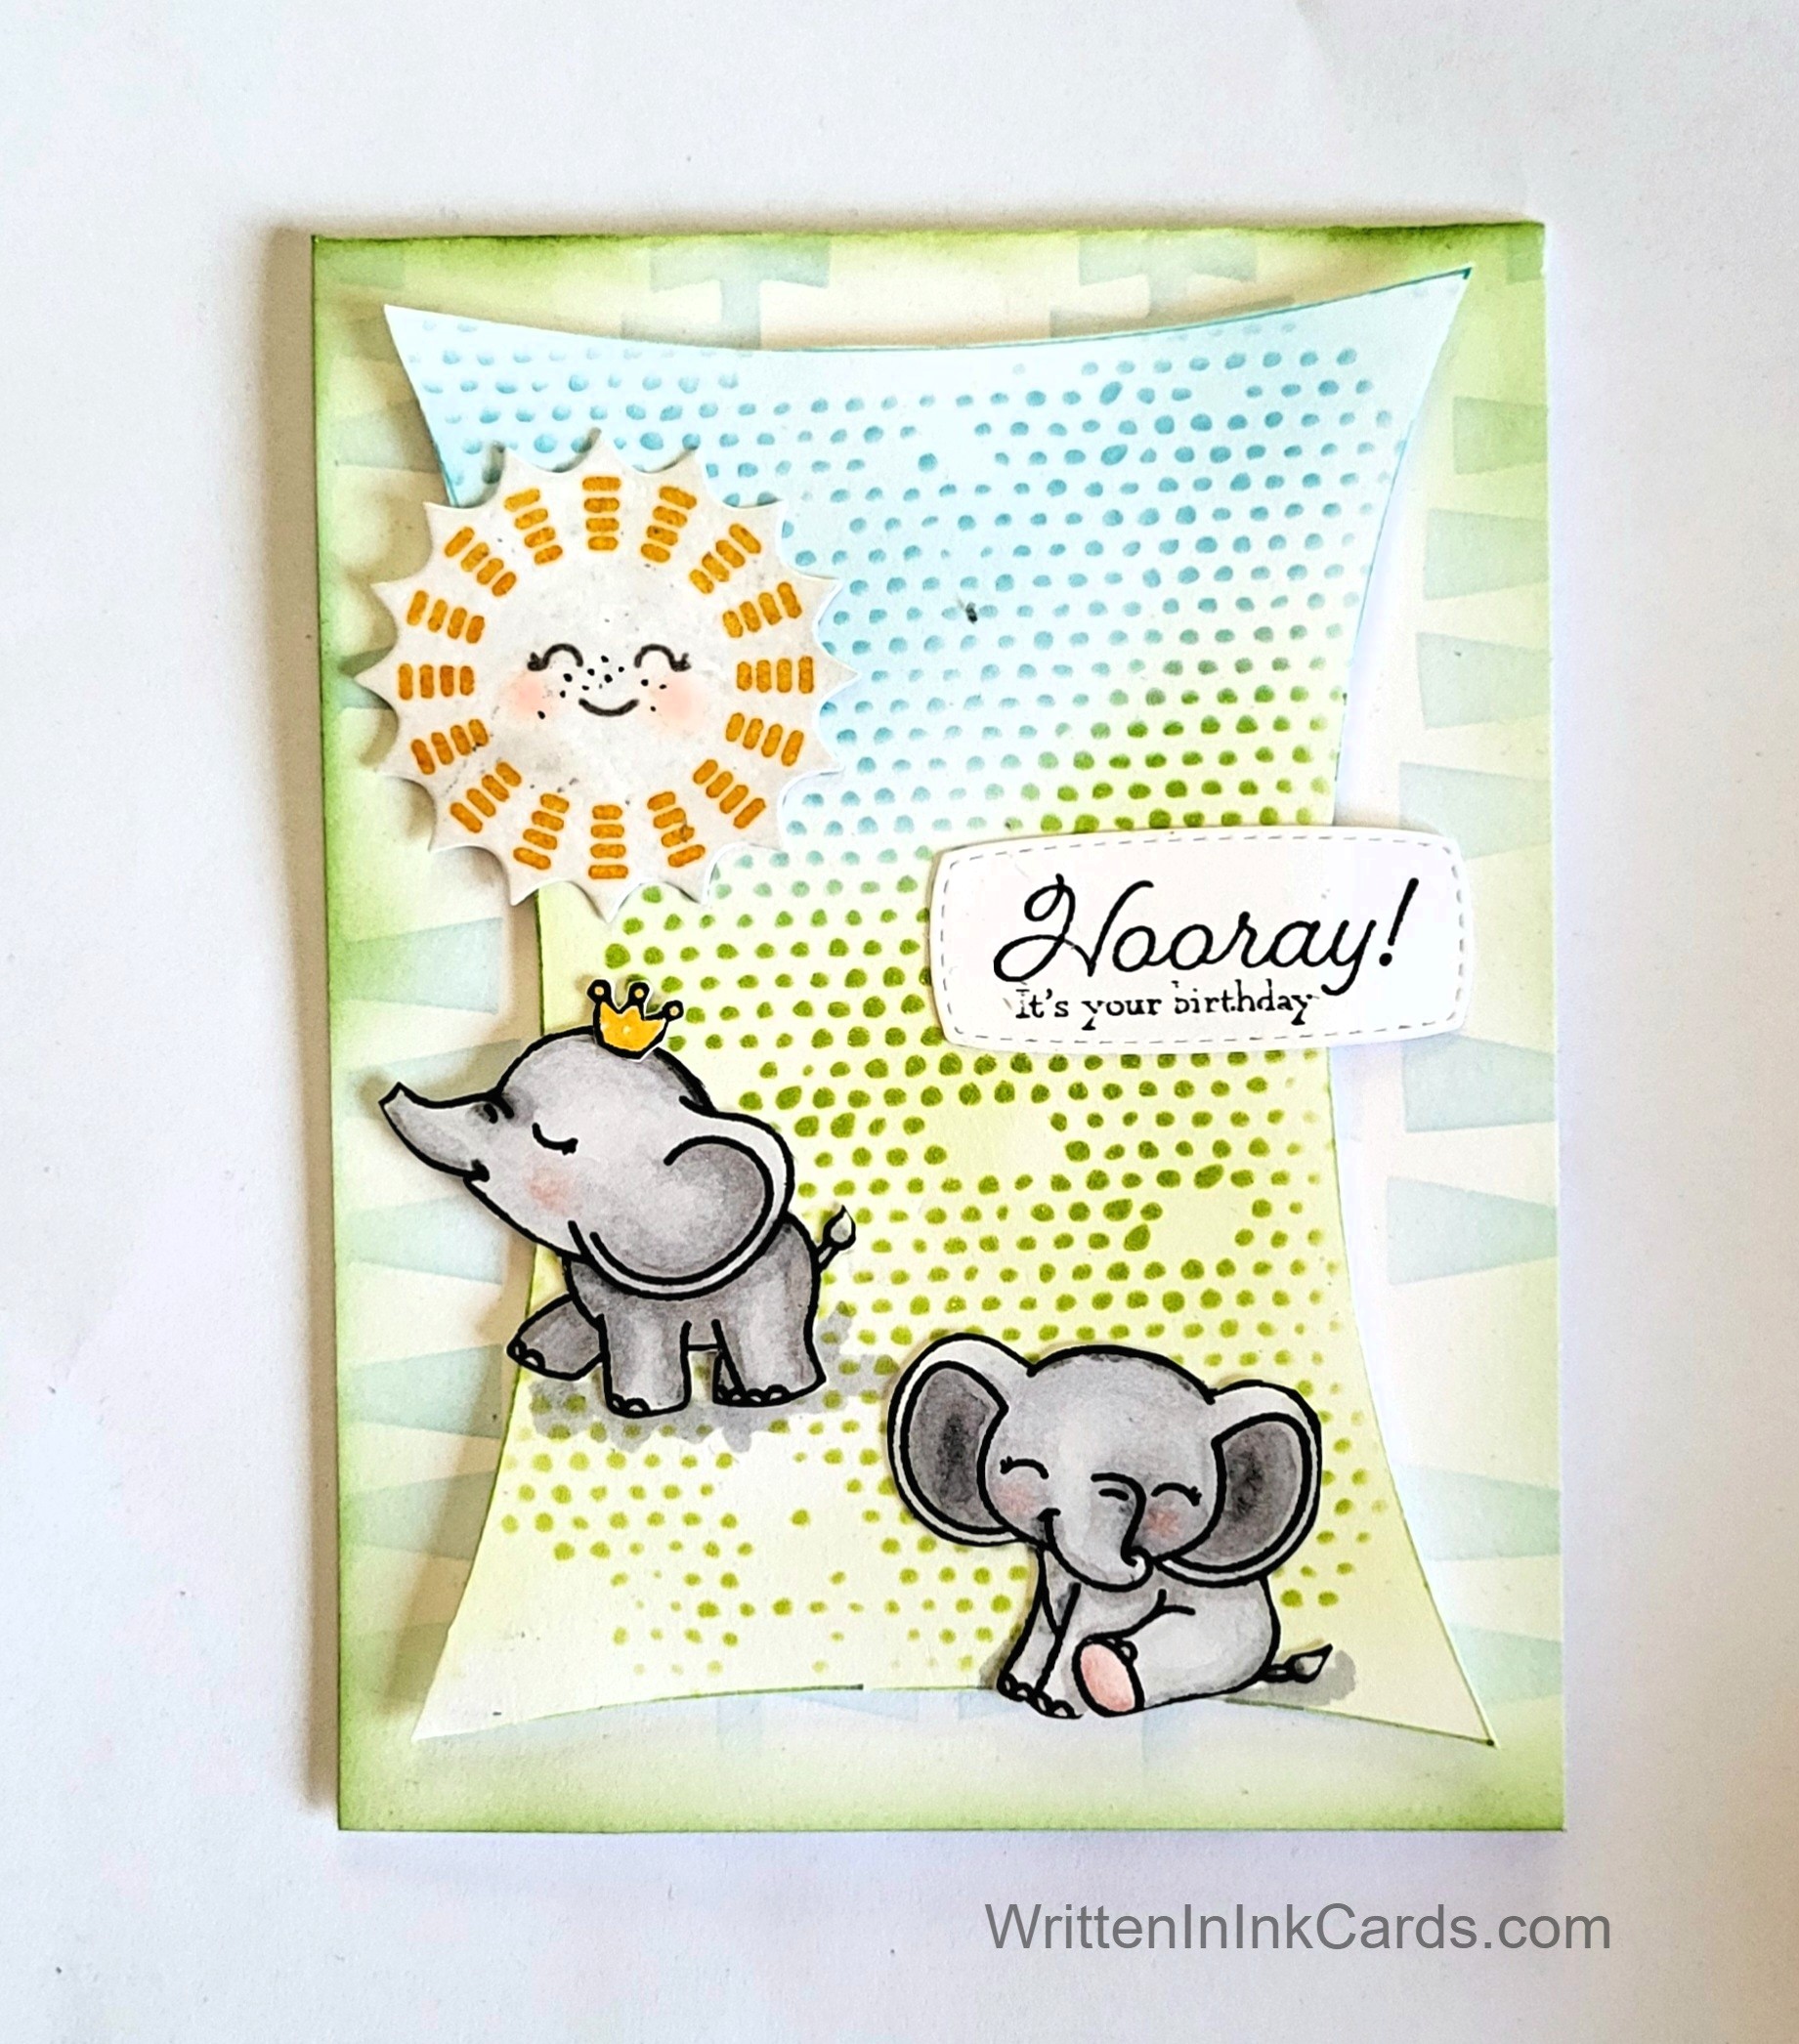
Card Base: 5.5 x 8.5, scored and folded at 4.25
Card Face: 5.5 x 4.25 before cutting down
Card Face:
- I laid my cardface on the Grip Mat and then centered the largest of the Squeezed Rectangle stencils on top.
- Over this, I laid the Grunge Dots Stencil.
- I used blue ink on the top of this stencil and green on the bottom, creating the basics for a scene. (having the Squeezed Rectangle stencil on the bottom meant that the ink was kept within it’s borders.
- I removed the stencils and trimmed the card face along the border created by the ink.
- I ran my ink pads along the newly cut edges, matching the colours already used.
Other:
- I laid the Mid Century Banner stencil on the front half of the card base and applied blue ink with a light hand.
- I brushed green ink in from the edges of this piece, again using a light hand.
- I looked through my Ready to Go binder and found the wee elephants, the sun and the sentiment – all just waiting for a chance to shine.
Assembly
- I put dimensional tape on the back of the card face and centered it on the card base.
- I glued the elephants and the sun in place as shown.
- After experimenting a bit I decided that the sentiment would be best about halfway down on the right, and put it in place.
Final Thoughts:
I’ve had all of the components for this card for quite a while – except for the inked up card base. I was delighted to put them into use, and to discover that they were willing to play nicely together.
I initially intended this to be a flat cardface, with the stencilled pattern inked directly onto the card base, however an inky glitch required the card face to be cut out – and after that dimensional tape seemed like a good idea to make it really stand out.
I feel that the green ink applied to the card base is a bit too dominant: if I were to recreate this card I would not apply it, or I would use an even lighter hand.
Supplies: (and links where possible)
I have listed which products I have used, and where they may be purchased. It’s a huge marketplace and in most instances, there are multiple sources and many alternatives to choose from.
Stencil:
Marvellous Masks, Squeezed Rectangle: A Colorful Life Designs
Grunge Dots: a Colorful Life Designs
Mid Century Banners: A Colorful Life Designs
Waffle Flower Grip Mat, 8.5 x 6.5, Scrapbook.com
Versamark Embossing Ink: Simon Says Stamp
Clear Embossing Powder, Wow, Simon Says Stamp
Stamps:
Elephants: Studio Light (retired)
Sun: Here Comes the Sun, Tayored Expressions
Ink: Stampin’ Up!
Blending Brushes: Stampin’ Up!
Versafine Onyx, Simon Says Stamp
Adhesive: Tombow Aqua, Michaels
Card Base & Card Face: Accent 100 lb., Amazon
Do you have comments or thoughts to share on this design? Drop me a line in the Comments Section below – I’d love to hear from you!
You can also use the Comments Section to be notified when I release new work.
Mid Century Banner by a Colorful Life Designs