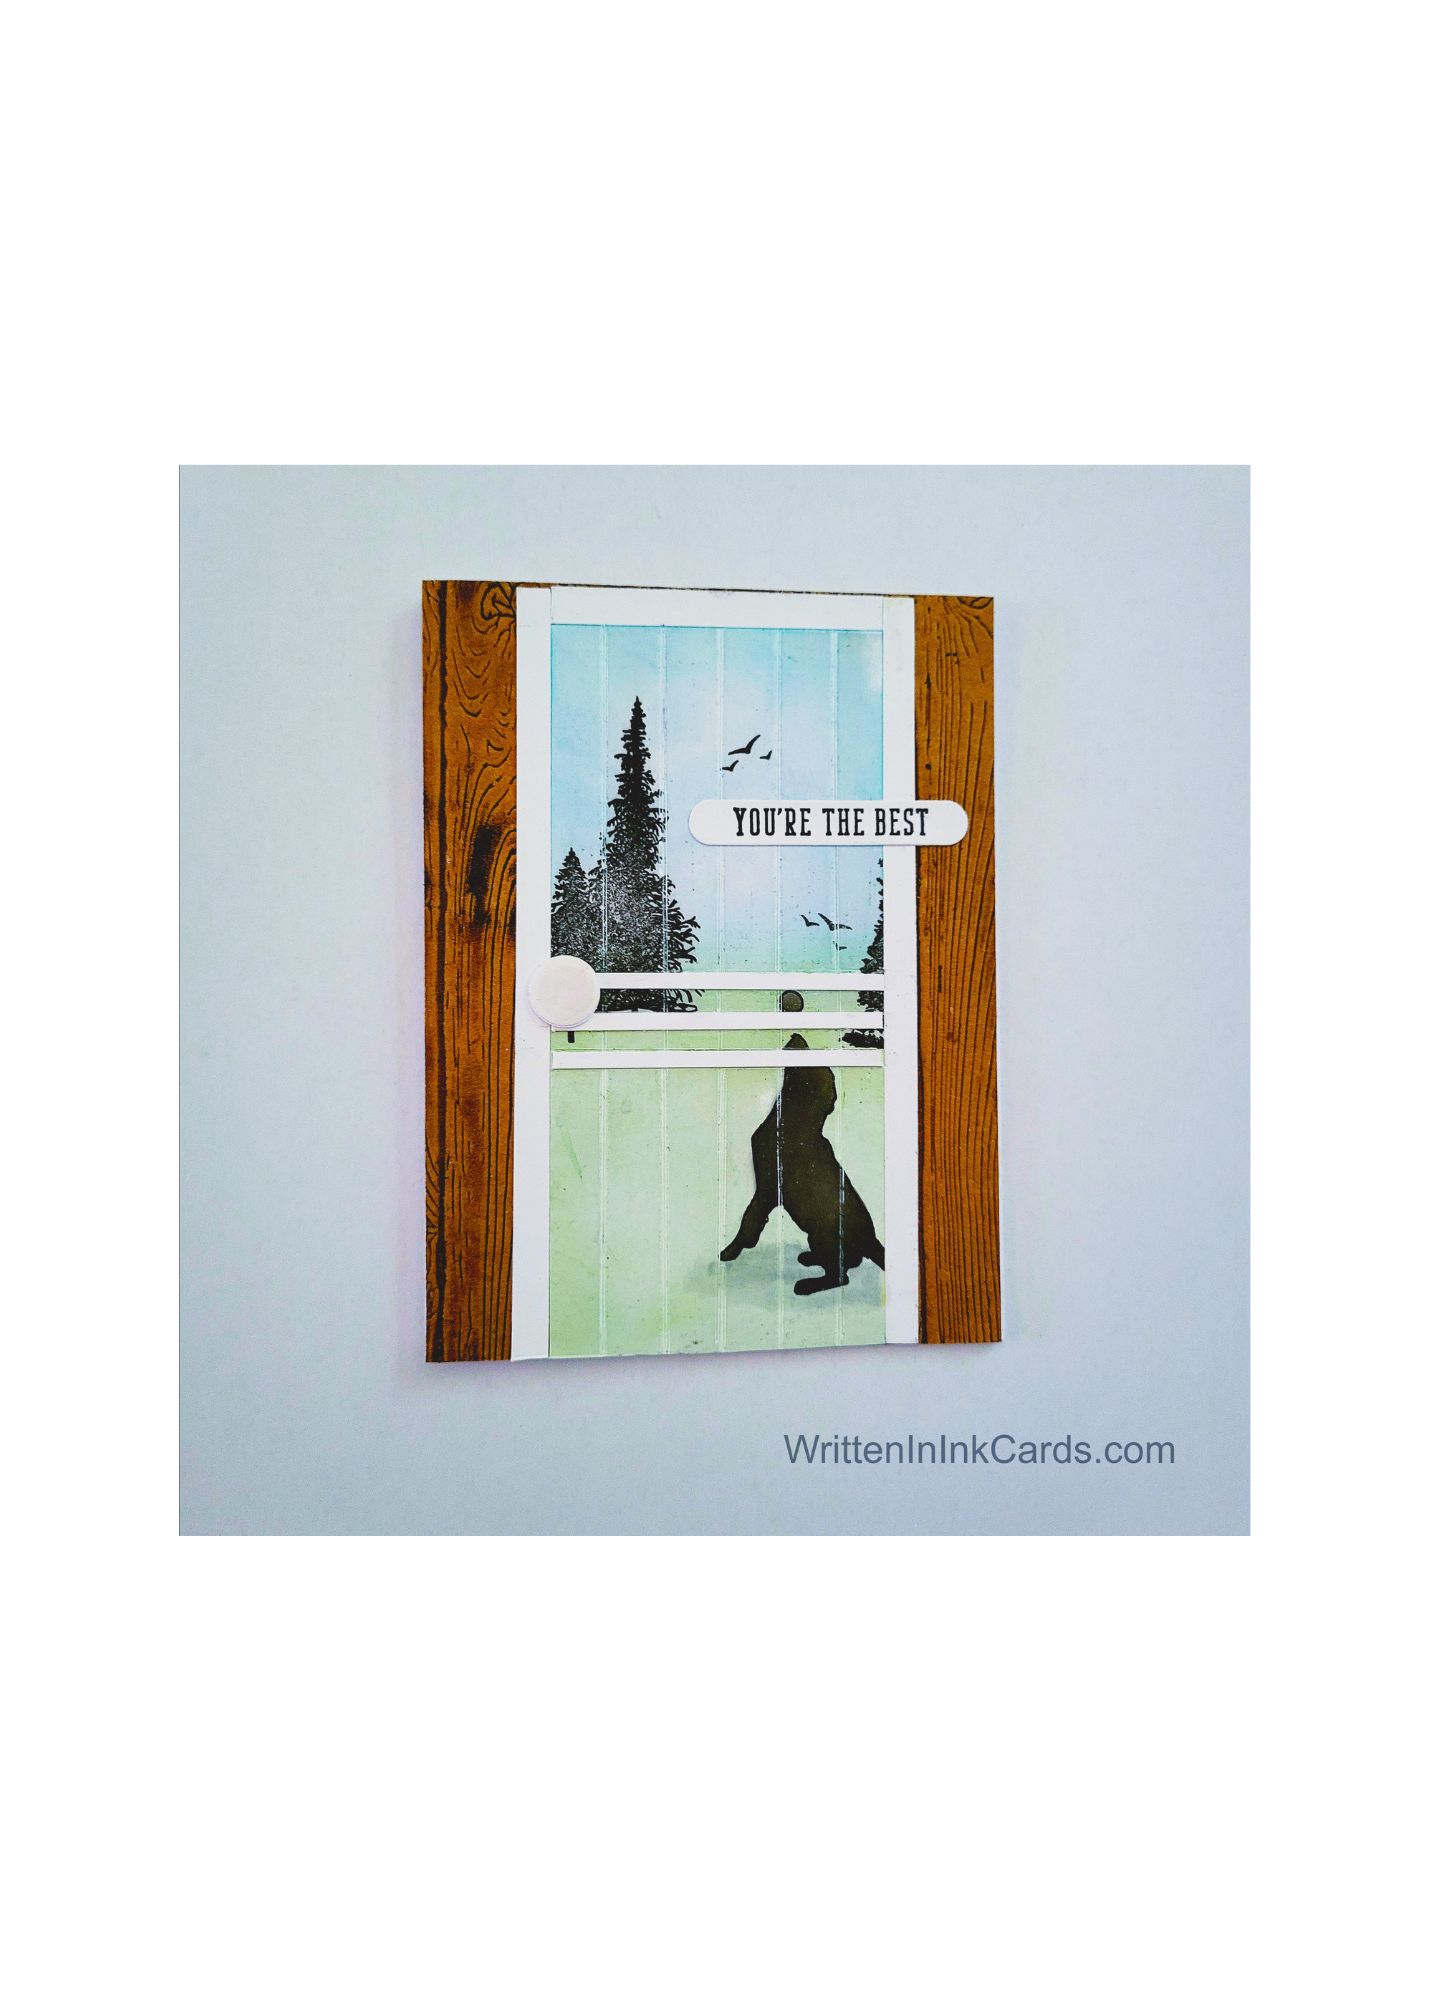

Would you like to experiment with a design like this? You’ll find a supply list below, including a link to the stencils I used from A Colorful Life Designs. Follow the link and use the discount code ChrisFan10 to save 10% on your entire order! (Master Creator Bundles are excluded as they already have a 20% discount built in.)
Let’s get Started:
Card Base: 5.5 x 8.5, scored and folded at 4.25
Border Layer: 5.5 x 4.25
Card Face: 5.5 x 4
Card Face:
- After laying the card face down on my grip mat, I positioned the Screen Door stencil and brushed green ink onto the bottom to represent grass, allowing variation in the depth of colour and building colour up a bit at the bottom.
- I added blue to the top of the card face to represent sky, allowing gaps in colour to create clouds.
- I grabbed the Dogs Playing stencil and carefully positioned the section I wanted over the first stencil. I created the dog using black ink.
- Leaving the first stencil in place created the lines on the dog and the effect of the dog being on the other side of the screen door.
- I put both stencils off to the side and placed the card face in my stamp positioner. I added the trees and birds using the same black ink.
Other:
- I put the border cardstock into an embossing folder and ran it through the Big Shot, adding planked wall texture to the paper. I brushed brown ink onto this piece, adding to the effect.
- I cut three ¼” pieces of white cardstock, and three ⅛” pieces of white cardstock.
- I put clear embossing powder on a scrap of cardstock and set it with my heat gun. I used a ½” circular punch to create the doorknob. (I used the embossing powder to create the look of an old porcelain knob.)
- I looked through my sentiment binder and selected one to work with the image being created.
- I often create sentiments in advance to save against future need: this is a great time saver, and also a good way to spend time when I’m not in the mood to create a design.
Assembly
- I glued the three ¼” strips around the outside of the screen door, cutting to length as I glued them in place.
- I glued the three ⅛” strips across the width of the door, trimming as necessary.
- I glued the doorknob in place.
- I glued the brown woodgrain layer onto the card base.
- I centered the completed card face on top of the wood grain layer.
- I added the sentiment as shown.
Final Thoughts:
My goal was to create a scene where we are looking out at a tranquil summer day through a screen door: I like the scene as created, but if I were to recreate this, I’d add some water to the scene, not just grass and sky. This would make it feel like a cottage.
Supplies: (and links where possible)
I have listed the products I have used and where they can be purchased. It’s a huge marketplace, and in most instances, there are multiple sources and many alternatives to choose from.
Stencils:
Dogs Playing, A Colorful Life Designs
Screen Door, A Colorful Life Designs
Versamark Embossing Ink: R&R Scrapbooking
Clear Embossing Powder, Wow, R&R Scrapbooking
Ink: Stampin’ Up!
Blending Brushes: Stampin’ Up!
Versafine Onyx, Simon Says Stamp
Adhesive: Tombow Aqua, Michaels
Card Base & Card Face: Accent 100 lb., Amazon
Do you have any comments or thoughts on this design? Drop me a line in the Comments Section below – I’d love to hear from you!
You can also use the Comments Section to be notified when I release new work.
Dogs Playing

Screen Door
