make a card that makes them say “WOW!”


Would you like to experiment with a design like this? You’ll find a supply list below, including a link to the stencil I used from A Colorful Life Designs. Follow the link and use discount code ChrisFan10 to save 10% on your entire order! (Master Creator Bundles are excluded as they already have a 20% discount built in.)
Let’s get Started:
Card Base: 5.5 x 8.5, scored and folded at 4.25
Card Face: 5.25 x 4
When I work with Duo Gel or embossing pastes I don’t use my Grip Mat – purely a personal preference in the interest of protecting the surface of the mat.
Card Face:
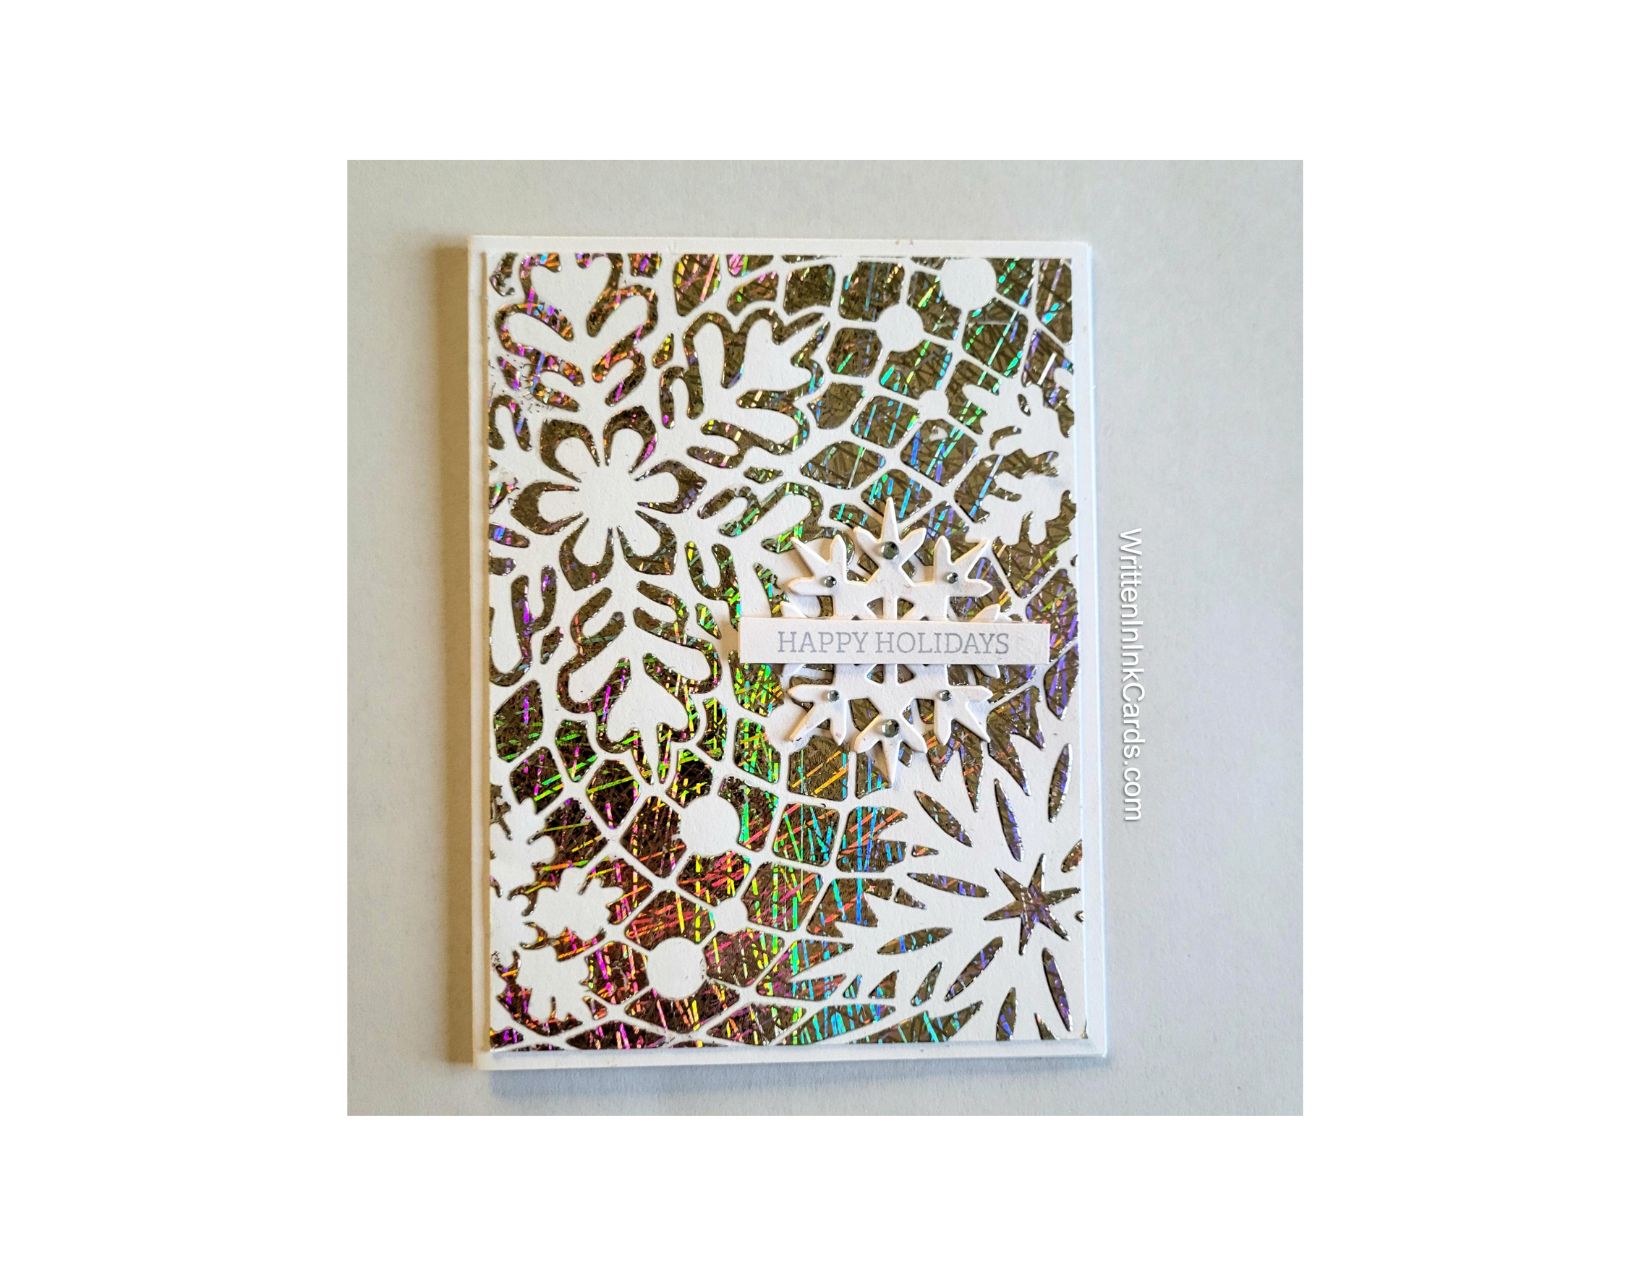
- I put my card face on a sheet of scrap paper, positioned the stencil and fastened it in place with Mint Tape.
- I spread Duo Gel over the entire surface and then carefully removed the stencil. The stencil is immediately immersed in water to prevent the gel from drying on the surface.
- I put the card face aside to dry. Duo Gel is dry when it is completely clear – I usually leave it for two or three hours before coming back to it.
- I don’t have running water near my craft room, so when working with this gel or pastes I have a container of water on the floor beside me so I can immerse the stencils immediately. I usually do several of these at a time when I settle down to work with either gel or paste.
- Once the card face had dried I laid a piece of transfer foil on top and ran it through the Big Shot.
- The pressure from the machine caused the pretty part of the foil to stick to the Duo Gel, so when I removed the sheet, the silver stayed behind on the stencilled pattern.
Other:
- I used a scrap of heavy white cardstock to cut out the snowflake.
- I looked through my sentiment binder and selected one that would work for this card.
Assembly
- I put dimensional foam on the back of my card face, and then centered it on the card base.
- I glued the snowflake to the card face as shown. (I allowed a little extra time for the liquid glue to grab on the foiled surface.)
- I glued the sentiment across the center of the snowflake.
- I added rhinestones to the top and bottom of the snowflake.
Final Thoughts:
If you’ve never tried foiling with stencils and duo gel, I recommend it! It’s a lot of fun with gorgeous results – just be certain to buy transfer foil for this purpose and you’re good to go.
This was a really fast card to make, but it was time consuming to figure out how to use the panel. The foiling is gorgeous, and really packs a punch. I tried several ideas, put it aside for a while, tried a few more …. And finally decided on the design that you see in the photo.
Supplies: (and links where possible)
I have listed which products I have used, and where they may be purchased. It’s a huge marketplace and in most instances, there are multiple sources and many alternatives to choose from.
Stencil: Snowflake Net, A Colorful Life Designs
Waffle Flower Grip Mat, 8.5 x 6.5, Scrapbook.com
Versamark Embossing Ink: Simon Says Stamp
Clear Embossing Powder, Wow, Simon Says Stamp
Duo Gel: Deco Foil, R& R Scrapbooking
Transfer Foil: Shattered Glass, Deco Foil, R&R Scrapbooking
Die: Recollections, Michaels (retired)
Ink: Stampin’ Up!
Adhesive: Tombow Aqua, Michaels
Card Base & Card Face: Accent 100 lb., Amazon
Do you have comments or thoughts to share on this design? Drop me a line in the Comments Section below – I’d love to hear from you!
You can also use the Comments Section to be notified when I release new work.
Snowflake Net by A Colorful Life Designs
