
Would you like to experiment with a design like this? You’ll find a supply list below, including a link to the stencil I used from A Colorful Life Designs. Follow the link and use discount code ChrisFan10 to save 10% on your entire order! (Master Creator Bundles are excluded as they already have a 20% discount built in.)
Let’s get Started:
Card Base: 5.5 x 8.5, scored and folded at 4.25
Black Border Layer: 5.5 x 4.25
Card Face: 5.25 x 4
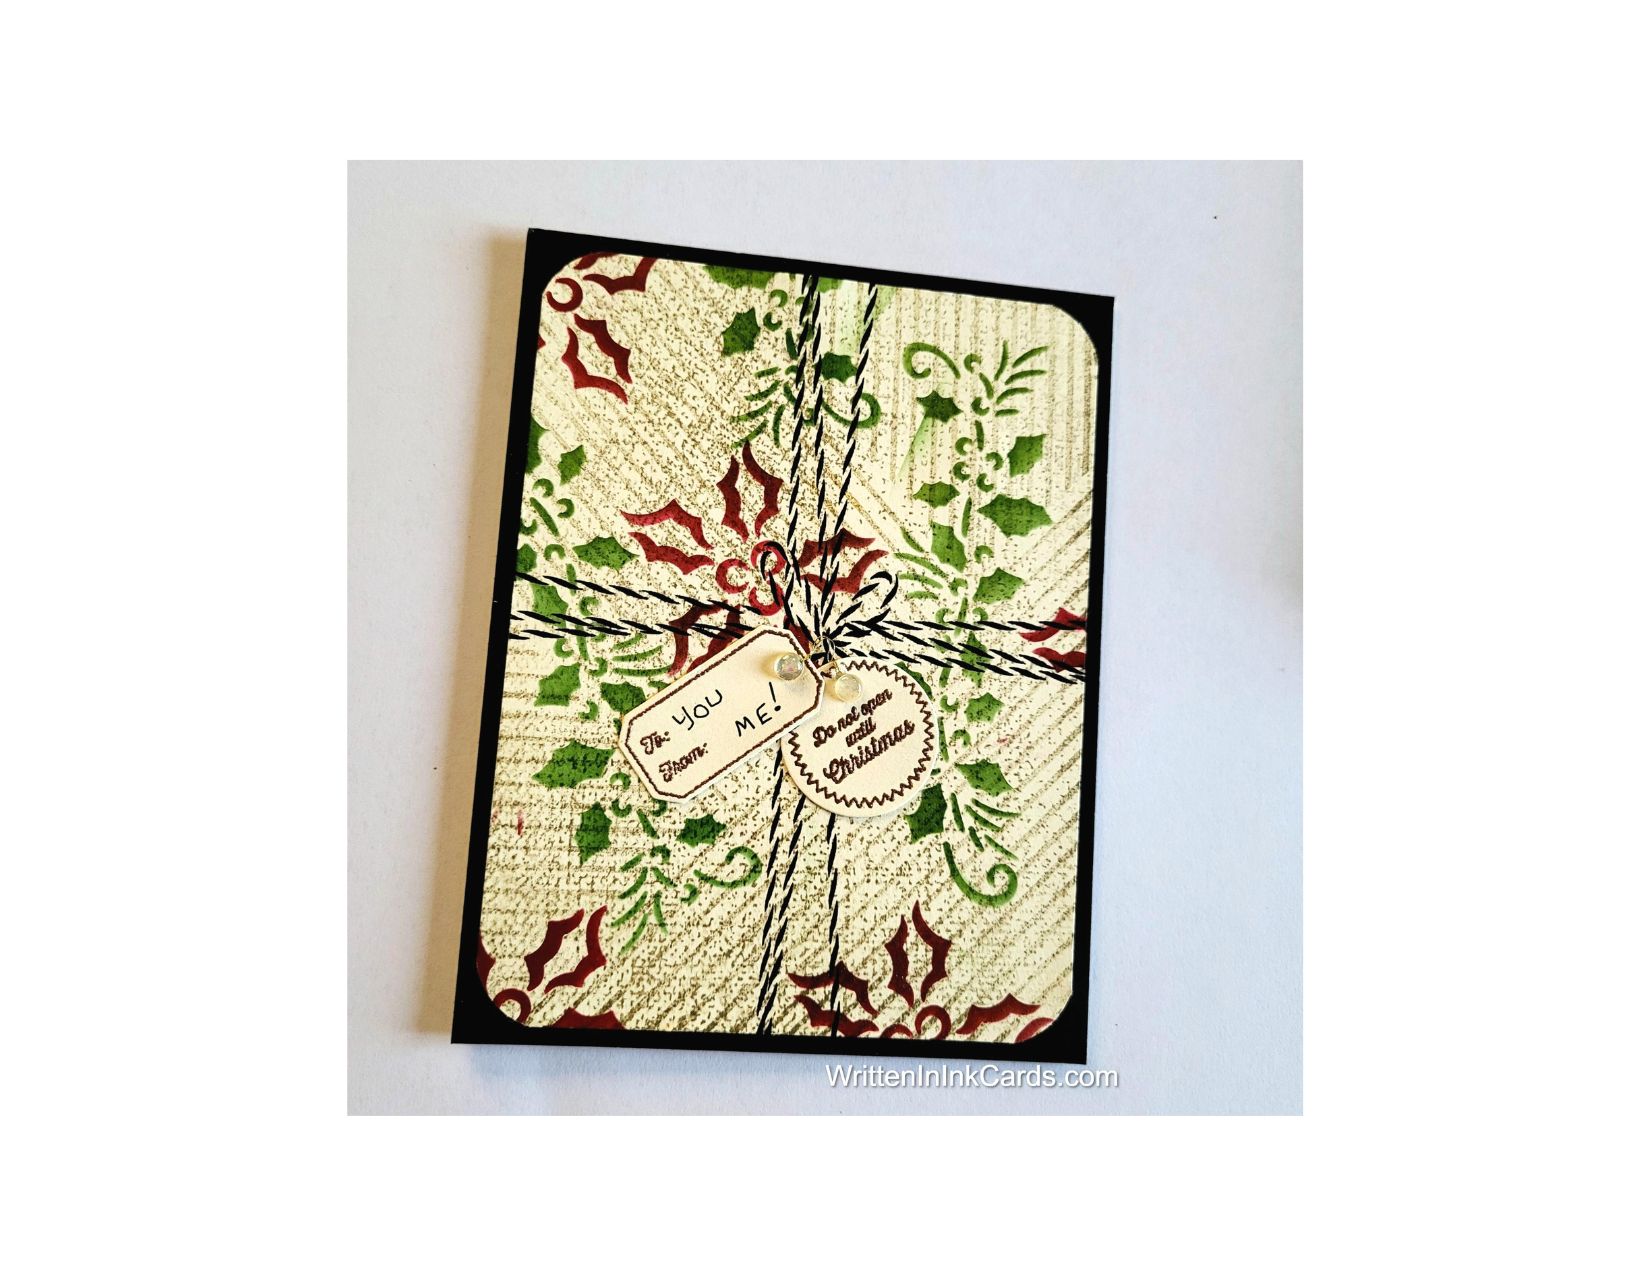
Card Face:
- I laid the card face onto my grip mat and positioned the stencil with the ivy swag where I wanted it. I used a small blending brush and green ink over this part of the stencil, being careful to avoid ink in other open areas on the stencil.
- I moved the stencil and added ivy to other sections of the card face randomly.
- I wiped the stencil down to remove the green ink. I added the poinsettias with red ink, switching to the small brush designated for that colour.
- The stencilling was complete, but I wanted more detail in the background, so I added two different backgrounds stamps with light brown ink.
To use a background stamp:
It can be difficult to get a good impression with a background stamp – there’s a lot of area to cover. I get good results with this method – I’m quite certain I saw it on Youtube, but cannot remember who to give credit to.
I lay the stamp on my work surface and ink it up thoroughly, going over it more than once to be certain I’ve got good coverage.
I lay my card face directly on this, carefully lining up the edges so that it’s straight. I hold it down with one hand to be certain that it doesn’t move.
I place a piece of copy paper over the card face very carefully, not allowing any movement.
I run my fingers or palm over the copy paper, switching hands as necessary – one holding everything still and the other transferring ink.
When I’m satisfied I remove the copy paper and then the card face, careful not to smudge.
I use the copy paper to keep ink off of my hands – it will inevitably transfer to the card face! (The stamps are larger than the card face, so there is exposed ink.)
This method allows me to vary pressure or skip over parts of the image if I don’t want solid inking.
I often use a slightly larger piece of cardstock than I need: if I don’t get it quite straight, I can trim it down and fix that.
- With the background complete I put the card face into my stamp positioner and added the bakers twine and bow images using Versafine Onyx ink.
- I used a corner rounder punch on each corner.
Other:
- I looked through my sentiment binder and found these wee gift tags which had been created and saved for future use … it saves so much time to have things like this ready and waiting.
Assembly
- I glued the black border layer to the card base, and then centered the card face on top of these.
- I added the tiny gift tags as shown.
Final Thoughts:
I think this card face would have been good with only one background stamp rather than two: if I recreate the design I will try that.
I was trying for the look of a retro Christmas gift with this card – not as successfully as hoped, but it’s a fun card anyway.
Supplies: (and links where possible)
I have listed which products I have used, and where they may be purchased. It’s a huge marketplace and in most instances, there are multiple sources and many alternatives to choose from.
Stencil: Retro Candy Canes, A Colorful Life Designs
Waffle Flower Grip Mat, 8.5 x 6.5, Scrapbook.com
Stamps:
Rustic Linen, Altenew
Woven Stripes, Altenew
Handmade Twine Bows, Picket Fence
Bakers Twine, Picket Fence, Scrapbook.com
Ink: Stampin’ Up!
Small Blending Brushes: Waffle Flower, Scrap n’ Stamp
Versafine Onyx, Simon Says Stamp
Adhesive: Tombow Aqua, Michaels
Cream Card Base & Card Face: Recollections 100 lb., Michaels
Do you have comments or thoughts to share on this design? Drop me a line in the Comments Section below – I’d love to hear from you!
You can also use the Comments Section to be notified when I release new work.
Retro Candy Canes by A Colorful Life Designs
