
Would you like to experiment with a design like this? You’ll find a supply list below, including a link to the stencil I used from A Colorful Life Designs. Follow the link and use discount code ChrisFan10 to save 10% on your entire order! (Master Creator Bundles are excluded as they already have a 20% discount built in.)
Let’s get Started:
Card Base: 5.5 x 8.5, scored and folded at 4.25
Card Face: 5.5 x 4.25
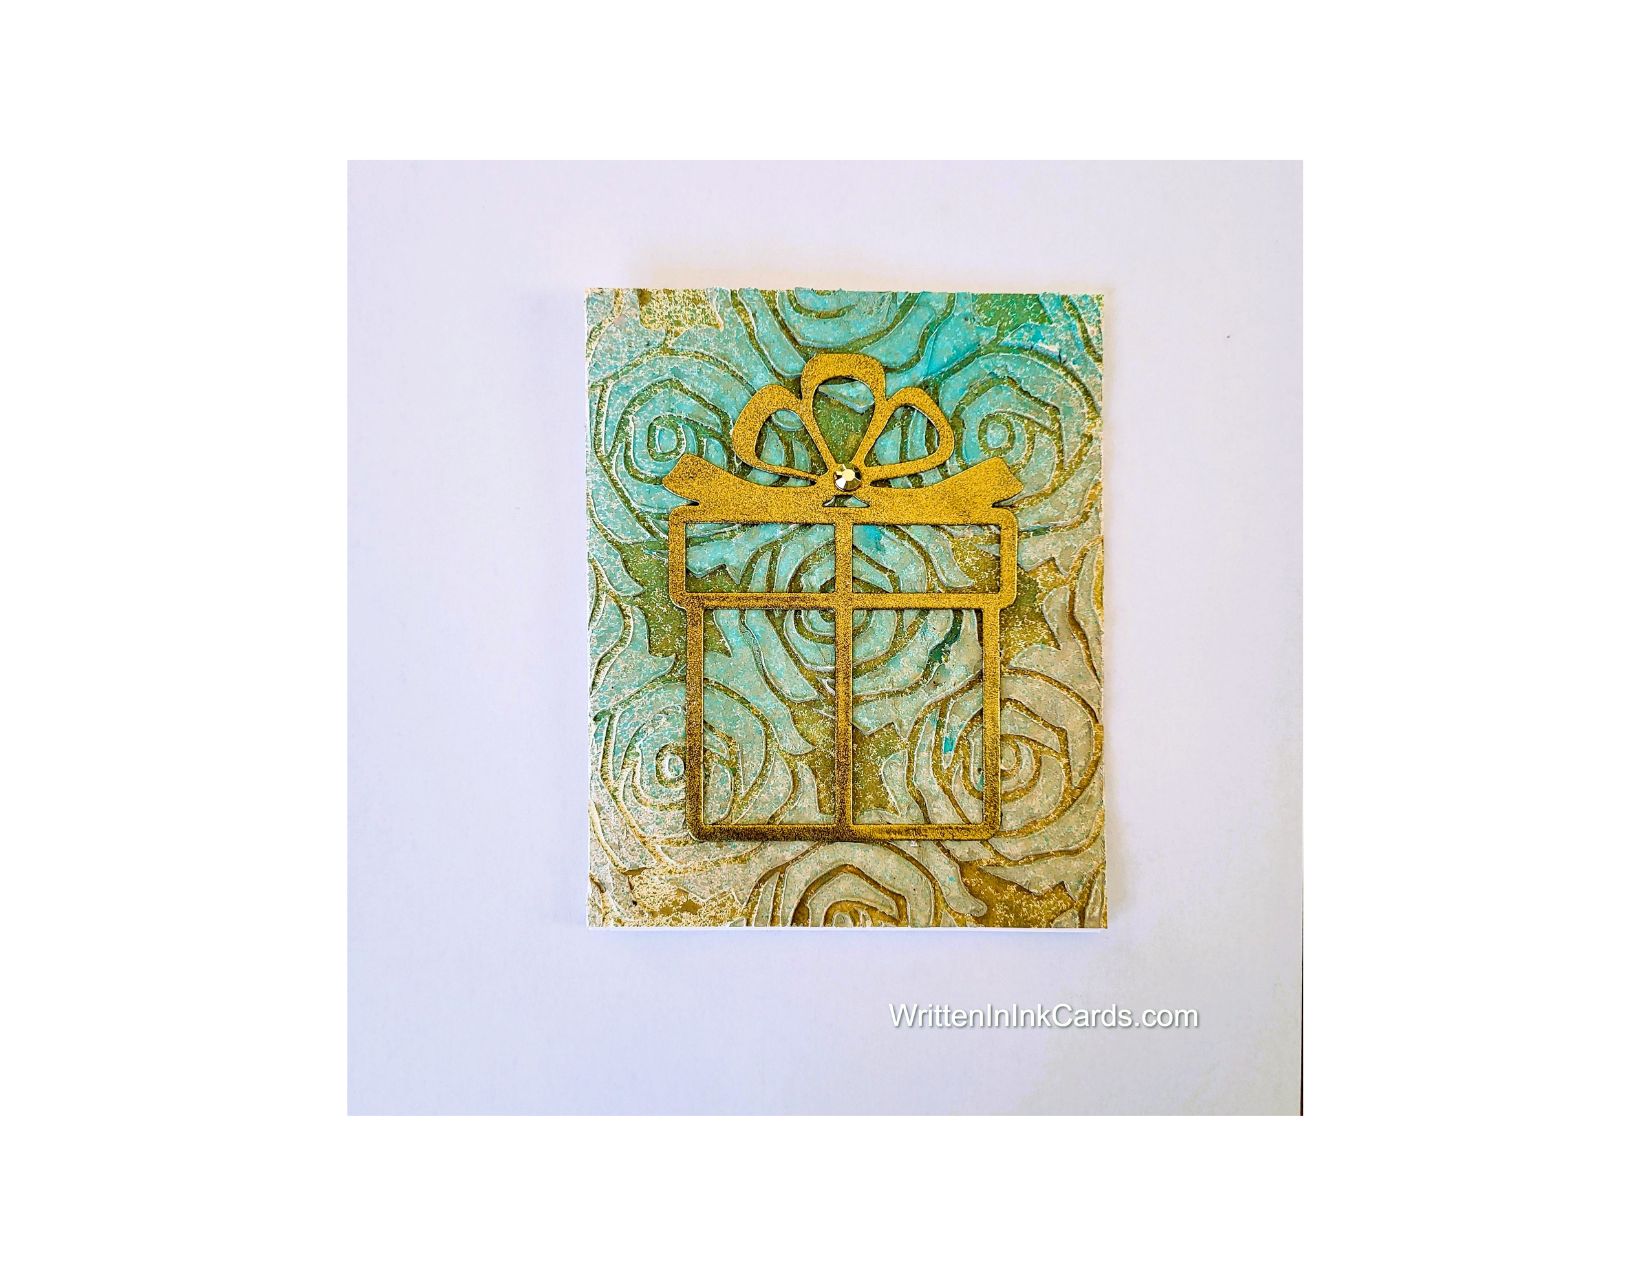
I love experimenting with new (to me) techniques and products: this card was created using spackle as an embossing paste. I remembered something from Youtube that I saw a few years ago, demonstrating that “something from a hardware store” made great embossing paste. The demonstrator was perfectly clear in what that product was – but I cannot remember! This was my attempt to substitute, and it was really successful!
Card Face:
- I put my card face onto a piece of scrap paper, positioned the stencil and secured both with Mint Tape.
- I spread spackle across all exposed areas, removed the stencil and put the card face aside to dry.
- I put the stencil into water immediately, to prevent the spackle from drying on the stencil.
When I work with embossing paste (or spackle, LOL) I prefer not to use my Grip Mat: I’m forever going beyond the paper with the paste, and I don’t want to get it on the Mat.
Other:
I had previously di- cut the gift from patterned paper: it wasn’t used at that time so I saved it in my Ready to Go Binder until it was needed.
- I pressed the die cut into my Versamark embossing ink pad, sprinkled it with gold powder and set it with my heat gun.
- There were a couple of spots that weren’t completely covered, so I repeated the process, and the second time around I had great coverage.
- Once the spackle had dried, I sprayed the card face with Lindy’s Magicals sprays (gold and blue). I was pretty enthusiastic with the spraying, so I left this to dry overnight.
Assembly
- I glued the card face to the card base.
- I glued the die-cut gift in the center of the card face.
- I glued a small gold embellishment in the center of the bow.
Final Thoughts:
I am impressed with how well the spackle worked. It is heavier bodied than embossing paste, so it takes a little extra work to cover the areas well, but it’s not difficult. Because it is so heavy bodied there is no danger of it seeping under the stencil – bonus!
I love the way the spackle took the spray, it’s really pretty.
Supplies: (and links where possible)
I have listed which products I have used, and where they may be purchased. It’s a huge marketplace, and in most instances, there are multiple sources and many alternatives to choose from.
Stencil: Joined Roses, A Colorful Life Designs
Versamark Embossing Ink: Simon Says Stamp
Gold Embossing Powder, Wow, R&R Scrapbooking
Dies: Gift, KSCraft, Amazon
Adhesive: Tombow Aqua, Michaels
Card Base & Card Face: Accent 100 lb., Amazon
Do you have any comments or thoughts on this design? Drop me a line in the Comments Section below – I’d love to hear from you!
You can also use the Comments Section to be notified when I release new work.
Joined Roses
