
Would you like to experiment with a design like this? You’ll find a supply list below, including a link to the stencil I used from A Colorful Life Designs. Follow the link and use the discount code ChrisFan10 to save 10% on your entire order! (Master Creator Bundles are excluded as they already have a 20% discount built in.)
Let’s get Started:
Card Base: 5.25 10.5, folded and score dat 5.25
Black Border Layer: 5.25 x 5.25
Card Face: 5 x 5
Card Face:
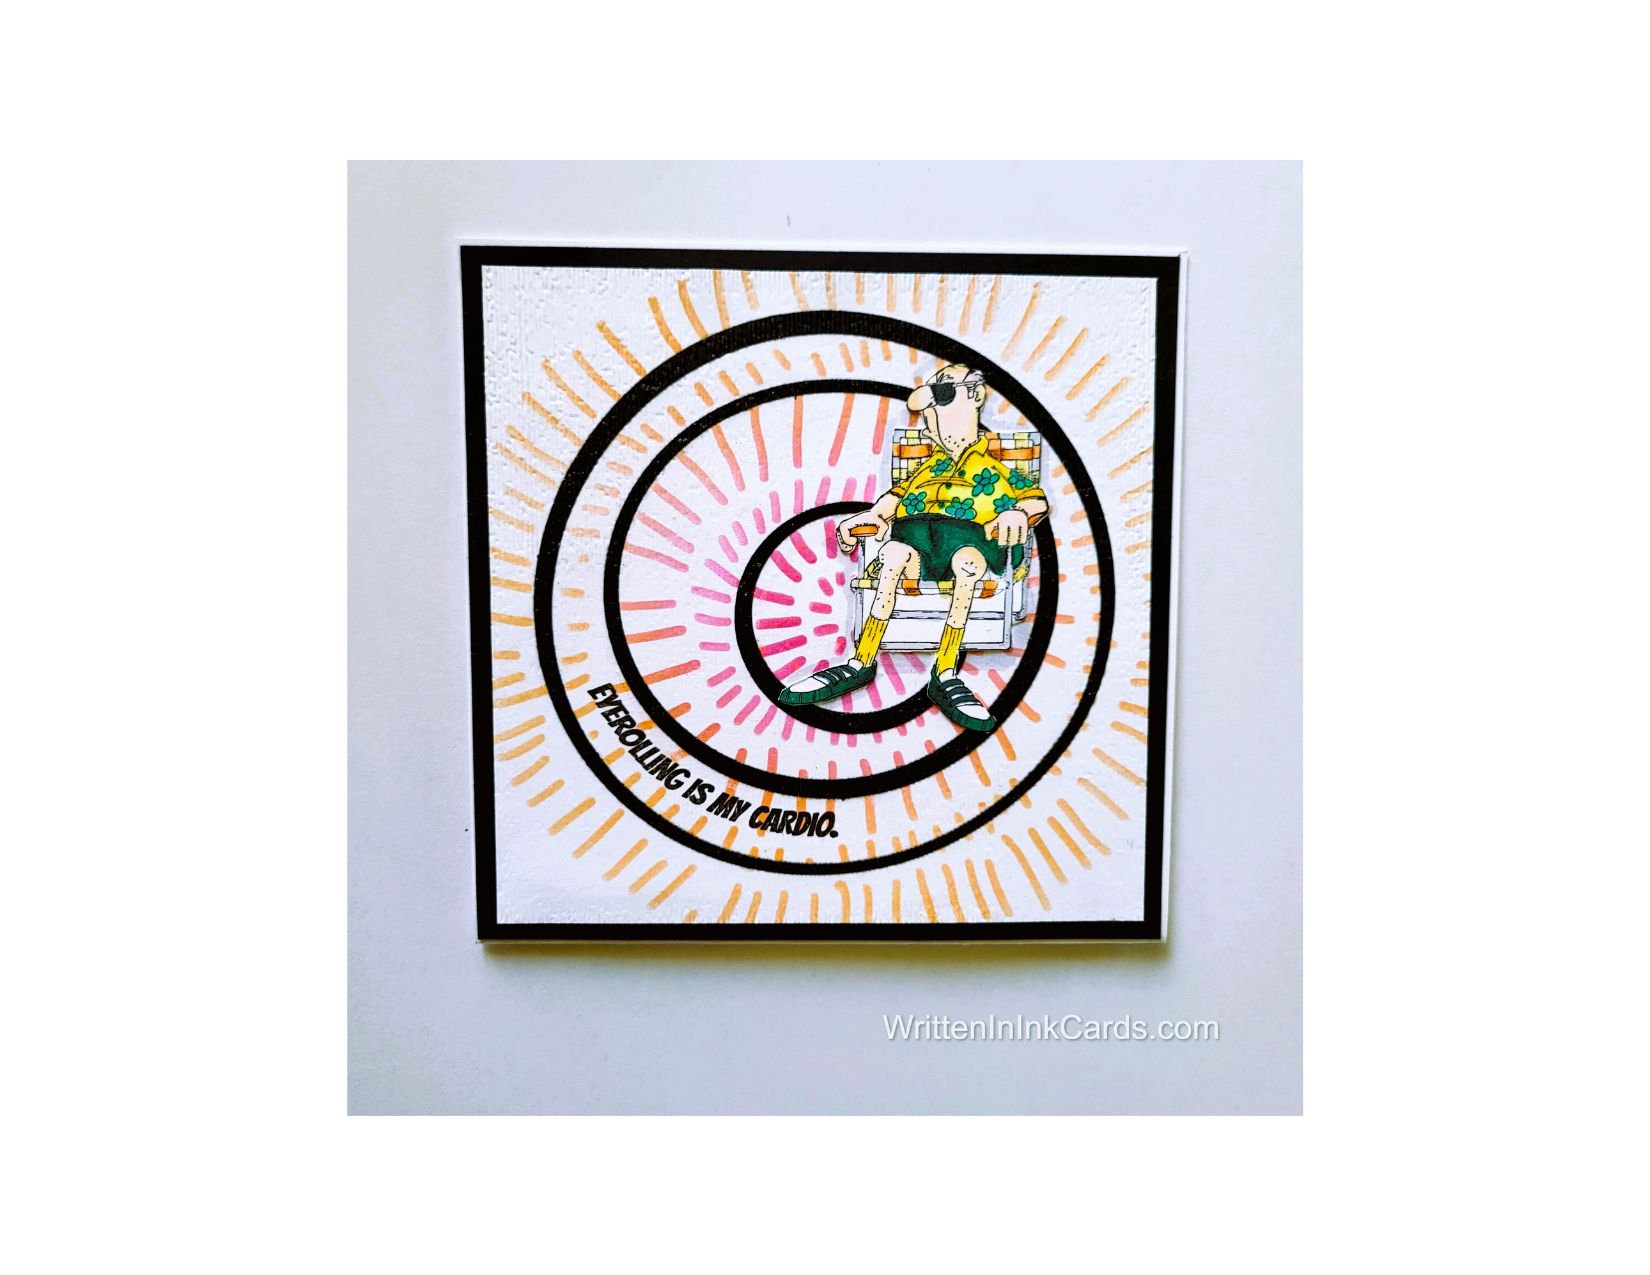
- I laid the card face down on the grip mat and positioned the stencil.
- I applied vibrant pink ink in the center of the stencil, and soft orange ink to the outer edges, blending the two where they met.
Other:
- I looked through my Ready to Go Binder to find the fine fellow you see in the image: I had previously coloured and fussy-cut him and wanted to use him on this card.
- I cut three circles using my infinity dies, but in each instance, instead of ensuring even spacing, I pushed the dies together on one side, creating uneven circles.
Assembly
- I glued the black border layer to the card base.
- I glued the three circles onto the card face, making the spacing uneven to echo the wonky shapes.
- I put the card face into my stamp positioner and created a curve with a photopolymer stamp that worked between the two outer circles. I stamped the sentiment with Versafine Onyx.
Photopolymer stamps can be manipulated into a curve: as soon as I was done stamping I removed it from the stamp positioner and allowed it to return to it’s original shape.
- I glued the old guy to the card face as shown.
- I glued the card face to the card base.
Final Thoughts:
I like this card, but looking at it now, I wish I had put a piece of vellum under the old guy to make him stand out against that background.
Supplies: (and links where possible)
I have listed the products I have used and where they can be purchased. It’s a huge marketplace, and in most instances, there are multiple sources and many alternatives to choose from.
Stencil: Spotlight, A Colorful Life Designs
Stamps:
Norm, Art Impressions, Amazon
Sentiment: Kraftigali (no longer in business)
Dies: Circular Infinity Dies, Hero Arts
Ink: Stampin’ Up!
Blending Brushes: Stampin’ Up!
Versafine Onyx, Simon Says Stamp
Adhesive: Tombow Aqua, Michaels
Card Base & Card Face: Accent 100 lb., Amazon
Do you have any comments or thoughts on this design? Drop me a line in the Comments Section below – I’d love to hear from you!
You can also use the Comments Section to be notified when I release new work.
Spotlight stencil