Tag: friendship card

  • DIY Card Making: Using a Stencil for Unique Designs

    DIY Card Making: Using a Stencil for Unique Designs

    Would you like to experiment with a design like this? You’ll find a supply list below, including a link to the stencil I used from A Colorful Life Designs.  Follow the link and use discount code ChrisFan10 to save 10% on your entire order! (Master Creator Bundles are excluded as they already have a 20% discount built in.)

    Let’s get Started:

    Card Base: 5.5 x 8.5, scored and folded at 4.25

    Card Face:  5.5 x 4.25 (before tearing)

    Card Face:

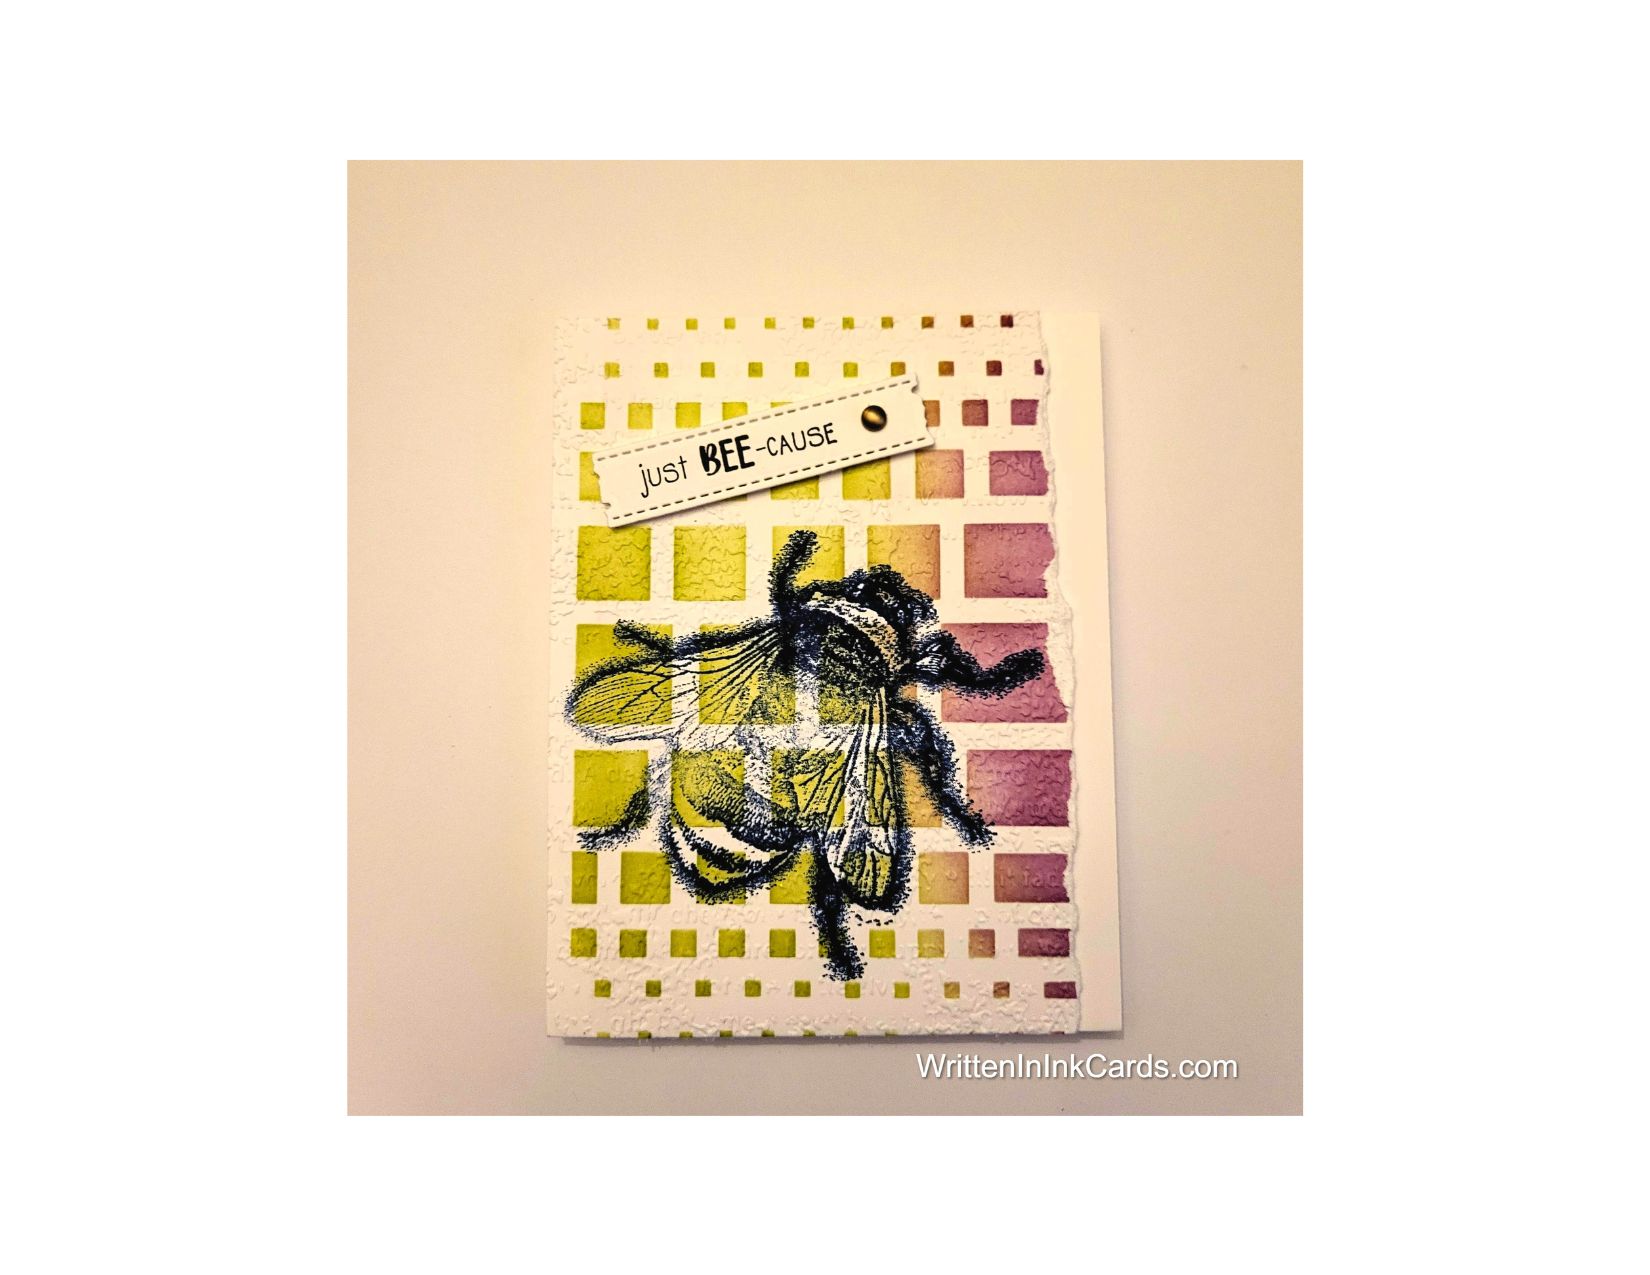
    • I laid my card face down onto the Grip Mat and positioned the stencil.
    • I used lime green ink on one end and purple on the other. I allowed the green ink to cover about ⅔  of the surface, and took care when it met the purple not to blend them too much –  there was a big possibility of creating  “mud”.
    • I put the card face into my stamp positioner and stamped the bee with Versafine Clair. 
    • I used an embossing folder to create texture on the card face.
    • I tore off the right-hand side to create texture and visual interest.

    Other:

    • I stamped the sentiment onto a scrap of cardstock,  and used a die to cut it out.

    Assembly

    • I glued the card face to the card base, aligning snugly to the left hand edge.
    • I added dimensional tape on the back of the sentiment, and put it in place as shown.
    • I added a metallic embellishment to the right-hand end of the sentiment.

    Final Thoughts:

    I’m so happy with this compilation:  I love the stencil, the image, the colours –  and they all played together wonderfully well.

    Supplies: (and links where possible)

       I have listed which products I have used, and where they may be purchased. It’s a huge marketplace and in most instances, there are multiple sources and many alternatives to choose from.

    Stencil: Ordered Lines, A Colorful Life Designs

    Waffle Flower Grip Mat, 8.5 x 6.5, Scrapbook.com

    Stamps:  Bee:  Technique Junkies  (no longer in business)

    Die: Impression Obsession  (no longer in business)

    Ink: Stampin’ Up!

    Blending Brushes: Stampin’ Up! 

    Versafine Onyx, Simon Says Stamp

    Adhesive: Tombow Aqua, Michaels

    Card Base & Card Face: Recollections 110 lb., Michaels

    Do you have comments or thoughts to share on this design?  Drop me a line in the Comments Section below –  I’d love to hear from you!

    You can also use the Comments Section  to be notified when I release new work

    Ordered Lines by A Colorful Life Designs

  • Be Your Beautiful Self – Celebrate the Wonderful Individuals in Your Life

    Be Your Beautiful Self – Celebrate the Wonderful Individuals in Your Life

    Oh, the elegance that can be added with gold!

    Would you like to experiment with a design like this? You’ll find a supply list below, including a link to the stencil I used from A Colorful Life Designs.  Follow the link and use discount code ChrisFan10 to save 10% on your entire order! (Master Creator Bundles are excluded as they already have a 20% discount built in.)

    Let’s get Started:

    Card Base: 5.25 x 10.5, scored and folded at 5.25

    Card Face:  5 x5

    Card Face:

    • I laid the card face down on the Grip Mat and positioned the stencil.  I used cranberry red ink over the exposed surface, avoiding the middle of the stencil.
    • I used an embossing marker to randomly go over some of the dots around the circle,  sprinkling the wet ink with gold embossing powder and setting it with my heat gun.

    Other:

    • I stamped the poppy outline with black ink,  and the fill-colour for the petals in the same red used in the background.
    • I used a circle punch to cut this out.
    • I taped two circular dies together on red card stock and ran them through the Big Shot to cut out the red circle.
    • I looked through my sentiment binder and selected the one shown in the picture.

    Assembly

    • I centered and glued the card face onto the card base.
    • I used the embossing pen to create a line around the edges of the card face, sprinkled gold embossing powder over this and set it with my heat gun.
    • I glued the poppy into the center of the card.
    • I glued the red ring around the poppy.
    • I put foam tape on the back of the sentiment and put it in place across the center of the blossom.
    • I put a gold pearl on both ends of the sentiment strip.

    Final Thoughts:

    This card is so pretty in real life:  the gold embossing catches the light beautifully,  and adds a touch of elegance to the finished design.

    Supplies: (and links where possible)

       I have listed which products I have used, and where they may be purchased. It’s a huge marketplace and in most instances, there are multiple sources and many alternatives to choose from.

    Stencil: Circle Moon, A Colorful Life Designs

    Waffle Flower Grip Mat, 8.5 x 6.5, Scrapbook.com

    Embossing Pen,  Ranger, R&R Scrapbooking

    Gold  Embossing Powder,  Wow, R & R Scrapbooking

    Stamps: Painted Poppies, Stampin’ Up! (retired)

    Dies: Nesting Circle Infinity Dies, Hero Arts

    Ink: Stampin’ Up!

    Blending Brushes: Stampin’ Up! 

    Versafine Onyx, Simon Says Stamp

    Adhesive: Tombow Aqua, Michaels

    Card Base & Card Face: Recollections 110 lb., Michaels

    Do you have comments or thoughts to share on this design?  Drop me a line in the Comments Section below –  I’d love to hear from you!

    You can also use the Comments Section  to be notified when I release new work

    Circle Moon by A Colorful Life Designs