Tag: creativeexpressions

  • Make Some Mid-Century Magic this Christmas

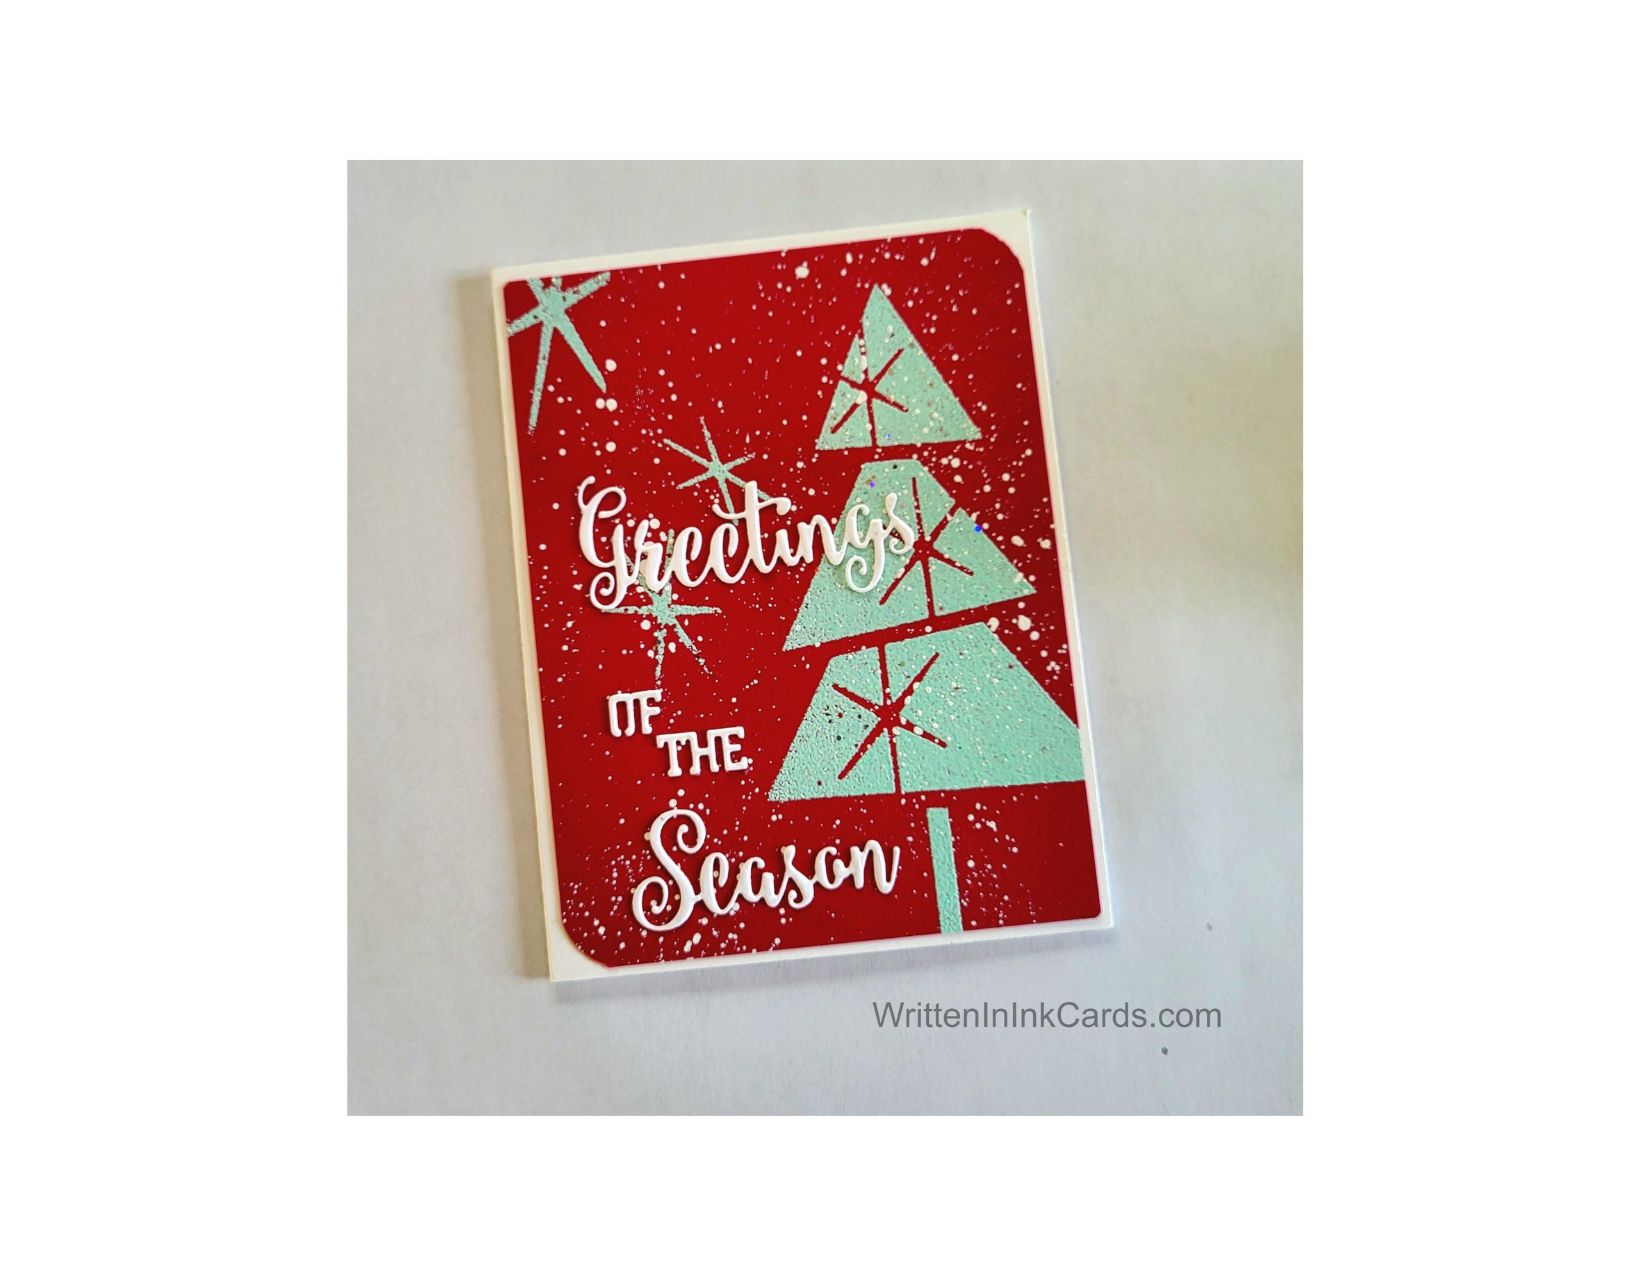
    Make Some Mid-Century Magic this Christmas

    Would you like to experiment with a design like this? You’ll find a supply list below, including a link to the stencil I used from A Colorful Life Designs.  Follow the link and use the discount code ChrisFan10 to save 10% on your entire order! (Master Creator Bundles are excluded as they already have a 20% discount built in.)

    Let’s get Started:

    Card Base: 5.5 x 8.5, scored and folded at 4.25

    Red Card Face:  5.25 x 4

    Card Face:

    • I laid the card face down on my grip mat and used a coordinating red ink to slightly darken the edges, leaving the center lighter.
    • After the ink had dried,  I positioned the stencil and masked off the openings for the stars.
    • I  pressed my Versamark embossing ink pad firmly through the openings for the tree.
    • I sprinkled light green (sparkly) embossing powder over the wet embossing ink and set it with my heat gun.
    • I repositioned the stencil and repeated the process to add the stars where I wanted them, masking off openings that were too close for comfort each time.
    • Using white acrylic,  I added spatter generously.
    • I used a punch to round the top-right and bottom-left corners.

    Other:

    • I looked through my Sentiment binder and pulled out this cutie,  cut previously and saved for just this purpose.

    Assembly

    • I glued the card face to the card base,  centering on all sides.
    • I added the sentiment as shown.

    Final Thoughts:

    I love the way this card turned out:  the colour combination,  the mid-century style,  the style of sentiment, and even the spatter –   everything played together so well!

    Supplies: (and links where possible)

       I have listed the products I have used and where they can be purchased. It’s a huge marketplace, and in most instances, there are multiple sources and many alternatives to choose from.

    Stencil: (see images below)

    Mid Century Christmas Tree, A Colorful Life Designs

    Versamark Embossing Ink: R&R Scrapbooking

    Green Embossing Powder,  Reflections, Michaels (retired)

    White Acrylic Spatter: Dr Ph Martin’s Bleed Proof White,  Taylored Expressions

    Dies:  Festive Collection,   Creative Expressions,  Ecstasy Crafts

    Ink: Stampin’ Up!

    Blending Brushes: Stampin’ Up! 

    Adhesive: Tombow Aqua, Michaels

    Card Base & Card Face:  Recollections 110 lb., Michaels

    Do you have any comments or thoughts on this design?  Drop me a line in the Comments Section below –  I’d love to hear from you!

    You can also use the Comments Section to be notified when I release new work.

    Mid Century Christmas Tree

  • “Make a Wish” and send it to a friend

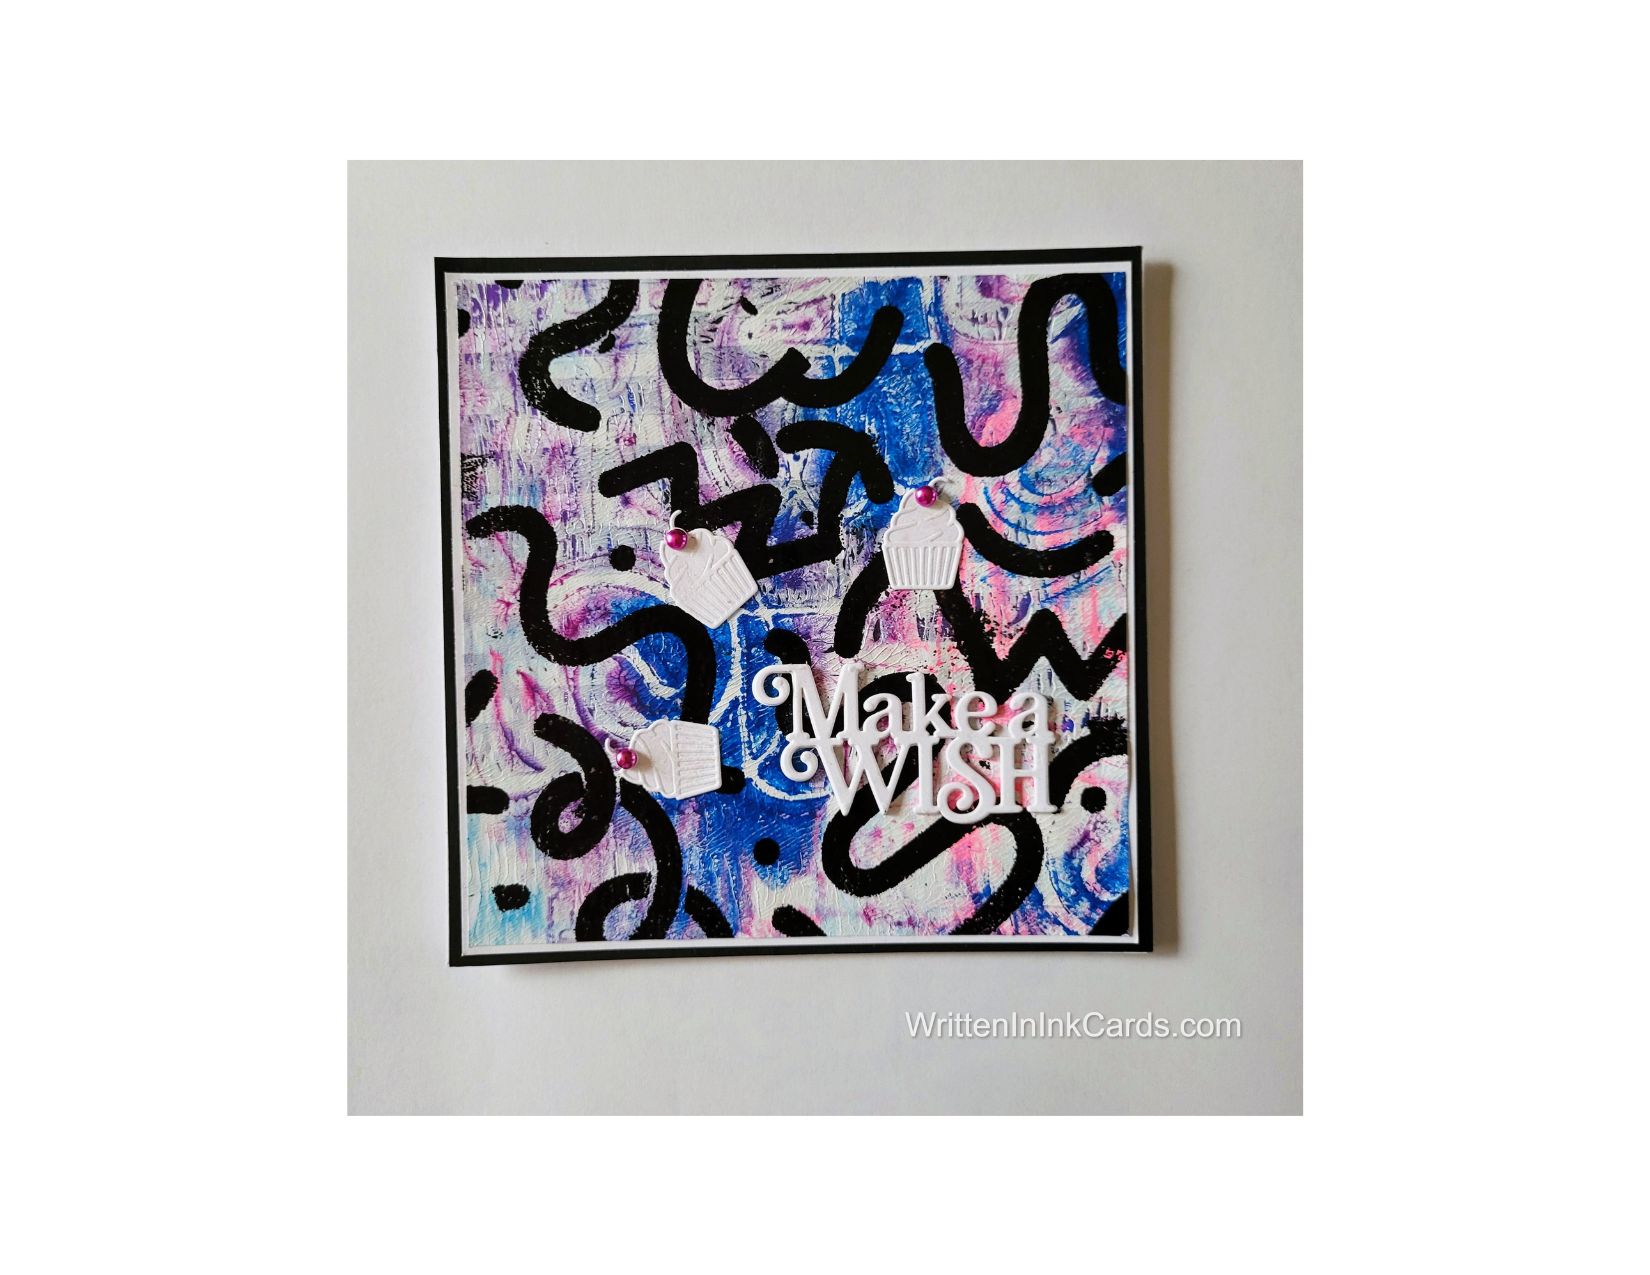
    “Make a Wish” and send it to a friend

    Would you like to experiment with a design like this? You’ll find a supply list below, including a link to the stencil I used from A Colorful Life Designs.  Follow the link and use the discount code ChrisFan10 to save 10% on your entire order! (Master Creator Bundles are excluded as they already have a 20% discount built in.)

    Let’s get Started:

    Card Base: 5.5 x 8.5, scored and folded at 4.25

    Black Border Layer: 5.25 x 5.25

    White Border Layer: 5 ⅛ x 5 ⅛

    Card Face:  5 x 5

    I love creating gel prints:  it’s an activity I share with my daughter (part of the reason I love it).  I have quite an accumulation,  and from time to time, I make a determined effort to use some of them up. This card was born during one of those times.

    Card Face:

    • I cut the gel print down to size and then placed it on the grip mat.  I positioned the stencil (it is a 6 x 9 stencil, so there are lots of options for how it’s placed on the page) and then pressed my Versamark ink pad firmly through the stencil onto the card face.
    • After removing the stencil, I sprinkled black embossing powder over the card face and set it with my heat gun.

    Other:

    • I used scraps of white cardstock to cut out the three cupcakes.  
    • I also cut three of the sentiments and glued them together, which created extra dimension and presence for the sentiment.

    Assembly

    • I glued the black border layer to the card base.
    • I centered the white border layer on top of these and then added the card face on top of both.
    • I glued the sentiment towards the bottom right as shown,  and then added the three cupcakes.
    • I added a pink embellishment to each cupcake.

    Final Thoughts:

    I love the addition of the stencilled embossing to the gel print: the die cuts finished it off perfectly.

    Supplies: (and links where possible)

       I have listed the products I have used and where to purchase them. It’s a huge marketplace, and in most instances, there are multiple sources and many alternatives to choose from.

    Stencil:  Big Squiggles,  A Colorful Life Designs

    Dies:  Make a Wish, Creative Expressions

    Adhesive: Tombow Aqua, Michaels

    Card Base & Card Face: Accent 100 lb., Amazon 

    Do you have any comments or thoughts on this design?  Drop me a line in the Comments Section below –  I’d love to hear from you!

    You can also use the Comments Section to be notified when I release new work.

    Big Squiggles

  • Support someone you Care for with a  Fast and Easy  Card

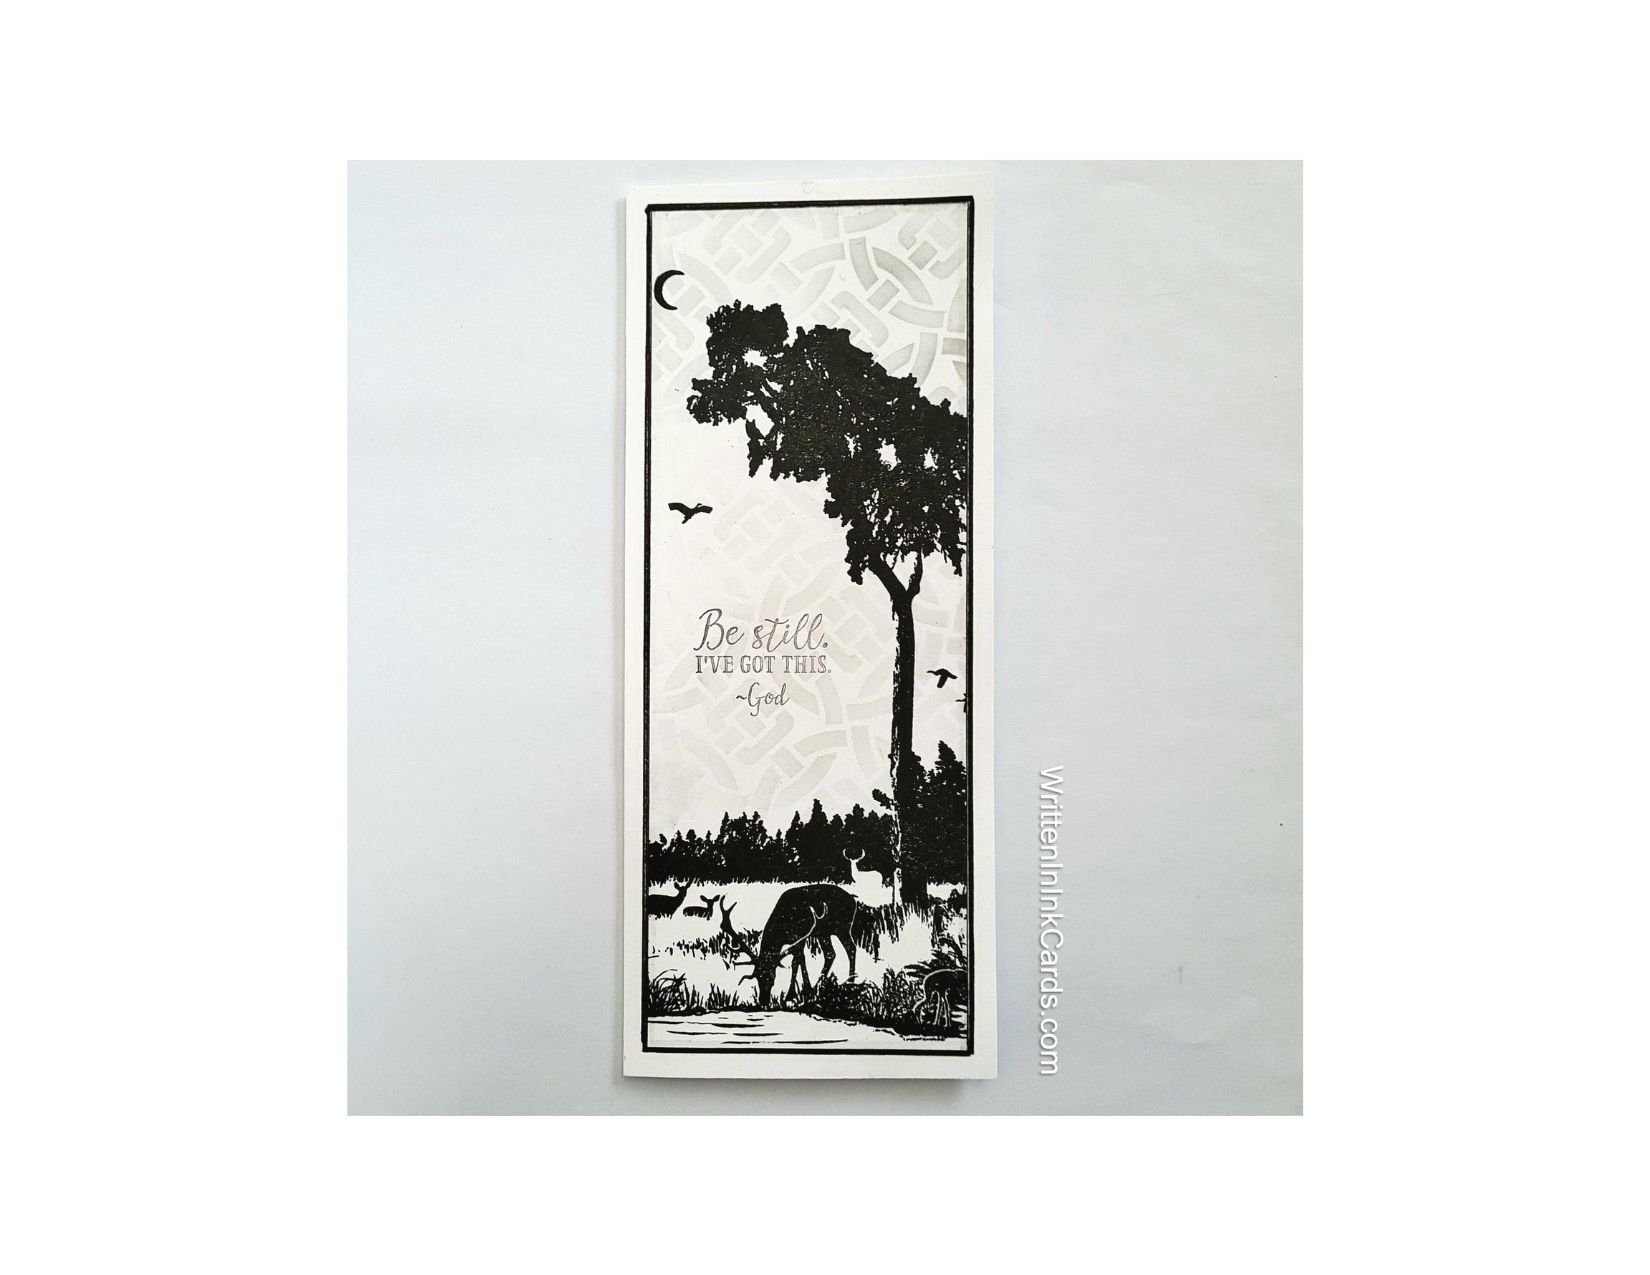
    Support someone you Care for with a Fast and Easy Card

    Would you like to experiment with a design like this? You’ll find a supply list below, including a link to the stencil I used from A Colorful Life Designs.  Follow the link and use discount code ChrisFan10 to save 10% on your entire order! (Master Creator Bundles are excluded as they already have a 20% discount built in.)

    Let’s get Started:

    Card Base: 8.5 x 7, scored and folded at 3.5

    Card Face: 8 ⅛ x 3 1/8

    Card Face:

    • I placed the card face into my stamp positioner and stamped the image with Versafine Onyx. I stamped a couple of times to create an intense image.
    • I let this dry for a couple of minutes and then placed the card face on my Grip Mat.  I positioned the stencil and added light grey ink around the image.   I allowed a variation in tone as I added ink.
    • I put the card face back into the stamp positioner and added the sentiment in the same light gray ink.

    Assembly

    • I glued the card face to the card base, centering on all sides.
    • I used a ruler and a black marker to create the narrow black border around the card face.

    Final Thoughts:

    This is such a beautiful image:  I purchased it recently, and couldn’t wait to use it.  The stencilled pattern in the background complements perfectly without distraction.

    Supplies: (and links where possible)

       I have listed which products I have used, and where they may be purchased. It’s a huge marketplace, and in most instances, there are multiple sources and many alternatives to choose from.

    Stencil: Celtic Knots, A Colorful Life Designs

    Waffle Flower Grip Mat, 8.5 x 6.5, Scrapbook.com

    Stamp:  Twilight Grazing,  Creative Expressions,  Ecstasy Crafts

    Ink: Stampin’ Up!

    Blending Brushes: Stampin’ Up! 

    Versafine Onyx, Simon Says Stamp

    Adhesive: Tombow Aqua, Michaels

    Card Base & Card Face: Accent 100 lb., Amazon

    Do you have any comments or thoughts on this design?  Drop me a line in the Comments Section below –  I’d love to hear from you!

    You can also use the Comments Section to be notified when I release new work.

    Celtic Knots