Tag: christmascard

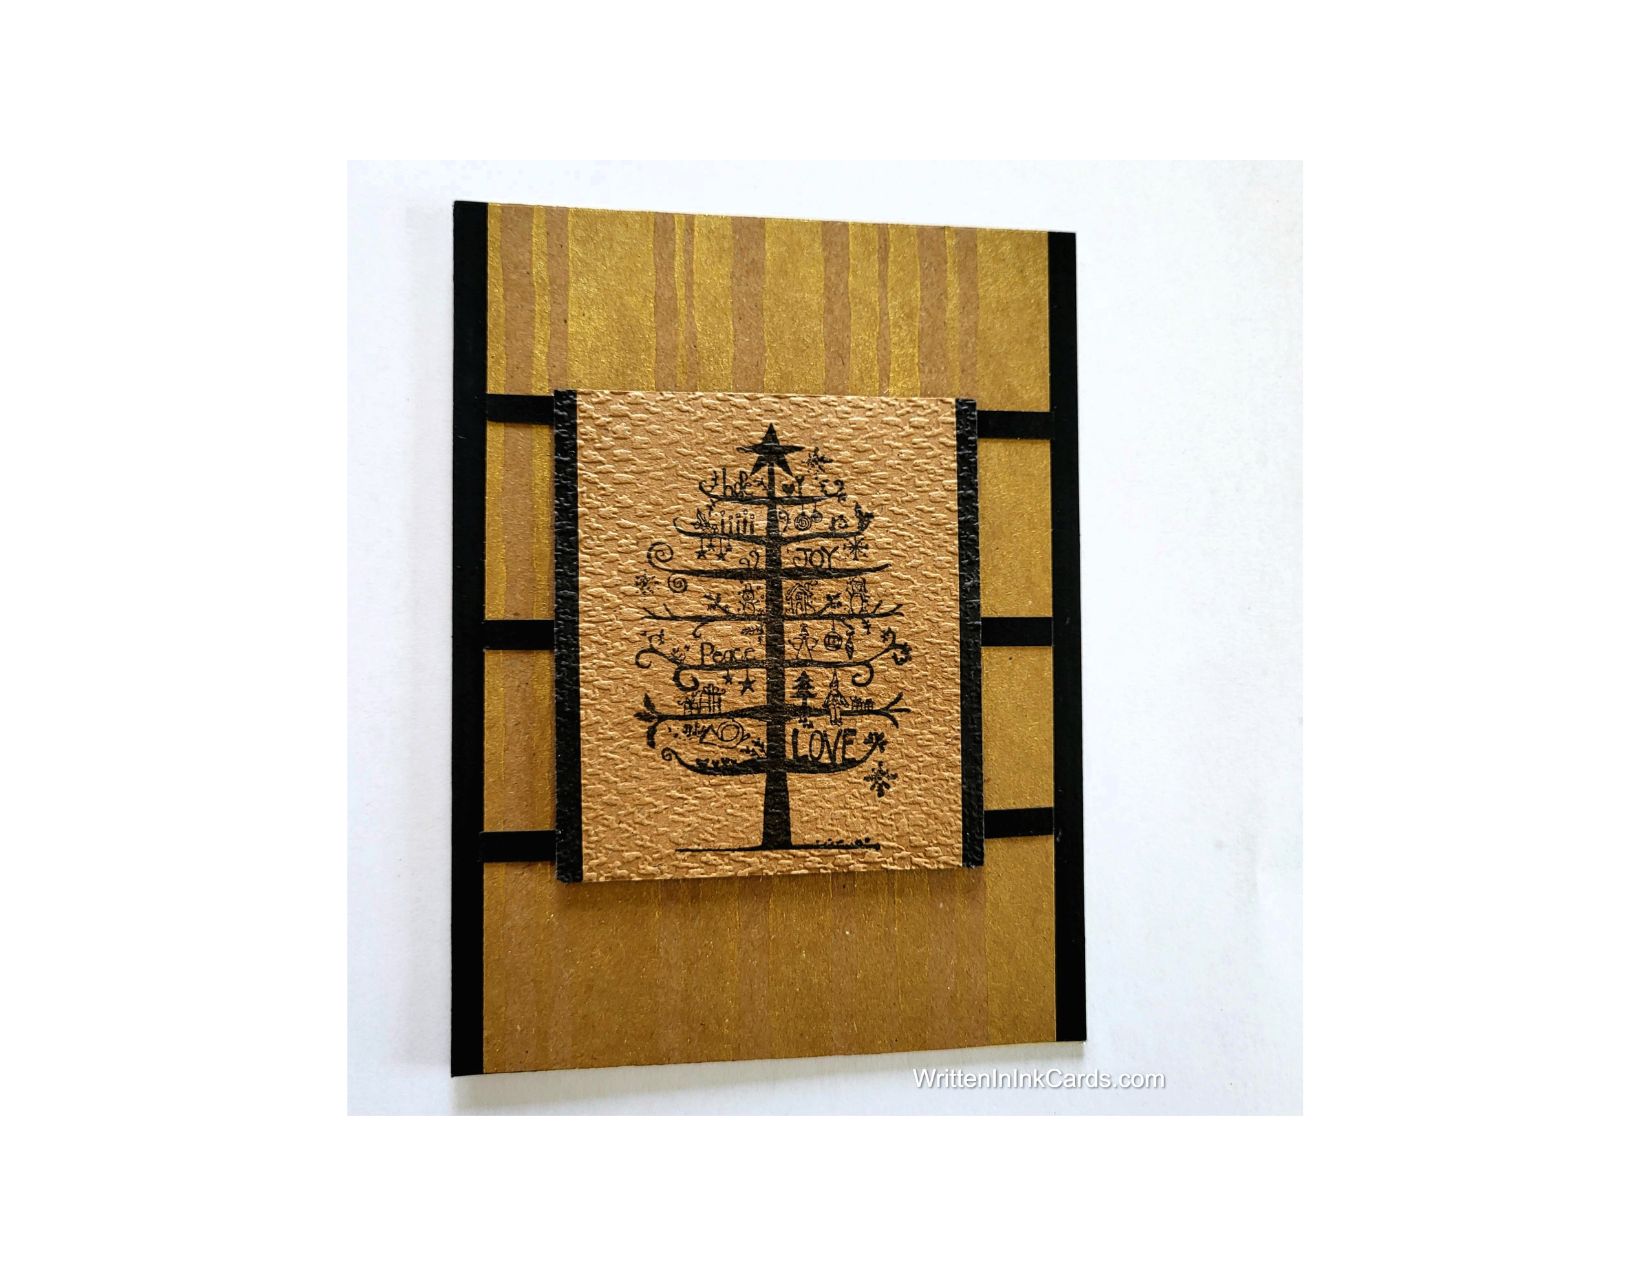
  • Make a Christmas card with a masculine twist

    Make a Christmas card with a masculine twist

    Would you like to experiment with a design like this? You’ll find a supply list below, including a link to the stencil I used from A Colorful Life Designs.  Follow the link and use discount code ChrisFan10 to save 10% on your entire order! (Master Creator Bundles are excluded as they already have a 20% discount built in.)

    Let’s get Started:

    Card Base: 5.5 x 8.5, scored and folded at 4.25

    Black Border Layer: 5.5 x  4.25

    Card Face:  5.5 x 4

    Scrap of Kraft Cardstock 3 x 2

    Small Black border layer: 3 x 2 3/16

    Black Strips:  4 x 3/19  (three of them)

    This stencil has long strands which are unsecured between the top and bottom – a recipe for unwanted movement while applying ink. Before starting I sprayed the back of the stencil with Pixie Spray, and waited about 30 seconds before proceeding.

    Card Face:

    • I laid the card face on my Grip Mat and positioned the stencil.  I applied metallic gold ink across the exposed areas.

    Other:

    • I placed the scrap of kraft cardstock into my stamp positioner and added the tree with Versafine Onyx.  I stamped a couple of times to ensure a very bold image.
    • Once the ink had dried,  I placed this in an embossing folder and ran it through the Big Shot.

    Assembly

    • I glued the black border to the card base.
    • I glued the card face to the border layer, centering vertically.
    • I glued the three narrow strips to the card face, evenly spaced.
    • I glued the embossed/stamped layer to the smaller black border, centering vertically.
    • I put dimensional foam on the back of this smaller piece,  and positioned it in the center of the card face.

    Final Thoughts:

    This is clearly a masculine card:  this is determined by the shapes and colours used.  There is nothing in the design or the focal image that indicates that this has to be for a male… and yet that is the only real choice.

    Supplies: (and links where possible)

       I have listed which products I have used, and where they may be purchased. It’s a huge marketplace and in most instances, there are multiple sources and many alternatives to choose from.

    Stencil: Drizzled Lines,  A Colorful Life Designs

    Waffle Flower Grip Mat, 8.5 x 6.5, Scrapbook.com

    Stamps:  Christmas Tree of Hope, Joy and Love, Unity Stamps (retired)

    Lisa Horton Metallic Gold Ink: Glitter & Ink

    Blending Brushes: Stampin’ Up! 

    Versafine Onyx, Simon Says Stamp

    Adhesive: Tombow Aqua, Michaels

    Card Base & Card Face: Accent 100 lb., Amazon

    Do you have comments or thoughts to share on this design?  Drop me a line in the Comments Section below –  I’d love to hear from you!

    You can also use the Comments Section  to be notified when I release new work.

    Drizzled Lines by A Colorful Life Designs

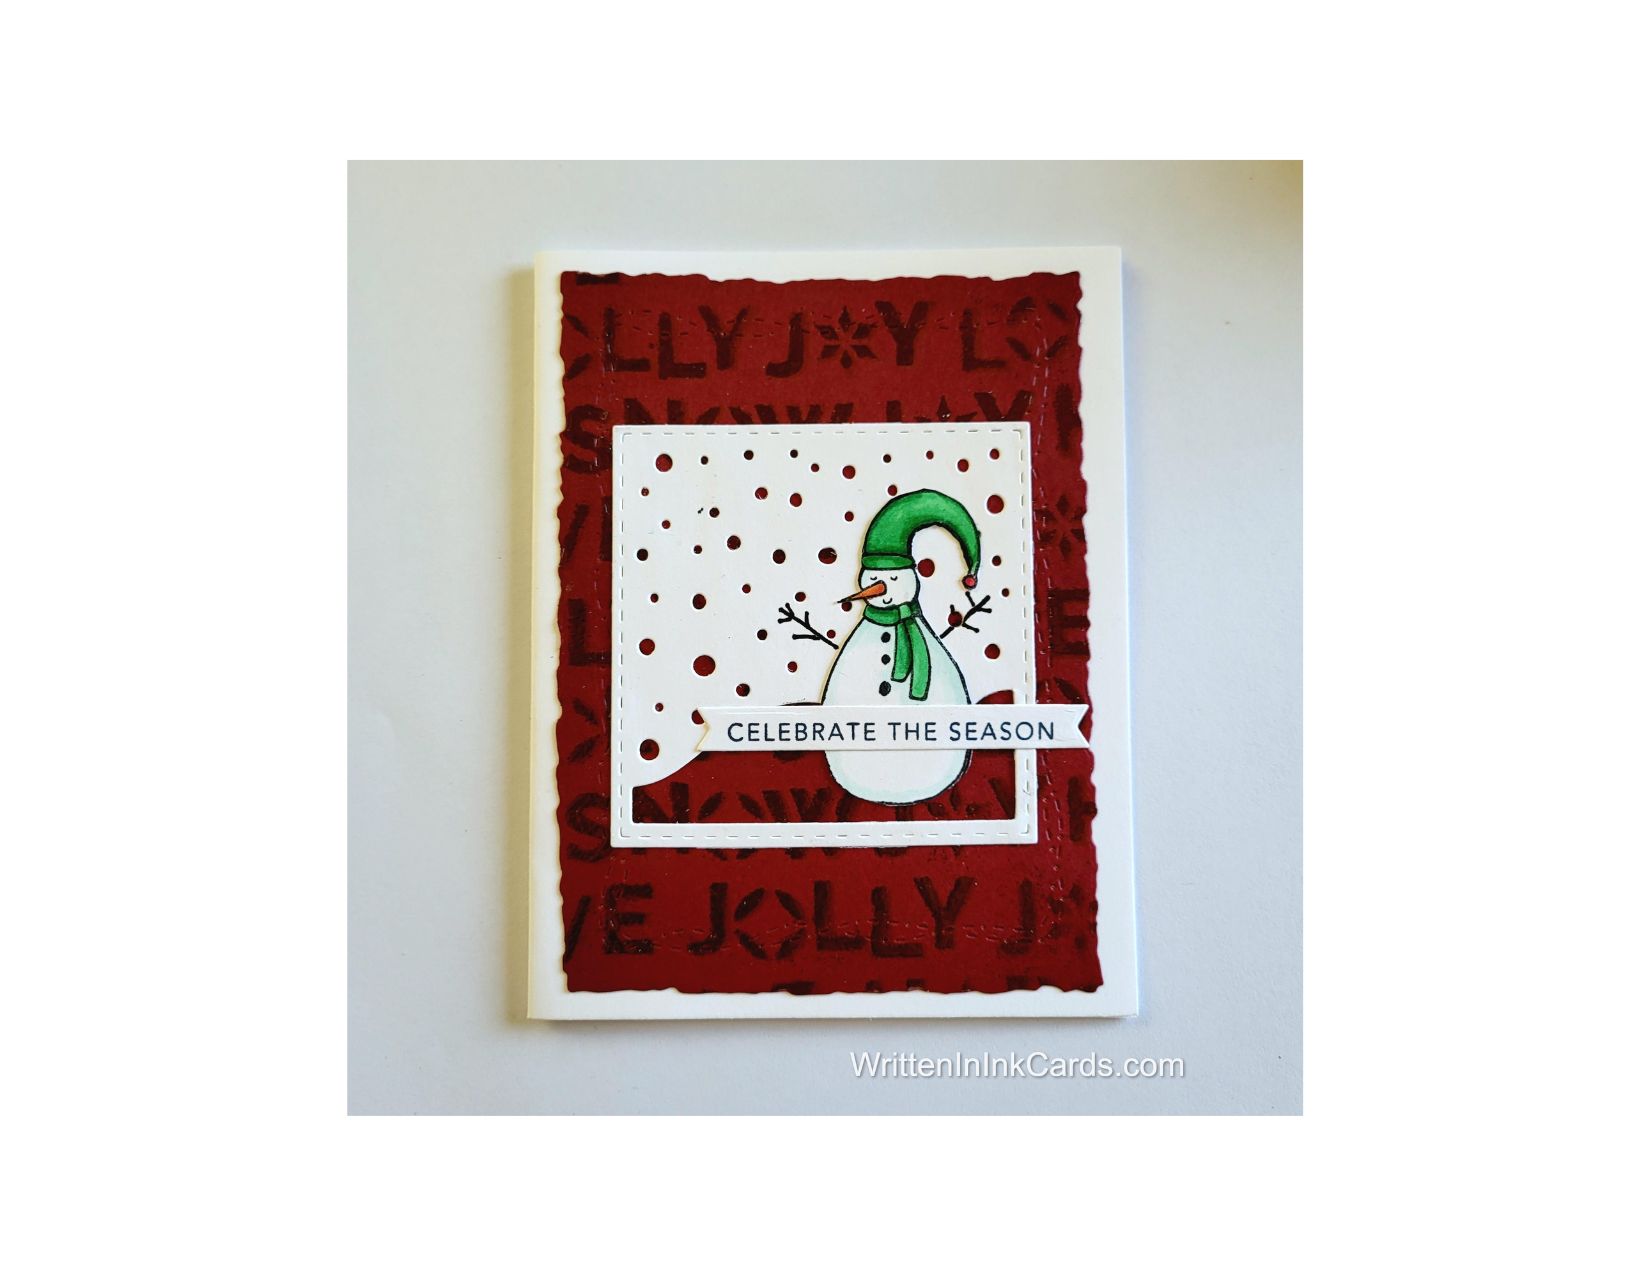
  • Create Your Own Snowman Card with Easy Techniques

    Create Your Own Snowman Card with Easy Techniques

    There is nothing this wee fella loves more than a good snowfall.

    Would you like to experiment with a design like this? You’ll find a supply list below, including a link to the stencil I used from A Colorful Life Designs.  Follow the link and use discount code ChrisFan10 to save 10% on your entire order! (Master Creator Bundles are excluded as they already have a 20% discount built in.)

    Let’s get Started:

    Card Base: 5.5 x 8.5, scored and folded at 4.25

    Card Face: 5.5 x 4.25 (before die cutting)

    White Cardstock for die cutting:  4 x 4

    Card Face:

    • I laid the card face on my Grip Mat and positioned the stencil.
    • I used ink that matched the cardstock across all open areas,  using a heavy hand to get a saturated result.
    • I removed the stencil and sprinkled clear embossing powder over the wet ink, immediately setting this with my heat gun.
    • I used a deckled rectangle die to cut the card face down to approximately 5.25 x 4”.

    Other:

    • I positioned the square die on the smaller piece of white cardstock and ran it through my Big Shot.
    • I looked through my Ready to Go binder and selected the wee snowman, which had already been coloured and cut out.
    • I checked my sentiment binder and selected one that worked with the design.

    Assembly

    • I glued the card face to the card base.
    • I centered the die-cut square on the card face and glued it down.
    • I added the snowman towards the bottom right.
    • I added the sentiment across the snowman.

    Final Thoughts:

    This is a fun and festive card to celebrate the season.

    When I cut out the snowman  I cut tight along the outer lines and cut off the arms  (they are so thin and delicate that  cutting them out would be very time-consuming.)   I rectified this by using a fineliner to draw them back on once I had the snowman glued to the die cut square.  I got this tip from a Jennifer McGuire video, and use it often.

    Supplies: (and links where possible)

       I have listed which products I have used, and where they may be purchased. It’s a huge marketplace and in most instances, there are multiple sources and many alternatives to choose from.

    Stencil: Christmas Words, A Colorful Life Designs

    Waffle Flower Grip Mat, 8.5 x 6.5, Scrapbook.com

    Versamark Embossing Ink: Simon Says Stamp

    Clear Embossing Powder,  Wow,  Simon Says Stamp

    Stamps: A Colorful Life Designs (retired)

    Dies: Your Next Stamp  (no longer in business)

    Ink: Stampin’ Up!

    Blending Brushes: Stampin’ Up! 

    Versafine Onyx, Simon Says Stamp

    Memento Ink: Stampin’ Up!

    Alcohol Markers:

         Stampin’ Blends: Stampin’ Up!

         Copics:  Wallacks

    Adhesive: Tombow Aqua, Michaels

    Card Base & Card Face: Accent 100 lb., Amazon

    Do you have comments or thoughts to share on this design?  Drop me a line in the Comments Section below –  I’d love to hear from you!

    You can also use the Comments Section  to be notified when I release new work

    Christmas Words by A Colorful Life Designs

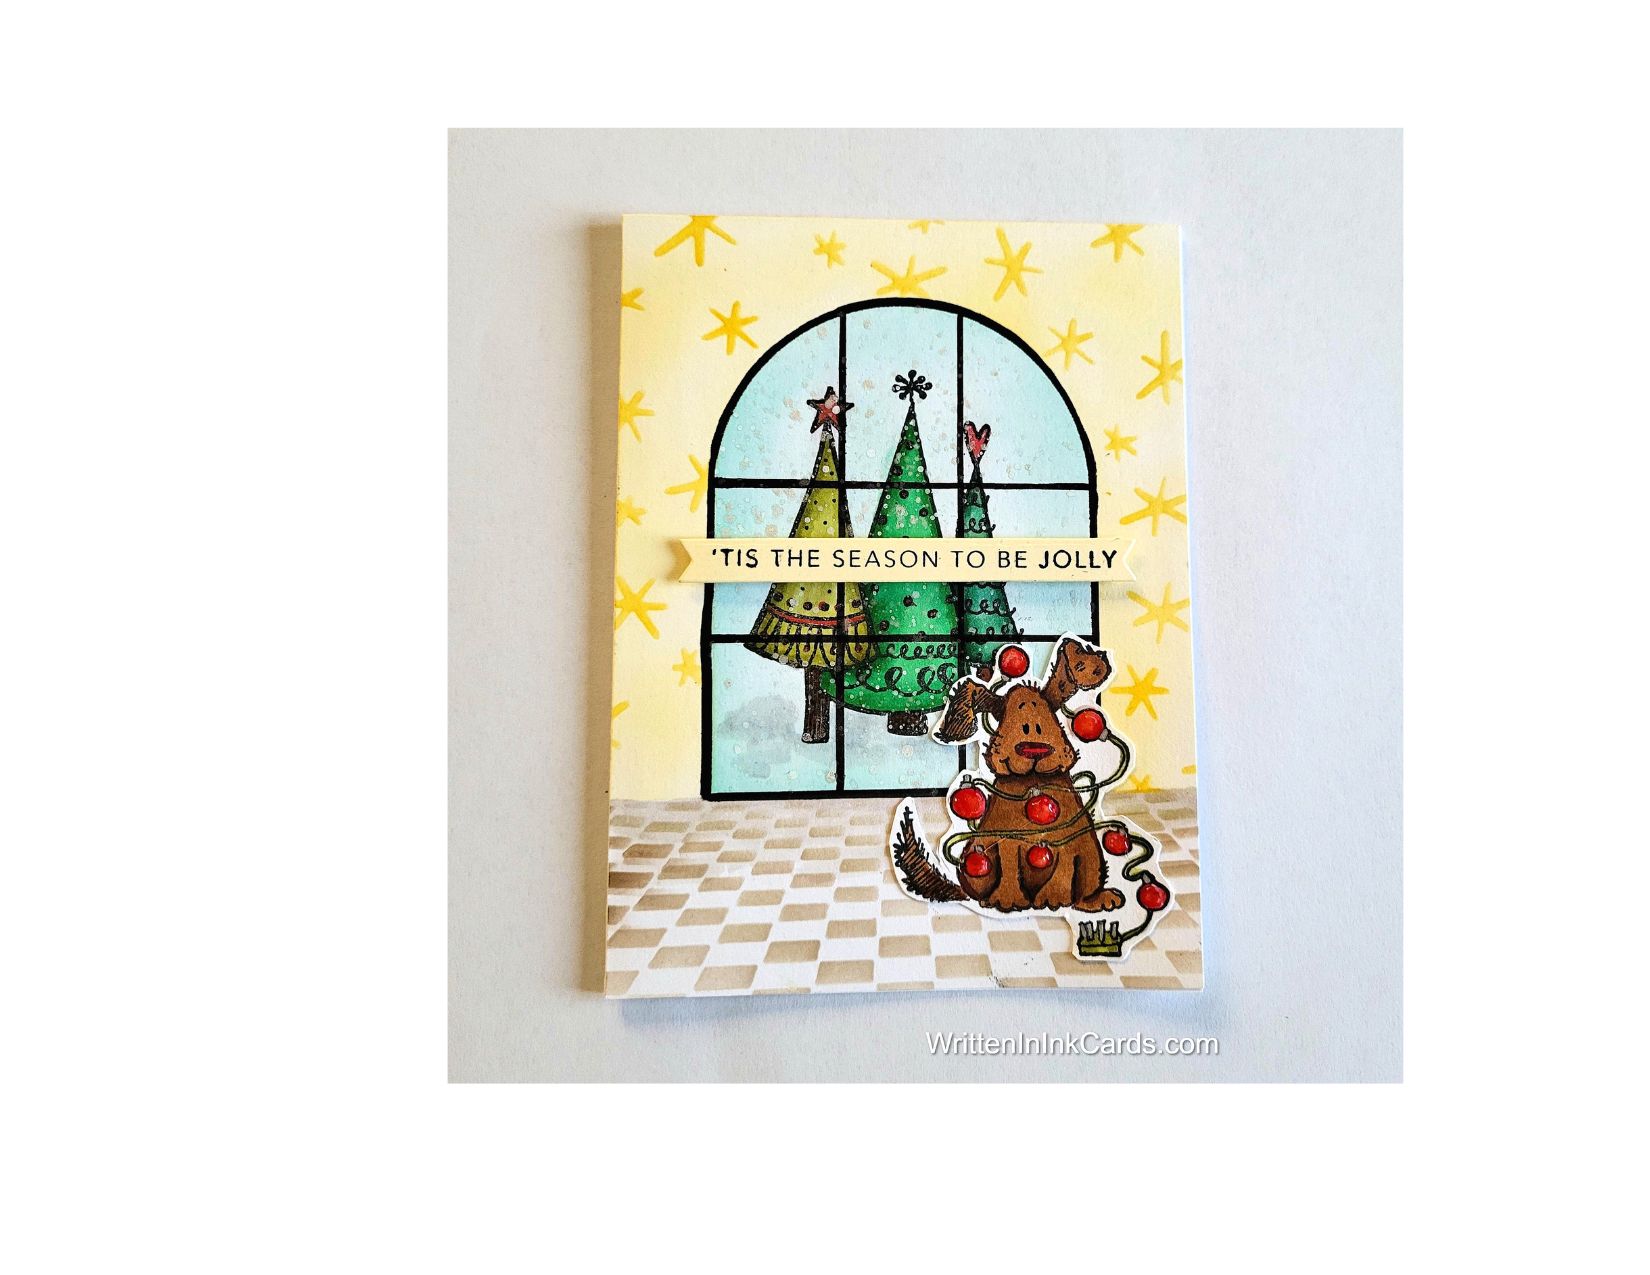
  • Making Cards or Making Mischief ?  sometimes you can have both!

    Making Cards or Making Mischief ? sometimes you can have both!

    Peaceful & calm outside, but inside? Mischief and mayhem!

    Would you like to experiment with a design like this? You’ll find a supply list below, including a link to the stencils I used from A Colorful Life Designs.  Follow the link and use discount code ChrisFan10 to save 10% on your entire order! (Master Creator Bundles are excluded as they already have a 20% discount built in.)

    Let’s get Started:

    Card Base: 5.5 x 8.5, scored and folded at 4.25

    Card Face: 5.5 x 4.25

    Card Face:

    • I stamped the trees roughly in the center of the paper using Memento black ink. I coloured the trees with alcohol markers.
    • I placed the card face onto the grip mat, and then added one of the Arches stencils,  centering the opening around the trees.  
    • Using a light hand, I added blue ink in the open areas.
    • I added snow to the scene by spattering white metallic watercolour into the opening, directly over the image.
    • I removed the Arches stencil and placed the Floor Perspective stencil towards the bottom of the card face, immediately under the window.   I used brown ink across the open areas.   I wanted to continue the floor pattern across the entire width of the card face, so I moved the stencil to the right and tried to line up the pattern before applying ink again. (you can see that I was not entirely successful!)  I repeated this on the left side of the card face, extending the tiled floor there as well.
    • I protected the window image created earlier by adding the corresponding mask to cover the inked area completely.  I used a loop of low-tack tape on the back of the mask to keep it in place.  
    • Using a strip of low tack tape to mask the edge of the floor,  I added yellow ink to the top of the card face around the window.
    • I put the Sparkles stencil in place and added the same yellow ink across the exposed areas, creating a tone on tone pattern.
    • I added light grey ink to the border area between the floor and wall to create shadow.
    • I put the mask back in place over the window and traced around this with a black marker.   I used a ruler and the same black marker to create the window panes within this border.

    Other:

    • I had previously stamped and coloured the image of the dog with the string of lights:  I fussy cut around the image.  To give this just a bit more “pop”  I used a clear medium over the Christmas bulbs –  this added a bit of depth and a lot of shine.
    • I looked through my sentiment binder and found one that worked perfectly with the scene.

    Assembly

    • I glued the card face to the card base.
    • I glued the dog in place.
    • I added the sentiment across the center of the trees.

    Final Thoughts:

    Supplies: (and links where possible)

    This card involved a lot of design on the fly …. I started the process with the idea of using the Arches stencil, and no real plan. It created itself as I went along (something that happens often in my craftroom), and once I had added the floor, wallpaper and outlined the window I thought the card was done.

    When I went back and had another look the following week, I realized it still needed “something”. So I looked through my pre-coloured images and discovered the perfect final touch.

    I love it when serendipity strikes!

    Supplies:

       I have listed which products I have used, and where they may be purchased. It’s a huge marketplace and in most instances, there are multiple sources and many alternatives to choose from.

    Stencils:

    Marvellous Masks Arches,  A Colorful Life Designs

    Floor Perspective, A Colorful Life Designs

    Sparkles, A Colorful Life Designs

    Waffle Flower Grip Mat, 8.5 x 6.5, Scrapbook.com

    Versamark Embossing Ink: Simon Says Stamp

    Clear Embossing Powder,  Wow,  Simon Says Stamp

    Stamps: 

    Dog:  Christmas Fun,  Penny Black,  Amazon

    Trees: Impression Obsession (no longer in business)

    Ink: Stampin’ Up!

    Blending Brushes: Stampin’ Up! 

    Versafine Onyx, Simon Says Stamp

    Memento Ink: Stampin’ Up!

    Alcohol Markers:

         Stampin’ Blends: Stampin’ Up!

         Copics:  Wallacks

    Adhesive: Tombow Aqua, Michaels

    Card Base & Card Face: Accent 100 lb., Amazon

    Do you have comments or thoughts to share on this design?  Drop me a line in the Comments Section below –  I’d love to hear from you!

    You can also use the Comments Section  to be notified when I release new work

    Marvellous Masks Arches by A Colorful Life Designs
    Sparkles by A Colorful Life Designs

    Floor Perspective by A Colorful Life Designs