Tag: Christmas

  • Winning at Holiday Cards: Get more mileage from your stencils.

    Winning at Holiday Cards: Get more mileage from your stencils.

    Would you like to experiment with a design like this? You’ll find a supply list below, including a link to the stencil I used from A Colorful Life Designs.  Follow the link and use the discount code ChrisFan10 to save 10% on your entire order! (Master Creator Bundles are excluded as they already have a 20% discount built in.)

    Let’s get Started:

    Card Base: 5.5 x 8.5, scored and folded at 4.25

    Holographic Border Layer: 5.5 x 4.25

    Card Face:  5.⅜ x 4 1/8

    Card Face:

    • I laid the card face on the grip match and positioned the stencil.
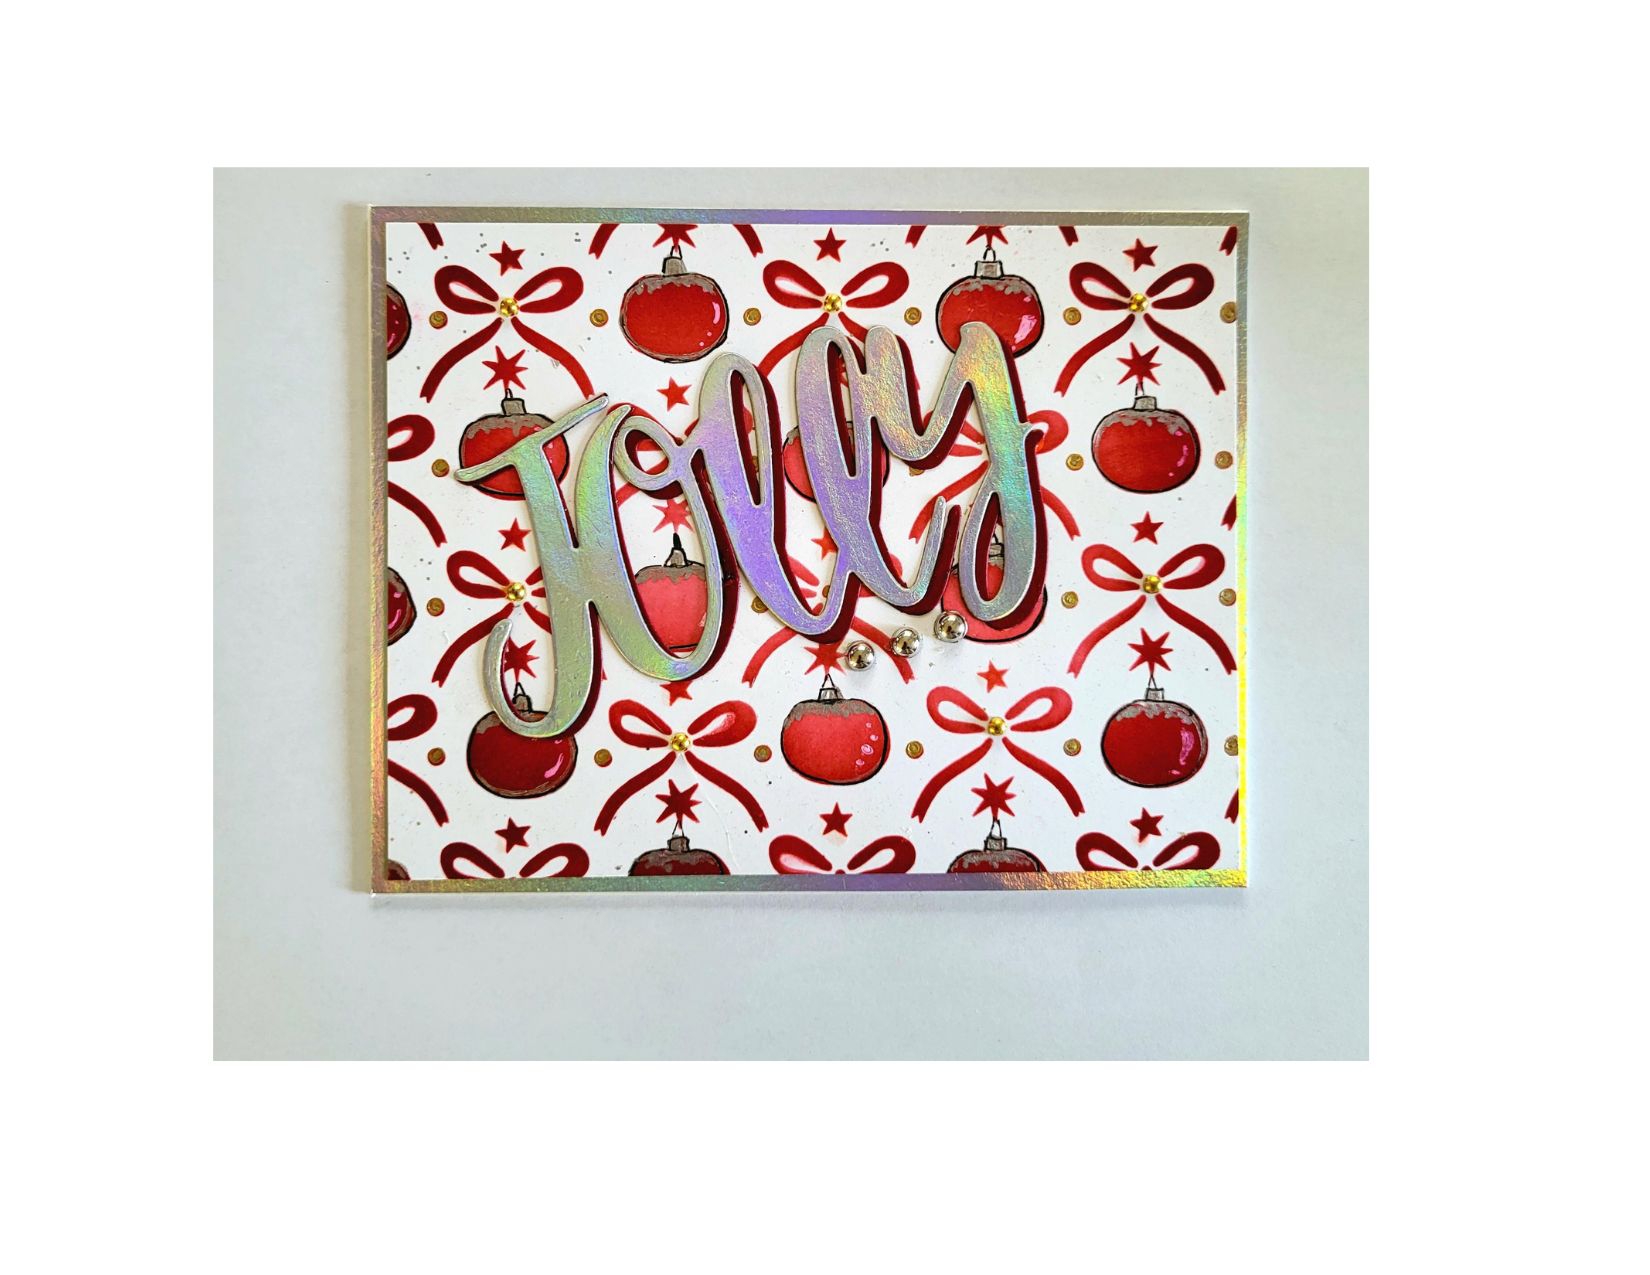
    • I used red ink across all exposed areas, applying more pressure on the outer edges of the card face, and allowing saturation to fade towards the center

    This stencil actually includes pumpkins and not christmas babbles,  so next I had to come up with a method to change the shape.

    • I started the transformation by coloring the pumpkin stems silver and then continuing on to trace each of the shapes with a silver gel pen but making  sure to go straight across on top, rather than dipping down  the way the stencil is created.
    • I liked the stems, but the silver outline did not show up well enough. So I retraced all the pumpkins with a black fine liner. – this defined the shape and I was satisfied.
    • I used the silver gel pen to add a bit of snow to the top of each ornament, which further disguised the original shape.
    • I used a white gel pan to add highlights to each of the ornaments.

    Other:

    • I die -cut “jolly” three times – once from holographic card stock and twice from black card stock.
    • I glued the two black die-cuts together and then added the silver one on top,  offsetting slightly.

    Assembly

    I glued the border layer to the cardbase and centered the card face on top of these.

    I added the die-cuts on an angle as shown.

    I added a small gold bead to the center of each bowl on the card face.

    I added three silver beads under the word as a finishing touch.

    Final Thoughts:

    This design transformed the pumpkins into Christmas baubles very well, and now I can use this stencil for fall , or for the Christmas season.

    Supplies: (and links where possible)

       I have listed the products I have used and where they can be purchased. It’s a huge marketplace, and in most instances, there are multiple sources and many alternatives to choose from.

    Stencil:  Pumpkins and bows, A colorful life designs.

    Dies:  Impression obsession ( No longer in business)

    Ink: Stampin’ Up!

    Blending Brushes: Stampin’ Up! 

    Adhesive: Tombow Aqua, Michaels

    Card Base & Card Face: Accent 100 lb., Amazon 

    Do you have any comments or thoughts on this design?  Drop me a line in the Comments Section below –  I’d love to hear from you!

    You can also use the Comments Section to be notified when I release new work.
  • Yes,  fast & easy can create beautiful holiday cards

    Yes, fast & easy can create beautiful holiday cards

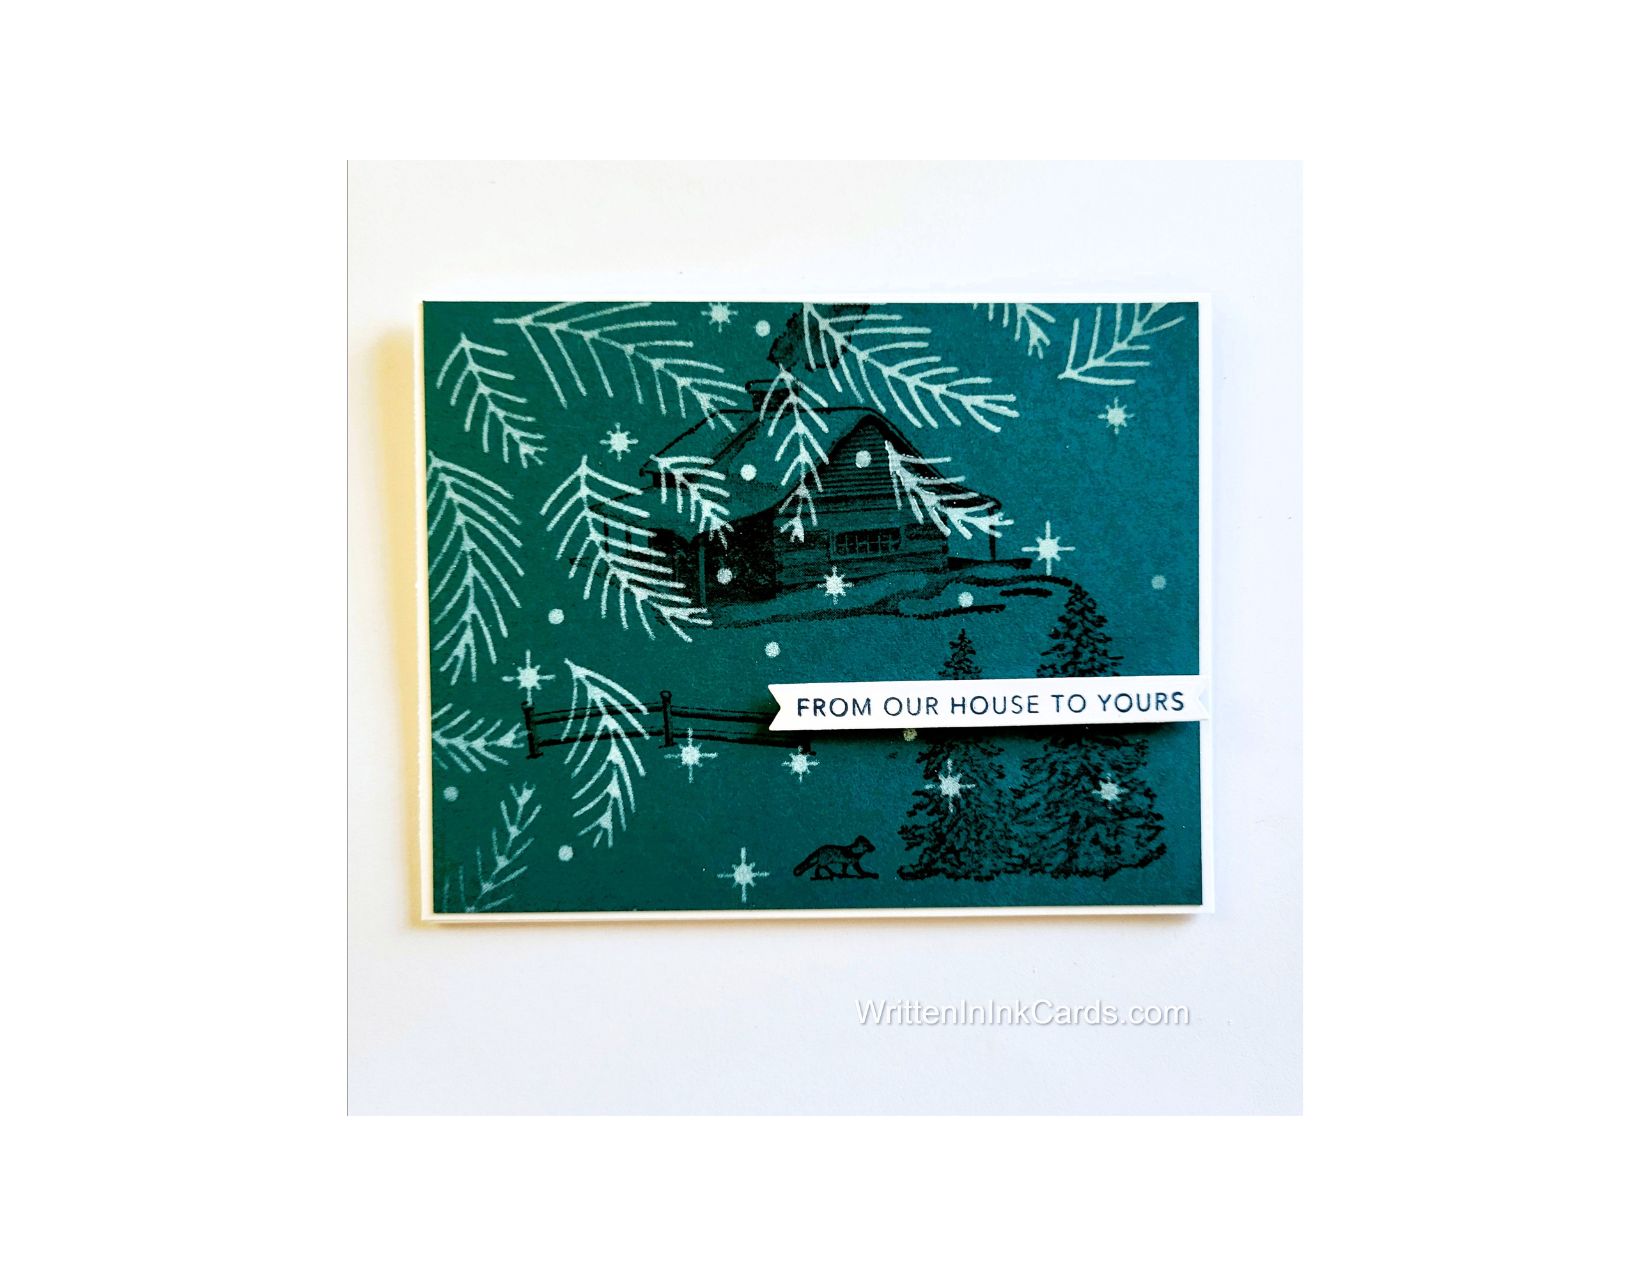
    The world is hushed as snow falls silently on a secluded cabin.

    Would you like to experiment with a design like this? You’ll find a supply list below, including a link to the stencil I used from A Colorful Life Designs.  Follow the link and use discount code ChrisFan10 to save 10% on your entire order! (Master Creator Bundles are excluded as they already have a 20% discount built in.)

    Let’s get Started:

    Card Base: 5.5 x 8.5, scored and folded at 4.25

    Card Face:  5 3/8 x 4 1/8

    Card Face:

    • I placed the card face into my stamp positioner and stamped the cabin, fence , fox and trees using Versafine Onyx.
    • I moved the card face to the grip mat,  positioned the stencil and added the design using white pigment ink.  I used a heavy hand with this,  to be sure that it would stand out well against the dark background.

    Other:

    • I looked through my sentiment binder,  and selected the one that worked for this card.

    Assembly

    • I glued the card face to the card base, centering on all sides.
    • I added the sentiment as shown.

    Final Thoughts:

    This was such a quick and easy card to create,  and a very satisfying result.

    I love the white ink on that dark teal cardstock –  a very pretty combination. If I wanted even more contrast I could have used clear embossing powder on top of the white ink, but I felt that it was distinct enough without that step.

    Supplies: (and links where possible)

       I have listed which products I have used, and where they may be purchased. It’s a huge marketplace and in most instances, there are multiple sources and many alternatives to choose from.

    Stencil: Christmas Greenery,  A Colorful Life Designs

    Waffle Flower Grip Mat, 8.5 x 6.5, Scrapbook.com

    Stamps:  Peaceful Cabin,  Stampin’ Up!  (retired)

    White Ink: Stampin’ Up!

    Blending Brushes: Peaceful Stampin’ Up! 

    Versafine Onyx, Simon Says Stamp

    Adhesive: Tombow Aqua, Michaels

    Card Base & Card Face: Accent 100 lb., Amazon

    Do you have comments or thoughts to share on this design?  Drop me a line in the Comments Section below –  I’d love to hear from you!

    You can also use the Comments Section  to be notified when I release new work

    Christmas Greenery by A Colorful Life Designs

  • Easy Steps to Craft a Santa Card

    Easy Steps to Craft a Santa Card

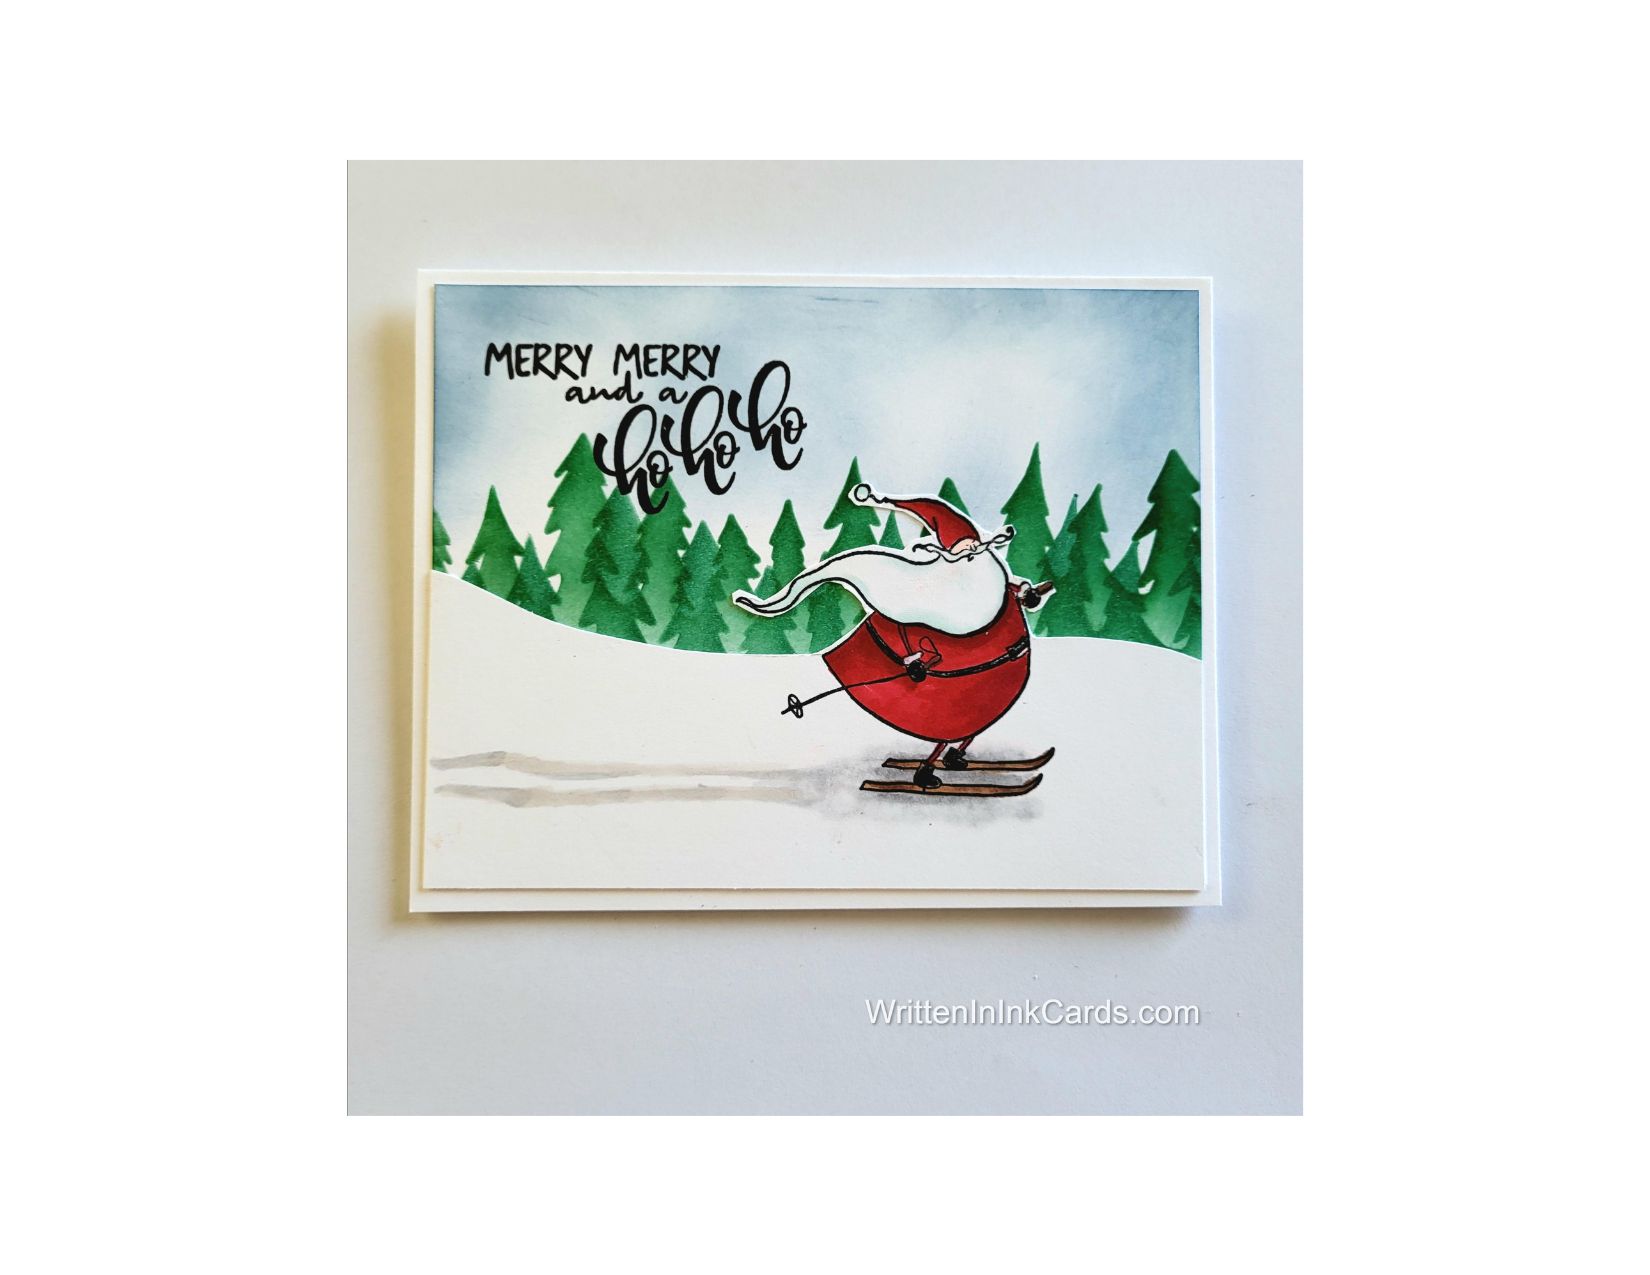
    Even the Big Guy needs a break and some fresh air every now and then!

    Would you like to experiment with a design like this? You’ll find a supply list below, including a link to the stencil I used from A Colorful Life Designs.  Follow the link and use discount code ChrisFan10 to save 10% on your entire order! (Master Creator Bundles are excluded as they already have a 20% discount built in.)

    Let’s get Started:

    Card Base: 5.5 x 8.5, scored and folded at 4.25

    Stamped Layer: 5.25 x 4

    Card Face:  5.25 x 4 

    Card Face:

    • I brushed blue ink onto the top two-thirds of the the card face, allowing variations in depth to create the look of clouds.
    • I placed the card face onto the grip mat,  and positioned the stencil about ¾ of the way down the card face.  I used green ink to create the tree line.
    • I shifted the stencil up and over (to allow the trees to fall in between those in the first row) and created a second row, overlapping where necessary.
    • I put the card face into the stamp positioner and added the sentiment in the upper left, using Versafine Onyx.

    Other:

    • I stamped  Santa on the second piece of cardstock, placing him towards the bottom right.
    • I coloured this with alcohol markers, adding a shadow under him and the ski track behind him in the snow as well.
    • I drew a curved hillside behind Santa,  and then cut along that line and also carefully cut around the upper half of Santa.

    Assembly

    • I glued the card face to the card base,  and the layer with the cut out Santa on top of these.

    Final Thoughts:

    This is such a cute combination –  the style of the tree stencil works with Santa so very well.  I really like this one.

    Supplies: (and links where possible)

       I have listed which products I have used, and where they may be purchased. It’s a huge marketplace and in most instances, there are multiple sources and many alternatives to choose from.

    Stencil: Christmas Tree Edger #1,  A Colorful Life Designs

    Waffle Flower Grip Mat, 8.5 x 6.5, Scrapbook.com

    Stamps: Jolly Santas, Colorado Craft Co., (retired)

    Ink: Stampin’ Up!

    Blending Brushes: Stampin’ Up! 

    Versafine Onyx, Simon Says Stamp

    Memento Ink: Stampin’ Up!

    Alcohol Markers:

         Stampin’ Blends: Stampin’ Up!

         Copics:  Wallacks

    Adhesive: Tombow Aqua, Michaels

    Card Base & Card Face: Accent 100 lb., Amazon

    Do you have comments or thoughts to share on this design?  Drop me a line in the Comments Section below –  I’d love to hear from you!

    You can also use the Comments Section  to be notified when I release new work

  • Stencils and Diecuts -making masculine cards just got easy

    Stencils and Diecuts -making masculine cards just got easy

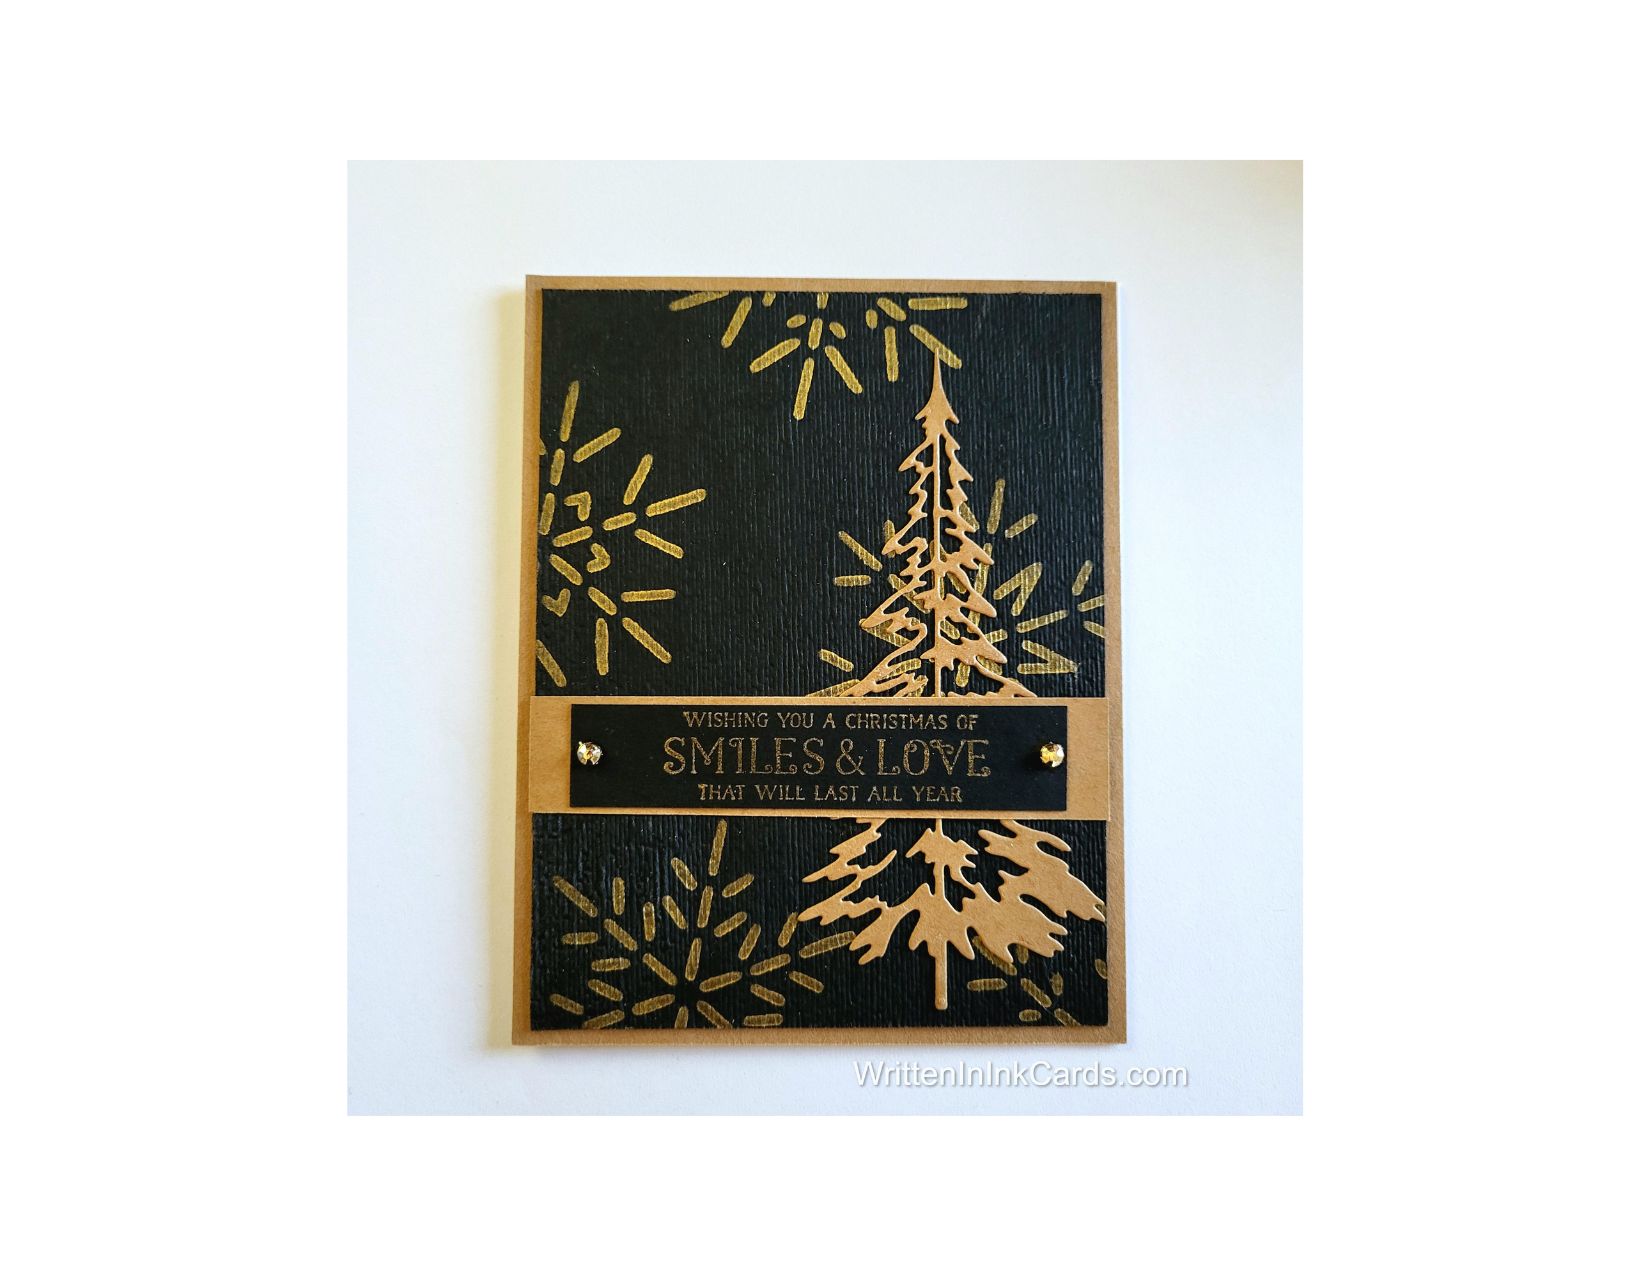
    An elegant masculine card – ready in a snap!

    Would you like to experiment with a design like this? You’ll find a supply list below, including a link to the stencil I used from A Colorful Life Designs.  Follow the link and use discount code ChrisFan10 to save 10% on your entire order! (Master Creator Bundles are excluded as they already have a 20% discount built in.)

    Let’s get Started:

    Card Base: 5.5 x 8.5, scored and folded at 4.25

    Kraft Border: 5.5 x 4.25

    Black Card Face:  5.25 x 4

    Scrap of Kraft Cardstock: .75 x 4

    Card Face:

    • I laid the card face onto my Grip Mat , positioned the stencil and applied metallic gold ink across the exposed surfaces.
    • After allowing the gold ink to dry (it is a very saturated pigment ink) I put the card face into an embossing folder and ran it through the Big Shot to add texture.

    Other:

    • I stamped the sentiment in gold ink on a piece of black cardstock,  and then cut it down to ⅝ x 3
    • I looked through my Bits & Pieces binder and found the tree, previously cut out of kraft and waiting to be used.

    Assembly

    • I glued the black sentiment strip to the kraft strip.
    • I glued the kraft border layer to the card base, and then centered the black card face on both.
    • I glued the tree in place on the right hand side as shown.
    • I glued the sentiment strip in place over the tree, just below the center of the card.
    • I added a metallic embellishment on either side of the sentiment.

    Final Thoughts:

    This was a fast & easy card to put together; it has a very masculine feel due to the colours used.

    I love the way gold and kraft play off of each other.

    Supplies: (and links where possible)

       I have listed which products I have used, and where they may be purchased. It’s a huge marketplace and in most instances, there are multiple sources and many alternatives to choose from.

    Stencil: Fine Snowflakes,  A Colorful Life Designs

    Waffle Flower Grip Mat, 8.5 x 6.5, Scrapbook.com

    Dies:  Woodlands,  Tim Holtz, Amazon

    Ink: Lisa Horton Metallic Ink,  Glitter & Ink

    Blending Brushes: Stampin’ Up! 

    Adhesive: Tombow Aqua, Michaels

    Card Base & Card Face: Accent 100 lb., Amazon

    Do you have comments or thoughts to share on this design?  Drop me a line in the Comments Section below –  I’d love to hear from you!

    You can also use the Comments Section  to be notified when I release new work

    Fine Snowflakes by A Colorful Life Designs