Written In Ink

Tag: bird

  • Design Techniques for Unique Greeting Cards are something to CHIRP about!

    Design Techniques for Unique Greeting Cards are something to CHIRP about!

    Would you like to experiment with a design like this? You’ll find a supply list below, including a link to the stencil I used from A Colorful Life Designs.  Follow the link and use discount code ChrisFan10 to save 10% on your entire order! (Master Creator Bundles are excluded as they already have a 20% discount built in.)

    I never feel that my day is something to chirp about until I’m caffeinated!

    Let’s get Started:

    Card Base:  5.5 x 8.5, scored and folded at 4.25

    Card Face:  5.25 x 4.25

    Card Face:

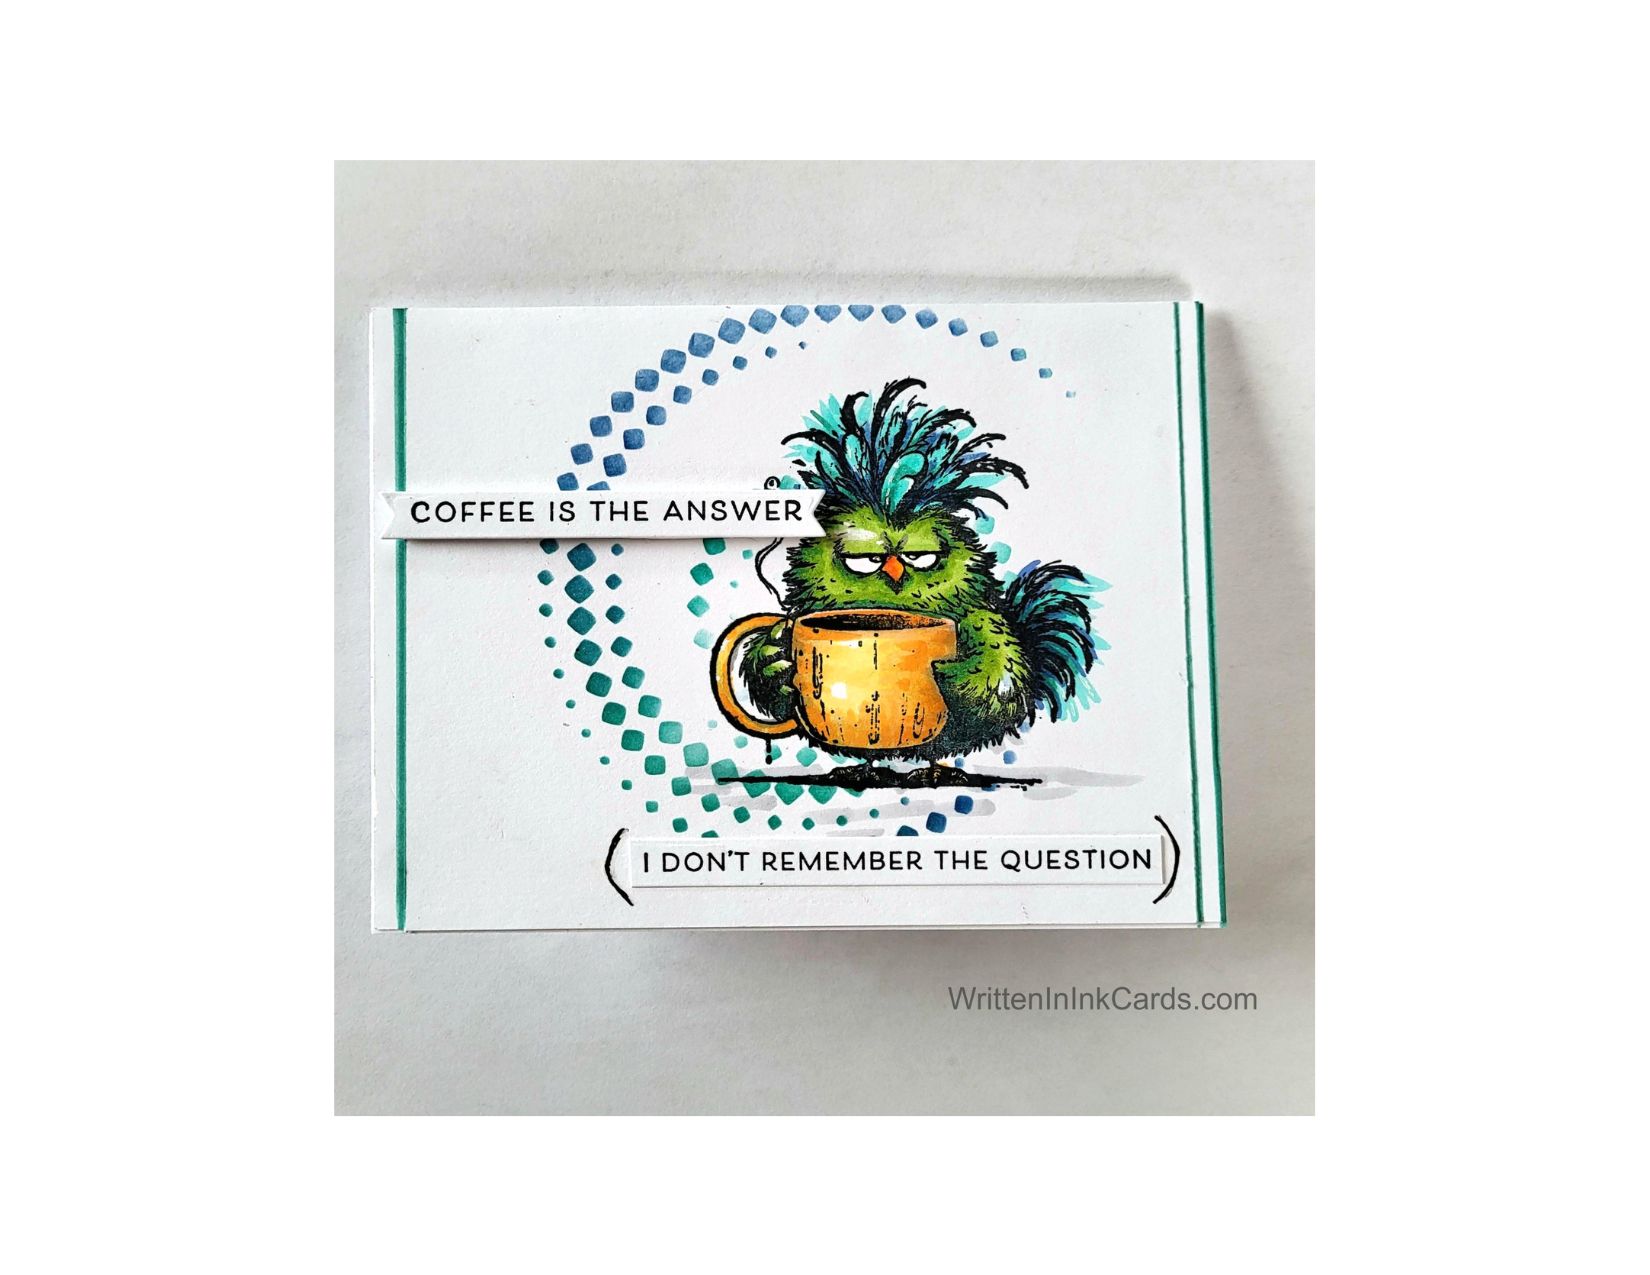
    • I placed the card face in my stamp positioner and stamped the focal image a couple of times with black Memento ink.
    • I coloured the image with alcohol markers. This caffeinated fella is ready to take center stage on the card!
    • After laying the card face on the Grip Mat,  I positioned the stencil, using a brayer to ensure good contact with the sticky surface of the mat.
    • I applied navy blue and teal ink across the exposed areas on the stencil, taking care to avoid the coloured image.

    Other:

    • I looked through my sentiment binder and found this pair – they are perfectly suited to the image!

    Assembly

    • I glued the card face to the card base,centering the vertical edges.
    • I created faux borders on the card by using a blue marker and a ruler. (The marker matched one of the blues used on the bird.)
    • I glued the sentiments in place as shown.
    • I drew brackets around the sentiment on the bottom, using a black fineliner.

    Final Thoughts:

    It’s odd what I don’t see when creating a card: for instance,  I see now that I forgot to create the outer border on the left of the card!   I will fix that up before sending it on.

    I love this sentiment,  and I like the concept of the brackets around the second half of it,  but if I recreate this card I will handwrite that one as I don’t like the combination of hand drawn brackets with the glued on sentiment.

    (but now that this fella is fully caffeinated, he’ll have more of a chance of remembering that question, LOL.)

    Supplies: (and links where possible)

       I have listed which products I have used, and where they may be purchased. It’s a huge marketplace and in most instances, there are multiple sources and many alternatives to choose from.

    Stencil: Square Swirl,  A Colorful Life Designs

    Waffle Flower Grip Mat, 8.5 x 6.5, Scrapbook.com

    Stamps:

        Coffee Doodle Doo,  Unity Stamps

         Simple Strips, Coffee: Taylored Expressions

    Dies:   Simple Strips Die, Taylored Expressions

    Ink: Stampin’ Up!

    Blending Brushes: Stampin’ Up! 

    Memento Ink: Stampin’ Up!

    Alcohol Markers:

         Stampin’ Blends: Stampin’ Up!

         Copics:  Wallacks

    Fineliner: Amazon

    Adhesive: Tombow Aqua, Michaels

    Card Base & Card Face: Accent 100 lb., Amazon

    Do you have comments or thoughts to share on this design?  Drop me a line in the Comments Section below –  I’d love to hear from you!

    You can also use the Comments Section  to be added to the list, and notified when I release new work.

  • Create a card that Celebrates Singing After the Storm

    Create a card that Celebrates Singing After the Storm

    Would you like to experiment with a design like this? You’ll find a supply list below, including a link to the stencils I used from A Colorful Life Designs.  Follow the link and use discount code ChrisFan10 to save 10% on your entire order! (Master Creator Bundles are excluded as they already have a 20% discount built in.)

    Let’s get Started:

    Card Base: 5.5 x 8.5, scored and folded at 4.25

    Border Layer: 5 x 3.75

    Card Face:  5 x 3.75

    White Cardstock to create window panels and window frame.

    Acetate:  5 x 3.75

    Card Face:

    • I laid the card face onto the Grip Mat and positioned the  MultiShadow stencil.  I applied teal ink with a light hand.
    • After removing this stencil,  I positioned the Message Bird stencil, using a dark blue ink for the bird.   I repositioned the stencil and added the branch with brown ink.
    • Setting both stencils aside,  I lightly spritzed water onto the card face to soften the lines and add depth.

    Other:

    • I used a “plaid” die to create the window panes.
    • I didn’t have a rectangular die in the correct size to create the window frame:  to get around this I cut 4 pieces of card stock,  each ¼” wide and 5” long.
    • I used a couple of dies to cut the foliage for the window and then brushed on a couple of different green inks.
    • I brushed teal ink around all borders of the card base, allowing it to fade as it moved away from the edges.
    • I found a great sentiment in my binder, ready and just waiting to be put to use.

    Assembly

    • I glued the card face to the card base, centering on all sides.
    • I secured the acetate to the back of the window pane die cut and then secured this to the card face.
    • I added the strips of cardstock to the outer edges of this, trimming to the correct size.
    • I glued the foliage to the window as shown.
    • I added the sentiment.

    Final Thoughts:

    I wanted to include acetate behind the window for the realistic shine it would provide:  securing this to the card face and then the window proved very difficult and I would not include it another time.

    I wanted the scene to have the look of being viewed through a window during a rainstorm,  and I think I succeeded!

    Supplies: (and links where possible)

       I have listed which products I have used, and where they may be purchased. It’s a huge marketplace and in most instances, there are multiple sources and many alternatives to choose from.

    Stencils:

        MultiShadow , a Colorful Life Designs

        Message Bird,  A Colorful Life Designs

    Waffle Flower Grip Mat, 8.5 x 6.5, Scrapbook.com

    Ink: Stampin’ Up!

    Blending Brushes: Stampin’ Up! 

    Versafine Onyx, Simon Says Stamp

    Adhesive: Tombow Aqua, Michaels

    Card Base & Card Face: Accent 100 lb., Amazon

    Do you have comments or thoughts to share on this design?  Drop me a line in the Comments Section below –  I’d love to hear from you!

    You can also use the Comments Section  to be added to the list, and notified when I release new work.