

dance like nobody’s watching
The elegance of Art Deco meets the extravagant feel of foil! (And a touch of sass, as an unexpected final touch.)
Would you like to experiment with a design like this? You’ll find a supply list below, including a link to the stencil I used from A Colorful Life Designs. Follow the link and use discount code ChrisFan10 to save 10% on your entire order! (Master Creator Bundles are excluded as they already have a 20% discount built in.)
Are you intrigued by the luxurious feel of foil, but at the same time just a bit intimidated? Me too! or, I was until I discovered Duo gel and transfer foil. No Minc or laminator required, but the same amazing results – and unlimited options.
Let’s get Started:
Card Base: 4.25 x 11, scored and folded at 5.5
Border Layer: 4.25 x 5.5 **
Card Face: 4 x 5.5
** Budget tip: Rather than a full piece of foiled cardstock, I used two strips of cardstock that were ⅛ x 5.5 each. Gluing them snugly alongside the card face gave the look of a full piece, and is more economical.
Card Face:
- I sprayed the back of my stencil with Pixie Spray. This is a temporary adhesive that will ensure that the stencil stays in place on the card face during use.
- I placed my card face on a piece of cardstock and positioned the stencil. I used a brayer over the entire surface to ensure good contact with the card face.
- I applied Duo gel to all exposed areas, carefully removed the stencil and put it into water. I set the card face aside to dry.
- After the gel had dried (this depends on the thickness of the application, but I typically leave this 2 – 4 hours) it was time for the magic! I put a piece of transfer foil over the card face and ran it through my Big Shot.
- Once this was done I removed the excess foil, leaving the beautiful pattern behind.
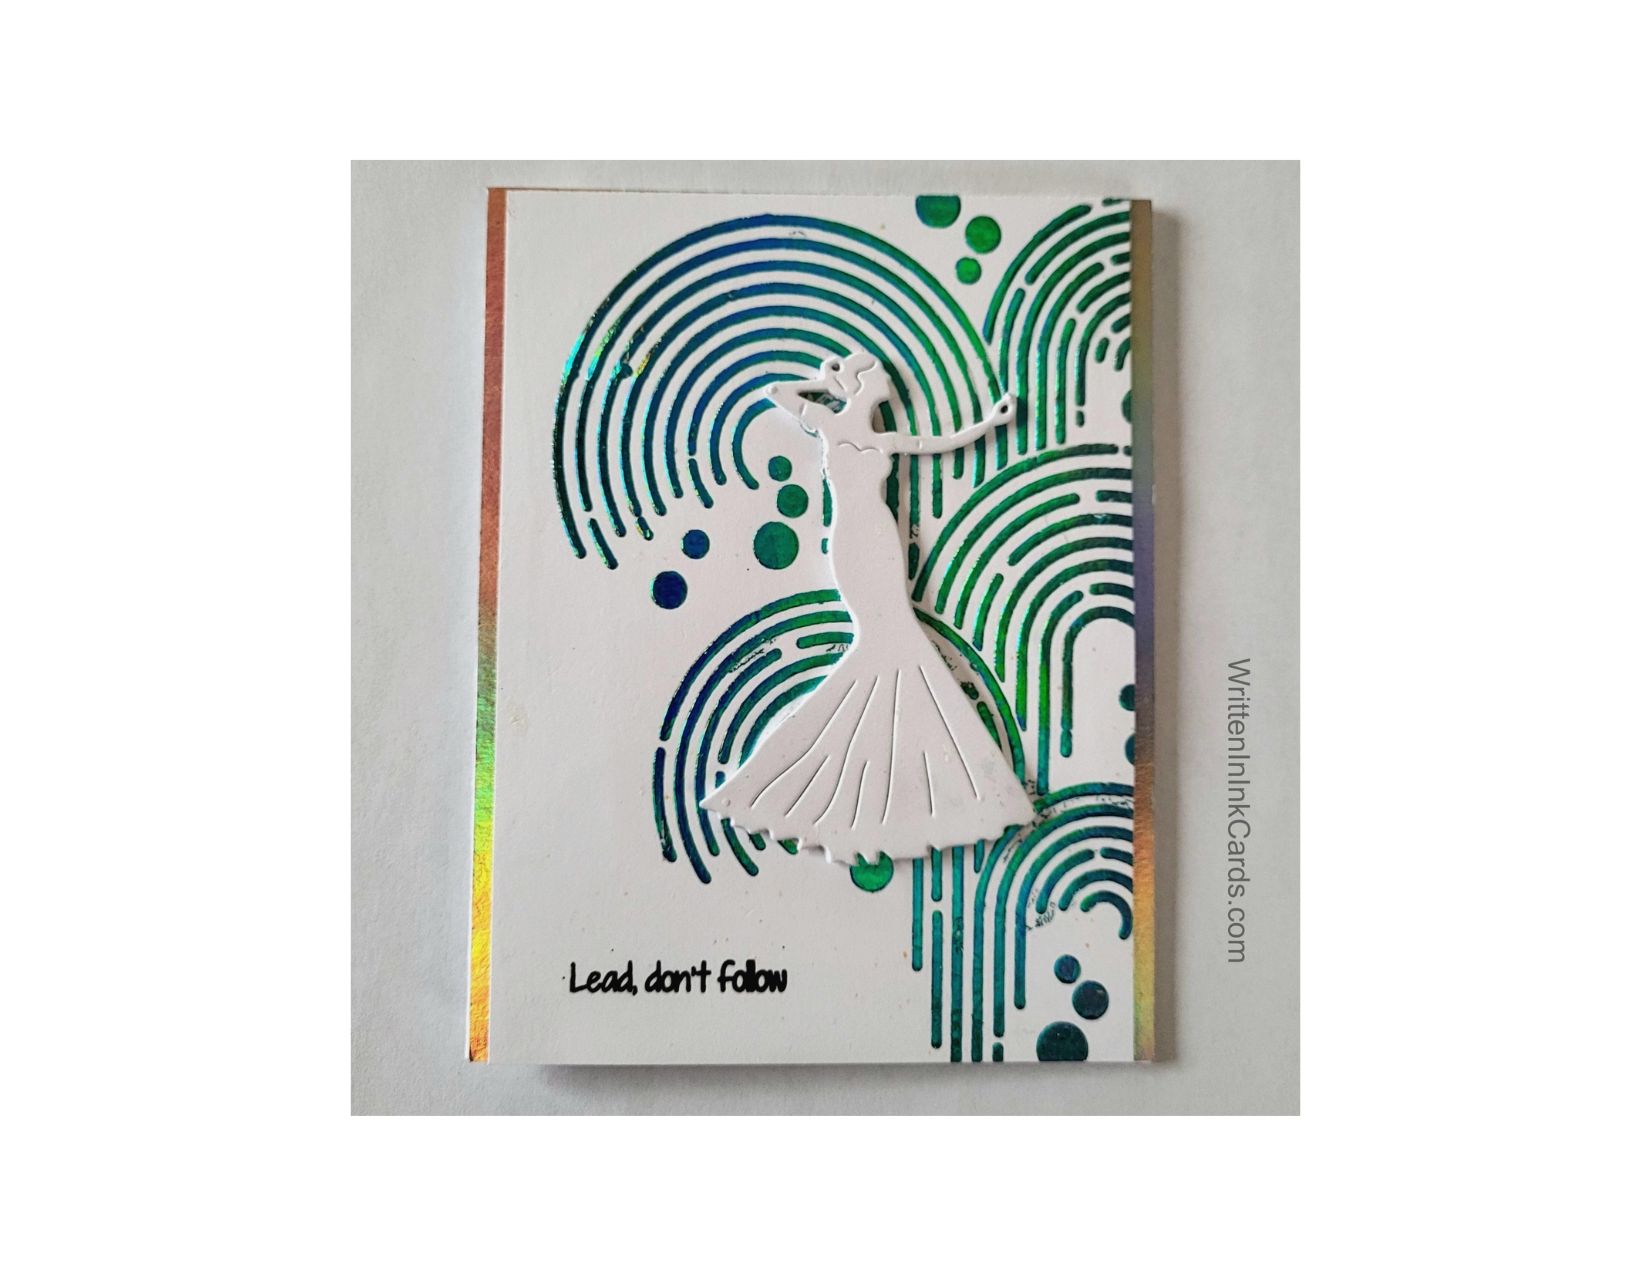
- This card needed a sentiment, but I wasn’t certain which direction to go in at first – and then I stumbled across this bit of sass, which fit the bill perfectly. So I put the card face into my stamp positioner and added the sentiment with Versafine Onyx, stamping 3x to get a bold result.
I didn’t use my Grip Mat for this as I don’t like to risk compromising the surface with gels and pastes. I’ve seen content creators do this successfully: I’m just not brave enough yet!
Other:
- I placed a piece of adhesive dimensional foam on the back of a scrap piece of cardstock and added the die. Then I ran it through the Big Shot.
Assembly
- I glued the card face to the card base, centering vertically.
- I glued a narrow strip of irridescent cardstock to both sides.
- I added the dancing lady as shown.
Final Thoughts:
This stencil was part of a water themed release from A Colorful Life Designs, but as soon as I saw it I thought of the elegance of Art Deco. This design has been perking away in my head for a while now – I’m glad to finally have it out and on paper.
Supplies: (and links where possible)
I have listed which products I have used, and where they may be purchased. It’s a huge marketplace and in most instances, there are multiple sources and many alternatives to choose from.
Stencil: Waterspout, A Colorful Life Designs
Versamark Embossing Ink: Simon Says Stamp
Clear Embossing Powder: Wow, R&R Scrapbooking
Stamps: Be Yourself, The Frantic Stamper
Dies: Carmen, The Frantic Stamper
Ink: Stampin’ Up!
Blending Brushes: Stampin’ Up!
Versafine Onyx, Simon Says Stamp
Memento Ink: Stampin’ Up!
Adhesive: Tombow Aqua, Michaels
Card Base & Card Face: Accent 100 lb., Amazon
Do you have comments or thoughts to share on this design? Drop me a line in the Comments Section below – I’d love to hear from you!
You can also use the Comments Section to be added to the list, and notified when I release new work.