a fast, easy & impressive card

Would you like to experiment with a design like this? You’ll find a supply list below, including a link to the stencil I used from A Colorful Life Designs. Follow the link and use discount code ChrisFan10 to save 10% on your entire order! (Master Creator Bundles are excluded as they already have a 20% discount built in.)
Let’s get Started:
Card Base: 5.5 x 8.5, scored and folded at 4.25
Card Face: 5.5 x 4.25
White Cardstock: 5 x 3.75 (before die cutting the frame)
Scraps of White Cardstock for the word
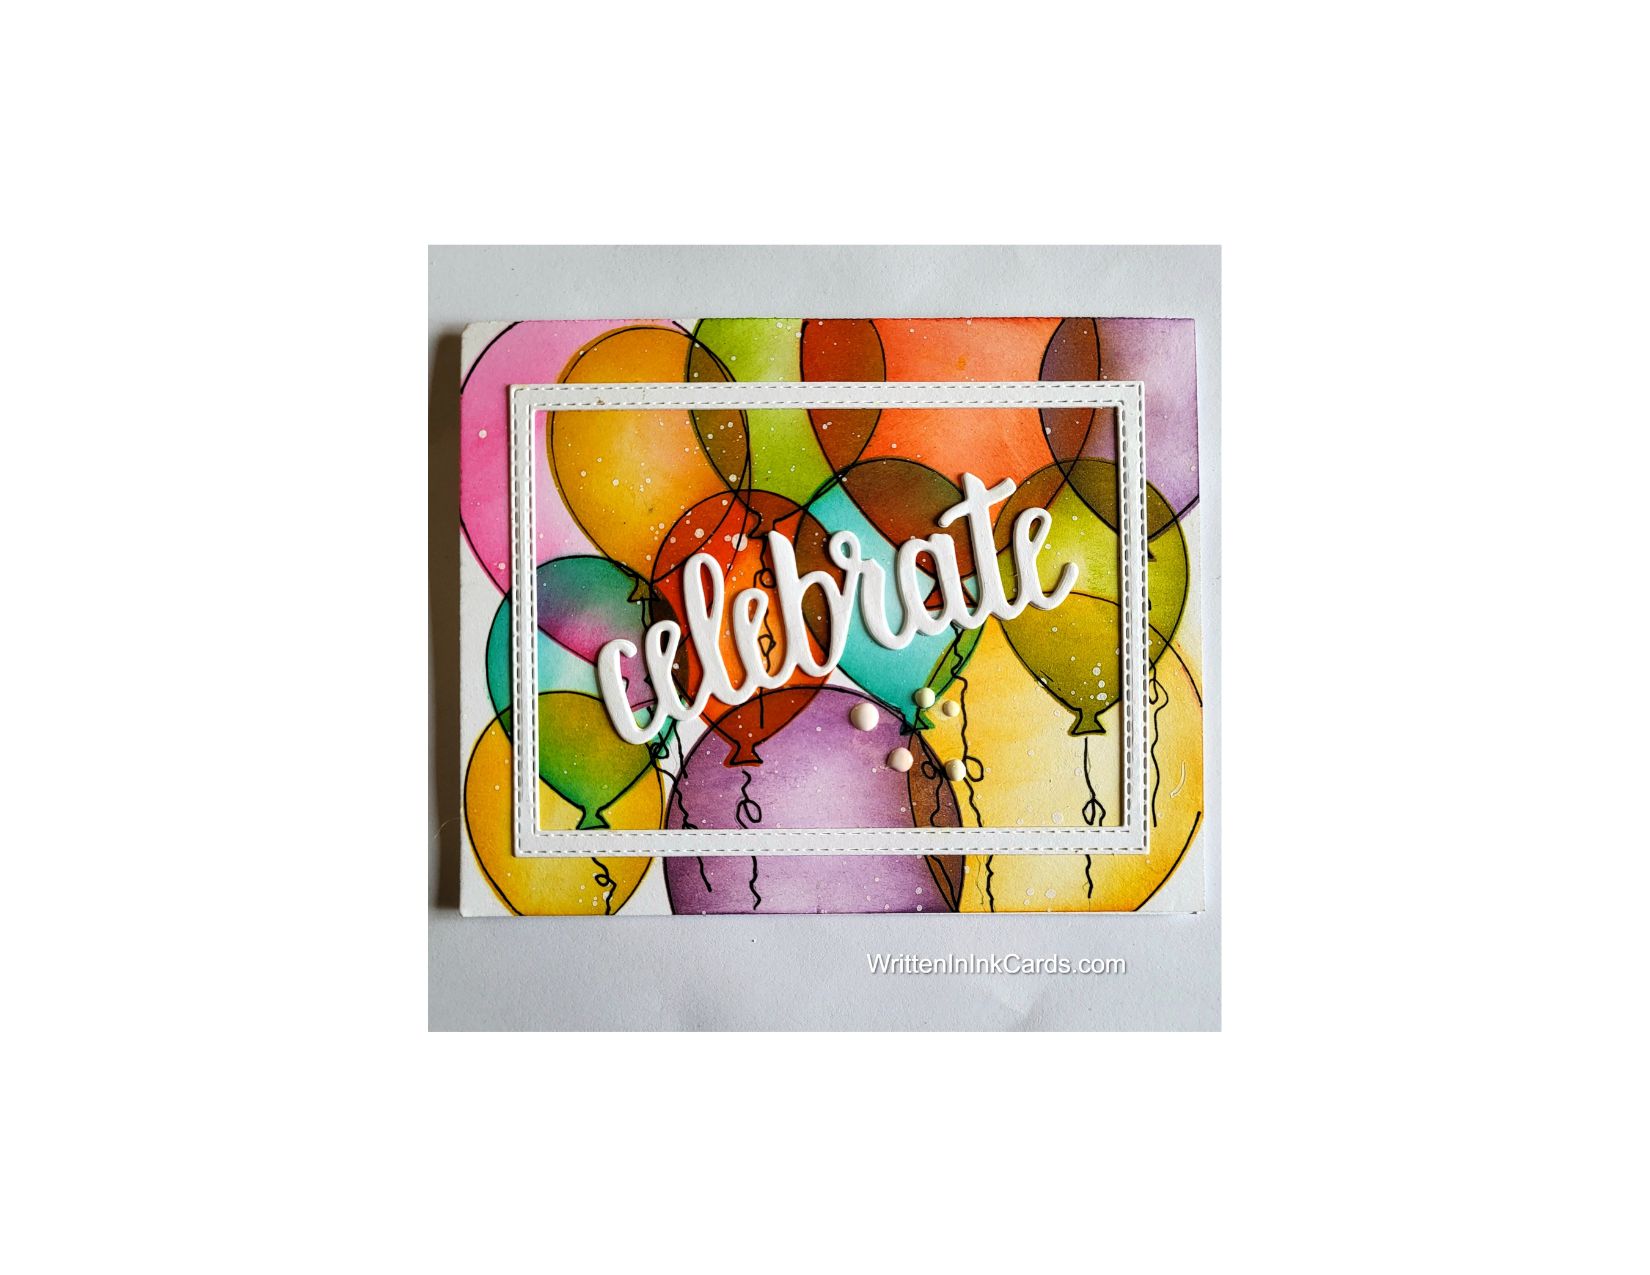
I used the Marvellous Masks – Balloons for this card, which include four different sizes of both stencils and masks and offers infinite variety.
Card Face:
I selected two of the balloon stencils, one quite a bit larger than the other.
I laid the card face on my Grip Mat and positioned the larger balloon stencil. I applied yellow ink across the exposed area.
I repeated this 3X, creating four large balloons randomly on the card face using purple, pink and red inks in addition to the yellow.
I added smaller balloons in the colours mentioned above as well as adding blue and green to the mix, allowing the balloons to overlap to create depth.
I outlined each balloon with a black micro liner (I put the stencils back in place to do this, making the process fast and easy).
I drew strings on the balloons using the same micro liner.
I added white spatter to the card face using diluted acrylic.
Other:
I die cut “celebrate” 3X from the scrap cardstock.
I positioned two stitched rectangle dies on the larger piece of white cardstock, taping them to ensure even spacing all the way around. I ran this through the Big Shot to create the white frame.
Assembly
I stacked and glued the three words on top of each other.
I glued the card face to the card base, and centered the white frame on these.
I added the Celebrate on an angle, slightly above the center.
I added white Nuvo drops as a finishing touch.
Final Thoughts:
I’m really happy with this fun, colourful card. I hadn’t initially planned to outline the balloons, but I am glad I did: the extra definition made a huge difference in this card.
I only used two of the four sizes of balloons in the set – you could easily alter the sizes and number of balloons in the design to create a new look each time.
Supplies: (and links where possible)
I have listed which products I have used, and where they may be purchased. It’s a huge marketplace and in most instances, there are multiple sources and many alternatives to choose from.
Stencil: Marvellous Masks, Balloons, A Colorful Life Designs
Waffle Flower Grip Mat, 8.5 x 6.5, Scrapbook.com
Dies: Amazing You, Stampin’ Up! (retired)
Ink: Stampin’ Up!
Blending Brushes: Stampin’ Up!
Micro Liners: Amazon
Acrylic: Dr Ph Martin, Taylored Expressions
Adhesive: Tombow Aqua, Michaels
Card Base & Card Face: Accent 100 lb., Amazon
Do you have comments or thoughts to share on this design? Drop me a line in the Comments Section below – I’d love to hear from you!
You can also use the Comments Section to be notified when I release new work