Category: winter

  • Create Stunning Embossed Christmas Cards for 2026

    Create Stunning Embossed Christmas Cards for 2026

    Let’s get Started:

    Card Base: 5.5 x 8.5, scored and folded at 4.25

    Card Face:  5.25 x 4

    A card for Christmas 2026!   My goal is to be ahead of the game next year:  I hope to make Christmas cards here and there between now and next November.

    Card Face:

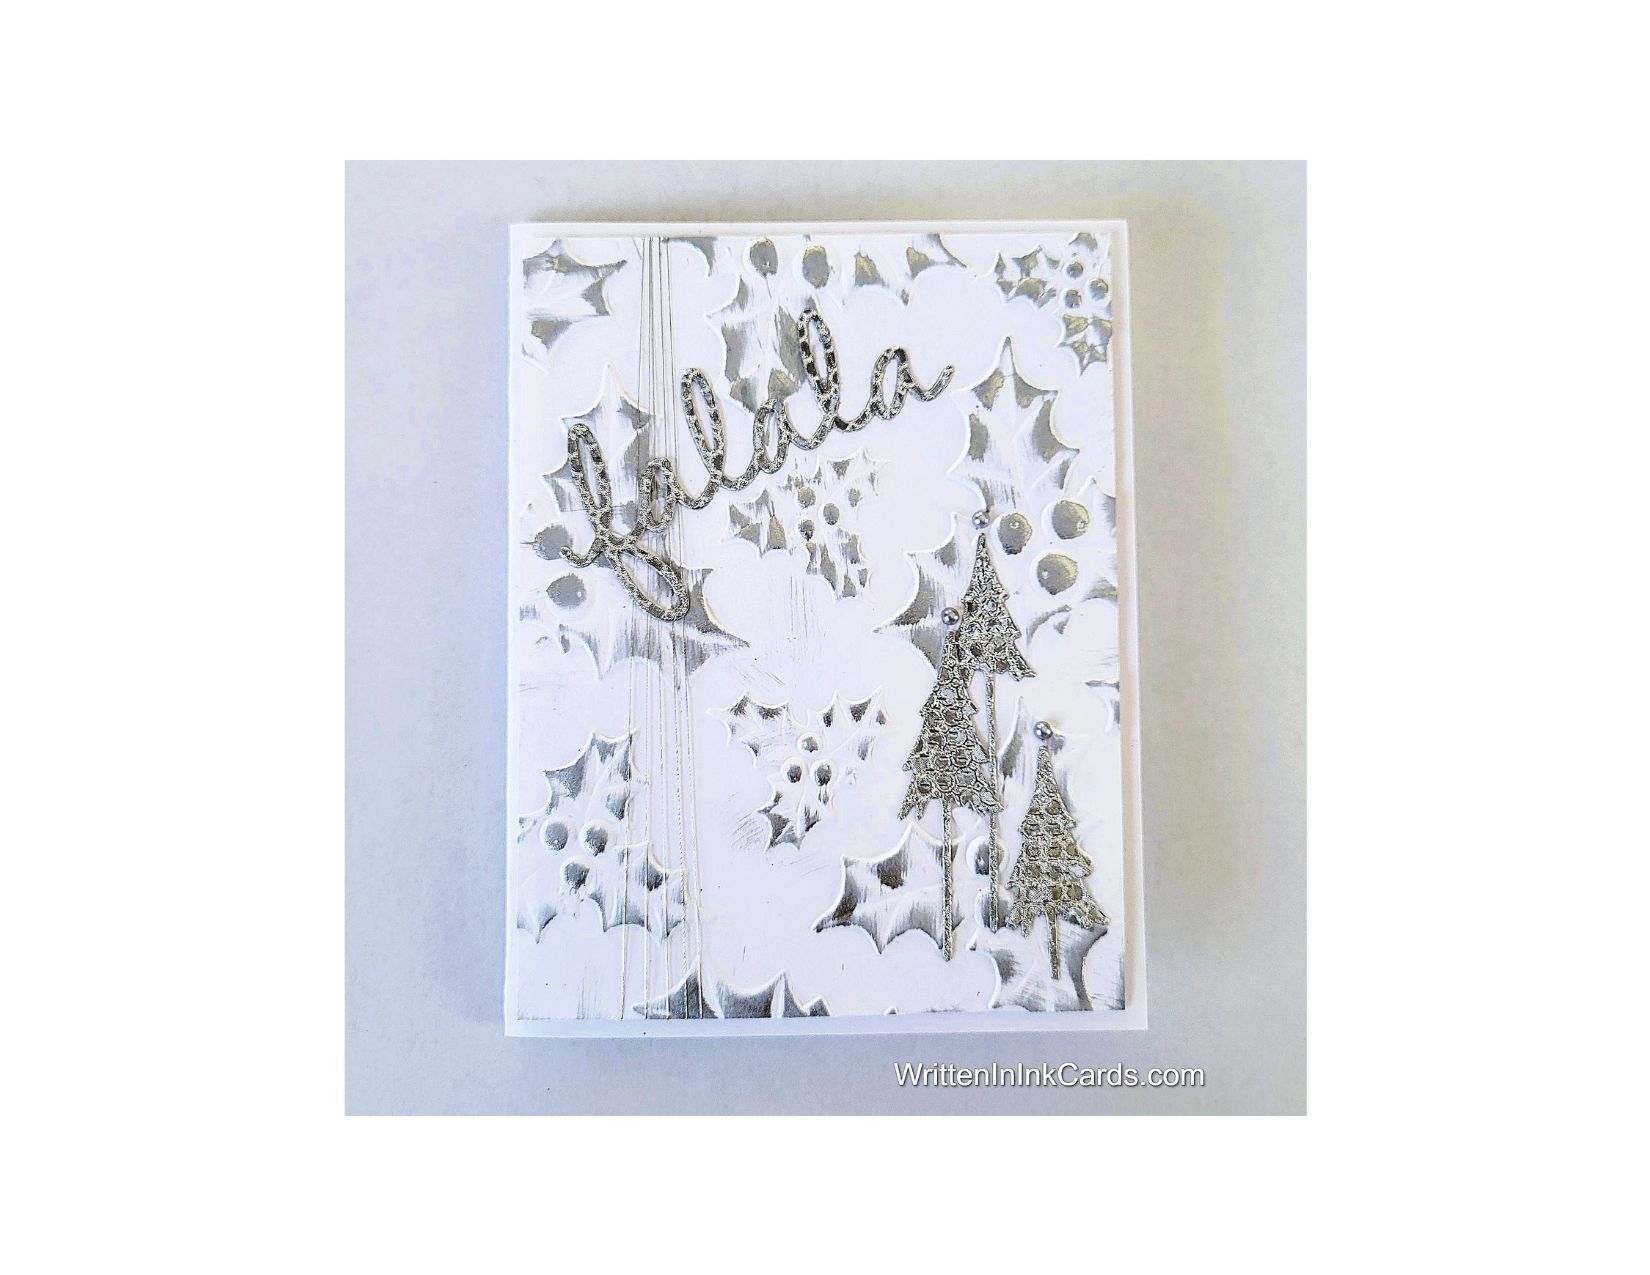
    • I inserted the card face into the embossing folder and ran it through the Big Shot.
    • I removed the paper from the folder and ran a silver ink pad lightly over the raised surfaces.
    • I secured silver metallic thread to the back of the cardface,  at the top left.  
    • I wound the thread around the card face 5 times, allowing it to gather at the top and fan out at the bottom.  I snipped the thread and secured the end with scotch tape.

    Other:

    • I had remnants of a patterned metallic silver paper that I used to die-cut the trees and the sentiment.

    Assembly

    • I put dimensional foam on the back of the card face and centered it on the card base.
    • I glued the three trees in place as shown.
    • I glued the sentiment in place, allowing the left-hand side to overlap the silver threads.
    • I added a small silver pearl to the top of each tree.

    Final Thoughts:

    The silver ink used to highlight the embossing has a gorgeous gleam,  and the die-cut silver elements on the card have a shine:  the contrast between the two is fabulous.

    Supplies: (and links where possible)

       I have listed the products I have used and where they can be purchased. It’s a huge marketplace, and in most instances, there are multiple sources and many alternatives to choose from.

    Embossing Folder:  Holly Leaves and Berrys,  Nellie’s Choice, Ecstasy Crafts

    Dies:  Stampin’ Up!  (retired)

    Ink: Lisa Horton, Glitter & Ink

    Adhesive: Tombow Aqua, Michaels

    Card Base & Card Face: Accent 100 lb., Amazon 

    Do you have any comments or thoughts on this design?  Drop me a line in the Comments Section below –  I’d love to hear from you!

    You can also use the Comments Section to be notified when I release new work.

  • Create Rustic Holiday Cards the Fast & Easy Way

    Create Rustic Holiday Cards the Fast & Easy Way

    Would you like to experiment with a design like this? You’ll find a supply list below, including a link to the stencil I used from A Colorful Life Designs.  Follow the link and use discount code ChrisFan10 to save 10% on your entire order! (Master Creator Bundles are excluded as they already have a 20% discount built in.)

    Let’s get Started:

    Card Base: 5.5 x 8.5, scored and folded at 4.25

    Card Face:  5.25 x 4

    I am trying to make a few Christmas cards as I go along this year,  to avoid the rush in November.  We’ll see if I am successful as the year goes on.

    Card Face:

    • I placed the card face in my stamp positioner and positioned the stamp at the bottom of the paper.
    • I stamped in soft blue ink,  moved the card face down ½” and stamped again. 
    •  I repeated this process until I reached the top of the page.

    One advantage of a stamp positioner is its ability to create a background pattern or feature with a single stamp.

    • Other:
    • I had previously created both the snowflake and the sentiment; it was fast and easy to retrieve them from my binders.  (I have two:  one for sentiments and one for shapes and precut /coloured images.They are great time savers!)

    Assembly

    • I put dimensional foam on the back of the card face, and then centered it on the card base.
    • I glued the snowflake into the center of the card face.  I added tiny, iridescent rhinestones around the snowflake,  and a larger one in the center.
    • I put a strip of dimensional foam on the back of the sentiment and positioned it under the snowflake, as shown.

    Final Thoughts:

    This card is very simple and has a delightfully rustic feel, created by that background. It almost takes on the look of lined paper.  Varying the background would change the style of the card entirely:  elegant, contemporary or grunge could all be easily achieved.

    Supplies: (and links where possible)

       I have listed which products I have used, and where they may be purchased. It’s a huge marketplace and in most instances, there are multiple sources and many alternatives to choose from.

    Stamps:  Background lace:  Stampin’ Up! (retired)

    Dies:  Sizzix Switchlets, Winter Snowflakes,  Amazon

    Ink: Catherine Pooler, Glitter & Ink

    Adhesive: Tombow Aqua, Michaels

    Recollections 110 lb., Michaels

    Do you have comments or thoughts to share on this design?  Drop me a line in the Comments Section below –  I’d love to hear from you!

    You can also use the Comments Section  to be notified when I release new work.

  • Is “Fast & Easy” your cardmaking jam?  Stencils for the win!

    Is “Fast & Easy” your cardmaking jam? Stencils for the win!

    Two stencils and a couple of pre-coloured & cut elements … easy peasy.

    Would you like to experiment with a design like this? You’ll find a supply list below, including a link to the stencils I used from A Colorful Life Designs.  Follow the link and use discount code ChrisFan10 to save 10% on your entire order! (Master Creator Bundles are excluded as they already have a 20% discount built in.)

    Let’s get Started:

    Card Base: 5.5 x 8.5, scored and folded at 4.25

    Card Face:  5.25 x 4

    Card Face:

    • I laid the card face onto my Grip Mat and then positioned the Fine Snowflakes stencil:  I applied white pigment ink on all exposed areas, using a heavy hand to ensure good saturation.
    • After removing this stencil, I replaced it with the Tree Edger #1 stencil, positioning this approximately half way down the page (horizonally).
    • I used the same white pigment ink to create a tree line, with a lighter hand than I had used for the snowflakes.
    • I moved the stencil down and repeated this step, to create a second tree line directly below the first.
    • I used a white gel pen to add dots of snow to the night sky.

    Other:

    • The wee house and tree were already stamped, coloured and cut out,  waiting in my Ready to Go binder,  as was the sentiment.  I pulled all three out for use on this card.

    Assembly

    • I glued the card face to the card base, centering on all sides.
    • I glued the house in the middle of the card,  just a bit up from the bottom. 
    • I added the tree as shown, overlapping the house slightly.
    • I added the sentiment to the upper left.
    • I added rhinestones to the center of each snowflake.

    Final Thoughts:

    This is a very outside-the-box card for me: both design wise and as a Christmas card.  None the less,  I like it!

    Supplies: (and links where possible)

       I have listed which products I have used, and where they may be purchased. It’s a huge marketplace and in most instances, there are multiple sources and many alternatives to choose from.

    Stencil:

    Fine Snowflakes:  A Colorful Life Designs

    Christmas Tree Edger #1, A Colorful Life Designs

    Waffle Flower Grip Mat, 8.5 x 6.5, Scrapbook.com

    Versamark Embossing Ink: Simon Says Stamp

    White Gel Pen: Arteza, Amazon

    Clear Embossing Powder,  Wow,  Simon Says Stamp

    Stamps & Coordinating Dies:  Stampin’ Up!  (retired)

    Ink: Stampin’ Up!

    Blending Brushes: Stampin’ Up! 

    Versafine Onyx, Simon Says Stamp

    Memento Ink: Stampin’ Up!

    Alcohol Markers:

         Stampin’ Blends: Stampin’ Up!

         Copics:  Wallacks

    Adhesive: Tombow Aqua, Michaels

    Card Base & Card Face: Accent 100 lb., Amazon

    Do you have comments or thoughts to share on this design?  Drop me a line in the Comments Section below –  I’d love to hear from you!

    You can also use the Comments Section  to be notified when I release new work.

    Fine Snowflakes by A Colorful Life Designs

    Christmas Tree Edger #1, by A Colorful Life Designs

  • Yes,  fast & easy can create beautiful holiday cards

    Yes, fast & easy can create beautiful holiday cards

    The world is hushed as snow falls silently on a secluded cabin.

    Would you like to experiment with a design like this? You’ll find a supply list below, including a link to the stencil I used from A Colorful Life Designs.  Follow the link and use discount code ChrisFan10 to save 10% on your entire order! (Master Creator Bundles are excluded as they already have a 20% discount built in.)

    Let’s get Started:

    Card Base: 5.5 x 8.5, scored and folded at 4.25

    Card Face:  5 3/8 x 4 1/8

    Card Face:

    • I placed the card face into my stamp positioner and stamped the cabin, fence , fox and trees using Versafine Onyx.
    • I moved the card face to the grip mat,  positioned the stencil and added the design using white pigment ink.  I used a heavy hand with this,  to be sure that it would stand out well against the dark background.

    Other:

    • I looked through my sentiment binder,  and selected the one that worked for this card.

    Assembly

    • I glued the card face to the card base, centering on all sides.
    • I added the sentiment as shown.

    Final Thoughts:

    This was such a quick and easy card to create,  and a very satisfying result.

    I love the white ink on that dark teal cardstock –  a very pretty combination. If I wanted even more contrast I could have used clear embossing powder on top of the white ink, but I felt that it was distinct enough without that step.

    Supplies: (and links where possible)

       I have listed which products I have used, and where they may be purchased. It’s a huge marketplace and in most instances, there are multiple sources and many alternatives to choose from.

    Stencil: Christmas Greenery,  A Colorful Life Designs

    Waffle Flower Grip Mat, 8.5 x 6.5, Scrapbook.com

    Stamps:  Peaceful Cabin,  Stampin’ Up!  (retired)

    White Ink: Stampin’ Up!

    Blending Brushes: Peaceful Stampin’ Up! 

    Versafine Onyx, Simon Says Stamp

    Adhesive: Tombow Aqua, Michaels

    Card Base & Card Face: Accent 100 lb., Amazon

    Do you have comments or thoughts to share on this design?  Drop me a line in the Comments Section below –  I’d love to hear from you!

    You can also use the Comments Section  to be notified when I release new work

    Christmas Greenery by A Colorful Life Designs