
Would you like to experiment with a design like this? You’ll find a supply list below, including a link to the stencils I used from A Colorful Life Designs. Follow the link and use the discount code ChrisFan10 to save 10% on your entire order! (Master Creator Bundles are excluded as they already have a 20% discount built in.)
Let’s get Started:
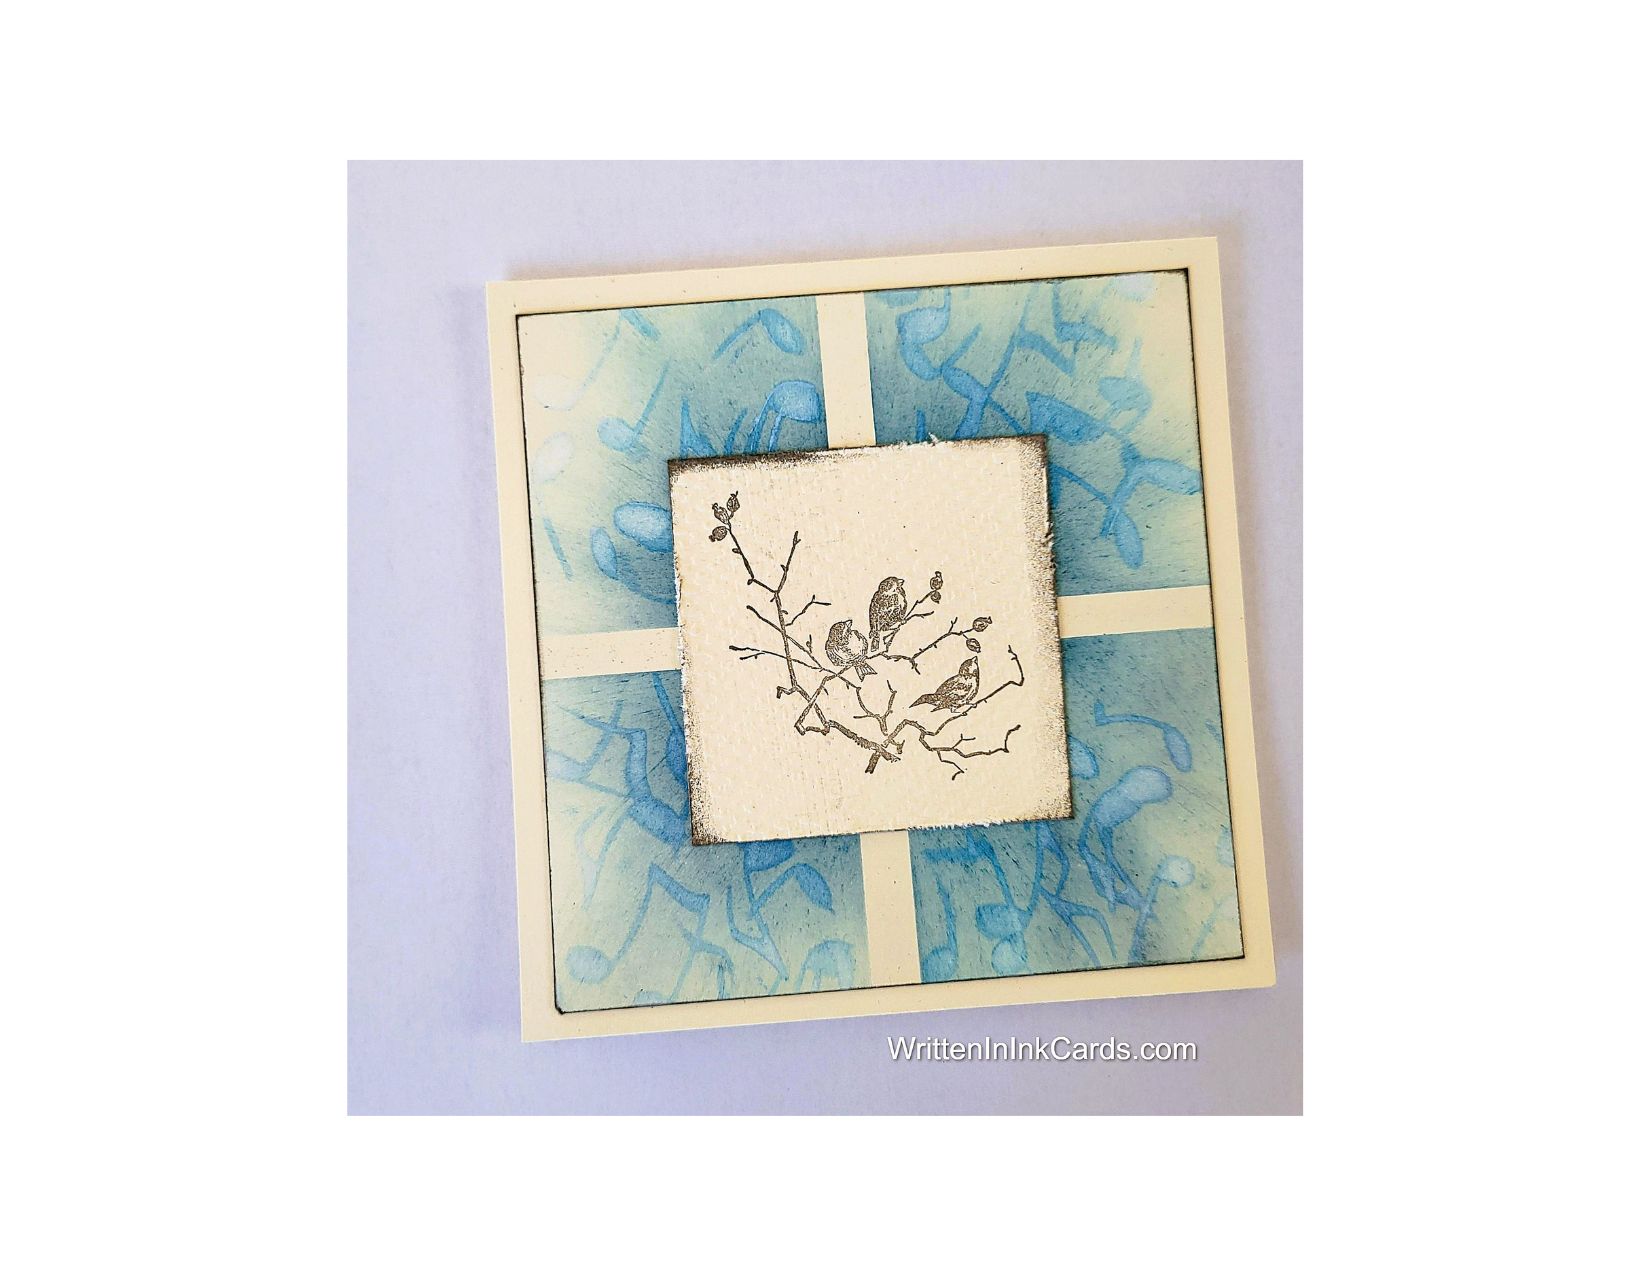
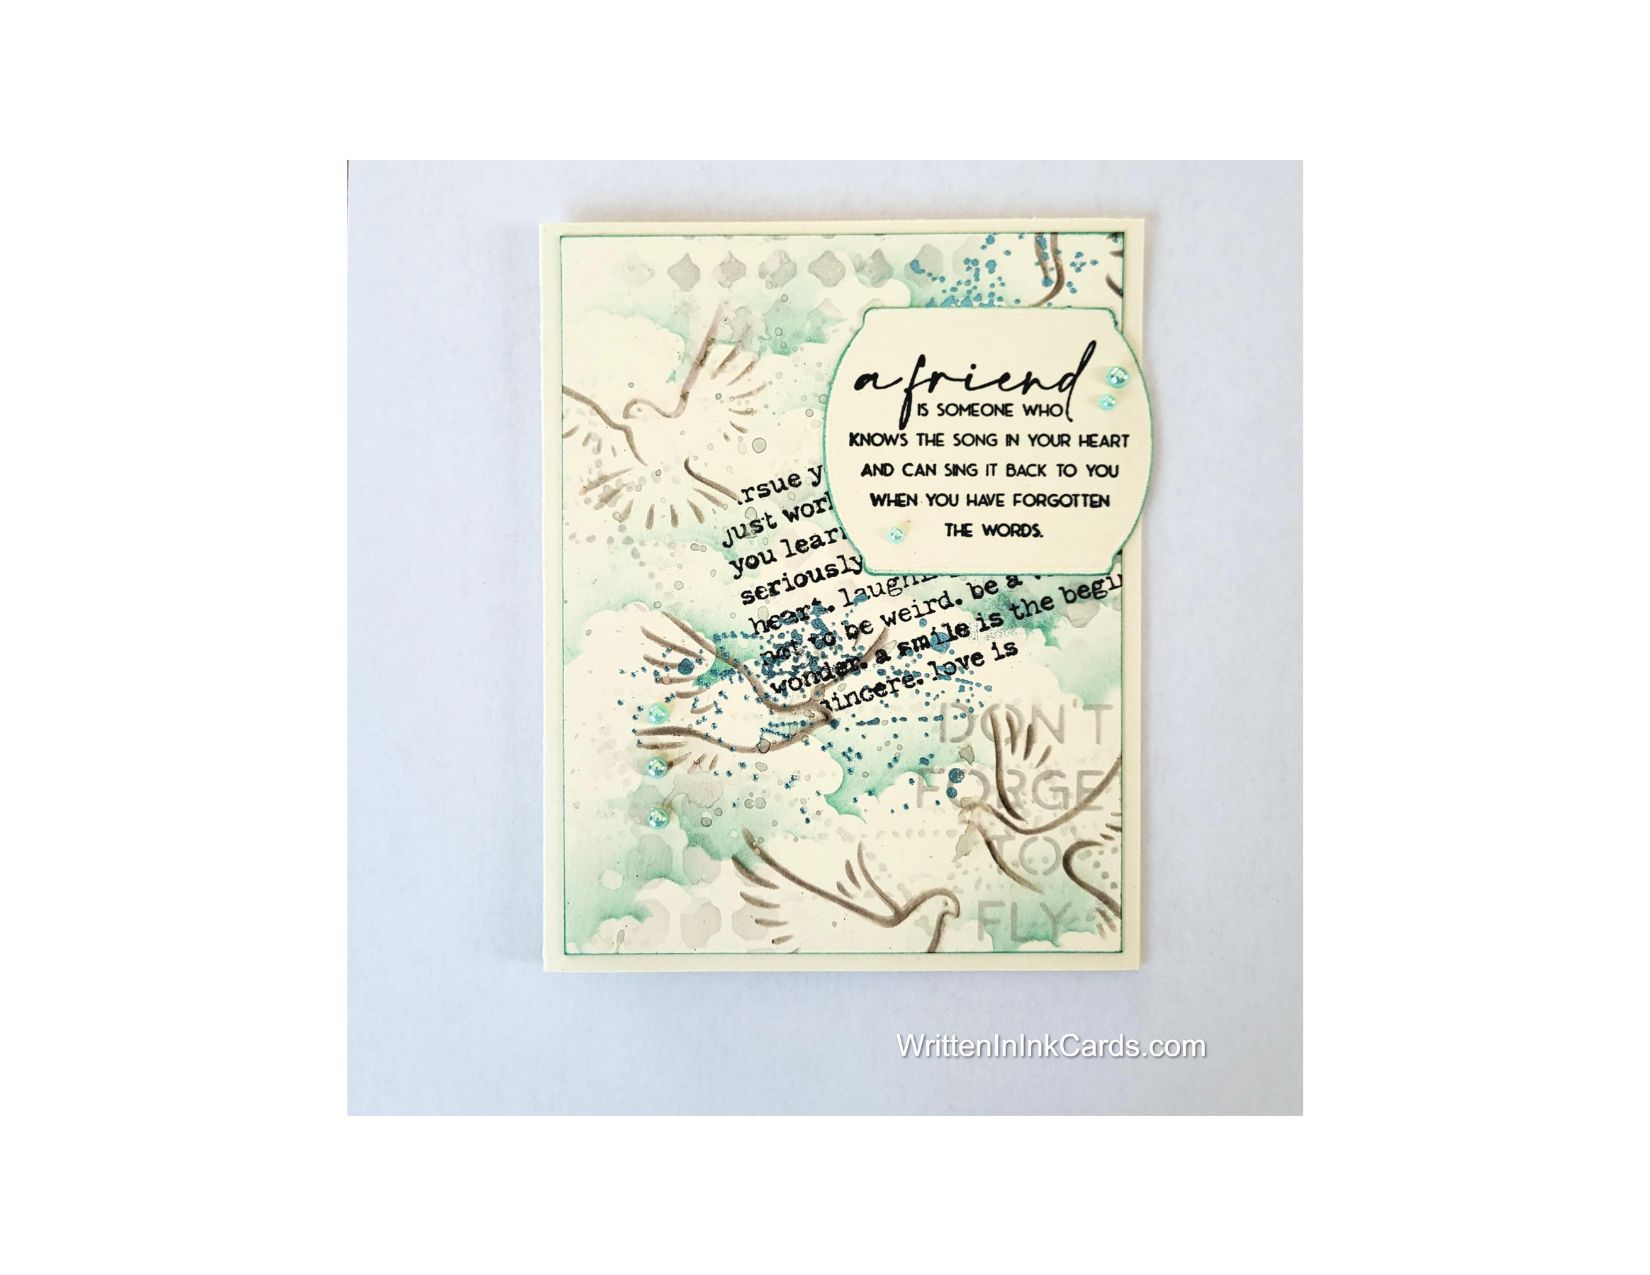
Card Base: 5.5 x 8.5, scored and folded at 4.25
Card Face: 5.25 x 4
Card Face:
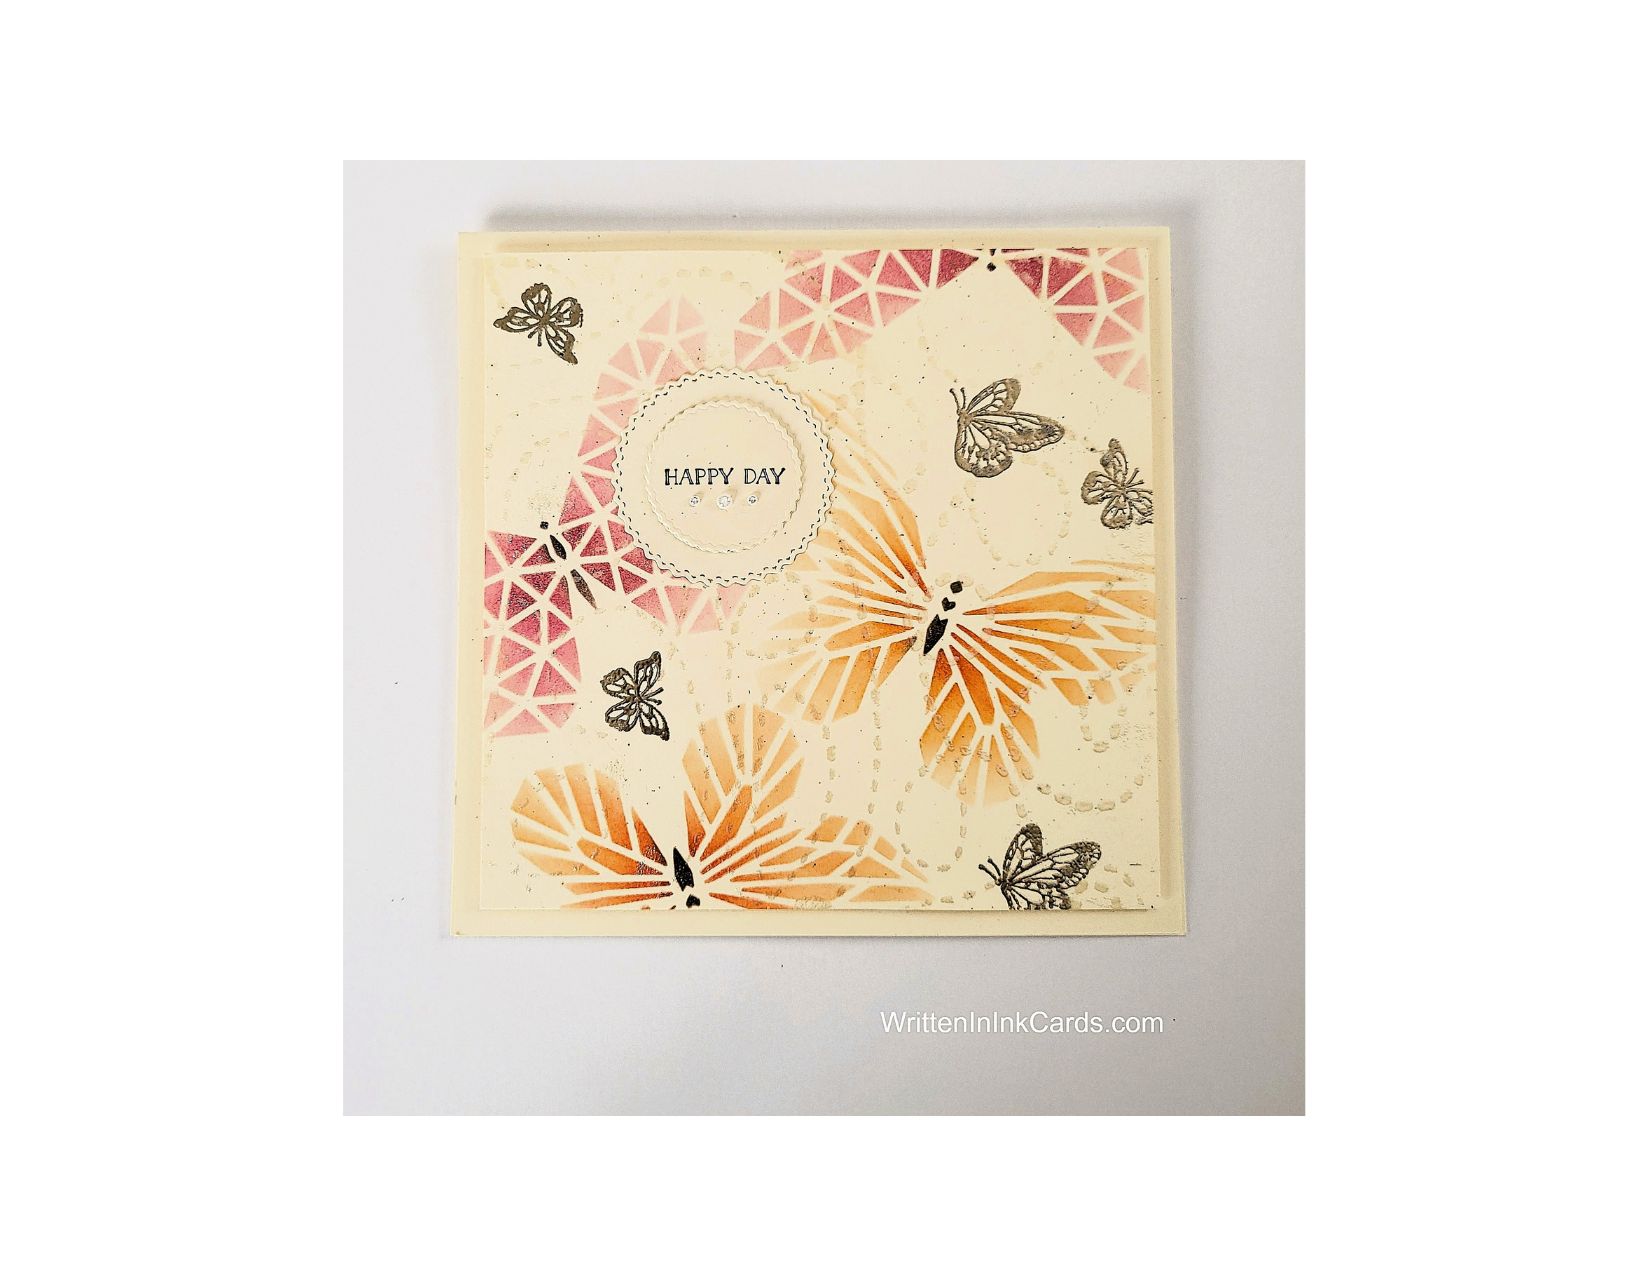
- I began by using my Glimmer Machine to add some background detail: I used black foil for the partially visible sentiment and blue foil for the spatter.
- Next, I used the Dove Set stencil to add the birds, using a soft hand and dark gray ink. I moved the stencil here and there on the card face and randomly switched up which of the birds was used in an area.
- I added additional detail to the background with gray ink and two stencils: Dot Mat and Faded Lines.
- And finally, I created the sky using light-teal ink and the Cloud Edger stencil.
- I used water to add spatter to the card face, creating texture and depth.
Other:
- I stamped the sentiment with Versafine Onyx, and created the shape with a die.
- I ran the edges of this piece over the teal ink pad to create visual interest and definition. I did the same thing with the card face.
Assembly
- I glued the card face to the card base, and then positioned the sentiment in the upper right as shown.
- I added three small teal pearls to the sentiment.
Final Thoughts:
This design is far more detailed than those I normally create, but I’m happy with the way the various elements play together.
Supplies: (and links where possible)
I have listed the products I have used and where they can be purchased. It’s a huge marketplace, and in most instances, there are multiple sources and many alternatives to choose from.
Stencils:
Dove Set stencil: A Colorful Life Designs
Faded Lines: A Colorful Life Designs
Dot Mat: A Colorful Life Designs
Cloud Edger: A Colorful Life Designs
Waffle Flower Grip Mat, 8.5 x 6.5, Scrapbook.com
Stamps: Getting Cozy, Unity Stamps
Die: Stampin’ Up! (retired)
Ink: Stampin’ Up!
Blending Brushes: Stampin’ Up!
Versafine Onyx, Simon Says Stamp
Adhesive: Tombow Aqua, Michaels
Recollections 110 lb., Michaels
Do you have any comments or thoughts on this design? Drop me a line in the Comments Section below – I’d love to hear from you!
You can also use the Comments Section to be notified when I release new work.
Dove Set Stencil

Dot Mat

Faded Lines

Cloud Edger