Category: Holiday

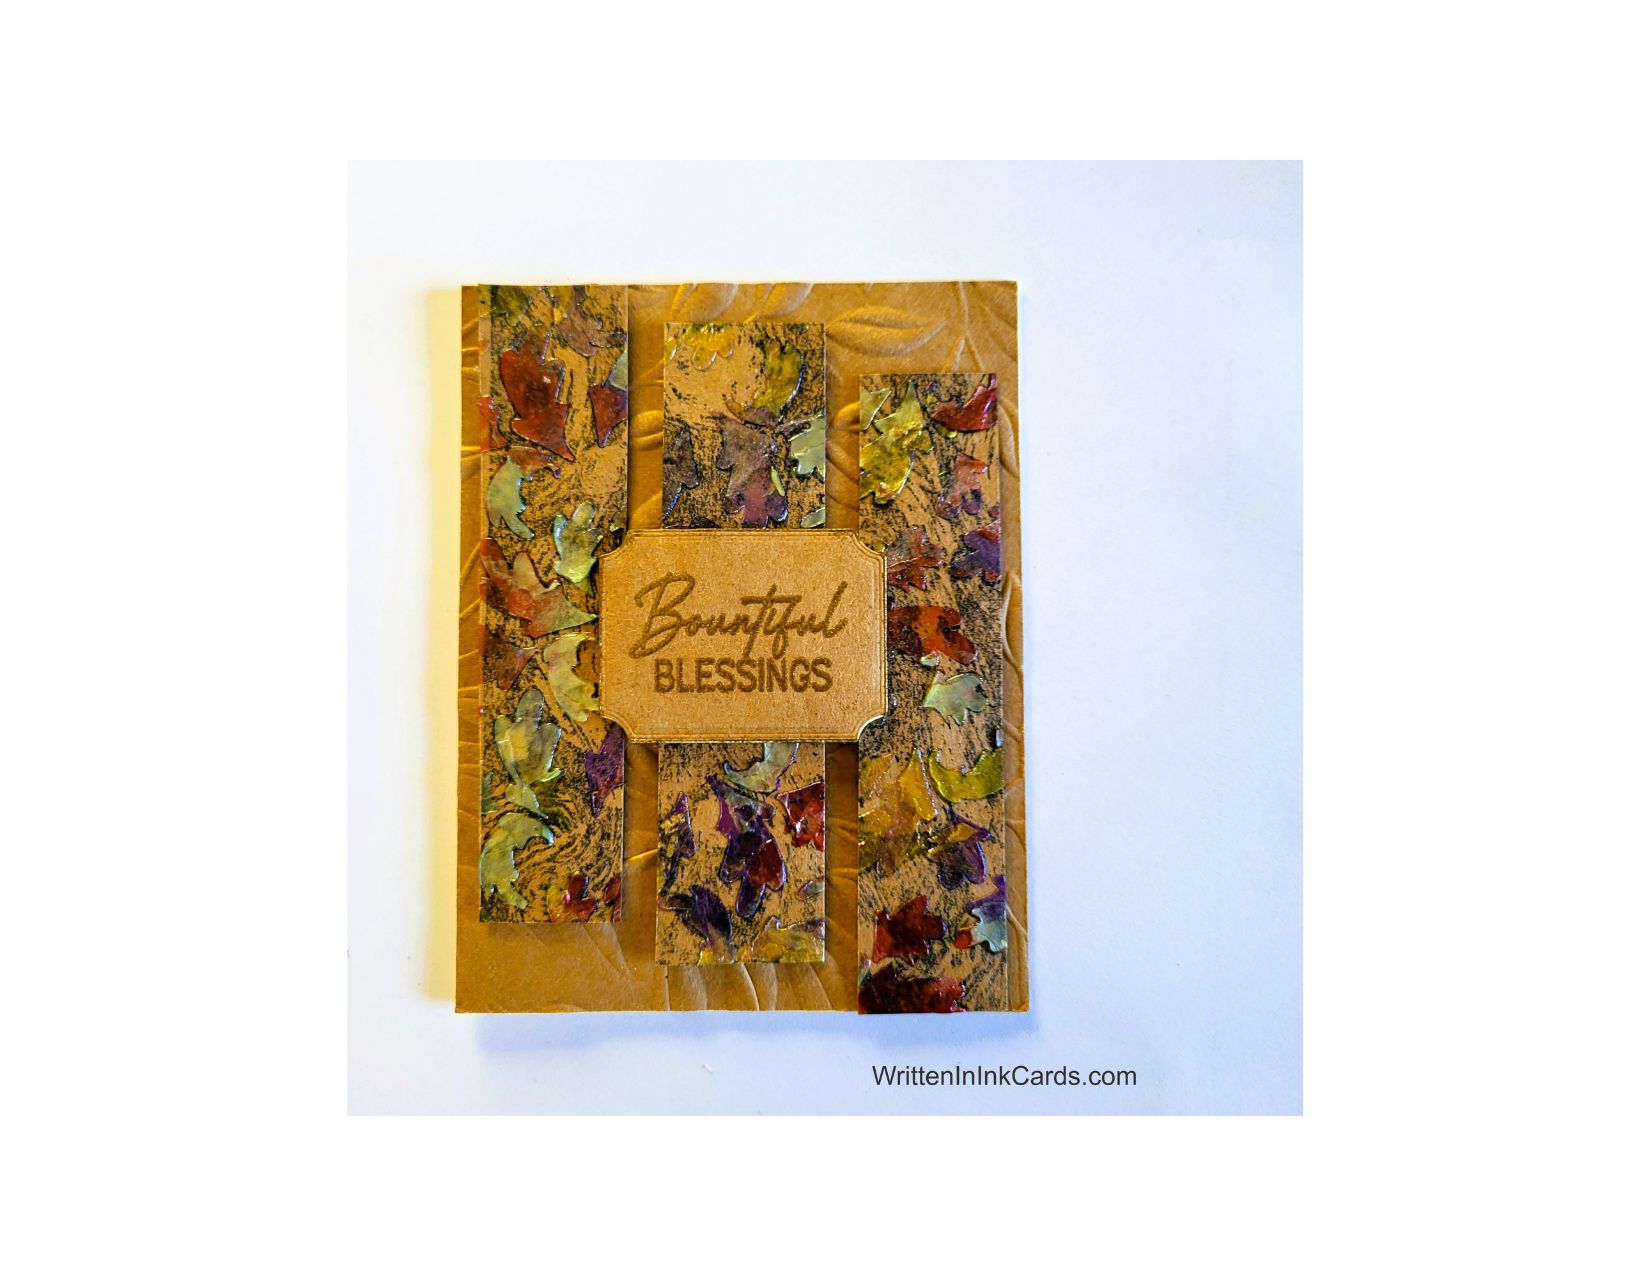
  • Create a one of a kind, elegant Thanksgiving card

    Create a one of a kind, elegant Thanksgiving card

    Would you like to experiment with a design like this? You’ll find a supply list below, including a link to the stencil I used from A Colorful Life Designs.  Follow the link and use discount code ChrisFan10 to save 10% on your entire order! (Master Creator Bundles are excluded as they already have a 20% discount built in.)

    Let’s get Started:

    Card Base: 5.5 x 8.5, scored and folded at 4.25

    Border Layer: 5.5 x 4.25

    Card Face:  5.5 x 4.25  (before cutting)

    Card Face:

    • I used a background stamp and black ink to provide additional texture on this layer.

    My standard practice with background stamps is to lay the stamp on my work surface, ink it, and then carefully lay the cardstock on top.  I cover this with a piece of scrap paper and rub the surface gently with my fingers to transfer the ink, always holding the paper absolutely still with my other hand. (The scrap paper serves to keep any excess ink off of my hands, and it is sure to transfer to the card face!)

    • I placed the card face down on the Grip Mat and positioned the stencil.  I applied a variety of embossing pastes through this, mixing the colours randomly.  
    • I removed the stencil and immediately put it in water,  and put the card face aside to dry.
    • Once the paste had dried completely, I trimmed it into three equal pieces measuring 1” x 4.75” each.
    • I put dimensional foam on the back of each of these strips.

    Other:

    • I put the border layer into an embossing folder and ran it through the Big Shot.
    • I stamped the sentiment with Versamark embossing ink, added gold embossing powder and set it with the heat gun.  I used a die to create the final size and shape.
    • Then I ran each side of this die cut lightly over the Versamark pad,  added gold embossing powder and set it with my heat gun.  This added a very fine gold edging to the die cut.

    Assembly

    • I glued the border layer to the card base,
    • I removed the backing from each strip and put them in place as shown.
    • I glued the die-cut sentiment into the middle of the card.

    Final Thoughts:

    The border layer for this actually started with a stamped image that I wasn’t happy with:  it was a new stamp, and the image hadn’t transferred as well as hoped.  Rather than waste this,  I made use of that paper and ink to create a background for this card.

    The card is so beautiful in real life – that embossing paste dries with a lovely sheen which is gorgeous with all that mixed colour.

    The use of the embossing folder on this card makes a subtle but massive difference to the end result – the additional depth and texture really elevated the card.

    Supplies: (and links where possible)

       I have listed which products I have used, and where they may be purchased. It’s a huge marketplace and in most instances, there are multiple sources and many alternatives to choose from.

    Stencil: Blowing Leaves,  A Colorful Life Designs

    Waffle Flower Grip Mat, 8.5 x 6.5, Scrapbook.com

    Versamark Embossing Ink: Simon Says Stamp

    Gold Embossing Powder,  Wow,  R&R Scrapbooking

    Stamps:   Impression Obsession (no longer in business)

    Ink: Stampin’ Up!

    Blending Brushes: Stampin’ Up! 

    Adhesive: Tombow Aqua, Michaels

    Card Base & Card Face: Accent 100 lb., Amazon

    Do you have comments or thoughts to share on this design?  Drop me a line in the Comments Section below –  I’d love to hear from you!

    You can also use the Comments Section  to be notified when I release new work.

    Blowing Leaves by A Colorful Life Designs

  • Easy Steps for Beautiful Handcrafted Cards

    Easy Steps for Beautiful Handcrafted Cards

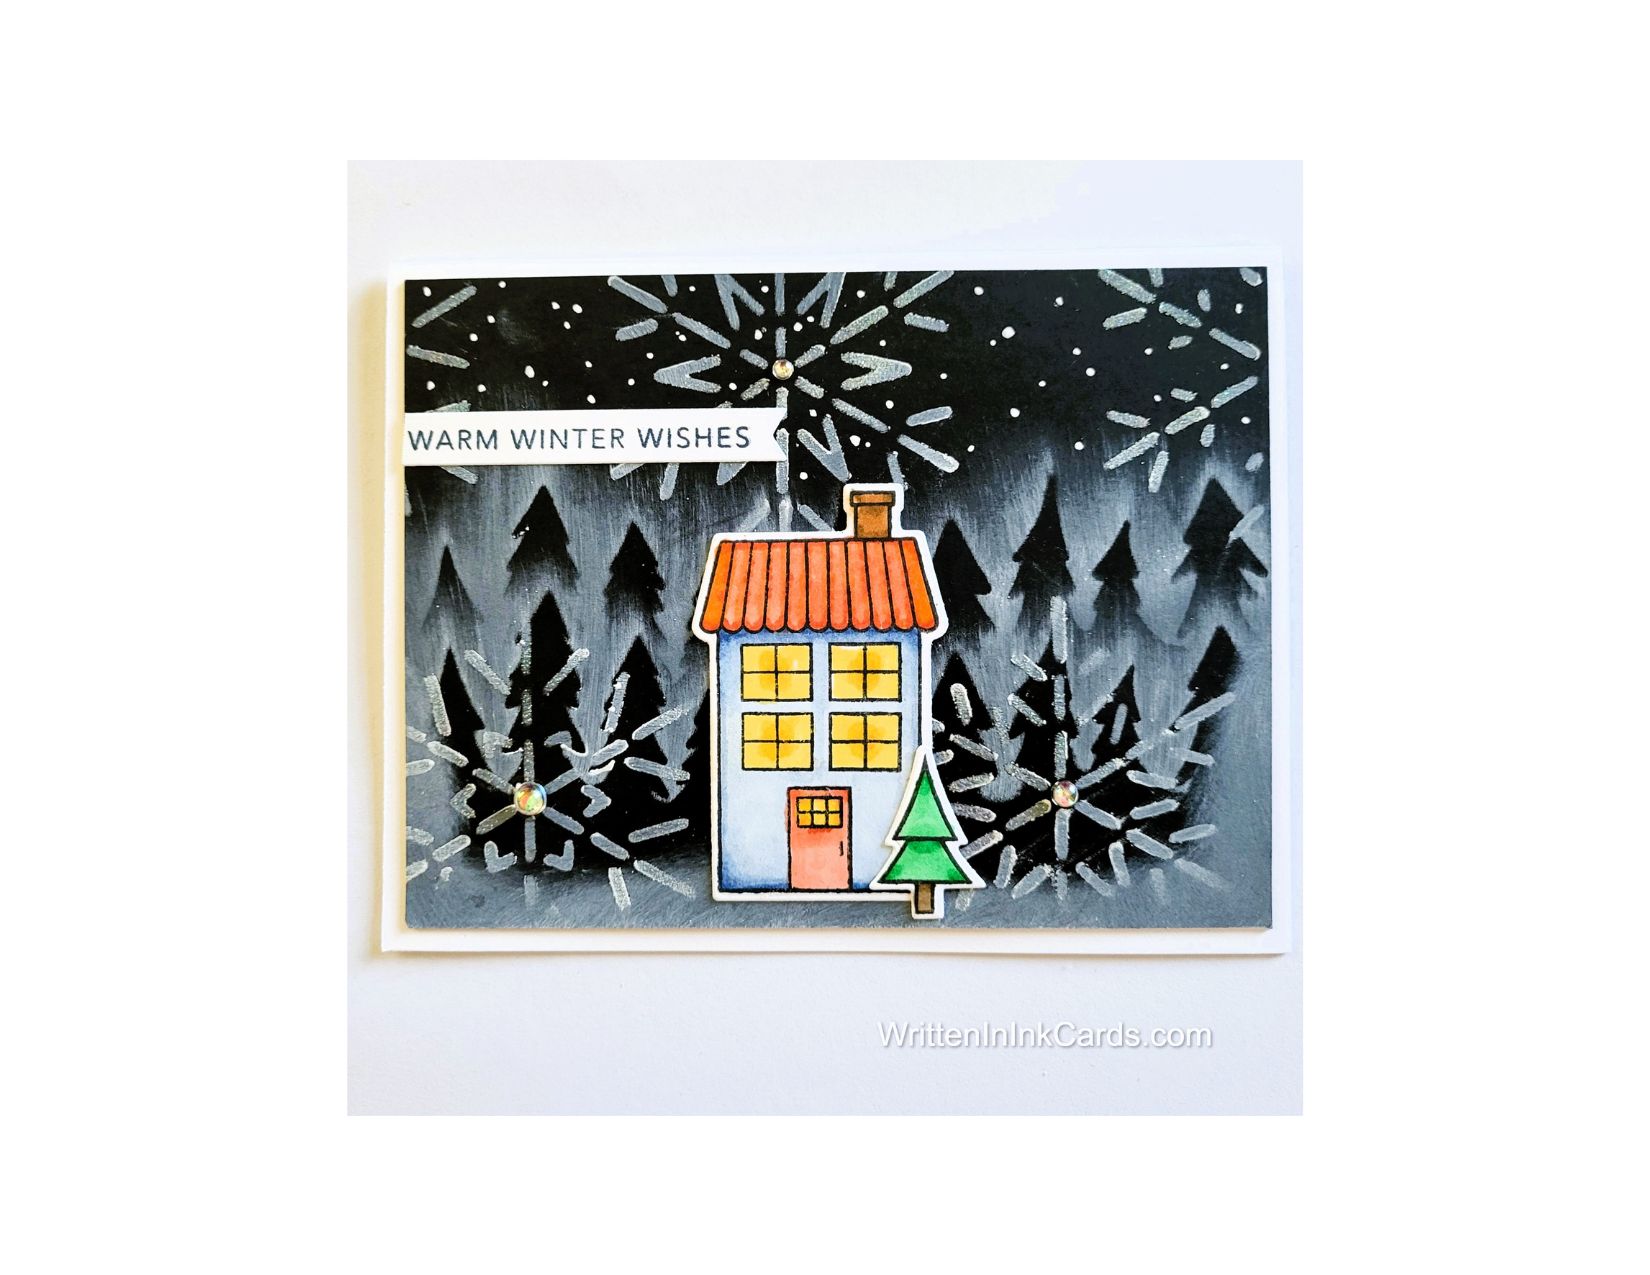
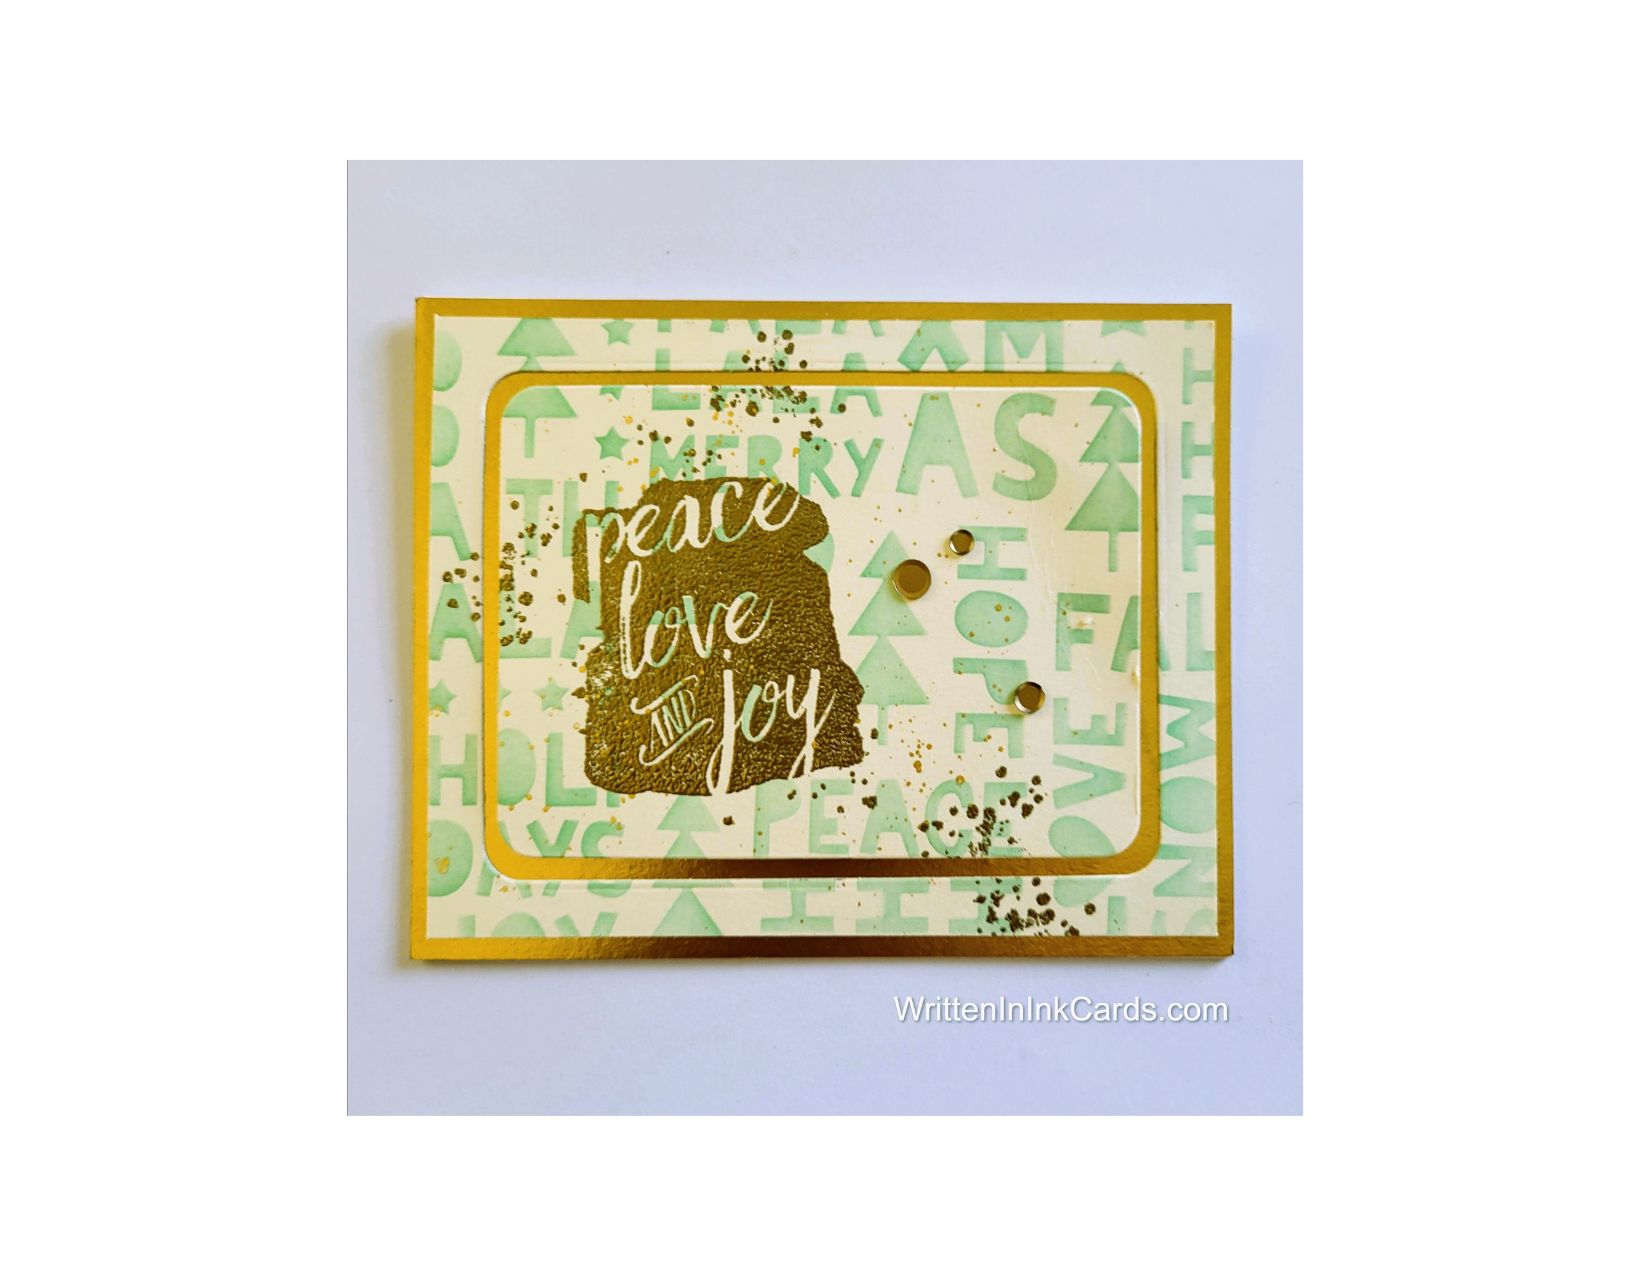
    My wish for you this year, next year and always.

    Would you like to experiment with a design like this? You’ll find a supply list below, including a link to the stencil I used from A Colorful Life Designs.  Follow the link and use discount code ChrisFan10 to save 10% on your entire order! (Master Creator Bundles are excluded as they already have a 20% discount built in.)

    Let’s get Started:

    Card Base: 5.5 x 8.5, scored and folded at 4.25

    Copper Border Layer: 5.5 x 4.25

    Card Face: 5.25 x 4

    Card Face:

    • I laid the card face on the Grip Mat and then positioned the stencil.
    • I applied light green ink with a soft hand over all exposed areas.
    • I allowed the ink to dry ( this only took minutes, but is a critical step when working with embossing powder).
    • I put the card face into my stamp positioner and added the sentiment and the spatters using Versamark embossing ink.
    • I sprinkled copper embossing powder over the surface, and set it with my heat gun.

    Other:

    • I positioned a rounded-corner rectangular die in the center of the card face.  I added the next largest die around this. 
    • After ensuring that there was equal spacing all the way between the two dies,  I ran it through the Big Shot.   This created that copper  outline in the center of the card.

    Assembly

    • I glued the copper border layer to the card base.
    • I glued the card face on top of these, centering on all sides.
    • I put the center piece in place, carefully centering on all sides.
    • I added three small gold embellishments to finish the card.

    Final Thoughts:

    I’m a sucker for the unexpected in design,  so I love negative images.  This is an old, long retired stamp set,  but I pull it out every year to make Christmas cards.

    Supplies: (and links where possible)

       I have listed which products I have used, and where they may be purchased. It’s a huge marketplace and in most instances, there are multiple sources and many alternatives to choose from.

    Stencil: Christmas Montage,  A Colorful Life Designs

    Waffle Flower Grip Mat, 8.5 x 6.5, Scrapbook.com

    Versamark Embossing Ink: Simon Says Stamp

    Copper Embossing Powder,  Wow,  R&R Scrapbooking

    Stamps: Stampin’ Up! (retired)

    Dies:  Rounded Corner Rectangle Infinity Dies,  Hero Arts

    Ink: Stampin’ Up!

    Blending Brushes: Stampin’ Up! 

    Adhesive: Tombow Aqua, Michaels

    Card Bling:  A Colorful Life Designs

    Cream Card Base & Card Face: Recollections, 110 lb.,  Michaels 

    Do you have comments or thoughts to share on this design?  Drop me a line in the Comments Section below –  I’d love to hear from you!

    You can also use the Comments Section  to be notified when I release new work.

    Christmas Montage by A Colorful Life Designs

  • Easy Steps to Craft a Santa Card

    Easy Steps to Craft a Santa Card

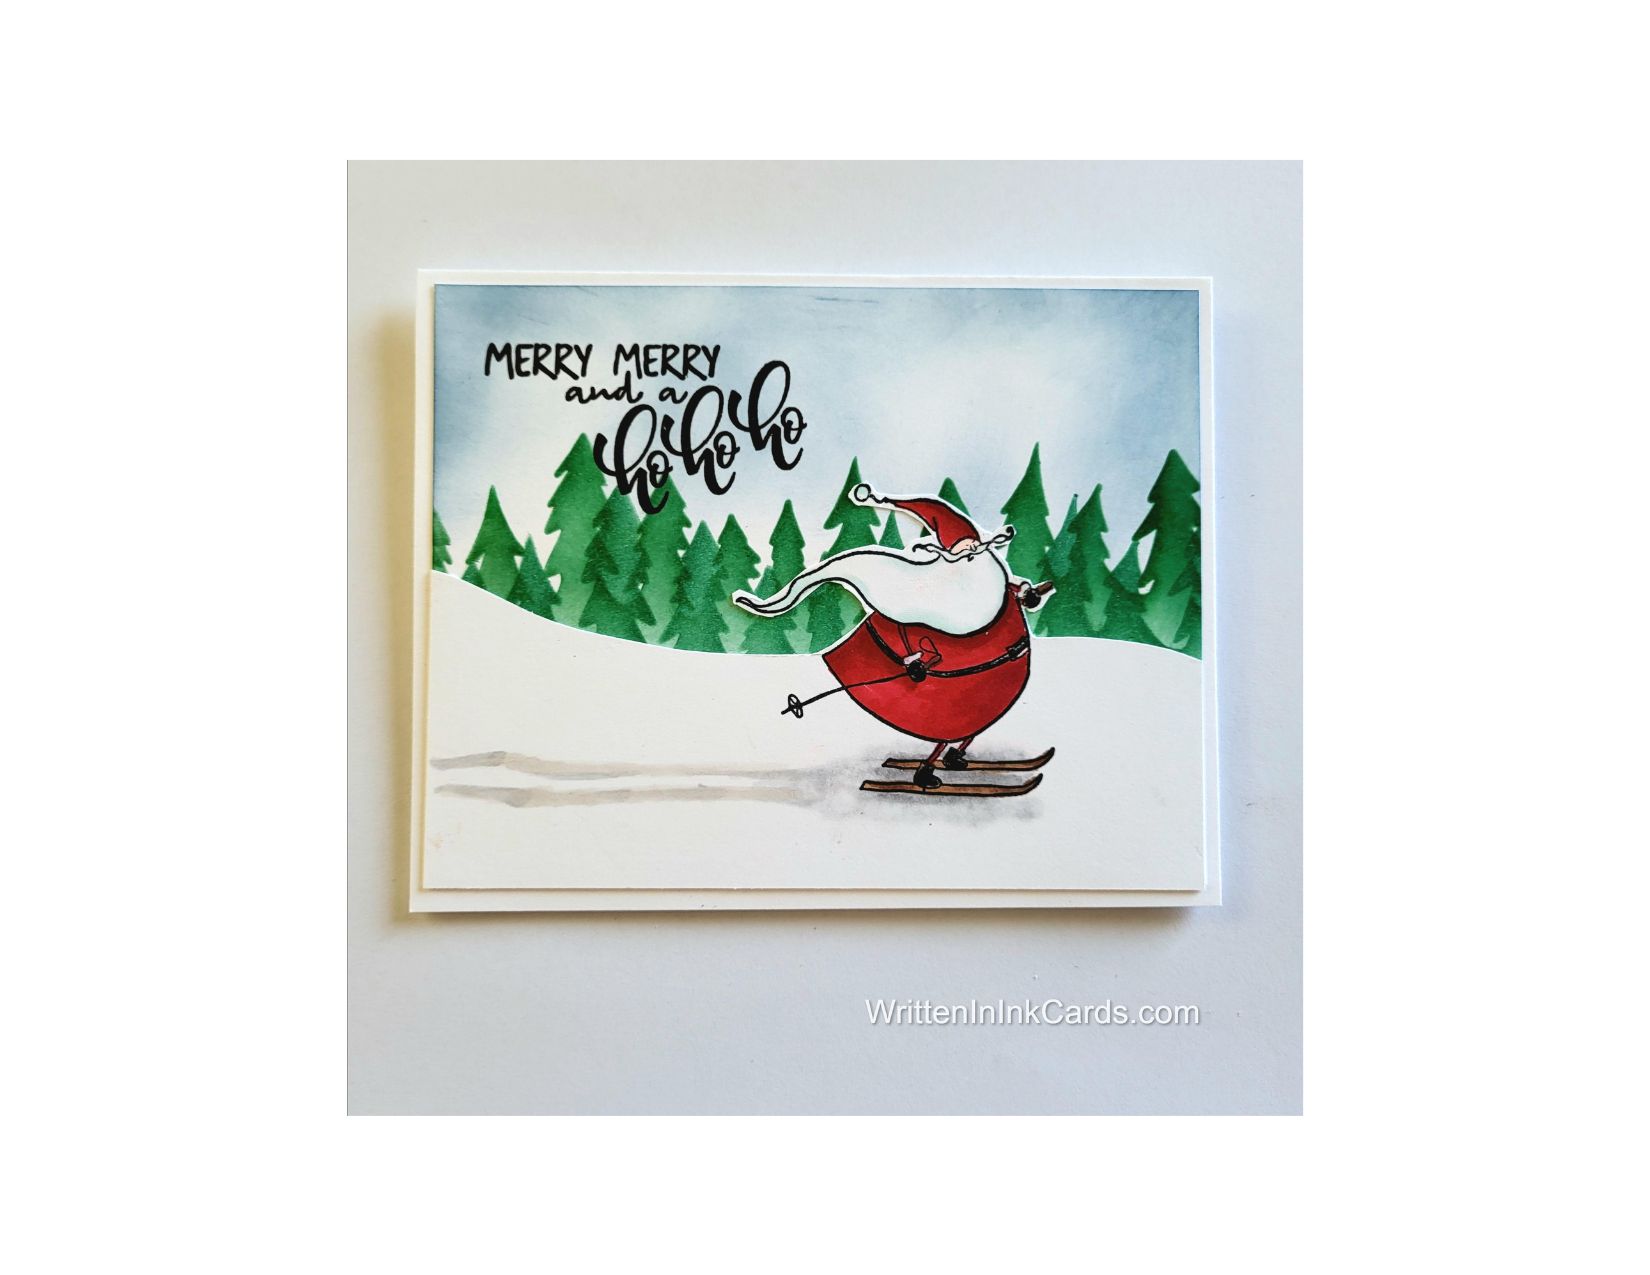
    Even the Big Guy needs a break and some fresh air every now and then!

    Would you like to experiment with a design like this? You’ll find a supply list below, including a link to the stencil I used from A Colorful Life Designs.  Follow the link and use discount code ChrisFan10 to save 10% on your entire order! (Master Creator Bundles are excluded as they already have a 20% discount built in.)

    Let’s get Started:

    Card Base: 5.5 x 8.5, scored and folded at 4.25

    Stamped Layer: 5.25 x 4

    Card Face:  5.25 x 4 

    Card Face:

    • I brushed blue ink onto the top two-thirds of the the card face, allowing variations in depth to create the look of clouds.
    • I placed the card face onto the grip mat,  and positioned the stencil about ¾ of the way down the card face.  I used green ink to create the tree line.
    • I shifted the stencil up and over (to allow the trees to fall in between those in the first row) and created a second row, overlapping where necessary.
    • I put the card face into the stamp positioner and added the sentiment in the upper left, using Versafine Onyx.

    Other:

    • I stamped  Santa on the second piece of cardstock, placing him towards the bottom right.
    • I coloured this with alcohol markers, adding a shadow under him and the ski track behind him in the snow as well.
    • I drew a curved hillside behind Santa,  and then cut along that line and also carefully cut around the upper half of Santa.

    Assembly

    • I glued the card face to the card base,  and the layer with the cut out Santa on top of these.

    Final Thoughts:

    This is such a cute combination –  the style of the tree stencil works with Santa so very well.  I really like this one.

    Supplies: (and links where possible)

       I have listed which products I have used, and where they may be purchased. It’s a huge marketplace and in most instances, there are multiple sources and many alternatives to choose from.

    Stencil: Christmas Tree Edger #1,  A Colorful Life Designs

    Waffle Flower Grip Mat, 8.5 x 6.5, Scrapbook.com

    Stamps: Jolly Santas, Colorado Craft Co., (retired)

    Ink: Stampin’ Up!

    Blending Brushes: Stampin’ Up! 

    Versafine Onyx, Simon Says Stamp

    Memento Ink: Stampin’ Up!

    Alcohol Markers:

         Stampin’ Blends: Stampin’ Up!

         Copics:  Wallacks

    Adhesive: Tombow Aqua, Michaels

    Card Base & Card Face: Accent 100 lb., Amazon

    Do you have comments or thoughts to share on this design?  Drop me a line in the Comments Section below –  I’d love to hear from you!

    You can also use the Comments Section  to be notified when I release new work

  • Stencils and Diecuts -making masculine cards just got easy

    Stencils and Diecuts -making masculine cards just got easy

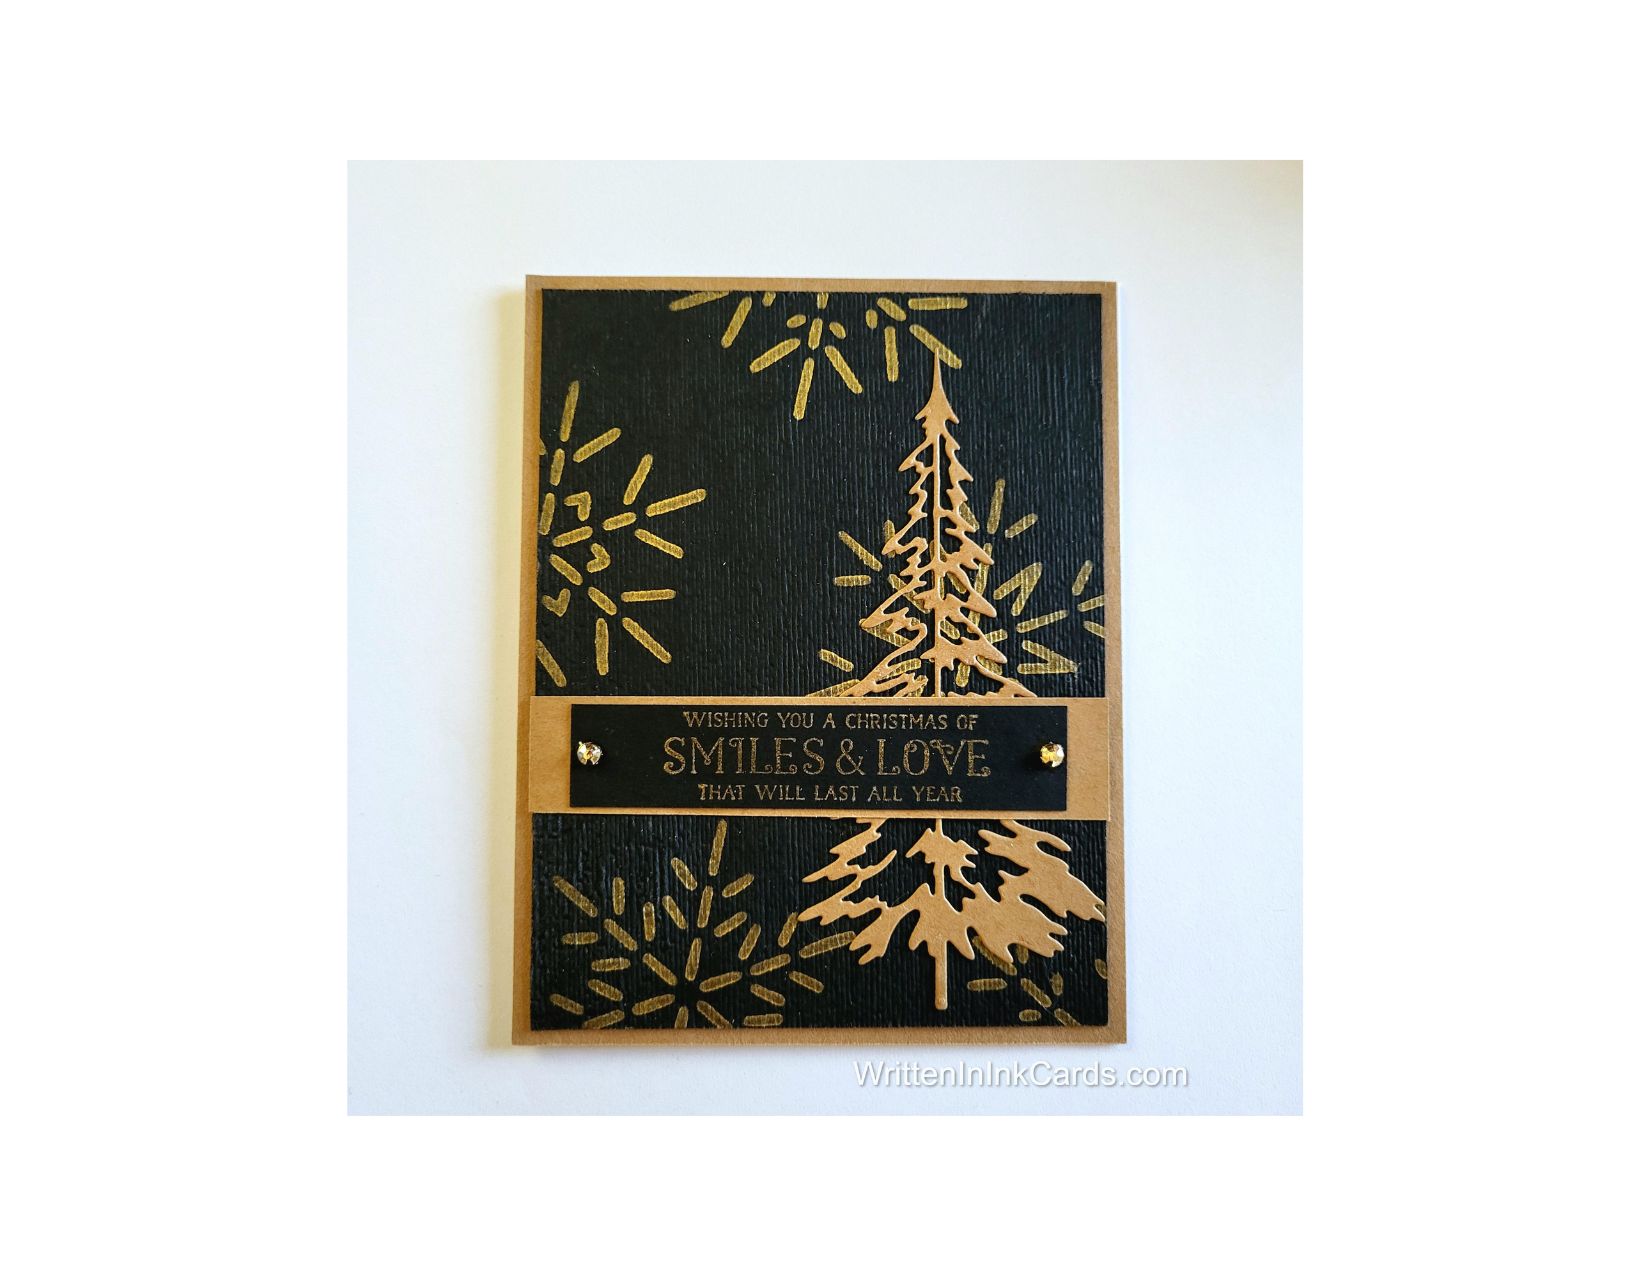
    An elegant masculine card – ready in a snap!

    Would you like to experiment with a design like this? You’ll find a supply list below, including a link to the stencil I used from A Colorful Life Designs.  Follow the link and use discount code ChrisFan10 to save 10% on your entire order! (Master Creator Bundles are excluded as they already have a 20% discount built in.)

    Let’s get Started:

    Card Base: 5.5 x 8.5, scored and folded at 4.25

    Kraft Border: 5.5 x 4.25

    Black Card Face:  5.25 x 4

    Scrap of Kraft Cardstock: .75 x 4

    Card Face:

    • I laid the card face onto my Grip Mat , positioned the stencil and applied metallic gold ink across the exposed surfaces.
    • After allowing the gold ink to dry (it is a very saturated pigment ink) I put the card face into an embossing folder and ran it through the Big Shot to add texture.

    Other:

    • I stamped the sentiment in gold ink on a piece of black cardstock,  and then cut it down to ⅝ x 3
    • I looked through my Bits & Pieces binder and found the tree, previously cut out of kraft and waiting to be used.

    Assembly

    • I glued the black sentiment strip to the kraft strip.
    • I glued the kraft border layer to the card base, and then centered the black card face on both.
    • I glued the tree in place on the right hand side as shown.
    • I glued the sentiment strip in place over the tree, just below the center of the card.
    • I added a metallic embellishment on either side of the sentiment.

    Final Thoughts:

    This was a fast & easy card to put together; it has a very masculine feel due to the colours used.

    I love the way gold and kraft play off of each other.

    Supplies: (and links where possible)

       I have listed which products I have used, and where they may be purchased. It’s a huge marketplace and in most instances, there are multiple sources and many alternatives to choose from.

    Stencil: Fine Snowflakes,  A Colorful Life Designs

    Waffle Flower Grip Mat, 8.5 x 6.5, Scrapbook.com

    Dies:  Woodlands,  Tim Holtz, Amazon

    Ink: Lisa Horton Metallic Ink,  Glitter & Ink

    Blending Brushes: Stampin’ Up! 

    Adhesive: Tombow Aqua, Michaels

    Card Base & Card Face: Accent 100 lb., Amazon

    Do you have comments or thoughts to share on this design?  Drop me a line in the Comments Section below –  I’d love to hear from you!

    You can also use the Comments Section  to be notified when I release new work

    Fine Snowflakes by A Colorful Life Designs

  • A retro Christmas card is easy to create with these supplies

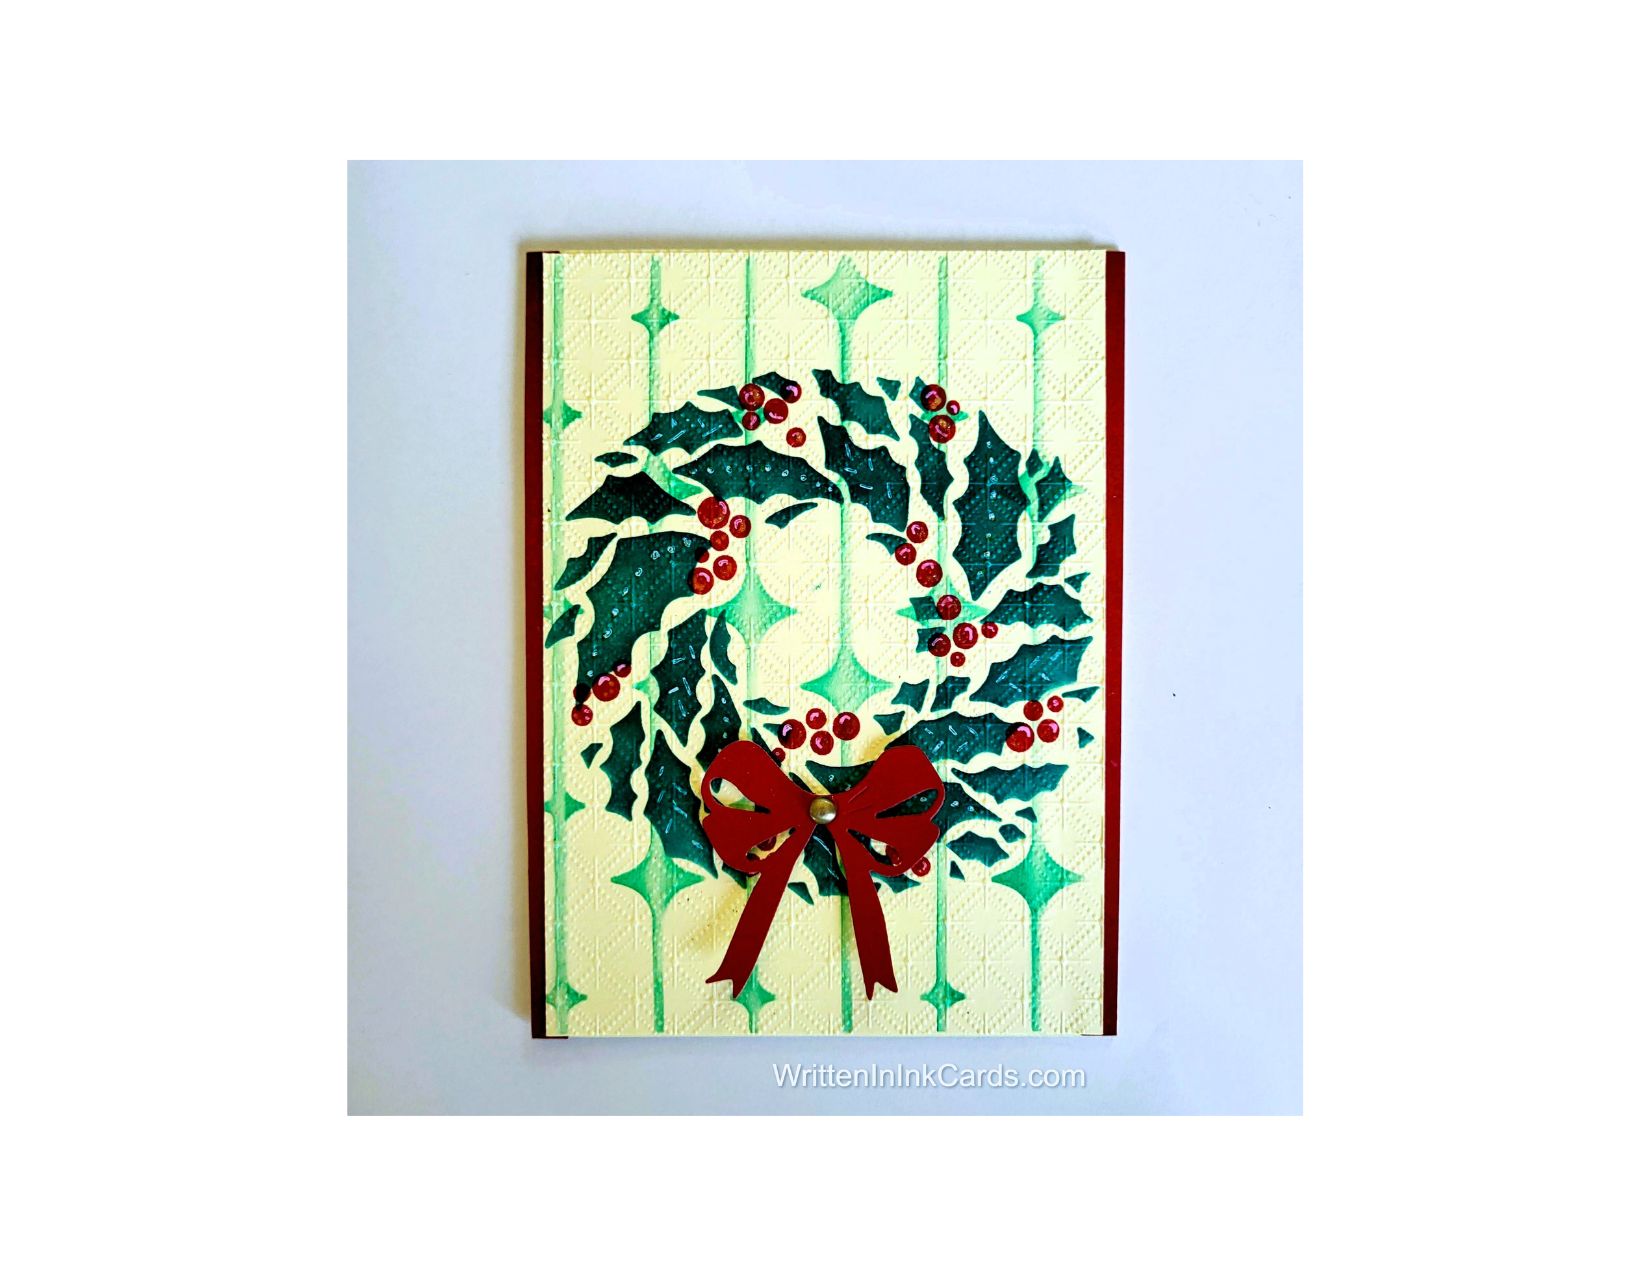
    A retro Christmas card is easy to create with these supplies

    Would you like to experiment with a design like this? You’ll find a supply list below, including a link to the stencils I used from A Colorful Life Designs.  Follow the link and use discount code ChrisFan10 to save 10% on your entire order! (Master Creator Bundles are excluded as they already have a 20% discount built in.)

    Let’s get Started:

    Card Base: 5.5 x 8.5, scored and folded at 4.25

    Border Layer: 5.5 x 4.25

    Card Face: 5.5 x 4

    Card Face:

    • I laid the card face on the Grip Mat and positioned the Atomic Strands stencil.  I used light green ink across the entire surface.
    • After removing this stencil,  I positioned the wreath on the card face: I applied dark green ink across all exposed areas
    • I repositioned the stencil to place the berries where they belonged on the wreath and applied red ink across all exposed areas.
    • Using a white gel pen, I added accents to both the leaves and the berries.
    • I put the card face into an embossing folder and ran it through the Big Shot, creating depth and visual interest.

    Other:

    • I used a scrap piece of red cardstock to create the bow, securing a die to the paper and running it through the Big Shot.

    Assembly

    • I glued the red border layer to the card base,  and centered the card face on top of these.
    • I glued the bow in place, and then added a small metallic gem to the center as a finishing touch.

    Final Thoughts:

    I love the retro feel of the Mid Century Atomic Strands stencil,  and I think it creates a wonderful vintage feel for this card.

    Supplies: (and links where possible)

       I have listed which products I have used, and where they may be purchased. It’s a huge marketplace and in most instances, there are multiple sources and many alternatives to choose from.

    Stencils:

         Mid Century Atomic Strands, A Colorful Life Designs
         Layered Holly Berry Wreath, A Colorful Life Designs

    Waffle Flower Grip Mat, 8.5 x 6.5, Scrapbook.com

    Dies:  Bow Toppers, Scrapbook.com

    Ink: Stampin’ Up!

    White Gel Pens, Arteza,  Amazon

    Blending Brushes: Stampin’ Up! 

    Adhesive: Tombow Aqua, Michaels

    Cream Card Base & Card Face: Recollections 100 lb.,Michaels

    Do you have comments or thoughts to share on this design?  Drop me a line in the Comments Section below –  I’d love to hear from you!

    You can also use the Comments Section  to be notified when I release new work

    Mid Century Atomic Strands from A Colorful Life Designs

  • Say Happy Easter with a Fabulous, Sparkly Bunny Card

    Would you like to experiment with a design like this? You’ll find a supply list below, including a link to the stencil I used from A Colorful Life Designs.  Follow the link and use discount code ChrisFan10 to save 10% on your entire order! (Master Creator Bundles are excluded as they already have a 20% discount built in.)

    Easter is typically visualized in happy springtime pastels. But sometimes a sparkly Easter bunny fits the bill!

    Let’s get Started:

    Card Base: 5.5 x 8.5, scored and folded at 4.25

    Green Border Layer: 4.25 x 4.25

    Card Face:  4 x 4

    Card Face:

    • I positioned the stencil on the card face, securing it with Mint Tape.
    • Next, using a palette knife,  I added sparkly white embossing paste over all exposed areas.   I  removed the stencil, being careful not to smudge the design.  
    • Afterwards, I placed the stencil in water and put the card face aside to dry.

    Other:

    • I stamped the sentiment and used a tiny die to cut it out.
    • I also stamped the tiny heart with green ink,  added embossing ink with a pen, sprinkled it with holographic powder and set it with a heat gun.   I used a punch to cut it out.
    • Once the card face was dry I used a pokey tool to create holes on either side of the bunny’s neck.  I threaded fine iridescent white yarn through the holes and secured this on the back with tape.

    Assembly

    • I glued the card face to the green border layer, centering on all sides.
    • Following that, I added this to the card base, aligning to the left-hand edge, and leaving a white border on the right.
    • I used metallic thread to attach the heart tag to the bunny’s collar.
    • I added the sentiment to the upper left of the card.
    • The finishing touch was the addition of three small green gems down the right-hand border.

    Final Thoughts:

    The sparkly Easter Bunny is really pretty:  I didn’t want to add anything to compete with that,  so I chose very soft green accents.   I’m really happy with the end result.

    Supplies: (and links where possible)

       I have listed which products I have used, and where they may be purchased. It’s a huge marketplace and in most instances, there are multiple sources and many alternatives to choose from.

    Stencil:  Heart Bunny,  A Colorful Life Designs
    Embossing Pen:  Ranger,  Amazon

    Holographic Embossing Powder: Ranger,  Amazon

    Ink: Stampin’ Up!

    Embossing Paste: Stampin’ Up!

    Adhesive: Tombow Aqua, Michaels

    Card Base & Card Face: Accent 100 lb., Amazon

    Do you have comments or thoughts to share on this design?  Drop me a line in the Comments Section below –  I’d love to hear from you!

    You can also use the Comments Section  to be added to the list, and notified when I release new work.

  • Say I love you with a whimsical handmade Easter card

    Say I love you with a whimsical handmade Easter card

    Would you like to experiment with a design like this? You’ll find a supply list below, including a link to the stencils I used from A Colorful Life Designs.  Follow the link and use discount code ChrisFan10 to save 10% on your entire order! (Master Creator Bundles are excluded as they already have a 20% discount built in.)

    Easter means bunnies, chocolate, and celebrating traditions created over the years. Sending a card is a wonderful way to send a hug to someone you can’t be with.

    Let’s get Started:

    Card Base: 5.5 x 8.5, scored and folded at 4.25

    Border Layer:  5 x 4

    Card Face:  5 x 4 

    Card Face:

    • After laying the card face on my Grip Mat, I positioned the Easter egg stencil.
    • I applied blue ink to the bottom and pink ink to the top, going back and forth between the two colours until I got a smooth blend where they met.
    • After removing that stencil, I positioned the bunny stencil so that the bunny on the right was in the correct position.
    • I masked off all necessary areas around the bunny and applied gray ink across the exposed surface.
    • I repositioned the stencil to place the bunny on the left in the right spot, and again added gray ink after masking off all necessary areas.
    • I used a punch on all four corners of the card face to create the peek-through design.

    Other:

    • Using a scrap piece of cardstock, I stamped the Happy Easter sentiment with Versamark embossing ink.
    • I sprinkled this with silver embossing powder and set it with my heat gun.
    • I ran this through my Big Shot and cut it down with a small banner die.
    • I applied gray ink to the corners of the border layer.   (This ensured a match to the bunnies on the card face,  and was more economical than using a piece of cardstock.)

    Assembly

    • I put dimensional foam on the back of the border layer, and then glued the card face on top of this, allowing the gray ink to show through the punched-out design.
    • I centered this on the card base.
    • I glued the banner on top of the Easter egg, in between the bunnies’ hands.
    • I added tiny rhinestones to the center of the flowers on the Easter egg.

    Final Thoughts:

    I love these two stencils together:  I’ve been eyeing  the Bunny Dance stencil for a while now, and I’m so happy that I got it.

    Supplies: (and links where possible)

       I have listed which products I have used, and where they may be purchased. It’s a huge marketplace and in most instances, there are multiple sources and many alternatives to choose from.

    Stencils:

        Cute Easter Egg:  A Colorful Life Designs

        Bunny Dance, A Colorful Life Designs

    Waffle Flower Grip Mat: Scrapbook.com

    Versamark Embossing Ink: Simon Says Stamp

    Silver Embossing Powder: Hero Arts, Simon Says Stamp

    Ink: Stampin’ Up!

    Blending Brushes: Stampin’ Up! 

    Adhesive: Tombow Aqua: Michaels

    Card Base & Card Face: Accent 100 lb., Amazon

    Do you have comments or thoughts to share on this design?  Drop me a line in the Comments Section below –  I’d love to hear from you!

    You can also use the Comments Section  to be added to the Notification list, and be contacted when I release new work.