
Would you like to experiment with a design like this? You’ll find a supply list below, including a link to the stencils I used from A Colorful Life Designs. Follow the link and use the discount code ChrisFan10 to save 10% on your entire order! (Master Creator Bundles are excluded as they already have a 20% discount built in.)
Let’s get Started:
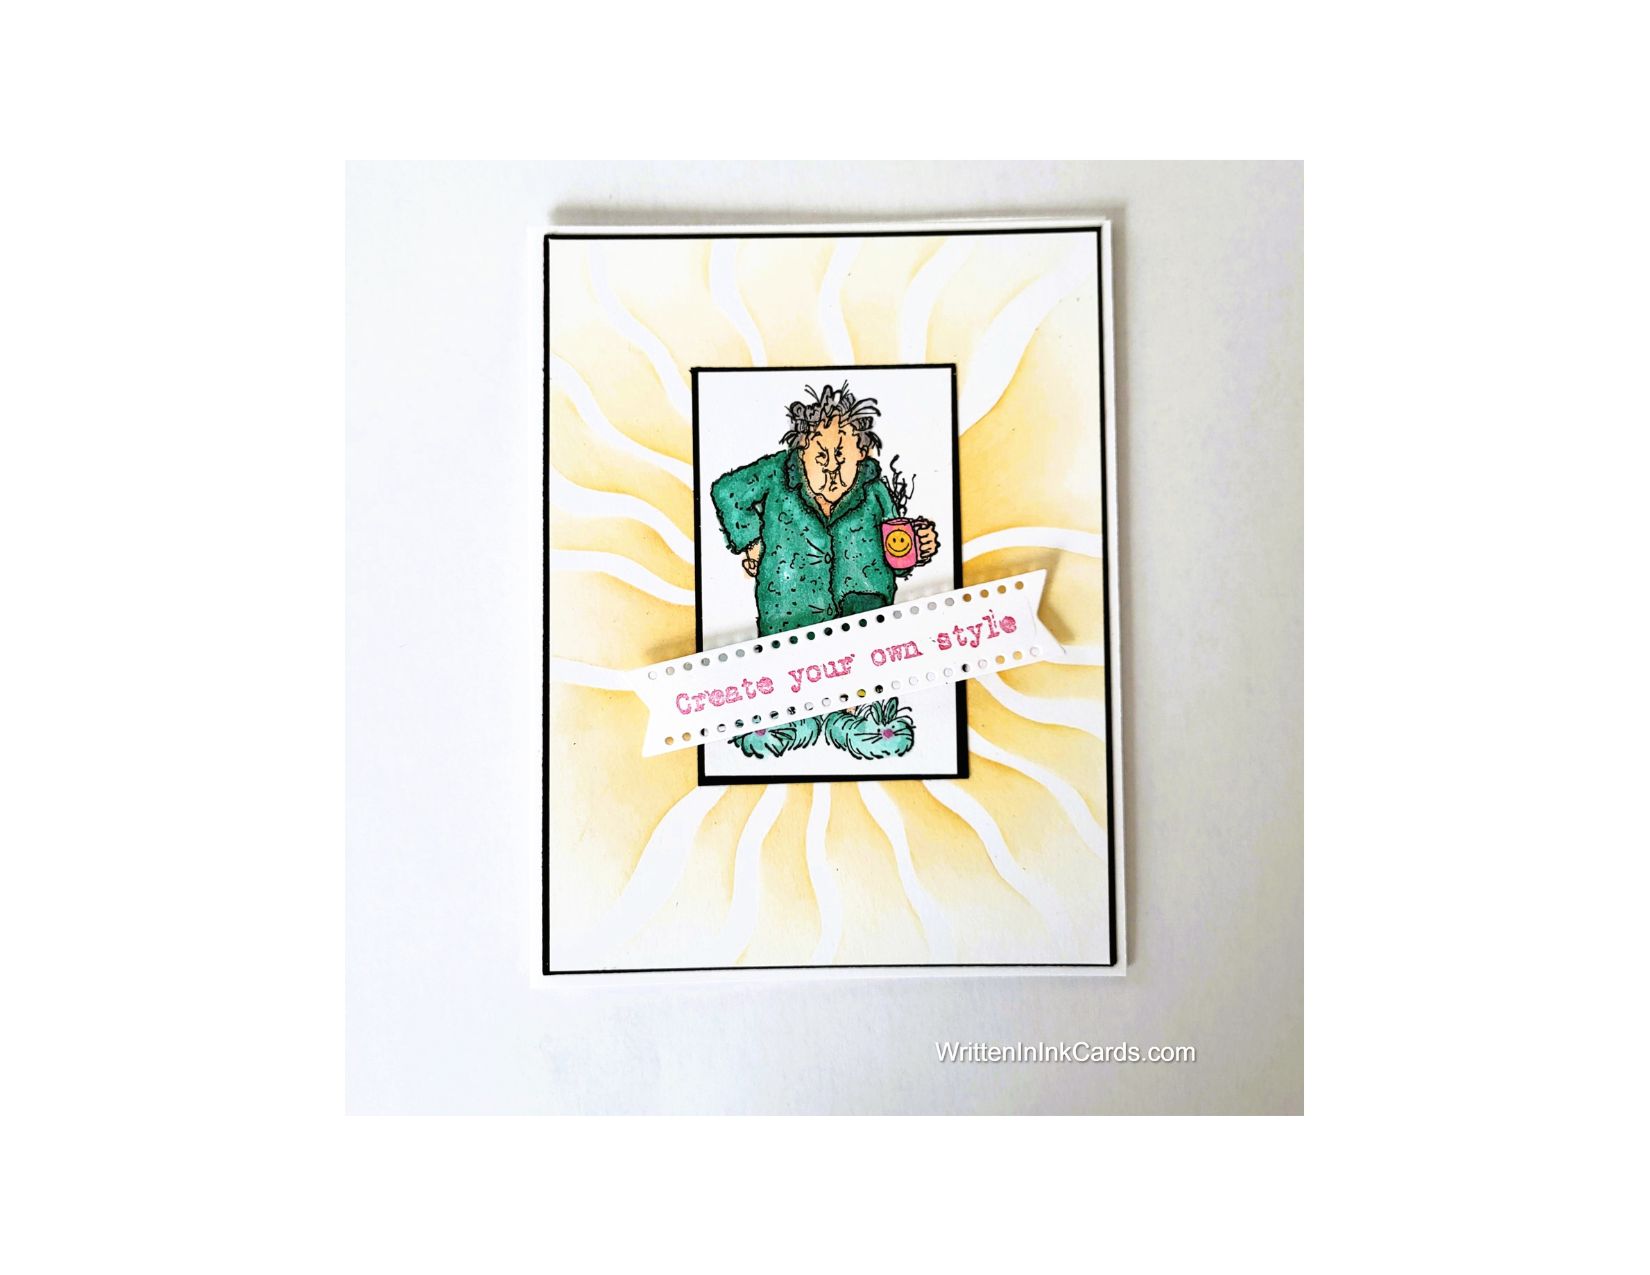
Card Base: 5.5 x 8.5, scored and folded at 4.25
Border Layer: 5.5 x 4.25
Card Face: 5 3/8 x 4 1/8
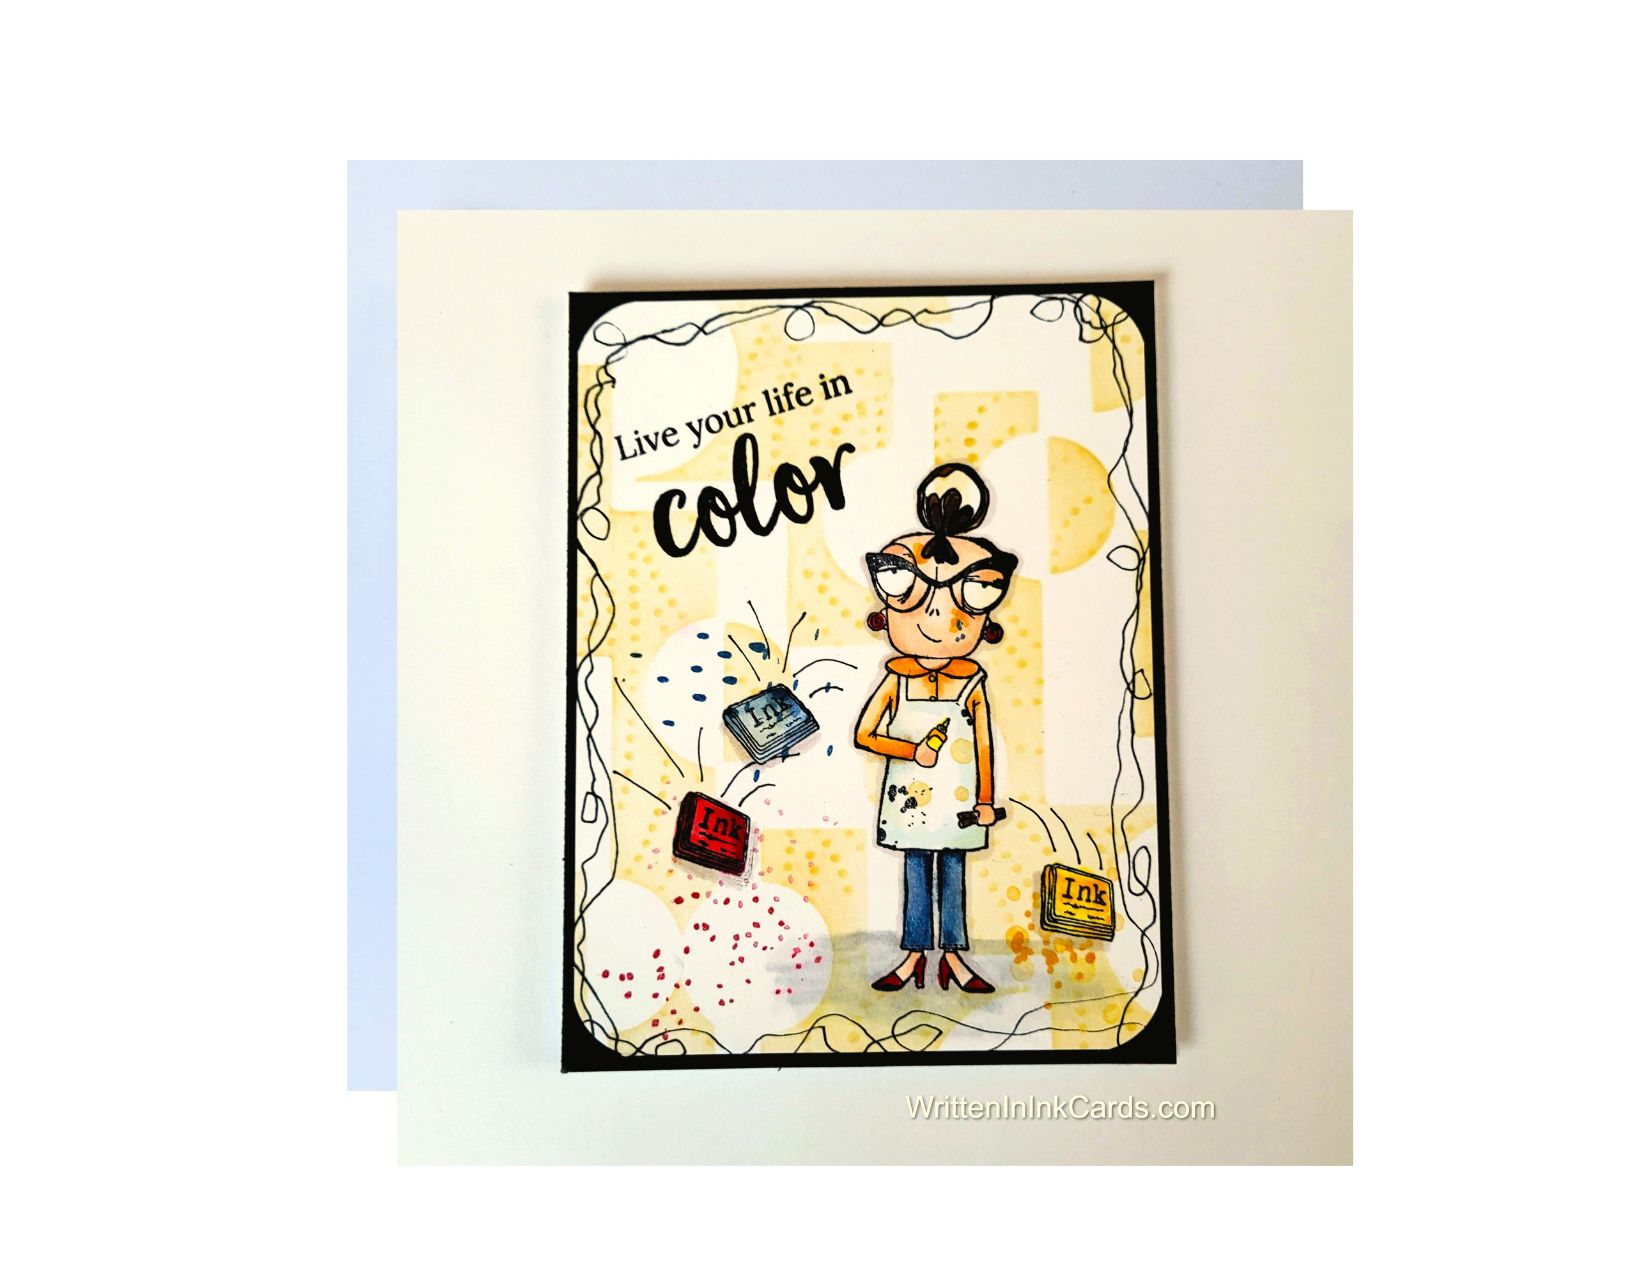
Card Face:
- I placed the card face down in my stamp positioner and stamped the artist and the three ink pads with Memento Black ink. I coloured these with alcohol markers.
- After removing the card face from the stamp positioner, I placed it on the Grip Mat and positioned the Mid Century Tower stencil. I applied yellow ink with a soft hand, avoiding the coloured images.
- Leaving the first stencil in place, I layered the Airy Swirls stencil directly on top and used the same yellow ink with a firmer hand to create the pattern.
Leaving the first stencil in place meant the ink was confined to those openings, resulting in a pattern within a pattern.
- I used small stamps to add spatter around each ink pad and a bit on the apron.
- I used markers to add spatter to the artist’s face.
- Using a fineliner, I added a messy border around the piece, and then used a punch to round all corners.
- I also used a fineliner to add lines around each ink pad, creating a sense of movement.
- I put the card face back into the stamp positioner to add the sentiment with Versafine Onyx.
Assembly
- I glued the black border layer to the card base and added the card face on top.
Final Thoughts:
I love this wacky artist, and had such fun creating this scene. (Part of the reason I love her is that I too am a very messy maker!)
Supplies: (and links where possible)
I have listed the products I have used and where they can be purchased. It’s a huge marketplace, and in most instances, there are multiple sources and many alternatives to choose from.
Stencil:
Mid Century Tower: A Colorful Life Designs
Airy Swirls, A Colorful Life Designs
Waffle Flower Grip Mat, 8.5 x 6.5, Scrapbook.com
Stamps:
Artist/InkPads: AALL & Creat, Craftaholic Dee, Ecstasy Crafts
Sentiment: Paint Your World, Spellbinders, Scrapbooking Fairies
Fineliners: Amazon
Ink: Stampin’ Up!
Blending Brushes: Stampin’ Up!
Versafine Onyx, Simon Says Stamp
Memento Ink: Stampin’ Up!
Alcohol Markers:
Stampin’ Blends: Stampin’ Up!
Copics: Wallacks
Adhesive: Tombow Aqua, Michaels
Card Base & Card Face: Accent 100 lb., Amazon
Do you have any comments or thoughts on this design? Drop me a line in the Comments Section below – I’d love to hear from you!
You can also use the Comments Section to be notified when I release new work.
Airy Swirls

Mid Century Tower