
Would you like to experiment with a design like this? You’ll find a supply list below, including a link to the stencils I used from A Colorful Life Designs. Follow the link and use discount code ChrisFan10 to save 10% on your entire order! (Master Creator Bundles are excluded as they already have a 20% discount built in.)
Let’s get started:
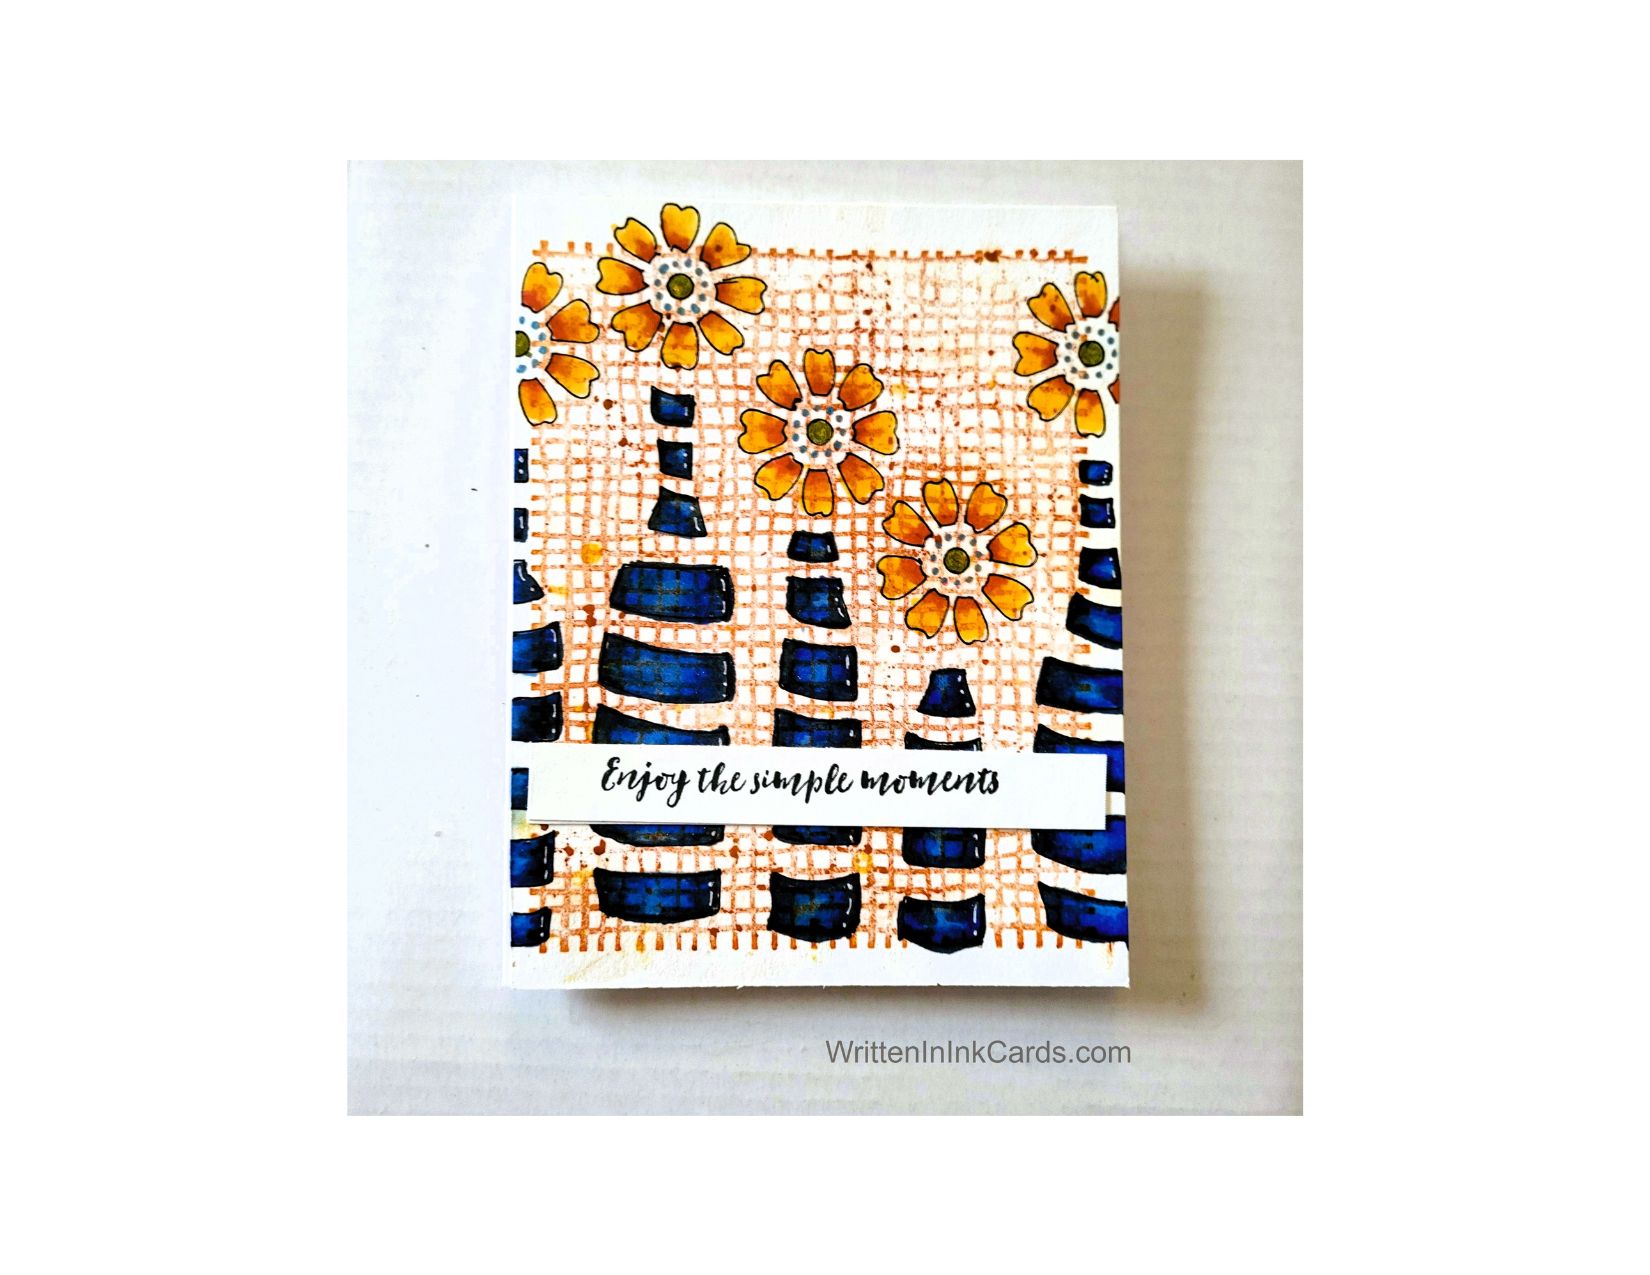
Card Base: 5.5 x 8.5, scored and folded at 4.25
Border Layer: 5.5 x 4.25
Card Face: 5.25 x 4
Scrap paper for the paint brush
Card Face:
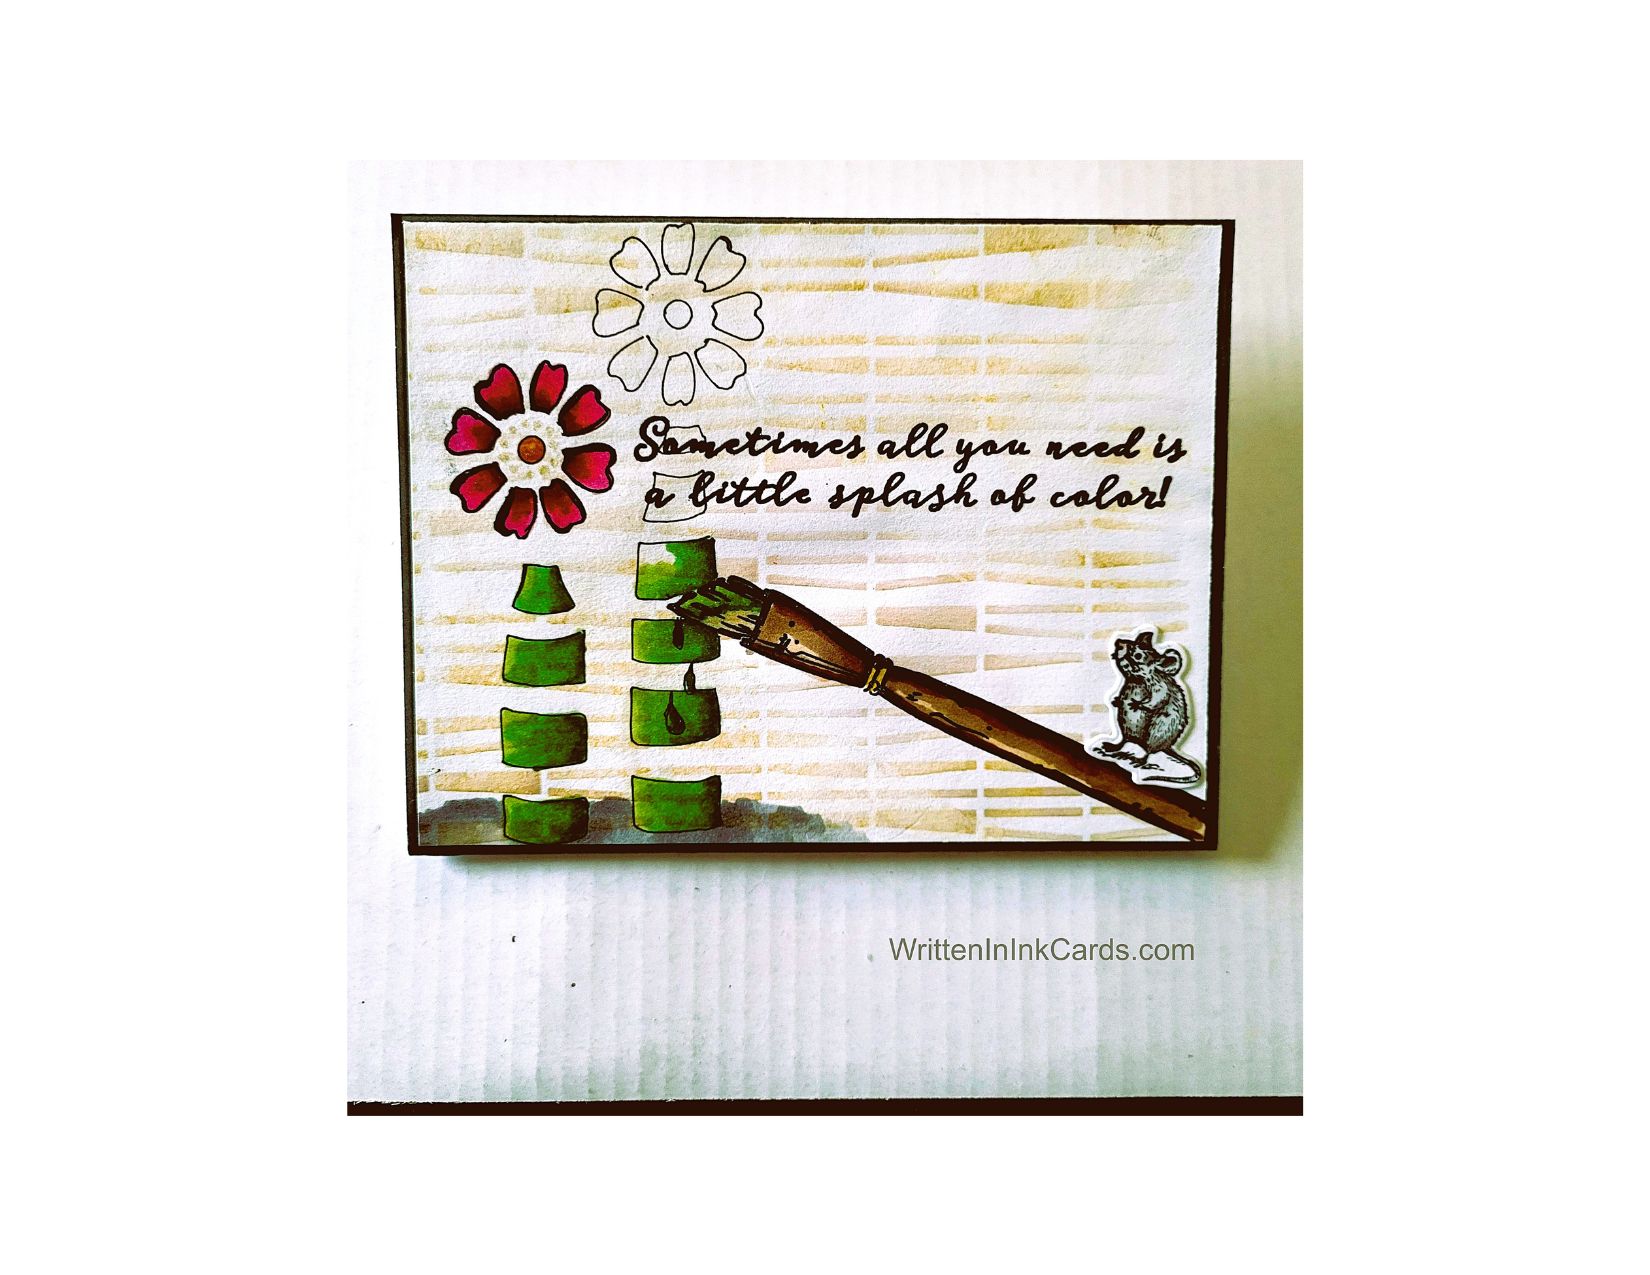
- I began by laying the card face down on my Grip Mat and positioning the Broken Lines stencil. I followed that by applying beige ink across the exposed areas.
- Laying that stencil aside, I positioned the Bottled Posies stencil towards the left of the card face and traced two of the bottles using a black fine liner.
- I used alcohol markers to completely colour the bottle on the left, and then I partially coloured the bottle on the right.
- With those steps complete, I decided that I wanted a bit of shadow underneath to ground them, so I added that.
- I spritzed the surface of the card face with water, blotting it quickly. This softened the background and added visual interest.
- The alcohol markers don’t react to water, making this process safe.
- Once the card face was completely dry again, I put it into my stamp positioner and added the sentiment with Versafine Onyx.
Other:
- I stamped the paint brush on scrap paper using Memento ink, and coloured it with alcohol markers.
- Once the colouring was complete I cut it out.
- I looked through my critters binder and found the wee mouse; I quickly decided that he would provide the perfect finishing touch.
Assembly
- I glued the black border layer to the card base, and then added the card face on top of these.
- I experimented with the placement of the brush, and then glued it in place.
- Finally, I added the mouse as shown, sitting on the brush.
Final Thoughts:
I was actually creating a completely different card with the Bottled Posies stencil when I this idea struck: I had used the same process of tracing/colouring the images and had too much time invested to try the concep at that moment, so I tried it on the next card.
I’m happy with the general feel of the card (I really like the watercolour “feel” that the background has), but would change the positioning of the brush if I were to do it again.
Supplies: (and links where possible)
I have listed which products I have used and where they may be purchased. It’s a huge marketplace and in most instances, there are multiple sources and many alternatives to choose from.
Stencils:
Broken Lines: A Colorful Life Designs
Bottled Posies: A Colorful Life Designs
Stamps: Color My World, Colorado Craft Co.
Waffle Flower Grip Mat, 8.5 x 6.5, Scrapbook.com
Ink: Stampin’ Up!
Fineliners: Amazon
Blending Brushes: Stampin’ Up!
Versafine Onyx, Simon Says Stamp
Memento Ink: Stampin’ Up!
Alcohol Markers:
Stampin’ Blends: Stampin’ Up!
Copics: Wallacks
Adhesive: Tombow Aqua, Michaels
Card Base & Card Face: Accent 100 lb., Amazon
Do you have comments or thoughts to share on this design? Drop me a line in the Comments Section below – I’d love to hear from you!
You can also use the Comments Section to be added to the list, and notified when I release new work.