Category: Celebrations

  • Celebrating the King of the Cookout with a DIY card

    Celebrating the King of the Cookout with a DIY card

    Would you like to experiment with a design like this? You’ll find a supply list below, including a link to the stencil I used from A Colorful Life Designs.  Follow the link and use discount code ChrisFan10 to save 10% on your entire order! (Master Creator Bundles are excluded as they already have a 20% discount built in.)

    Let’s get Started:

    Card Base: 5.5 x 8.5, scored and folded at  4.25

    Card Face:  5.25 x 4

    Card Face:

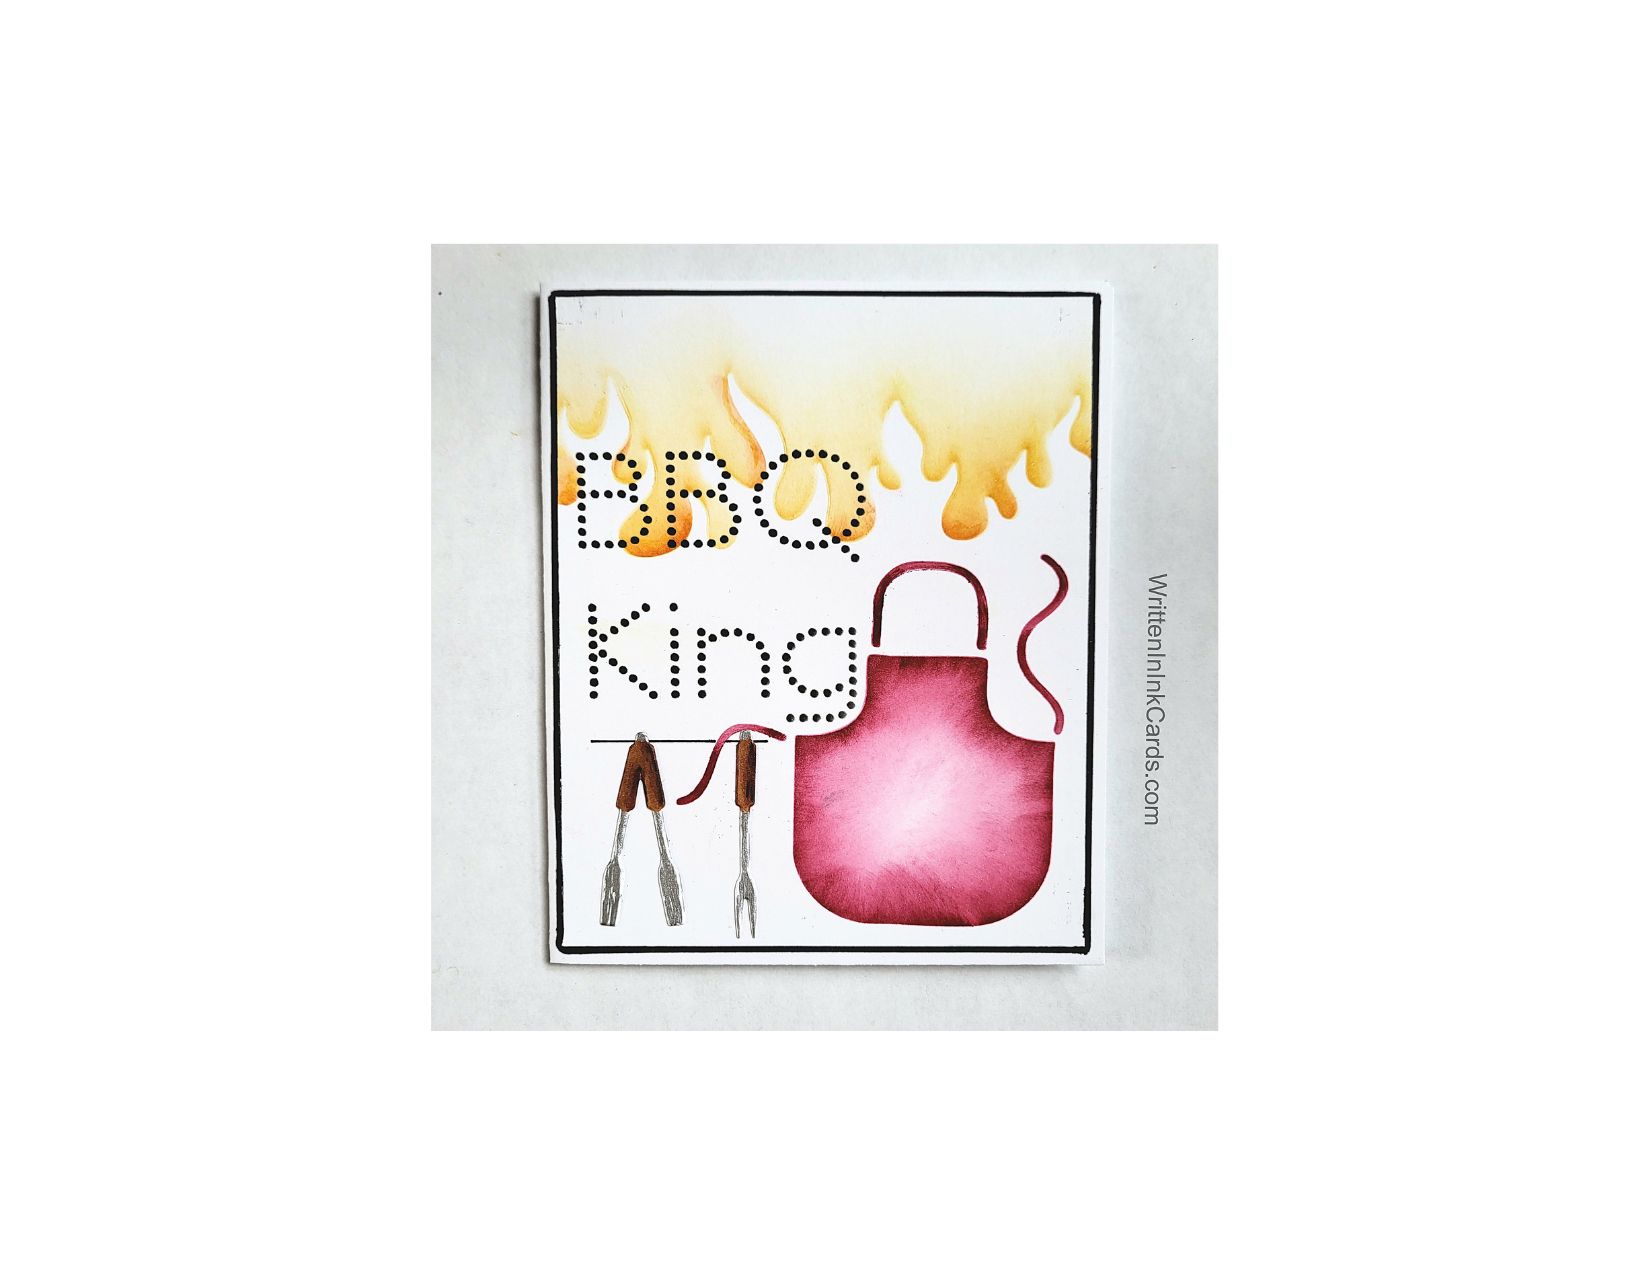
    After laying the card face on my Grip Mat, I positioned the stencil towards the top of the panel. I was using the section of the stencil which creates flames,  and I masked off any nearby openings.

    I brushed soft yellow ink over the exposed area,  and then (using a detail brush) I added touches of red to the base of the flames to provide visual interest.

    I rotated the stencil to allow the apron to appear in the bottom right of my card face.  After once again masking off nearby areas  I applied red ink.  I used a full sized brush for the main part of the apron,  and a detail brush for the strings.

    I repositioned the stencil again, this time to feature the dotty words.  After  (you guessed it!)  masking nearby areas  I applied black ink to create the fun font.

    Other:

    I die cut the BBQ tools from white cardstock.

    I used alcohol markers to colour the handles. 

    I used an embossing pen to colour the metallic parts of the tools, sprinkled some silver embossing powder over this and set it with my heat gun.

    Assembly

    I glued the card face to the card base.

    I used a ruler and a black marker to create a fine black border around the card face.  (There are two advantages to this:  it saves a piece of cardstock,  and I can draw a very fine line which is perfectly centered.)

    I used a ruler and a fineliner to draw a black line on the card face where shown,  and then glued the BBQ tools onto this.

    Final Thoughts:

    A fun “guy” card –  I haven’t decided if this will be for Father’s Day or a birthday.  My guy is truly a BBQ King,  he produces amazing results from the grill.

    Supplies: (and links where possible)

       I have listed which products I have used, and where they may be purchased. It’s a huge marketplace and in most instances, there are multiple sources and many alternatives to choose from.

    Stencil:  Kiss The Cook,  A Colorful Life Designs

    Waffle Flower Grip Mat, 8.5 x 6.5, Scrapbook.com

    Embossing Pen: Ranger, Amazon

    Silver  Embossing Powder: Wow, R&R Scrapbooking

    Dies:  Apron of Love,  Stampin’ Up!  (retired)

    Fineliner: Amazon

    Ink: Stampin’ Up!

    Blending Brushes: Stampin’ Up! 

    Detail Brushes:  Scrap n’ Stamp

    Versafine Onyx, Simon Says Stamp

    Adhesive: Tombow Aqua, Michaels

    Card Base & Card Face: Accent 100 lb., Amazon

    Do you have comments or thoughts to share on this design?  Drop me a line in the Comments Section below –  I’d love to hear from you!

    You can also use the Comments Section  to be added to the list, and notified when I release new work.

  • Easy Stencil Ideas for Beautiful DIY Mother’s Day Cards

    Easy Stencil Ideas for Beautiful DIY Mother’s Day Cards

    Would you like to experiment with a design like this? You’ll find a supply list below, including a link to the stencils I used from A Colorful Life Designs.  Follow the link and use discount code ChrisFan10 to save 10% on your entire order! (Master Creator Bundles are excluded as they already have a 20% discount built in.)

    Let’s get Started:

    Card Base: 5.5 x 8.5, scored and folded at 4.25

    Card Face:  5.5 x 4 (patterned paper)

    Card Face:

    • I began by laying the patterned paper on the Grip Mat and positioning the Love You stencil.
    • I used medium purple ink and a light hand to apply ink across all exposed areas.
    • After removing this stencil,  I replaced it with the Heart of Hearts stencil positioned at an angle and towards the left of the card face.
    • I applied the same purple ink with a heavier hand, allowing it to stand out against the first layer of stencilling.
    • I applied additional layers of ink to the left-hand side of the stencil,  building up intensity and depth.
    • I used gold watercolour paint to add a fine spatter to the card face.

    Other:

    • I stamped the sentiment with Versamark Embossing Ink, added gold embossing powder and set it with the heat gun.
    •  I cut this out with an oval die.

    Assembly

    • I glued the card face to the card base, centering vertically.
    • I put a thin strip of gold foil on both top and bottom of the card face.   This left me with a very narrow strip of the card base visible, which I didn’t care for.   I dealt with that by running an embossing pen along the strip, sprinkling gold embossing powder over top and setting it with my heat gun. 
    • I used double-faced tape to add metallic gold thread to the back of the sentiment.  I added a piece of foam tape as well,  and put it in place as shown.

    Final Thoughts:

    This patterned paper is so pretty with the gold marbling:  the gold accents I included in the design echo this very well.

    I was very happy with this card in the end.

    Supplies: (and links where possible)

       I have listed which products I have used, and where they may be purchased. It’s a huge marketplace and in most instances, there are multiple sources and many alternatives to choose from.

    Stencils:

        Love You:  A Colorful Life Designs

        Heart of Hearts,  A Colorful Life Designs

    Waffle Flower Grip Mat, 8.5 x 6.5, Scrapbook.com

    Embossing Pen: Ranger,  Amazon

    Gold  Embossing Powder:  Wow,  R&R Scrapbooking

    Metallic Watercolour: Amazon

    Dies:  Nesting Oval Dies,  Hero Arts

    Ink: Stampin’ Up!

    Blending Brushes: Stampin’ Up! 

    Versafine Onyx, Simon Says Stamp

    Adhesive: Tombow Aqua, Michaels

    Card Base & Card Face: Accent 100 lb., Amazon

    Do you have comments or thoughts to share on this design?  Drop me a line in the Comments Section below –  I’d love to hear from you!

    You can also use the Comments Section  to be added to the list, and notified when I release new work.