Category: Anniversary

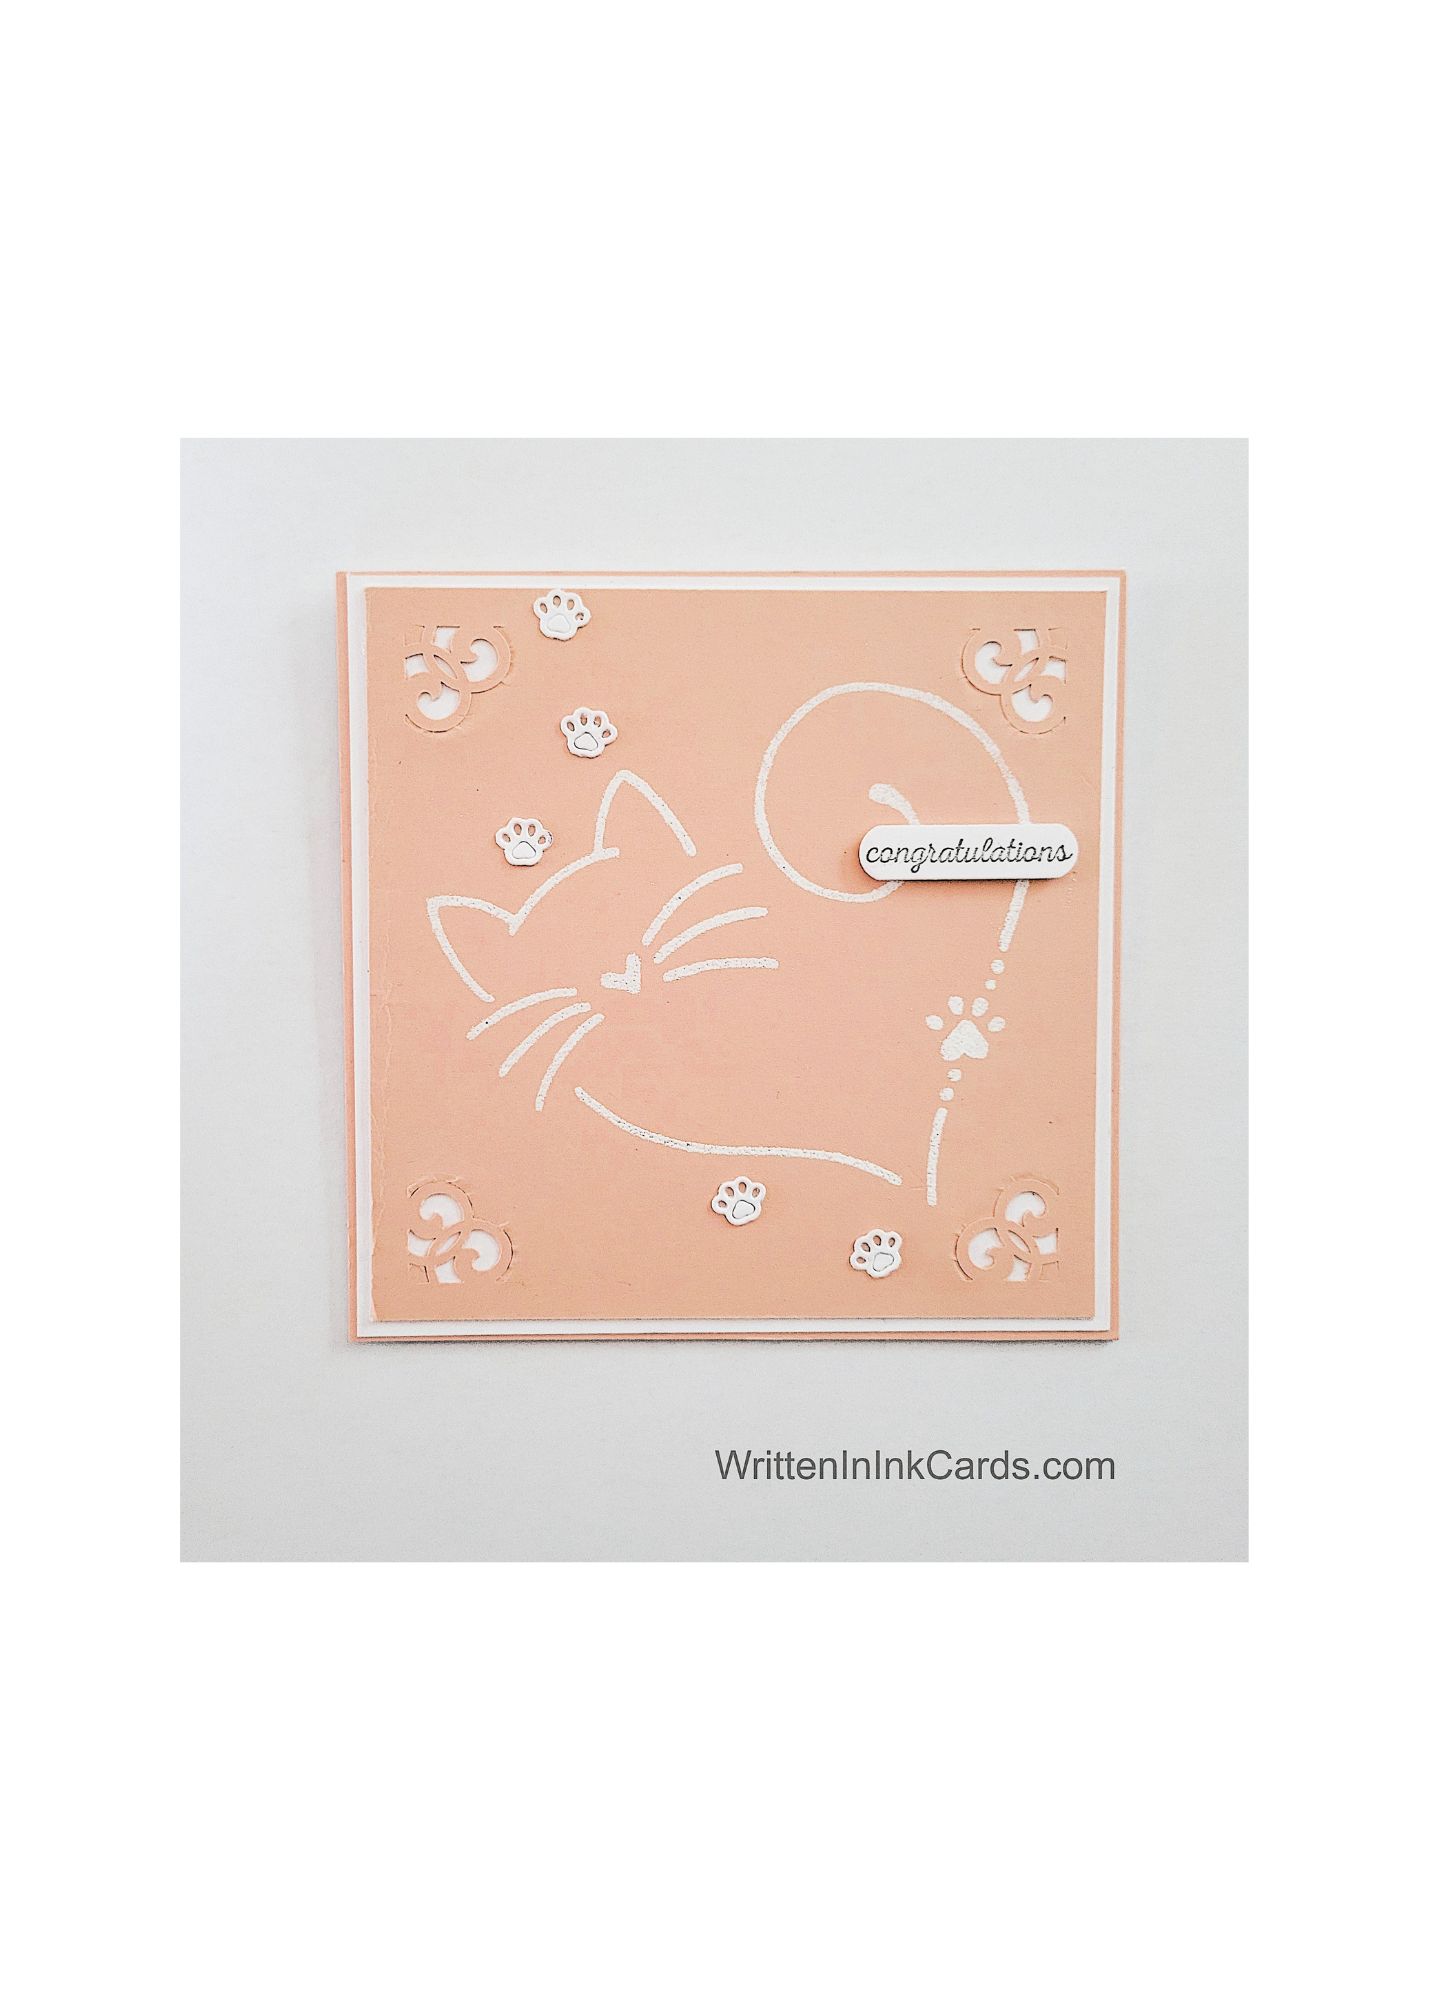
  • DIY a  Simple Curlicue Cat Card with Paw Prints

    DIY a Simple Curlicue Cat Card with Paw Prints

    Would you like to experiment with a design like this? You’ll find a supply list below, including a link to the stencil I used from A Colorful Life Designs.  Follow the link and use the discount code ChrisFan10 to save 10% on your entire order! (Master Creator Bundles are excluded as they already have a 20% discount built in.)

    Let’s get Started:

    Card Base: 5.25 x 10.5, scored and folded at 5.25

    Pink Border Layer:  5.25 x 5.25

     White Border Layer:5 ⅛ x 5 1/8

    Pink Card Face:  4 ⅞ x47/8

    Card Face:

    • I dusted the card face liberally with anti-static powder, then positioned the stencil and secured both with low-tack tape.
    • I pressed my Versamark embossing pad firmly through the openings in the stencil, repeating a couple of times to ensure good coverage.
    • After setting the stencil aside, I sprinkled white embossing powder over the wet ink,  and set it with my heat gun.
    • I used a corner punch to add additional detail to each corner.

    Other:

    • I used a scrap of white cardstock and a die that cuts tiny, adorable pawprints.
    • I looked through my Sentiments binder and selected the  “congratulations”.

    Assembly

    • I glued the pink border layer to the card base, and centered the white border on top of these.
    • I added the pink card face (centered carefully), then added the paw prints as shown.
    • I put dimensional foam on the back of the sentiment and positioned it in the upper right quadrant of the card face.

    Final Thoughts:

    I love the white-on-pink-on white- on pink effect achieved here.  Fun,  without distracting from the design.

    Although I pulled out the “congratulations”,  this card would work for many other occasions.

    Supplies: (and links where possible)

       I have listed the products I have used and where they can be purchased. It’s a huge marketplace, and in most instances, there are multiple sources and many alternatives to choose from.

    Stencil:  Cat Curlicue ,  A Colorful Life Designs

    Versamark Embossing Ink: R&R Scrapbooking

    White Embossing Powder,  Wow,  R&R Scrapbooking

    Dies:  KSCraft,  Amazon

    Versafine Onyx, Simon Says Stamp

    Adhesive: Tombow Aqua, Michaels

    Card Base & Card Face: Accent 100 lb., Amazon 

    Do you have any comments or thoughts on this design?  Drop me a line in the Comments Section below –  I’d love to hear from you!

    You can also use the Comments Section to be notified when I release new work.

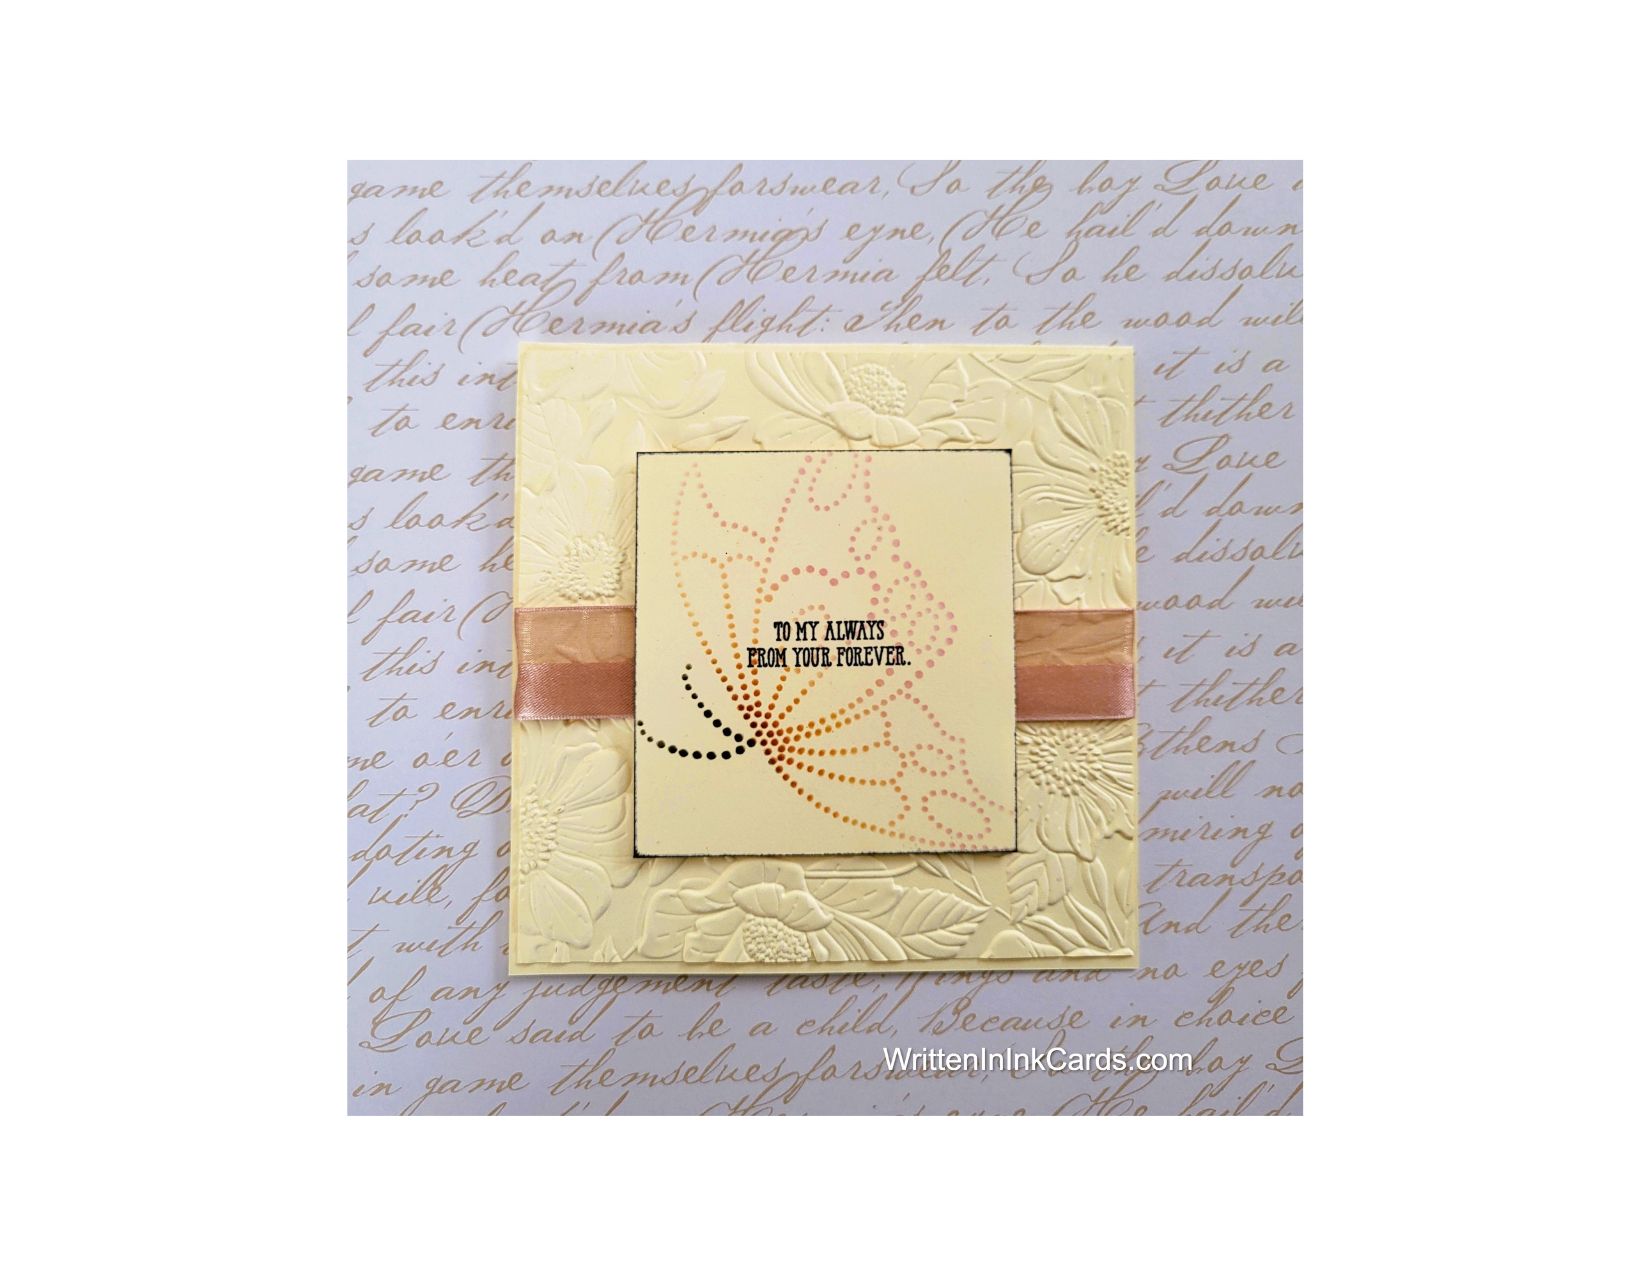
  • Create Fast, Easy & Elegant Cards with Dotty Side Butterfly Stencil

    Create Fast, Easy & Elegant Cards with Dotty Side Butterfly Stencil

    Would you like to experiment with a design like this? You’ll find a supply list below, including a link to the stencil I used from A Colorful Life Designs.  Follow the link and use the discount code ChrisFan10 to save 10% on your entire order! (Master Creator Bundles are excluded as they already have a 20% discount built in.)

    Let’s get Started:

    Card Base: 5.25 x 10.5, scored and folded at 5.25

    Border Layer: 5.25 x 5.25

    Card Face:  3 x 3

    Ribbon –  7 x 1

    Card Face:

    I placed the card face on the Grip Mat and positioned the stencil.  I masked off the antennae and applied orange ink to the left-hand edge of the butterfly.  

     I applied pink ink to the right-hand edge, bringing it into the middle so that it touched the edge of the orange ink.

    I added orange ink on the left until it was quite intense,  allowing it to fade as it moved into the butterfly.

    I moved the mask to cover the left-hand edge of the butterfly and added dark brown ink to the antennae.

    I placed the card face down in the stamp positioner and added the sentiment with brown ink.

    I ran the edges of the card face over the brown ink pad, creating a narrow border which offered definition on the edges.

    Other:

    I put the border layer into an embossing folder and ran it through the Big Shot.

    Assembly

    I secured the ribbon horizontally around the middle of the border layer and then glued it to the card base.

    I put dimensional foam on the back of the card face and centered it on the border layer.

    Final Thoughts:

    This is such a pretty combination – sometimes all the elements in a card work together perfectly, and I feel this is an example of that.  The ribbon pairs beautifully with the embossing ,  and the butterfly is a lovely focal point on top of both.

    Supplies: (and links where possible)

       I have listed the products I have used and where they can be purchased. It’s a huge marketplace, and in most instances, there are multiple sources and many alternatives to choose from.

    Stencil: Dotty Side Butterfly,  A Colorful Life Designs

    Waffle Flower Grip Mat, 8.5 x 6.5, Scrapbook.com

    Embossing Folder:  Four Petal,  Spellbinders

    Ink: Stampin’ Up!

    Blending Brushes: Stampin’ Up! 

    Adhesive: Tombow Aqua, Michaels

     Recollections 110 lb., Michaels

    Do you have any comments or thoughts on this design?  Drop me a line in the Comments Section below –  I’d love to hear from you!

    You can also use the Comments Section to be notified when I release new work.
    Dotty Side Butterfly