Category: Baby

  • Stencil + Cats + Butterflies = A One of a Kind Card

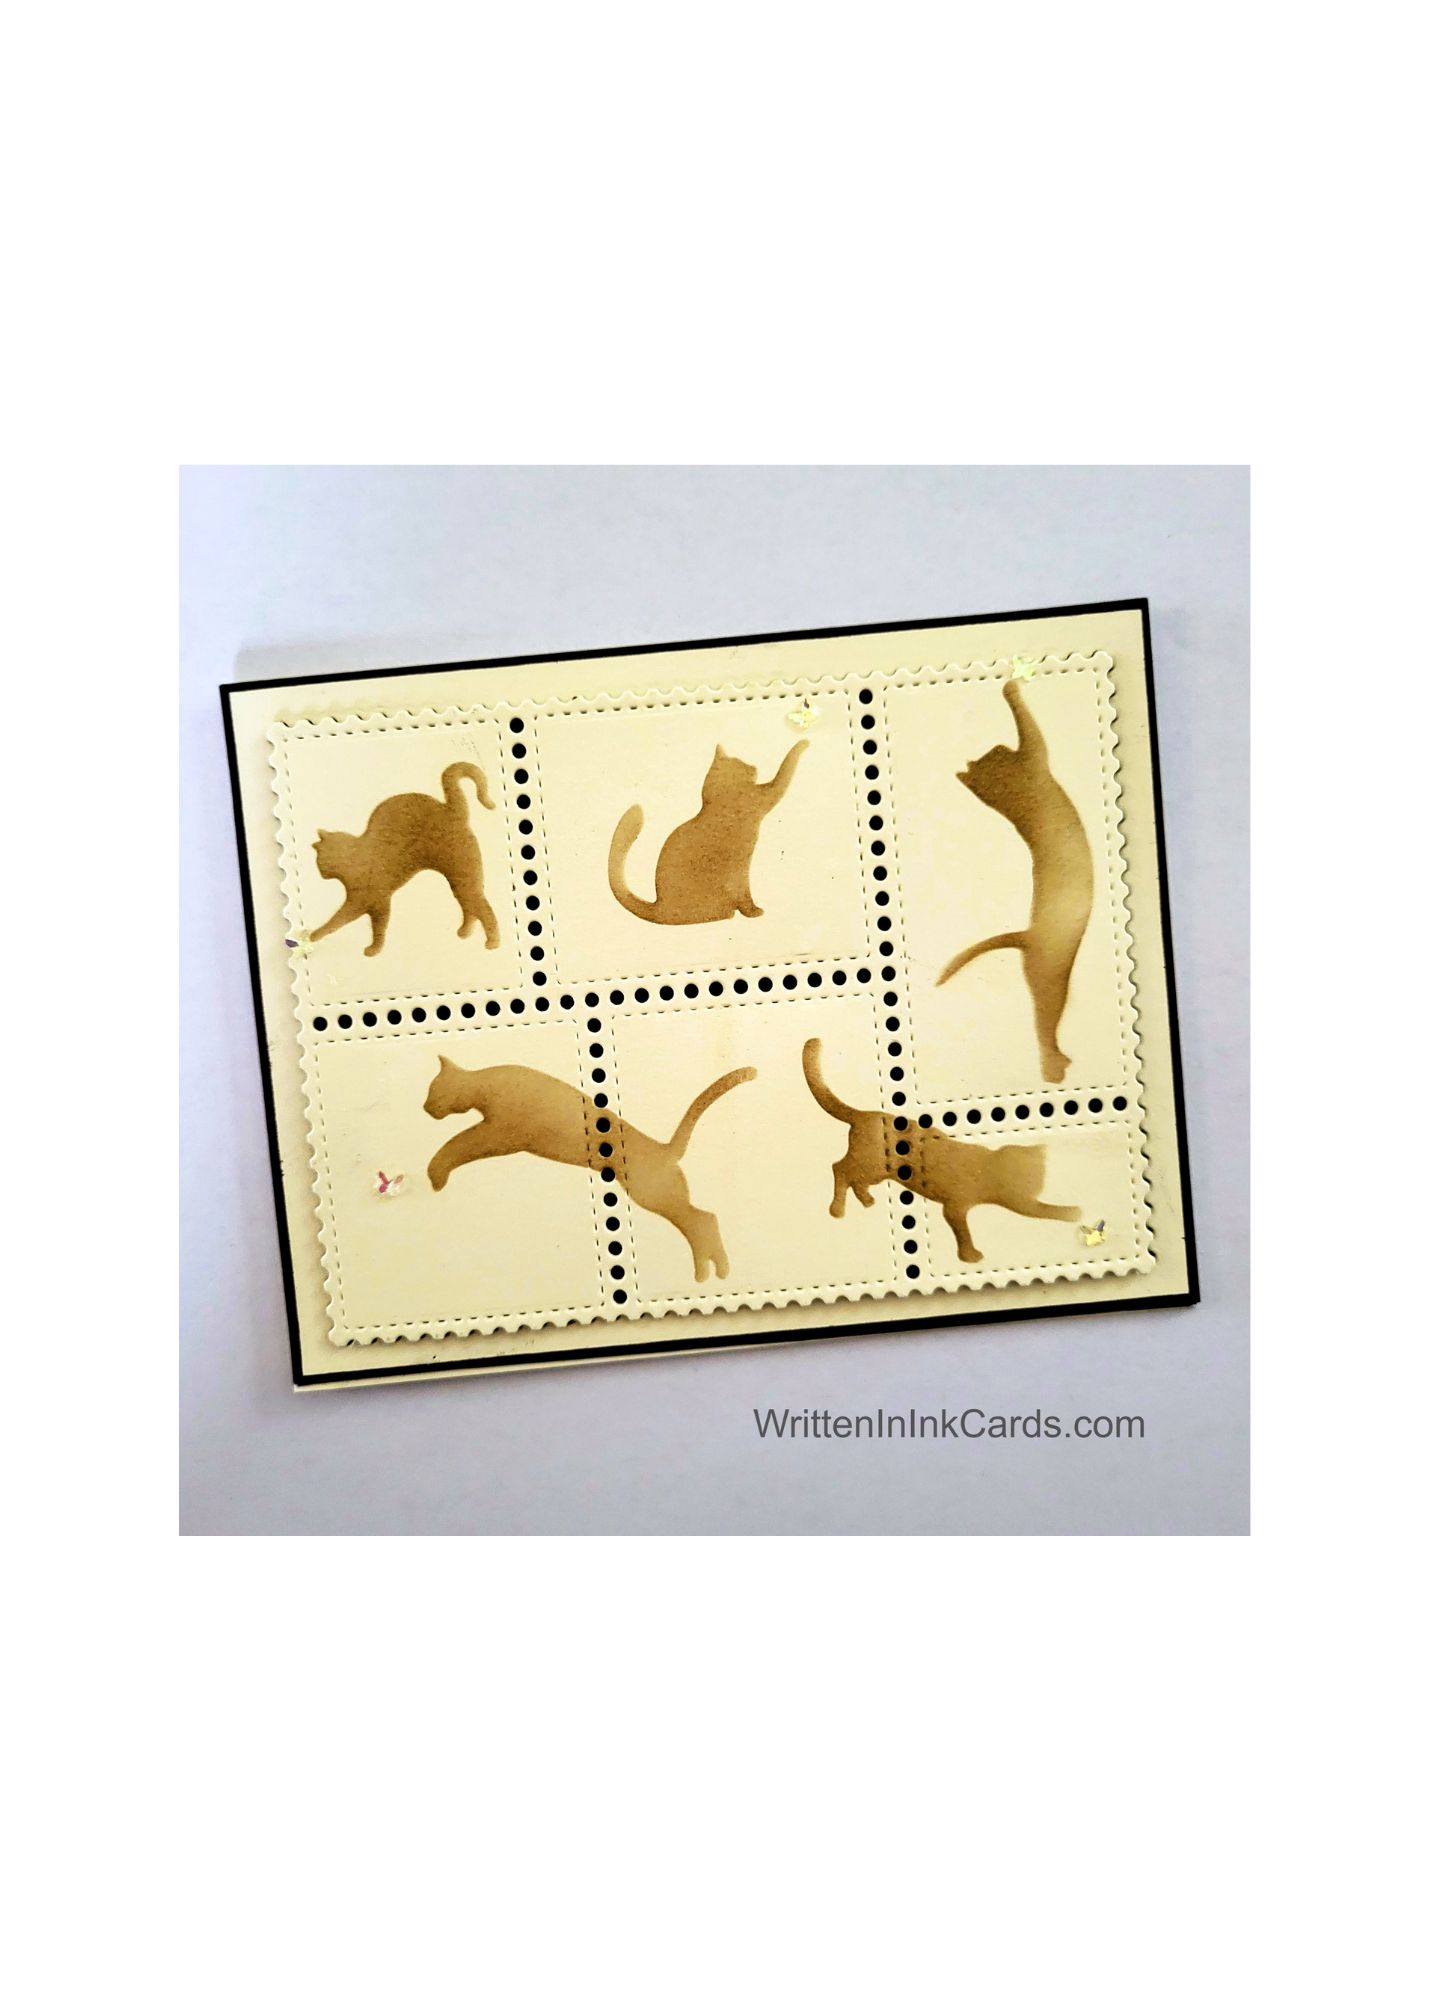
    Stencil + Cats + Butterflies = A One of a Kind Card

    Would you like to experiment with a design like this? You’ll find a supply list below, including a link to the stencil I used from A Colorful Life Designs.  Follow the link and use the discount code ChrisFan10 to save 10% on your entire order! (Master Creator Bundles are excluded as they already have a 20% discount built in.)

    Let’s get Started:

    Card Base: 5.5 x 8.5, scored and folded at 4.25

    Black Border Layer: 5.5 x 4.25

    Card Face:  5 ⅜ x 4 1/8

    Card Face:

    • I positioned the die on the card face – centering carefully –  and ran it through the Big Shot.
    • I placed the center cut-out section on the grip mat and added the cats into the squares individually, using brown ink and varying pressure to create depth. This involved both moving the stencil and masking as necessary to prevent stray ink from ruining the design.  
    • Two of the cats were too large to fit into the squares – they were allowed to “spill over”   as shown in the picture.

    Assembly

    • I glued the black border layer to the card base,  and centered the outer section of the card face on top.
    • I put dimensional foam on the back of the card face and placed it back in the center opening.
    • I gave each cat a small butterfly embellishment to play with.

    Final Thoughts:

    This is such a fun design –  I think the cats and the postage stamp die are a great combination.  The tiny butterflies are hard to see in the picture,  but they are a great finishing touch.

    I will add a sentiment to this when I send it –  it could be used for almost any occasion and I’m leaving the options open till then.

    Supplies: (and links where possible)

       I have listed the products I have used and where they can be purchased. It’s a huge marketplace, and in most instances, there are multiple sources and many alternatives to choose from.

    Stencil: Cats Playing, A Colorful Life Designs

    Versamark Embossing Ink: R&R Scrapbooking

    Dies: Postage Collage,  Waffle Flower,  Glitter & Ink

    Ink: Stampin’ Up!

    Blending Brushes: Stampin’ Up! 

    Versafine Onyx, Simon Says Stamp

    Memento Ink: Stampin’ Up!

    Alcohol Markers:

         Stampin’ Blends: Stampin’ Up!

         Copics:  Wallacks

    Adhesive: Tombow Aqua, Michaels

    Card Base & Card Face: Accent 100 lb., Amazon 

    Do you have any comments or thoughts on this design?  Drop me a line in the Comments Section below –  I’d love to hear from you!

    You can also use the Comments Section to be notified when I release new work.

    Cats Playing

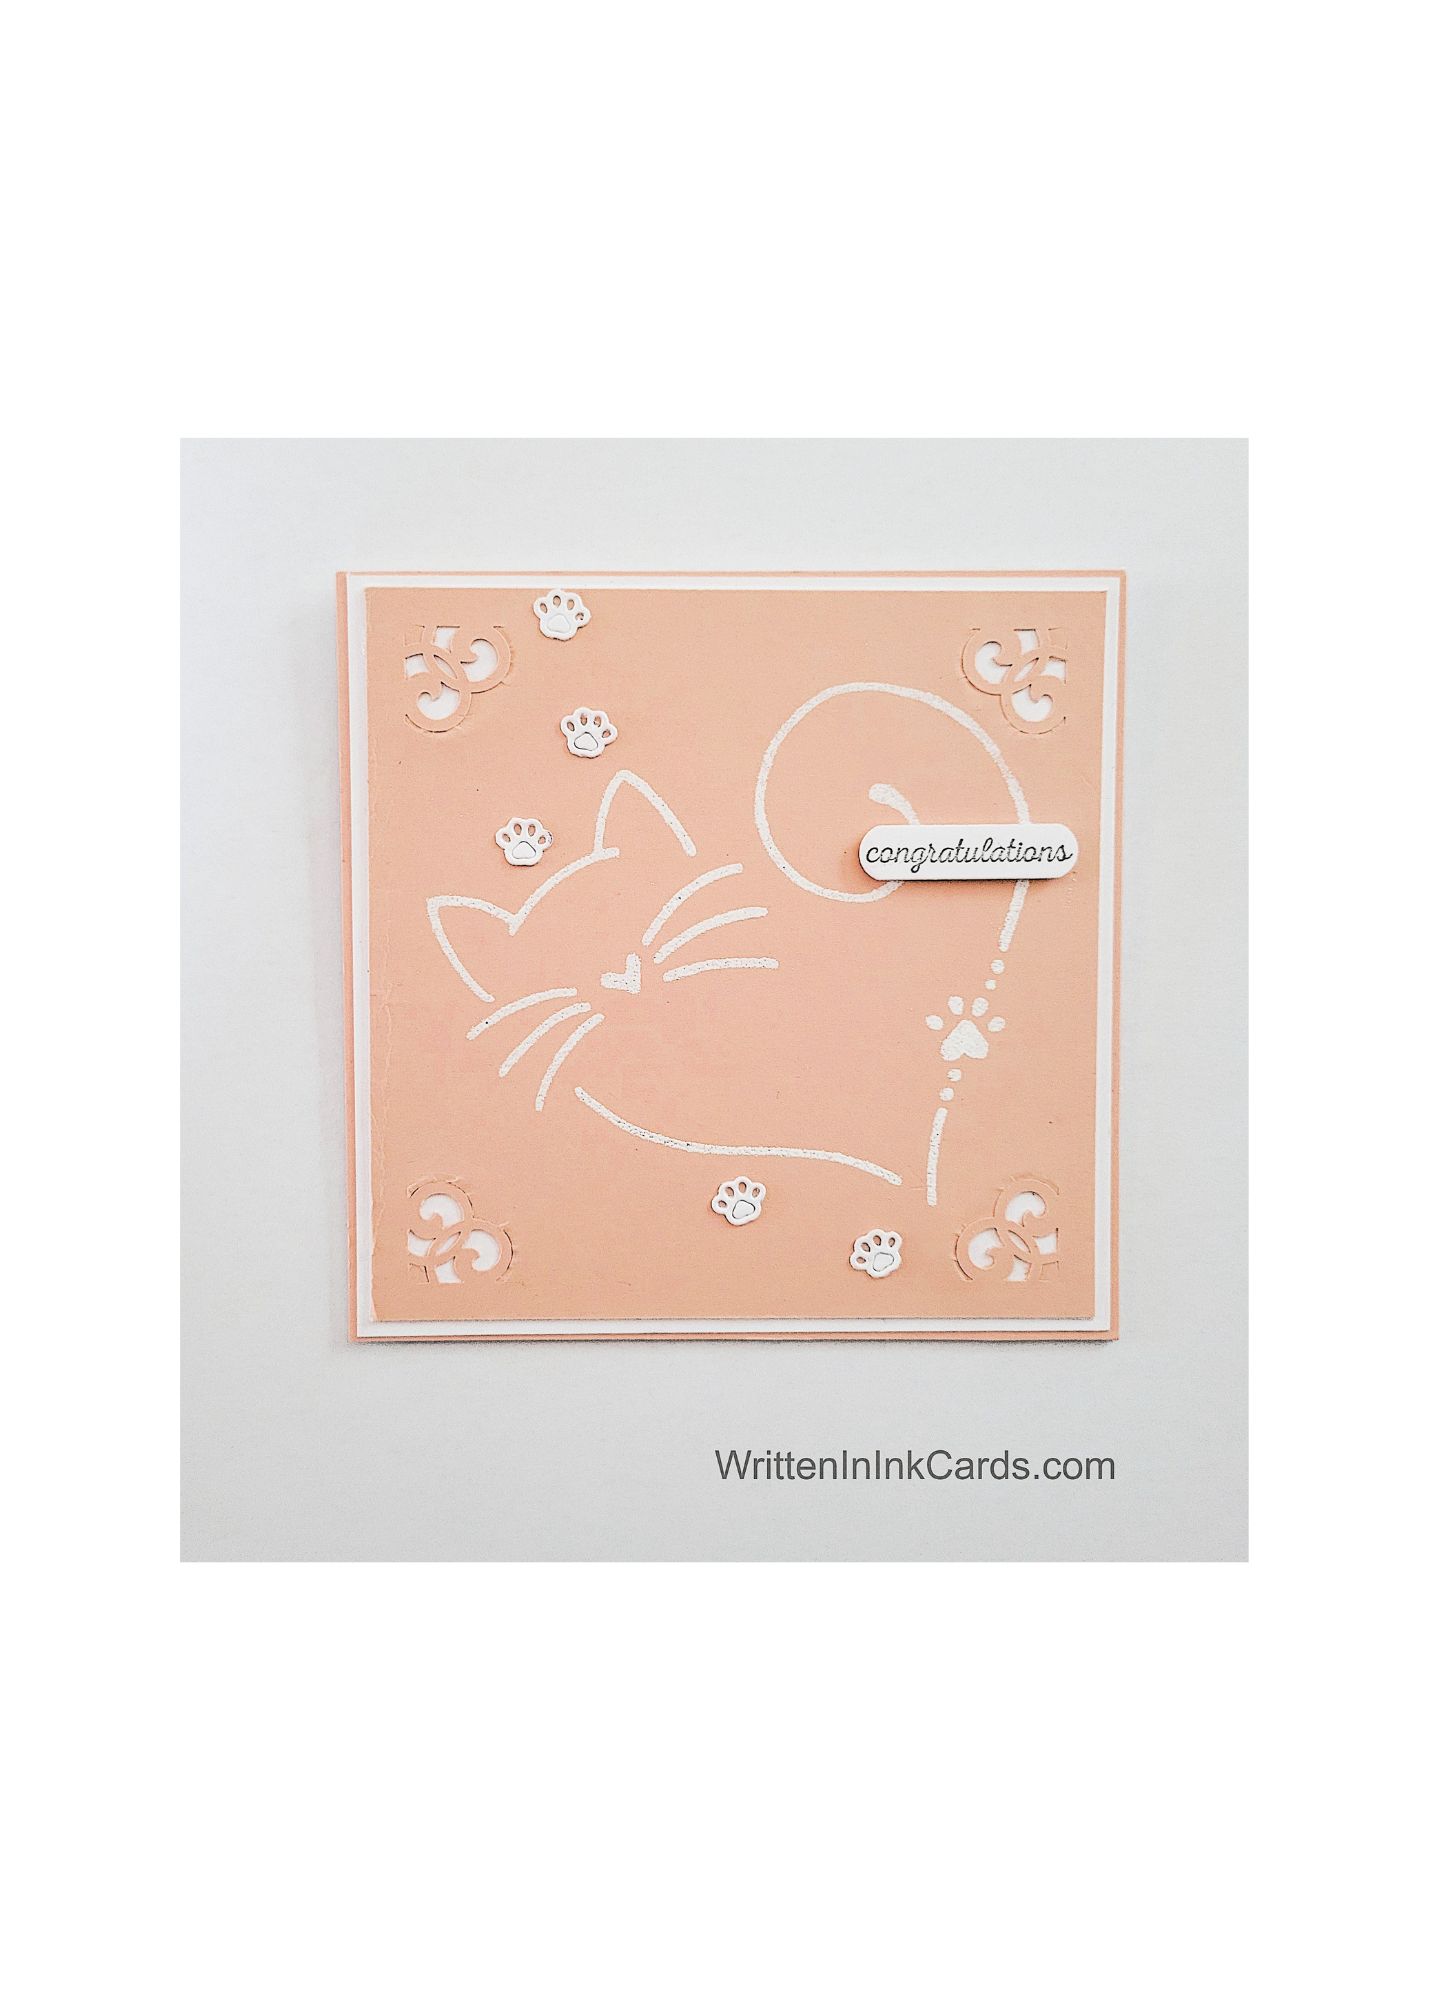
  • DIY a  Simple Curlicue Cat Card with Paw Prints

    DIY a Simple Curlicue Cat Card with Paw Prints

    Would you like to experiment with a design like this? You’ll find a supply list below, including a link to the stencil I used from A Colorful Life Designs.  Follow the link and use the discount code ChrisFan10 to save 10% on your entire order! (Master Creator Bundles are excluded as they already have a 20% discount built in.)

    Let’s get Started:

    Card Base: 5.25 x 10.5, scored and folded at 5.25

    Pink Border Layer:  5.25 x 5.25

     White Border Layer:5 ⅛ x 5 1/8

    Pink Card Face:  4 ⅞ x47/8

    Card Face:

    • I dusted the card face liberally with anti-static powder, then positioned the stencil and secured both with low-tack tape.
    • I pressed my Versamark embossing pad firmly through the openings in the stencil, repeating a couple of times to ensure good coverage.
    • After setting the stencil aside, I sprinkled white embossing powder over the wet ink,  and set it with my heat gun.
    • I used a corner punch to add additional detail to each corner.

    Other:

    • I used a scrap of white cardstock and a die that cuts tiny, adorable pawprints.
    • I looked through my Sentiments binder and selected the  “congratulations”.

    Assembly

    • I glued the pink border layer to the card base, and centered the white border on top of these.
    • I added the pink card face (centered carefully), then added the paw prints as shown.
    • I put dimensional foam on the back of the sentiment and positioned it in the upper right quadrant of the card face.

    Final Thoughts:

    I love the white-on-pink-on white- on pink effect achieved here.  Fun,  without distracting from the design.

    Although I pulled out the “congratulations”,  this card would work for many other occasions.

    Supplies: (and links where possible)

       I have listed the products I have used and where they can be purchased. It’s a huge marketplace, and in most instances, there are multiple sources and many alternatives to choose from.

    Stencil:  Cat Curlicue ,  A Colorful Life Designs

    Versamark Embossing Ink: R&R Scrapbooking

    White Embossing Powder,  Wow,  R&R Scrapbooking

    Dies:  KSCraft,  Amazon

    Versafine Onyx, Simon Says Stamp

    Adhesive: Tombow Aqua, Michaels

    Card Base & Card Face: Accent 100 lb., Amazon 

    Do you have any comments or thoughts on this design?  Drop me a line in the Comments Section below –  I’d love to hear from you!

    You can also use the Comments Section to be notified when I release new work.

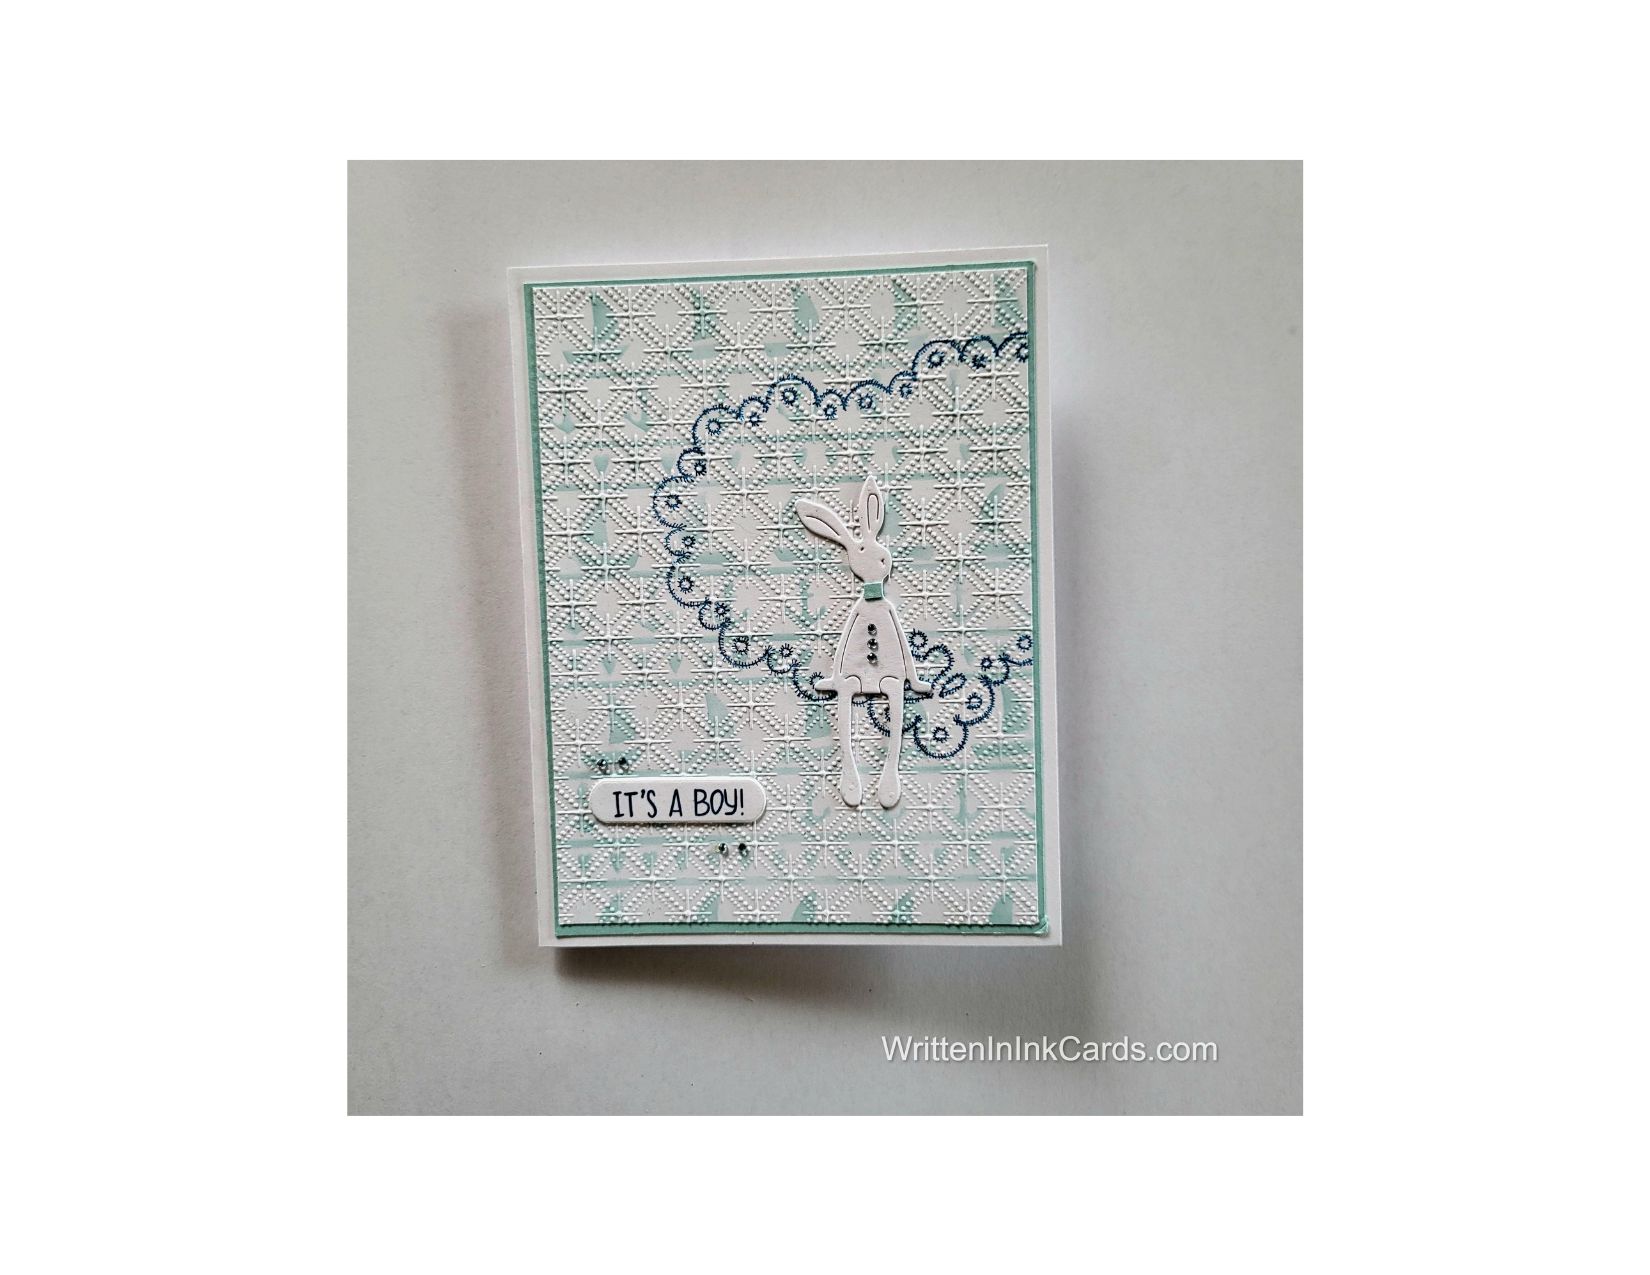
  • Create Unique Baby Cards with a Subtle Nautical Feel

    Create Unique Baby Cards with a Subtle Nautical Feel

    Would you like to experiment with a design like this? You’ll find a supply list below, including a link to the stencil I used from A Colorful Life Designs.  Follow the link and use the discount code ChrisFan10 to save 10% on your entire order! (Master Creator Bundles are excluded as they already have a 20% discount built in.)

    Let’s get Started:

    Card Base: 5.5 x 8.5, scored and folded at 4.25

    Blue Border Layer: 5.25 x 4

    Card Face:  5 ⅛ x 3 7/8

    Card Face:

    I laid the card face down on the Grip Mat and positioned the stencil; I applied light teal ink to all exposed areas.

    Setting the stencil aside,  I placed the card face in my stamp positioner.  I stamped the heart with dark blue ink, allowing the heart to extend over the right-hand edge of the paper.

    I put the card face into an embossing folder and ran it through the Big Shot to add depth and texture.

    Other:

    I used a scrap of white cardstock to die-cut the bunny.

    Using the dark blue I had used earlier, I stamped the sentiment on another scrap of white and cut it out with a small oblong die.

    I used a small scrap of blue cardstock (the same colour used for the border layer)  to create a collar for the bunny. 

    Assembly

    I glued the card face to the card base and added the bunny as shown in the picture.

    I glued the collar onto the bunny.

    I added the sentiment in the lower-left corner, as shown.

    I added three “buttons” to the bunny with tiny pale blue gems, and two above the sentiment on the left, as well as two more below on the right.

    Final Thoughts:

    I’ve wanted to create a baby card with this stencil since I first got it (isn’t it funny how some things just demand a specific use?).   

    These elements came together really well,  and I love the result.  It definitely reads “baby boy”,  but in a slightly less traditional way.

    Supplies: (and links where possible)

       I have listed the products I have used and where to purchase them. It’s a huge marketplace, and in most instances, there are multiple sources and many alternatives to choose from.

    Stencil: Nautical Stripes, A Colorful Life Designs

    Waffle Flower Grip Mat, 8.5 x 6.5, Scrapbook.com

    Dies: 

    Bunny:  unbranded,  Amazon

    Oblong:  Ornate Labels,   Sizzix,  Amazon

    Ink: Stampin’ Up!

    Blending Brushes: Stampin’ Up! 

    Adhesive: Tombow Aqua, Michaels

    Card Base & Card Face: Accent 100 lb., Amazon  

    Do you have any comments or thoughts on this design?  Drop me a line in the Comments Section below –  I’d love to hear from you!

    You can also use the Comments Section to be notified when I release new work.

    Nautical Stripes

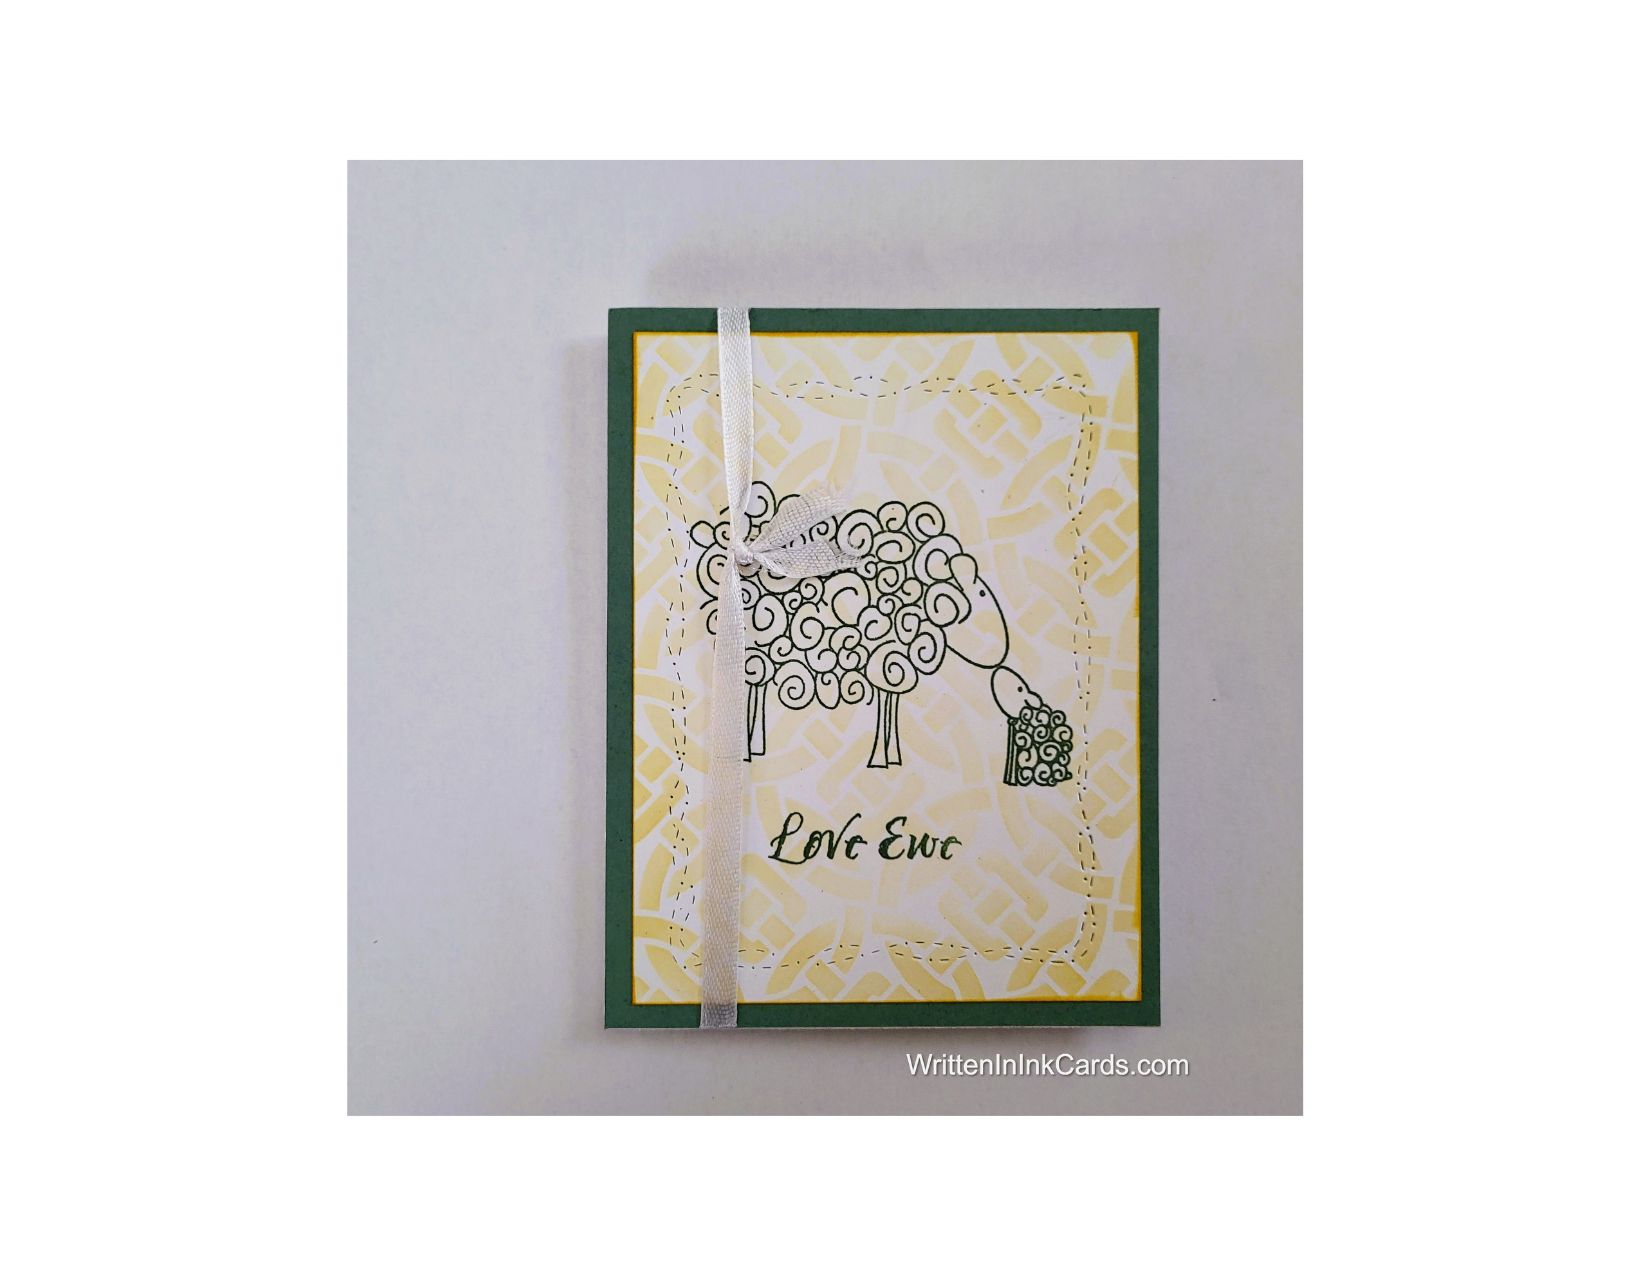
  • Create Beautiful Cards with Love Ewe and Celtic Knots

    Create Beautiful Cards with Love Ewe and Celtic Knots

    Would you like to experiment with a design like this? You’ll find a supply list below, including a link to the stencil I used from A Colorful Life Designs.  Follow the link and use the discount code ChrisFan10 to save 10% on your entire order! (Master Creator Bundles are excluded as they already have a 20% discount built in.)

    Let’s get Started:

    Card Base: 5.5 x 8.5, scored and folded at 4.25

    Border Layer: 5.5 x 4.25

    Card Face: 5.25 x 4

    8”  of ¼” white ribbon.

    Card Face:

    • I placed the card face in my stamp positioner and stamped the image in the center using Versafine Onyx.
    • I sprinkled clear embossing powder over the wet ink and set it with my heat gun.
    • I repeated these steps with the sentiment.
    • I laid the card face on the Grip Mat and positioned the stencil.  I used yellow ink and a light hand to apply it through the stencil around the edges of the card face, allowing it to fade as it approached the image.
    • I ran the edges of the card face over the ink pad to create definition.
    • I secured the embossing die on the card face using Mint Tape and ran it through the Big Shot.

    Other

    • I tied the ends of the ribbon together in a knot,  and then cut the ribbon at the half way spot on the loop.

    Assembly

    • I used scotch tape to secure the ribbon to the card face towards the left as shown.
    • I glued the black border layer to the card base, and then added the card face on top,  centering on all sides. 

    Final Thoughts:

    I love this image/sentiment from Unity,  and the stencil makes a great backdrop.  When I had the card face complete I thought it needed “something more”,  and added the ribbon.

    I don’t like the look of the ribbon,  and would omit it next time!

    Supplies: (and links where possible)

       I have listed the products I have used and where they can be purchased. It’s a huge marketplace, and in most instances, there are multiple sources and many alternatives to choose from.

    Stencil: Celtic Knots,  A Colorful Life Designs

    Waffle Flower Grip Mat, 8.5 x 6.5, Scrapbook.com

    Versamark Embossing Ink: Simon Says Stamp

    Clear Embossing Powder,  Wow,  Simon Says Stamp

    Stamps:  Love Ewe, Unity Stamps (retired)

    Dies: Whimsy Dies,  Stampin’ Up!  (retired)

    Ink: Stampin’ Up!

    Blending Brushes: Stampin’ Up! 

    Versafine Onyx, Simon Says Stamp

         Copics:  Wallacks

    Adhesive: Tombow Aqua, Michaels

    Card Base & Card Face: Accent 100 lb., Amazon

    Do you have any comments or thoughts on this design?  Drop me a line in the Comments Section below –  I’d love to hear from you!

    You can also use the Comments Section to be notified when I release new work.

    Celtic Knots

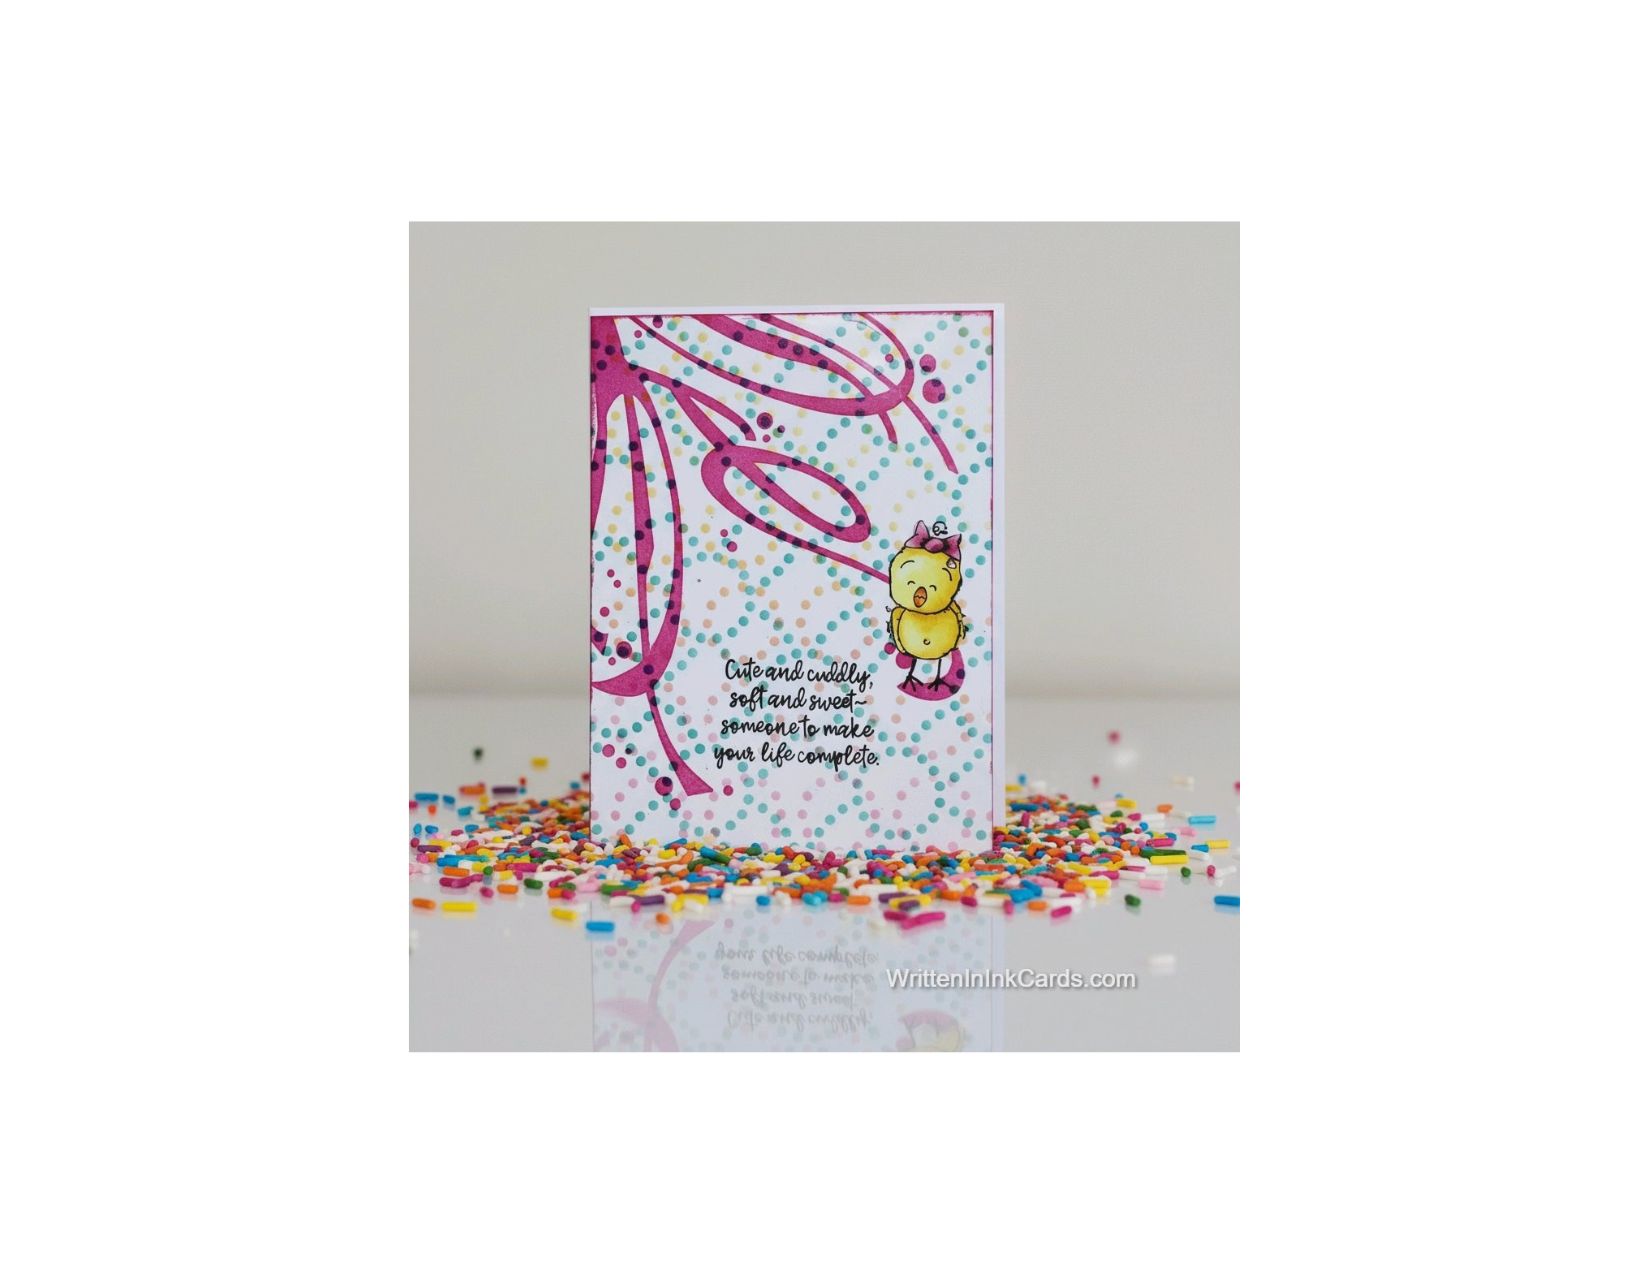
  • Create an Adorable Baby Card That Will be Treasured

    Create an Adorable Baby Card That Will be Treasured

    Would you like to experiment with a design like this? You’ll find a supply list below, including a link to the stencils I used from A Colorful Life Designs.  Follow the link and use discount code ChrisFan10 to save 10% on your entire order! (Master Creator Bundles are excluded as they already have a 20% discount built in.)

    Let’s get Started:

    Card Base: 5.5 x 8.5, scored and folded at 4.25

    Card Face:  5.25 x 4

    Card Face:

    • I placed my card face on the Grip Mat and positioned the Dotted Trellis stencil. I applied a mixture of yellow and pink ink randomly across the exposed areas.
    • I switched out the stencils, putting the Circles Galore stencil in place, and added turquoise ink over the first layer of stencilling.
    • I placed the card face in the stamp positioner and added the pink ribbon to the top-left corner of the card face.
    • I stamped the sentiment directly onto the card face, as shown, using Versafine Onyx.  I sprinkled this with clear embossing powder and set it with my heat gun.
    • I ran the edges of the card face across the pink ink pad.

    Other:

    • I looked through my Ready To Go binder and decided to use the wee chick, which was pre-coloured with alcohol markers and fussy cut.

    Assembly

    • I glued the card face to the card base, centering on all sides.
    • I glued the wee chick onto the card face and drew legs and feet so she is standing on the bottom of the ribbon.
    • I added card bling randomly to the card face.

    Final Thoughts:

    I really like the shapes and colours in the two layers of stencilling:  with that in place turning this into a baby card seemed natural.  (I almost always decide what direction a card will go in once the first steps are complete …. And often not until the card is finished.)

    The large stamped ribbon is a nice contrast to the wee chick.

    Supplies: (and links where possible)

       I have listed which products I have used, and where they may be purchased. It’s a huge marketplace and in most instances, there are multiple sources and many alternatives to choose from.

    Stencils:

          Dotted Trellis,  A Colorful Life Designs

          Circles Galore, A Colorful Life Designs

    Waffle Flower Grip Mat, 8.5 x 6.5, Scrapbook.com

    Versamark Embossing Ink: Simon Says Stamp

    Clear Embossing Powder,  Wow,  Simon Says Stamp

    Stamps:

    Ribbon:  Technique Junkies (no longer in business)

    Chick:  I am Chickie, Nellies Choice, Ecstasy Crafts

    Ink: Stampin’ Up!

    Blending Brushes: Stampin’ Up! 

    Versafine Onyx, Simon Says Stamp

    Memento Ink: Stampin’ Up!

    Alcohol Markers:

         Stampin’ Blends: Stampin’ Up!

         Copics:  Wallacks

    Adhesive: Tombow Aqua, Michaels

    Card Base & Card Face: Accent 100 lb., Amazon 

    Do you have comments or thoughts to share on this design?  Drop me a line in the Comments Section below –  I’d love to hear from you!

    You can also use the Comments Section  to be notified when I release new work.

    Dotted Trellis by A Colorful Life Designs

    Circles Galore by A Colorful Life Designs

  • Create Stunning Cards with Love Waterfall Stencil

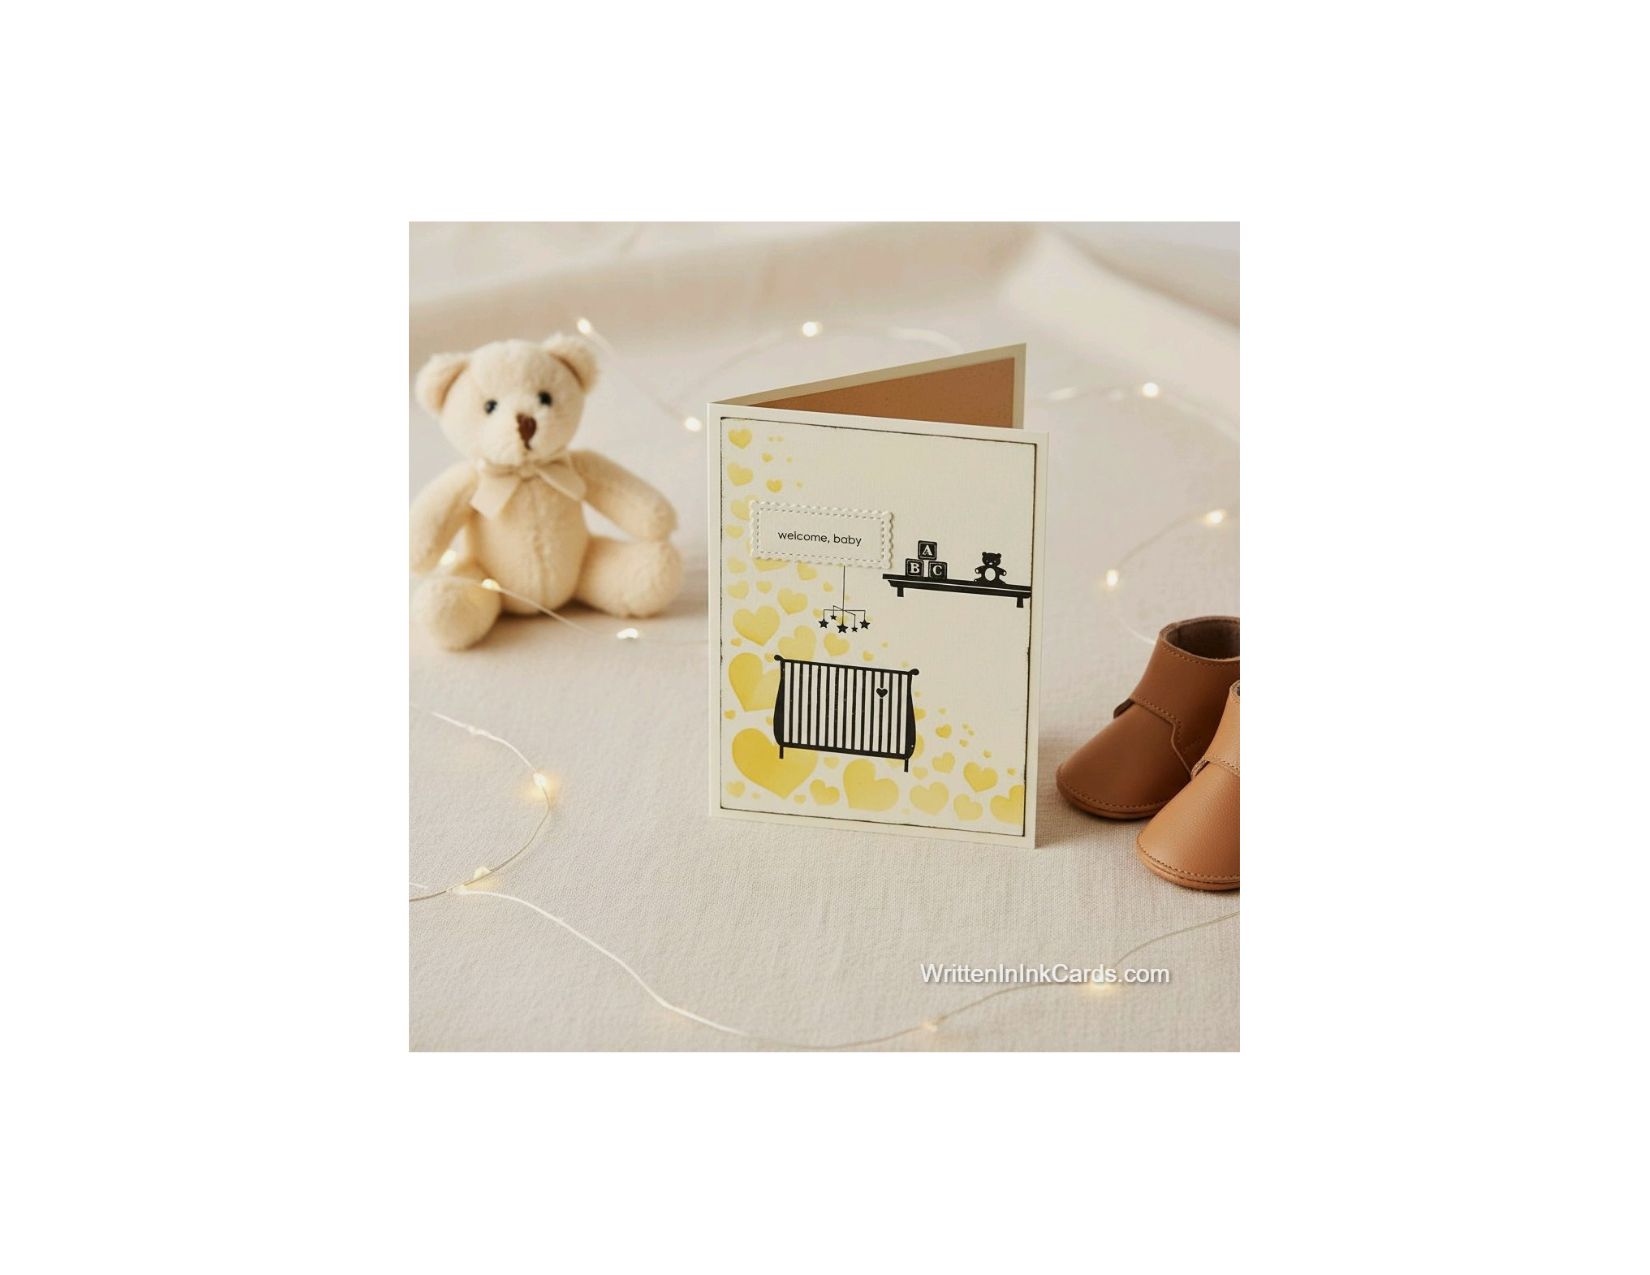
    Create Stunning Cards with Love Waterfall Stencil

    Would you like to experiment with a design like this? You’ll find a supply list below, including a link to the stencil I used from A Colorful Life Designs.  Follow the link and use discount code ChrisFan10 to save 10% on your entire order! (Master Creator Bundles are excluded as they already have a 20% discount built in.)

    Let’s get Started:

    Card Base: 5.5 x 8.5, scored and folded at 4.25

    Card Face:  5.25 x 4

    Card Face:

    • I placed the card face down on my Grip Mat and positioned the stencil. 
      I added soft yellow ink across all open areas.
    • After removing the stencil I placed the card face into my stamp positioner and added the crib, mobile and the shelf with teddy and blocks using Versafine Onyx.
    • I ran the edges of the card face over the versafine ink pad.

    Other:

    • I used a scrap of cardstock to stamp the sentiment with Versafine Onyx,  and cut it out with a die.

    Assembly

    • I glued the card face onto the card base, centering on all sides.
    • I glued the sentiment in place at the top of the mobile, created the illusion that the mobile was hanging from the sentiment.

    Final Thoughts:

    I love the contrast between the soft yellow and the dramatic black:  they work very well for this design.

    Looking at the card now,  I wish I had added a bit of shadow under the crib to ground it:  I didn’t think of it at the time,  but it would have been a good touch.

    Supplies: (and links where possible)

       I have listed which products I have used, and where they may be purchased. It’s a huge marketplace and in most instances, there are multiple sources and many alternatives to choose from.

    Stencil: Love Waterfall,  A Colorful Life Designs

    Waffle Flower Grip Mat, 8.5 x 6.5, Scrapbook.com

    Stamps & Die: Stampin’ Up!  (retired)

    Ink: Stampin’ Up!

    Blending Brushes: Stampin’ Up! 

    Versafine Onyx, Simon Says Stamp

    Adhesive: Tombow Aqua, Michaels

    Card Base & Card Face: Recollections 110 lb., Michaels

    Do you have comments or thoughts to share on this design?  Drop me a line in the Comments Section below –  I’d love to hear from you!

    You can also use the Comments Section  to be notified when I release new work.

    Love Waterfall by A Colorful Life Designs

  • Send Big Love with a Handmade Card

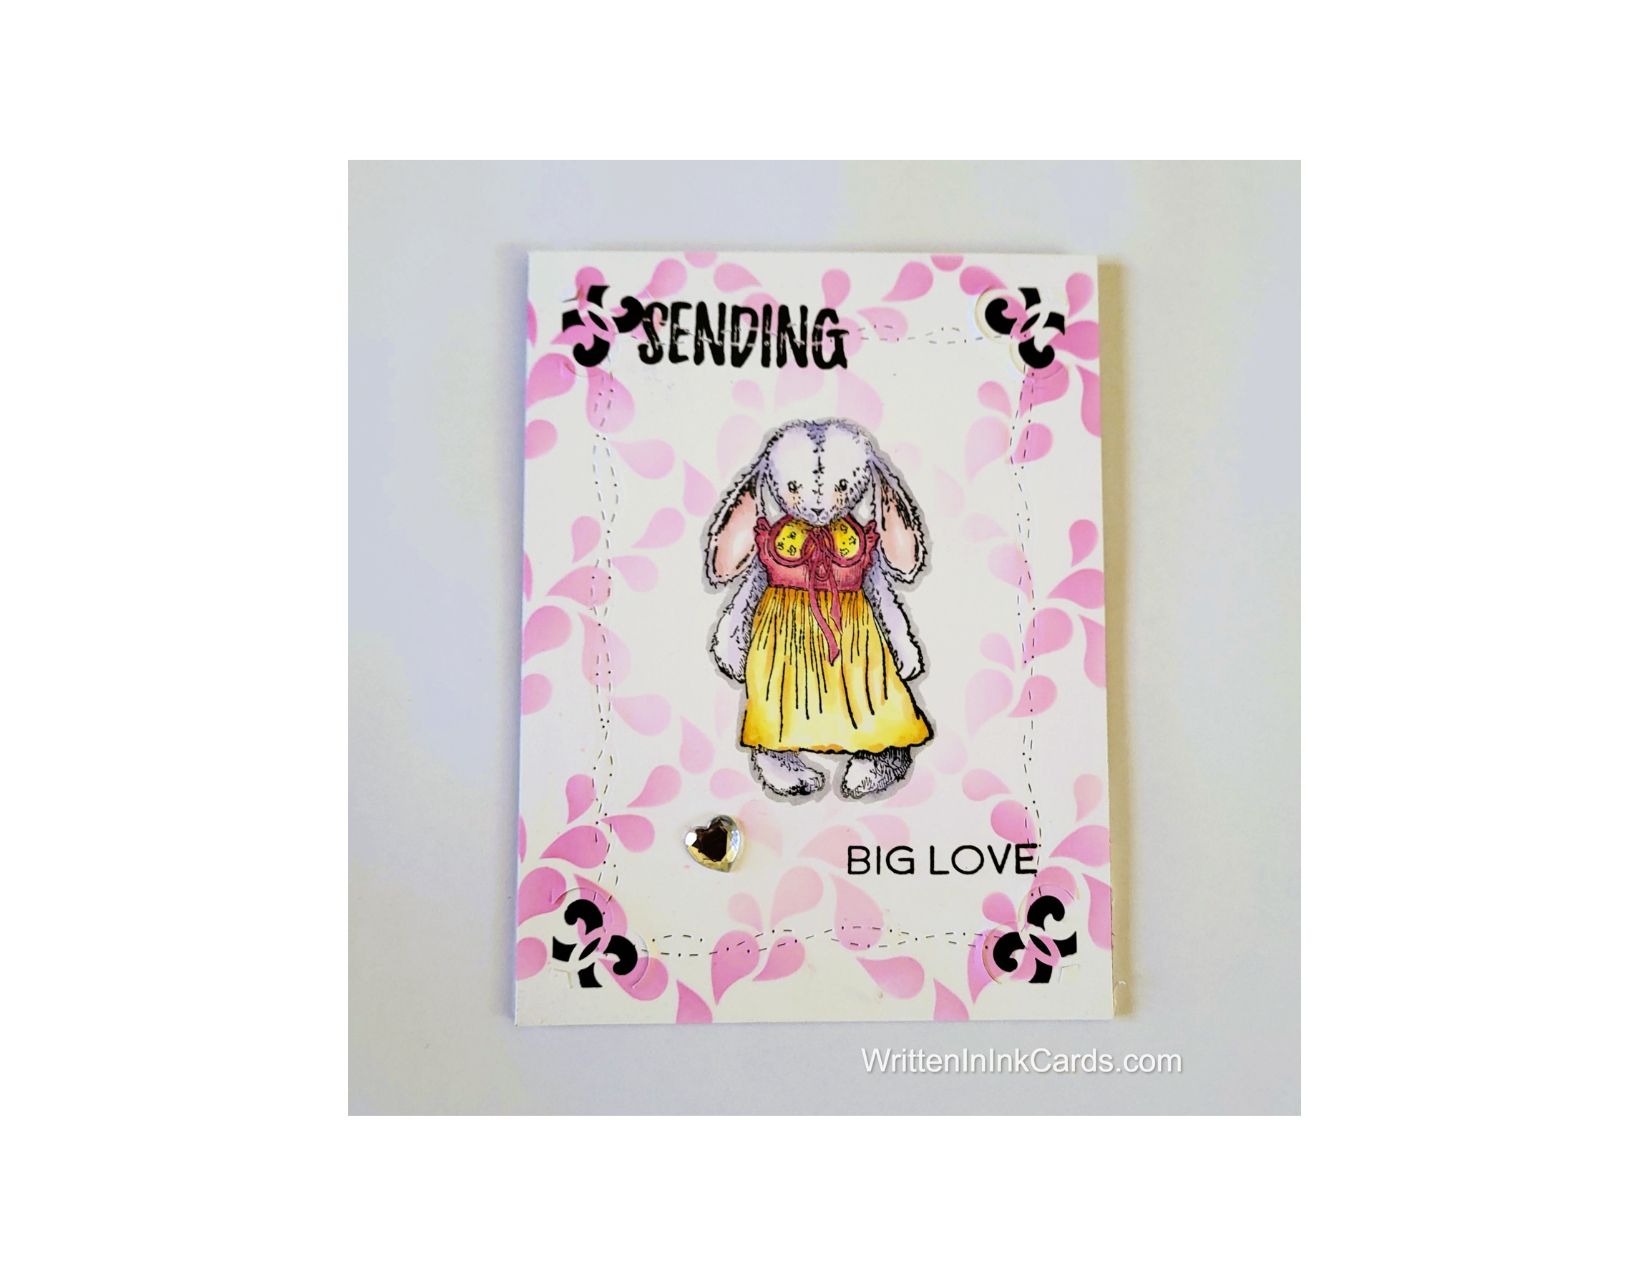
    Send Big Love with a Handmade Card

    Would you like to experiment with a design like this? You’ll find a supply list below, including a link to the stencil I used from A Colorful Life Designs.  Follow the link and use discount code ChrisFan10 to save 10% on your entire order! (Master Creator Bundles are excluded as they already have a 20% discount built in.)

    Let’s get Started:

    Card Base: 5.5 x 8.5, scored and folded at 4.25

    Border Layer: 5.5 x 4.25

    Card Face: 5.5 x 4.25

    Card Face:

    • I put the card face into the stamp positioner and stamped the bunny a couple of times with black Memento ink, centering the image.
    • I coloured her in with alcohol markers  (Memento ink doesn’t react to alcohol, making it perfect for this purpose).
    • I put the card face onto the grip mat and positioned the stencil:  I used pink ink to create the pattern around the bunny –  using more ink/ more pressure around the edges and allowing the ink to fade as I neared the center.
    • I added a rectangular stitched die to the card face, centering carefully.  This die creates a pattern in the paper; \it is not a cutting die.
    • I returned the card face to the stamping platform and added the sentiment with Versafine Onyx.  This is actually one stamp: to create the separation, I had to mask off the appropriate section, and stamp the other.
    • I used a punch on all four corners to create the peek-a-boo pattern.

    Assembly

    • I glued the black border layer to the card base, and then added the card face on top of that.
    • I thought this card needed one final detail,  so I added a clear heart shaped gem to the card face to finish it off.

    Final Thoughts:

    • This bunny is absolutely adorable,  and that sentiment suits perfectly.
    • If I were to re-do this card,  I would position the “sending” a little further to the right –  but by the time I saw the problem on this card it was too late to fix!

    Supplies: (and links where possible)

       I have listed which products I have used, and where they may be purchased. It’s a huge marketplace and in most instances, there are multiple sources and many alternatives to choose from.

    Stencil: Droplet Grid,  A Colorful Life Designs

    Waffle Flower Grip Mat, 8.5 x 6.5, Scrapbook.com

    Stamps:

         Cuddly Girl, Nellie’s Choice, Ecstasy Crafts  (out of stock)

          Sentiment:  Technique Junkies  (out of business)

    Dies: Stitched with Whimsy, Stampin’ Up!  (retired)

    Ink: Stampin’ Up!

    Blending Brushes: Stampin’ Up! 

    Versafine Onyx, Simon Says Stamp

    Memento Ink: Stampin’ Up!

    Alcohol Markers:

         Stampin’ Blends: Stampin’ Up!

         Copics:  Wallacks

    Adhesive: Tombow Aqua, Michaels

    Card Base & Card Face: Accent 100 lb., Amazon

    Do you have comments or thoughts to share on this design?  Drop me a line in the Comments Section below –  I’d love to hear from you!

    You can also use the Comments Section  to be notified when I release new work

    Droplet Grid by A Colorful Life Designs