
Unexpected adhesive residue proves to be a bit of serendipity in the design!
Would you like to experiment with a design like this? You’ll find a supply list below, including a link to the stencil I used from A Colorful Life Designs. Follow the link and use discount code ChrisFan10 to save 10% on your entire order! (Master Creator Bundles are excluded as they already have a 20% discount built in.)
Let’s get Started:
Card Base: 5.5 x 8.5, scored and folded at 4.25
Card Face: 5.5 x 4.25
Card Face:
- I began by spraying the back of the stencil with Pixie Spray. This is a temporary adhesive which I use to prevent movement in stencils that are delicate, or that have longer, unattached “strands” in the design.
- With that complete, I laid the card face on my Grip Mat, and then positioned the stencil. I rolled a brayer across the entire surface to ensure good contact between the adhesive and the paper.
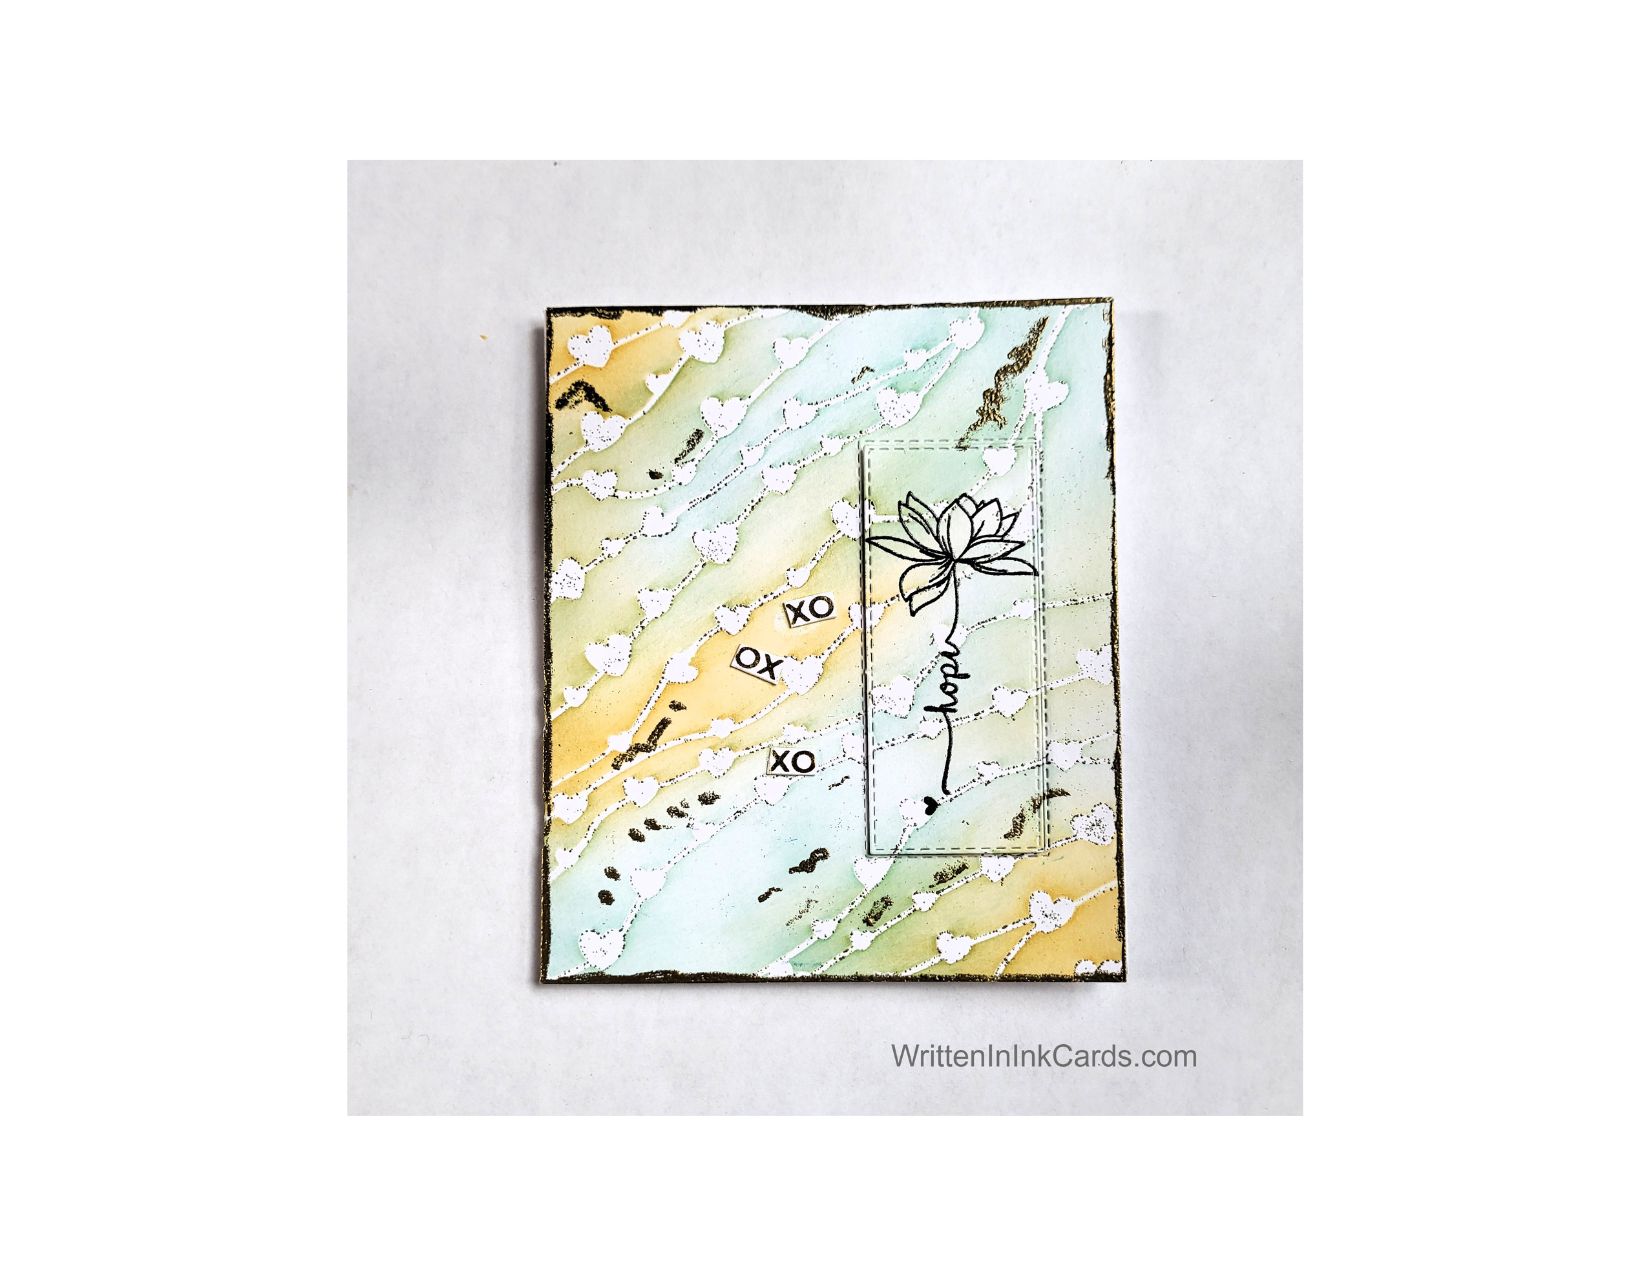
- Next I selected light aqua and yellow inks and applied them diagonally over the stencil, using a soft hand throughout the process.
- I removed the stencil and placed the card face into my stamp positioner before adding the floral image with Versamark embossing ink.
- I added gold embossing powder over this stamped image, and this is where the serendipity comes in –
- During this step I realized that the stencil had left residue behind from the Pixie Spray, and bits of embossing powder had stuck to this. I could have brushed this off of the background, but decided to roll with it and allow it to add an unexpected touch to the background.
- I used an embossing pen to add a few random lines and dots to the background, and then added gold embossing powder.
- After heat setting this, I decided that one more thing was needed to finish the look: a gold border. I used an embossing pen again, going around the border of the card and creating an irregular line (I could have used a ruler, if I’d wanted precision). After heat setting the gold powder added to this I was satisfied with presence of gold on the card face.
- I used a rectangular stitched die to cut the floral image from the card face.
An adhesive eraser can be used to remove residue from Pixie Spray. Just rub it over the paper as if you’re trying to remove a pencil mark.
Other:
- I looked through my sentiments binder and found a foiled XOXOXOXOXO sentiment.
- I cut three separate XO sections out of this.
Assembly
- I glued the card face to the card base.
- I added dimensional foam to the back of the die-cut focal image and then set it in place on the card face.
- I positioned the three XO sections as shown.
Final Thoughts:
I love the serendipity that is evidenced in the bits of gold embossing . They are very tiny and and add a lovely, delicate detail to the card face.
Initially I didn’t have the three sentiment sections on the card face: I was going to keep the imaging very clean and simple: after living with it that way for a couple of days I decided that the additional detail was needed.
Supplies: (and links where possible)
I have listed which products I have used, and where they may be purchased. It’s a huge marketplace and in most instances, there are multiple sources and many alternatives to choose from.
Stencil: Glittering Hearts, A Colorful Life Designs
Waffle Flower Grip Mat, 8.5 x 6.5, Scrapbook.com
Versamark Embossing Ink: Simon Says Stamp
Embossing Pen: Tim Holtz, A Colorful Life Designs
Gold Embossing Powder: Ranger, PCW
Stamps: Words in Bloom, Unity Stamps
Dies: Stitched Rectangles, Stampin’ Up! (retired)
Pixie Spray: Michaels
Ink: Stampin’ Up!
Blending Brushes: Stampin’ Up!
Adhesive: Tombow Aqua, Michaels
Card Base & Card Face: Accent 100 lb., Amazon
Do you have comments or thoughts to share on this design? Drop me a line in the Comments Section below – I’d love to hear from you!
You can also use the Comments Section to be added to the list, and notified when I release new work.
Glittering Hearts from A Colorful Life Designs
