
Would you like to experiment with a design like this? You’ll find a supply list below, including a link to the stencil I used from A Colorful Life Designs. Follow the link and use discount code ChrisFan10 to save 10% on your entire order! (Master Creator Bundles are excluded as they already have a 20% discount built in.)
Let’s get Started:
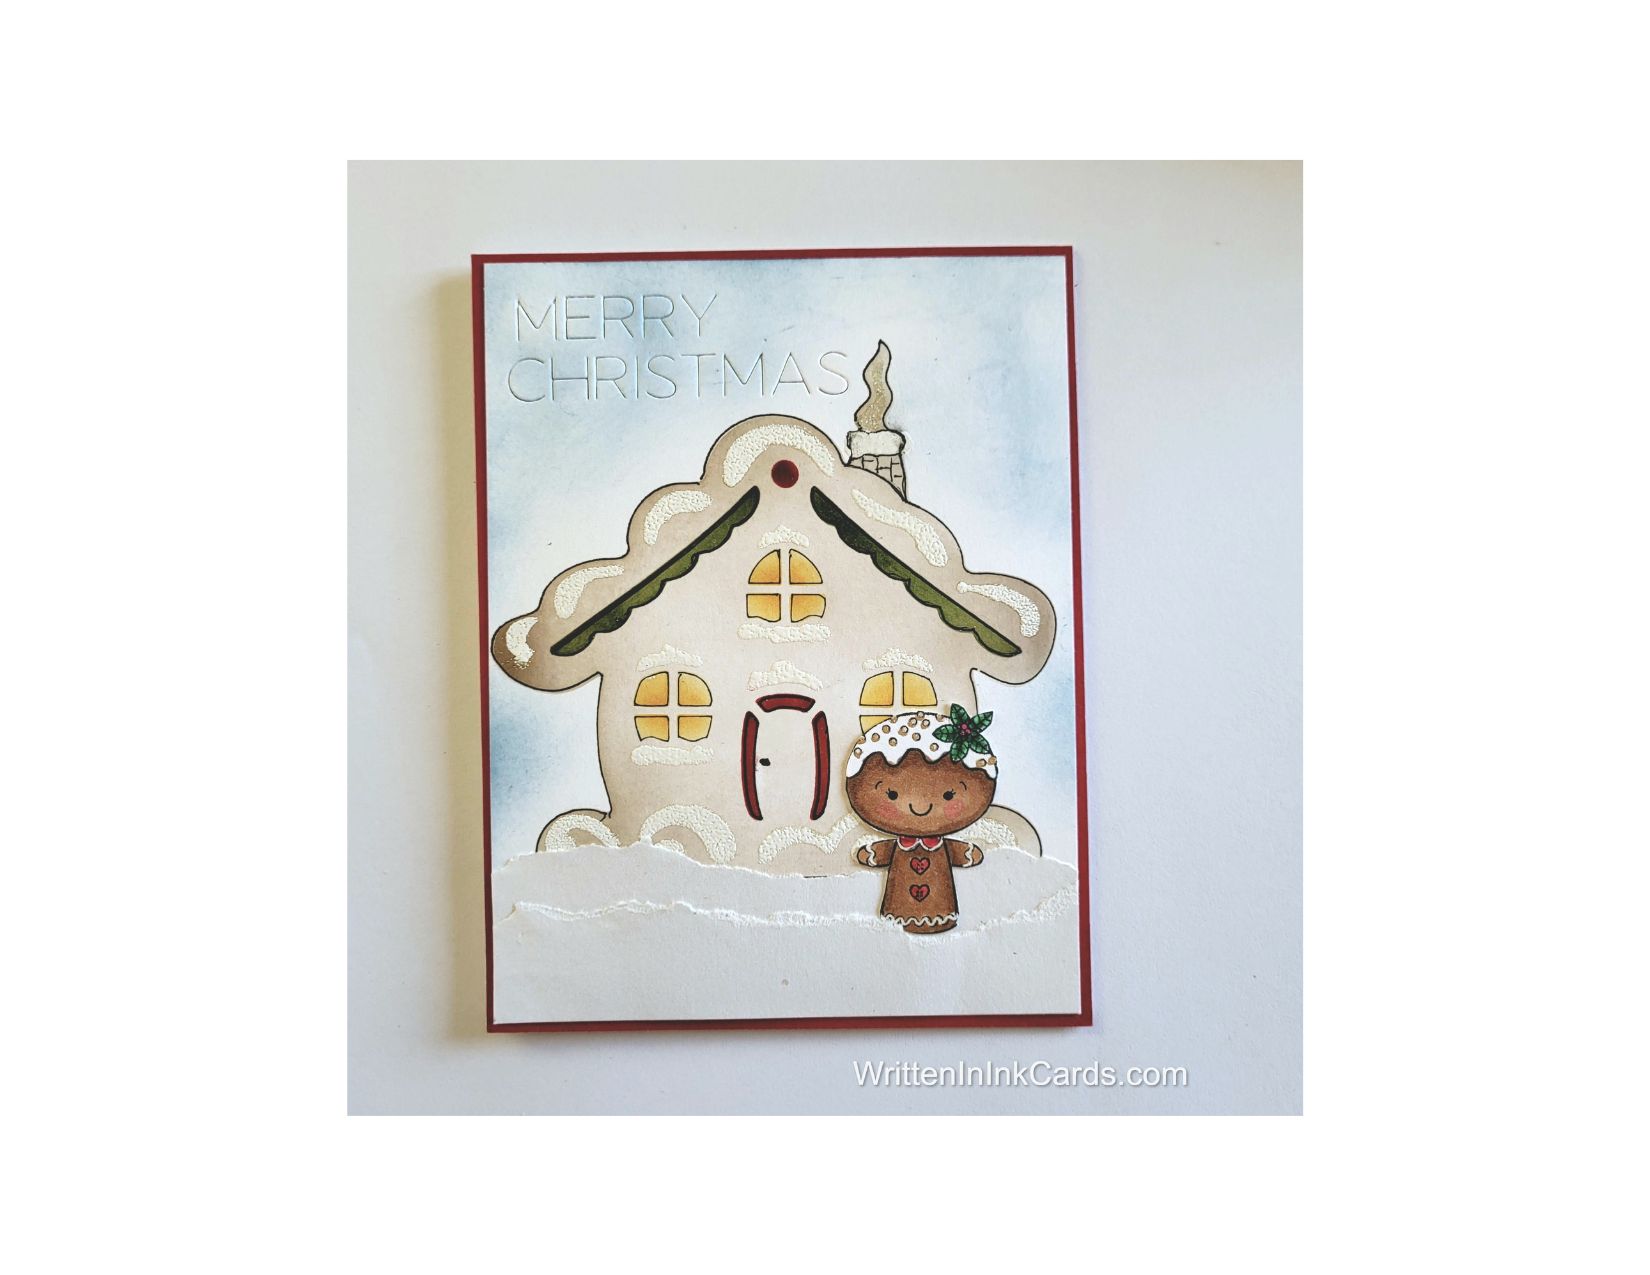
Card Base: 5.5 x 8.5, scored and folded at 4.25
Border Layer: 5.5 x 4.25
Card Face: 5 ⅜ x 4 ⅛
“Snow” layer: 5.5 x 4.25
Card Face:
- I laid the card face down on the Grip Mat, then positioned the stencil to use the house’s outline.
- I applied light brown ink with a very soft hand to this portion of the stencil, adding a little extra pressure around the edges to add depth and visual interest.
- I repositioned the stencil to add the details to the house. Masking off portions of the stencil as necessary, I grabbed my small blending brushes and added the door, windows, and trim to the house, adding additional colour saturation where shown to create visual interest.
- I added “snow” to the house by colouring in each portion with an embossing pen, adding white embossing powder and setting it with my heat gun.
- There is also a small detail inside the smoke coming out of the chimney – I coloured this with my embossing pen, added holographic embossing powder and set it with my heat gun.
- I added definition by using a black fine liner to outline the house and around each of the detail areas: I also added “bricks” to the chimney.
- I used a soft hand and light blue ink around the house to remove the harsh contrast between the house and the stark white paper.
- I positioned the die on the card face and ran it through the Big Shot to create the sentiment.
Other:
- I pulled out my “someday” binder and grabbed a gingerbread girl who had been coloured and fussy cut, and was just waiting for a chance to shine on a card.
- I tore one edge of the snow layer, creating hills and valleys on that edge; I tore this piece in two, creating additional hills and valleys in the second tear.
Assembly:
- I glued the card face to the card base.
- I glued the upper layer of the snow in place, and then added the lower one, overlapping the two.
- Before the second layer was fully dry I added the gingerbread girl, tucking one lower edge in behind the snow just slightly.
- I trimmed all layers evenly at the bottom.
Final Thoughts:
I love the look of that debossed sentiment on this card.
When I added the micro liner around the chimney, I somehow managed to smudge the ink slightly – that detail grabs my eye and frustrates me so much!
Over all I like the card, and was delighted to create a home for my gingerbread girl.
Supplies: (and links where possible)
I have listed which products I have used, and where they may be purchased. It’s a huge marketplace and in most instances, there are multiple sources and many alternatives to choose from.
Stencil: Gingerbread House, A Colorful Life Designs
Waffle Flower Grip Mat, 8.5 x 6.5, Scrapbook.com
Embossing Pen: Ranger, Amazon
Hollographic Embossing Powder: Ranger, R&R Scrapbooking
White Embossing Powder: Wow, R& R Scrapbooking
Stamps: Gingerbread girl: Your Next Stamp (no longer in business)
Dies: Impression Obsession (no longer in business)
Ink: Stampin’ Up!
Blending Brushes: Stampin’ Up!
Detail Blending Brushes: Waffle Flower, Glitter & Ink
Adhesive: Tombow Aqua, Michaels
Card Base & Card Face: Accent 100 lb., Amazon
Do you have comments or thoughts to share on this design? Drop me a line in the Comments Section below – I’d love to hear from you!
You can also use the Comments Section to be notified when I release new work.
Gingerbread House by A Colorful Life Designs
