
Would you like to experiment with a design like this? You’ll find a supply list below, including a link to the stencils I used from A Colorful Life Designs. Follow the link and use discount code ChrisFan10 to save 10% on your entire order! (Master Creator Bundles are excluded as they already have a 20% discount built in.)
Let’s get Started:
Card Base: 5.5 x 8.5, scored and folded at 4.25
Kraft Card Face:5.25 x 4
Card Face:
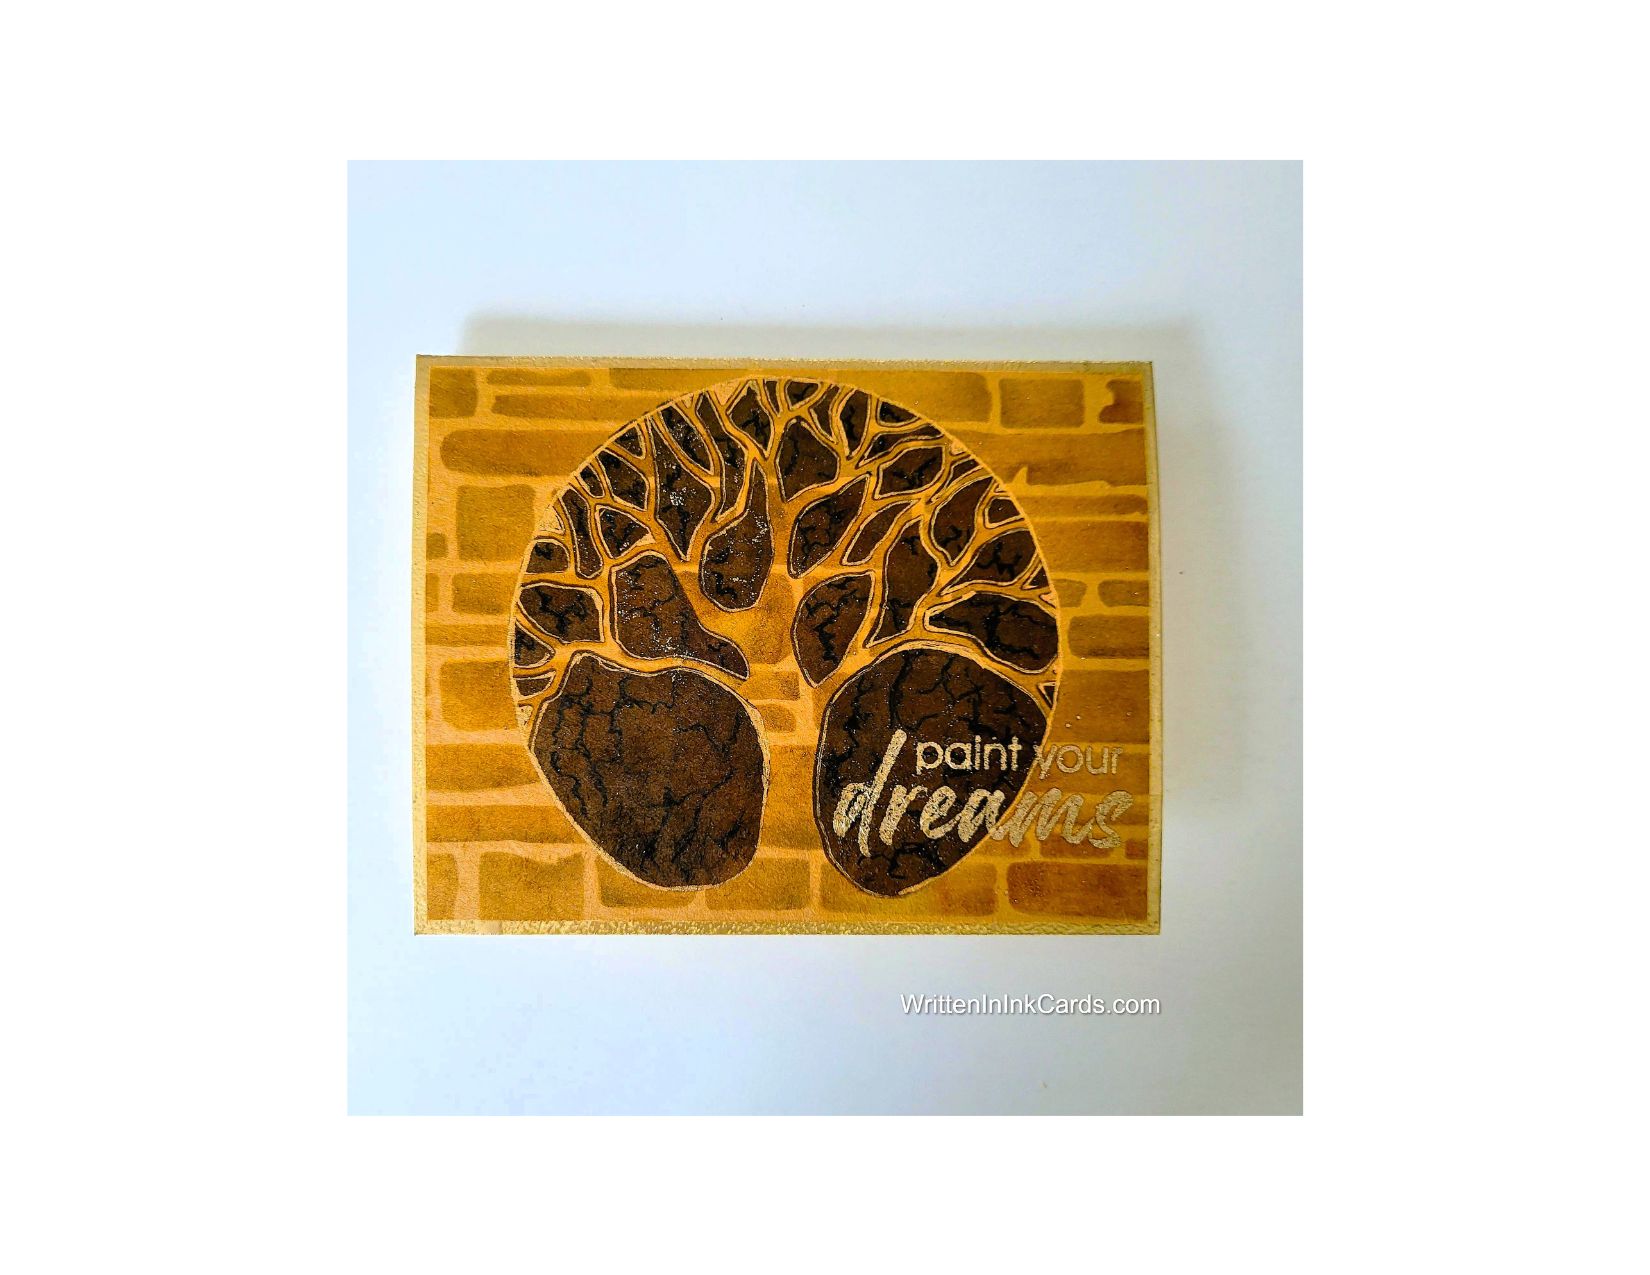
- I laid the card face down on my Grip Mat and positioned the Stonework stencil. I covered exposed areas with a mixture of light brown, yellow brown, and orange brown inks.
- Removing that stencil, I positioned the Circle Tree stencil, masking off the edges to protect the surface that was already inked. I used dark brown ink and a heavy hand to create the tree.
- Leaving this stencil in place, I inked up a background stamp with black ink and pressed it firmly into the exposed areas. The stamp creates a “crackled” look, as if the paint on the stone wall were about to flake off. I used fineliners to intensify the black on the dark brown.
- I used a gold gel pen to outline all the openings in the stencil and to complete the circle around the tree.
- I wasn’t satisfied, so I removed the Circle Tree stencil and put the Stonework stencil back in place: I used medium brown ink and a small shading brush to add darker colour to the stones, adding depth and dimension.
- I put the cardface into my stamp positioner and added the sentiment with Versamark embossing ink. I added Metallic Platinum embossing powder, and set it with my heat gun.
Other:
- I pressed the Versamark embossing pad onto the borders of the cardbase, sprinkled it with the same Platinum embossing powder, and set it with my heat gun. (This ensured that the border matched the sentiment perfectly.)
Assembly
I glued the card face to the card base, centering on all sides.
Final Thoughts:
I did not completely achieve my goals with this card, but I still like it.
I wanted it to resemble a stone wall with a tree painted onto it by a graffiti artist. I’m not seeing my vision, which is frustrating: the addition of the extra brown ink did help with the wall’s visual depth, but it still needs improvement. A challenge to future self.
Supplies: (and links where possible)
I have listed which products I have used, and where they may be purchased. It’s a huge marketplace, and in most instances, there are multiple sources and many alternatives to choose from.
Stencil:
Stonework: A Colorful Life Designs
Circle Tree: A Colorful Life Designs
Waffle Flower Grip Mat, 8.5 x 6.5, Scrapbook.com
Versamark Embossing Ink: Simon Says Stamp
Metallic Platinum Embossing Powder, Wow, R &R Scrapbooking
Stamps: Paint Your World, Spellbinders (retired)
Ink: Stampin’ Up!
Blending Brushes: Stampin’ Up!
Shading Brush: Waffle Flower, R&R Scrapbooking
Adhesive: Tombow Aqua, Michaels
Card Base & Card Face: Accent 100 lb., Amazon or Recollections 110 lb., Michaels
Do you have any comments or thoughts on this design? Drop me a line in the Comments Section below – I’d love to hear from you!
You can also use the Comments Section to be notified when I release new work.
Stonework Stencil

Circle Tree stencil
